
Game Pi Zero - Retro Gaming System
/
Ever since the Nintendo Classic's release, I have been determined to build a retro gaming system that would be smaller, play all of the old Atari, NES, SNES, and Sega games (not just 30 NES titles), and cost less. To reach my goal, I utilized the extremely cheap and small Raspberry Pi Zero. Although they're still in a bit of a high demand, Microcenter sells them for just $5. If there are no Microcenters nearby, Amazon sells them for around $20. With an additional "Pi Zero Starter Kit" the total system costs are $41. Add a couple of USB SNES controllers for $7 each, and the final total is just $55 compared to the NES Classic with two controllers at $90 MSRP. The MakerSpot USB Hub/Starter kit is a great value that includes a USB Hub, 2.4A Power Supply, Micro USB Power Cable with an Inline On/Off Switch, Wifi Dongle, 8GB MicroSD Card, HDMI adapter, Acrylic Case, and extra Pins/Headers. The total parts list is below:
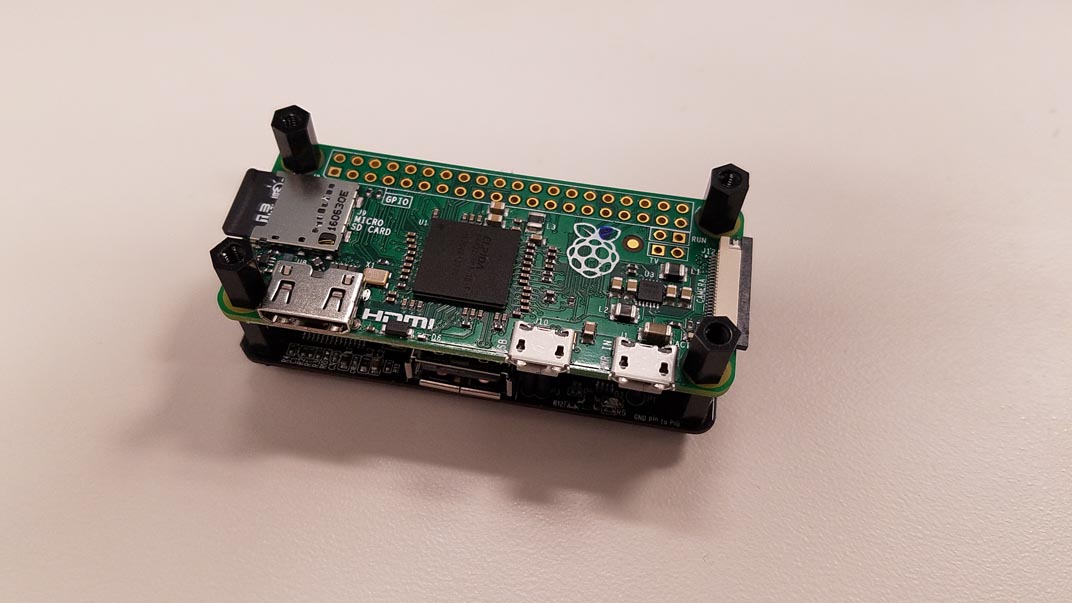
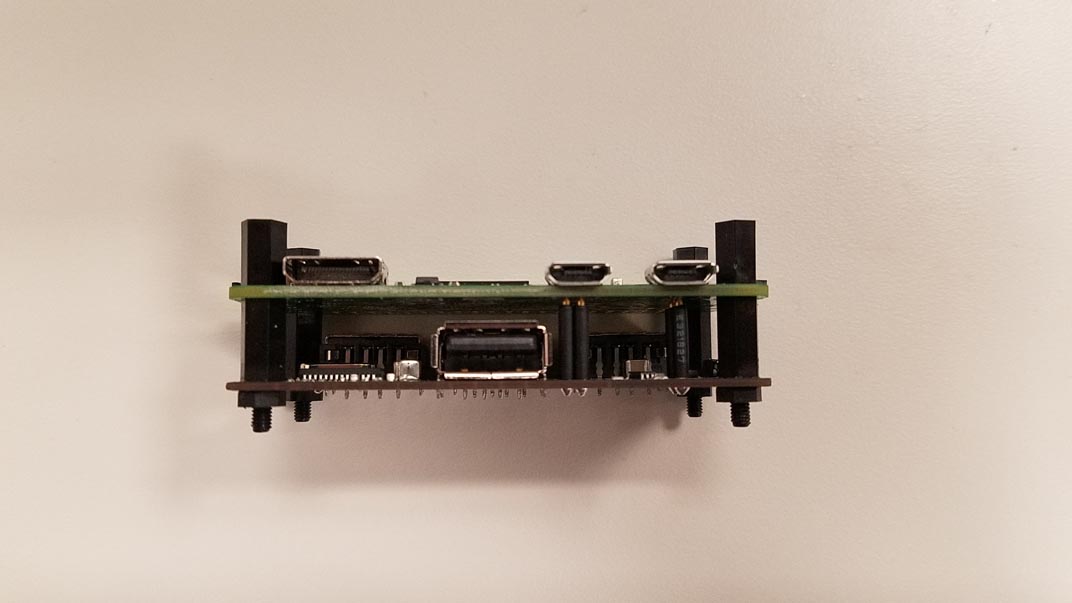
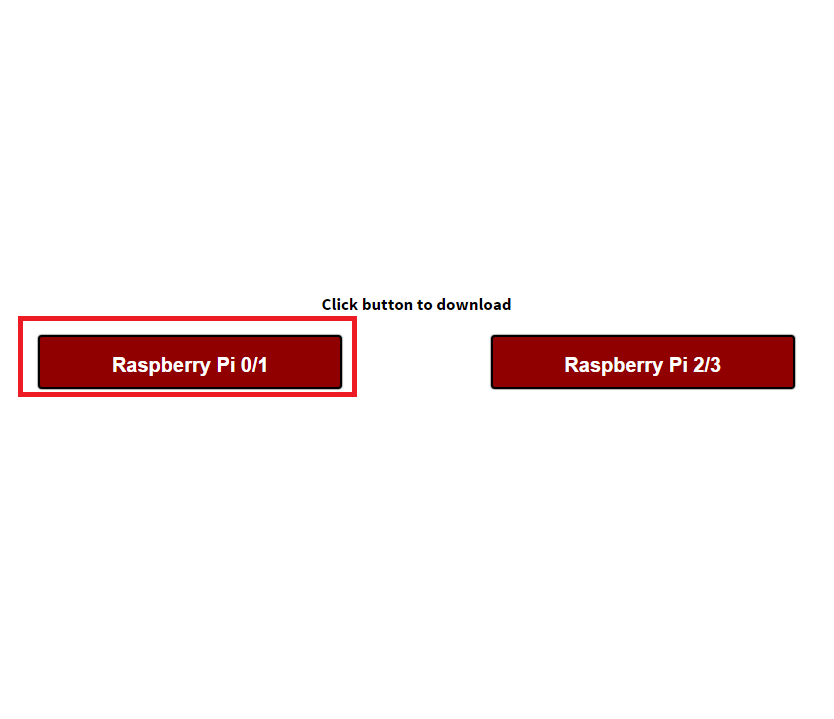
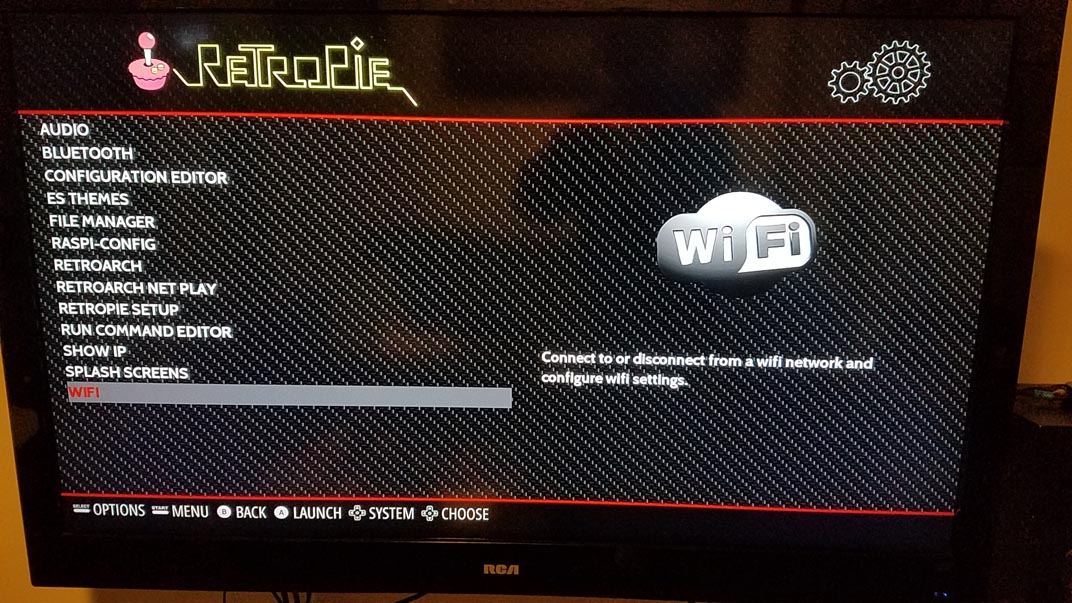
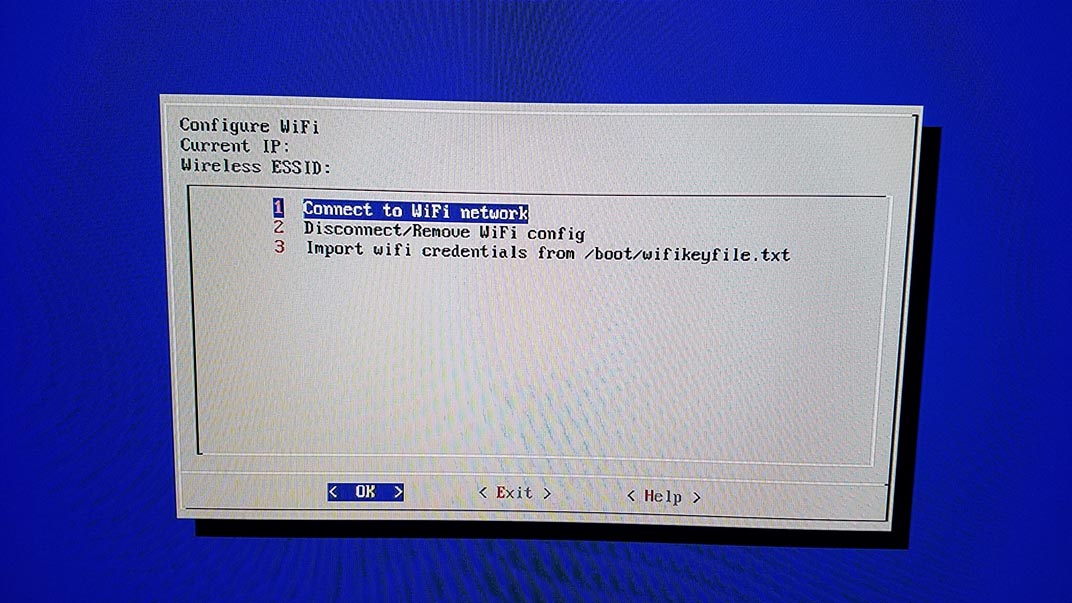

I started out by installing the USB Hub "Hat", popped in the micro SD card, and made sure power was being delivered to the board via the board's pogo pins. When putting the boards together, make sure to use the large standoffs in between the boards, the starter kit comes with two different sizes. Next, I downloaded the latest copy of RetroPie from https://retropie.org.uk/download/ making sure to download the Raspberry Pi 0/1 Version. I used a microSD to SD card adapter and followed the RetroPie Installation Guide. I then plugged in the HDMI adapter/cable, a SNES USB Controller, USB keyboard, and Wifi Adapter and powered it up. When RetroPie first boots up, it prompts the user and lets them know a controller was detected. I pressed each of the buttons on the USB controller per the on screen instructions and when I reached the buttons that are not available on the SNES controller, I pressed and held any button to skip it. Next I setup the WiFi connection and started transferring over my roms. I typed \\retropie\roms in windows explorer, found the relevant rom folder, and placed the files in there. Since this is over wifi, it took a few minutes for each system. A great resource for ROMs is the Internet Archive. You have to sign up for an account, but they have great zip files for each system with no duplicates or "hacked ROMs" and each file is considered the best quality available. Link Here.
With the roms now on the pi zero's microSD card, I then "scraped" them to download the cover art and information for each game. The built in scraper isn't very accurate and requires constant input. To make things go quicker, I used sselph's scraper script. To install and run the script I completed the following steps:
Hit F4 on the keyboard to return to the terminal
Typed in sudo /home/pi/RetroPie-Setup/retropie_setup.sh
Selected option "Configuration/Tools"
Selected Item 821 - "Scraper for EmulationStation by Steven Selph" and allowed it to install and start up (15 minutes)
Select the settings shown in the picture above. Most importantly, scraper: TheGamesDB, ROM names: TheGamesDB
Selected scrape all systems (30 minutes)
Depending on how many roms are on your system, this process could be pretty lengthy.
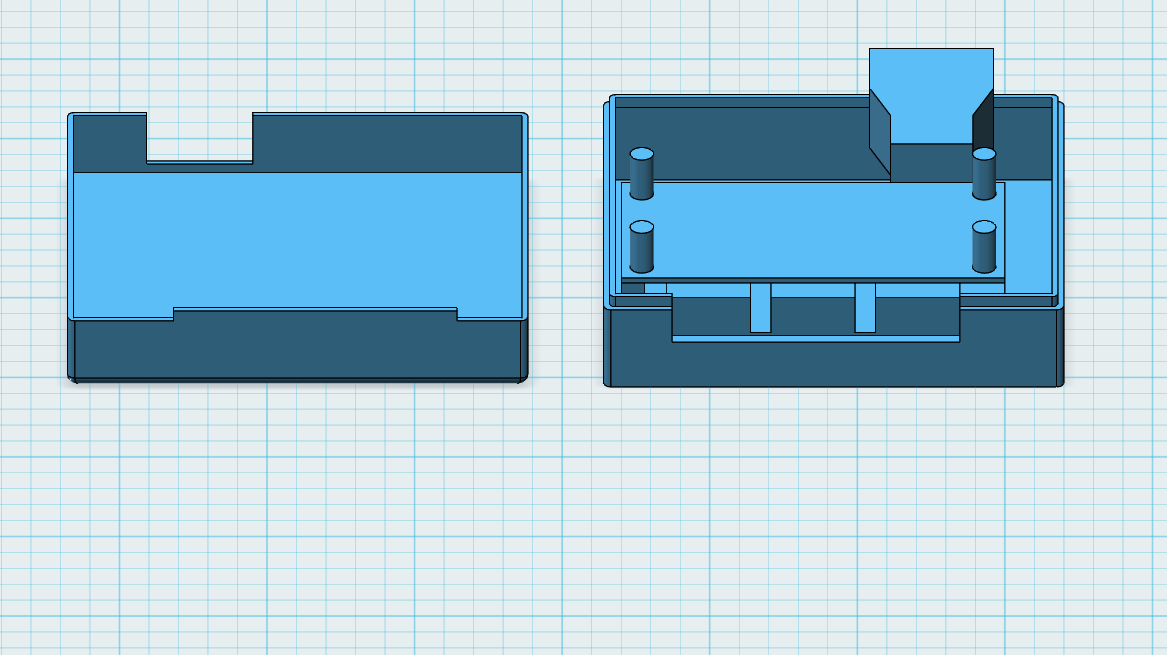
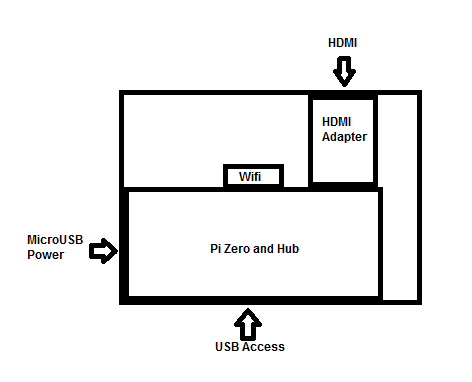
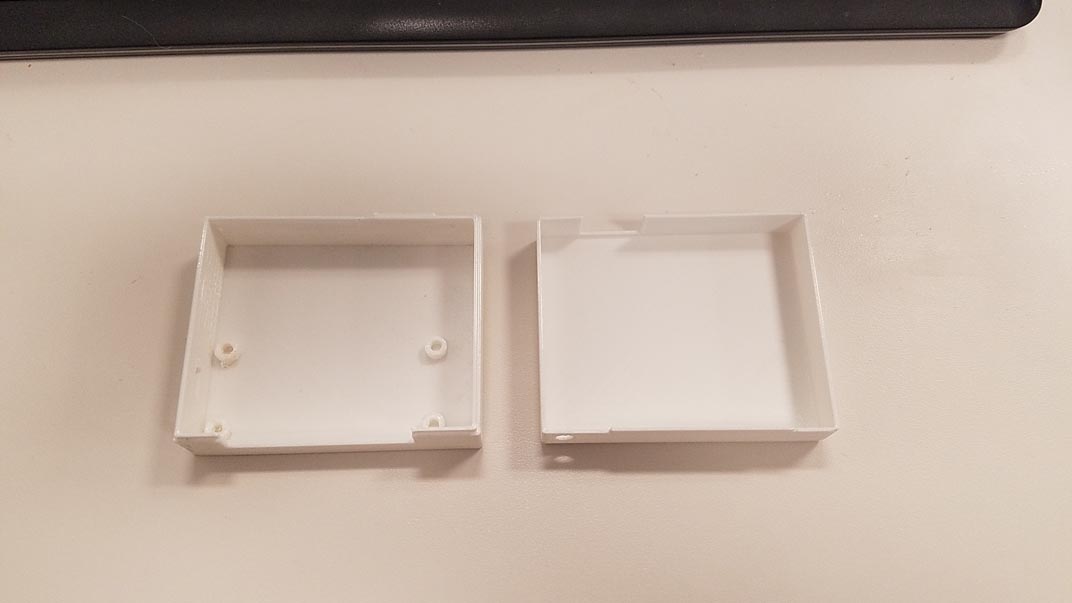
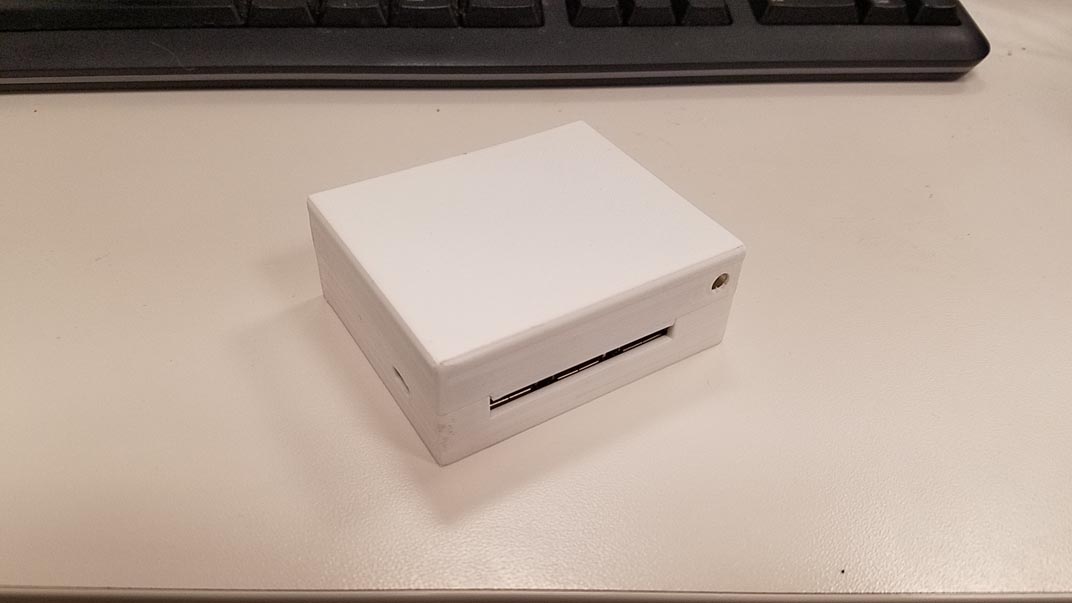
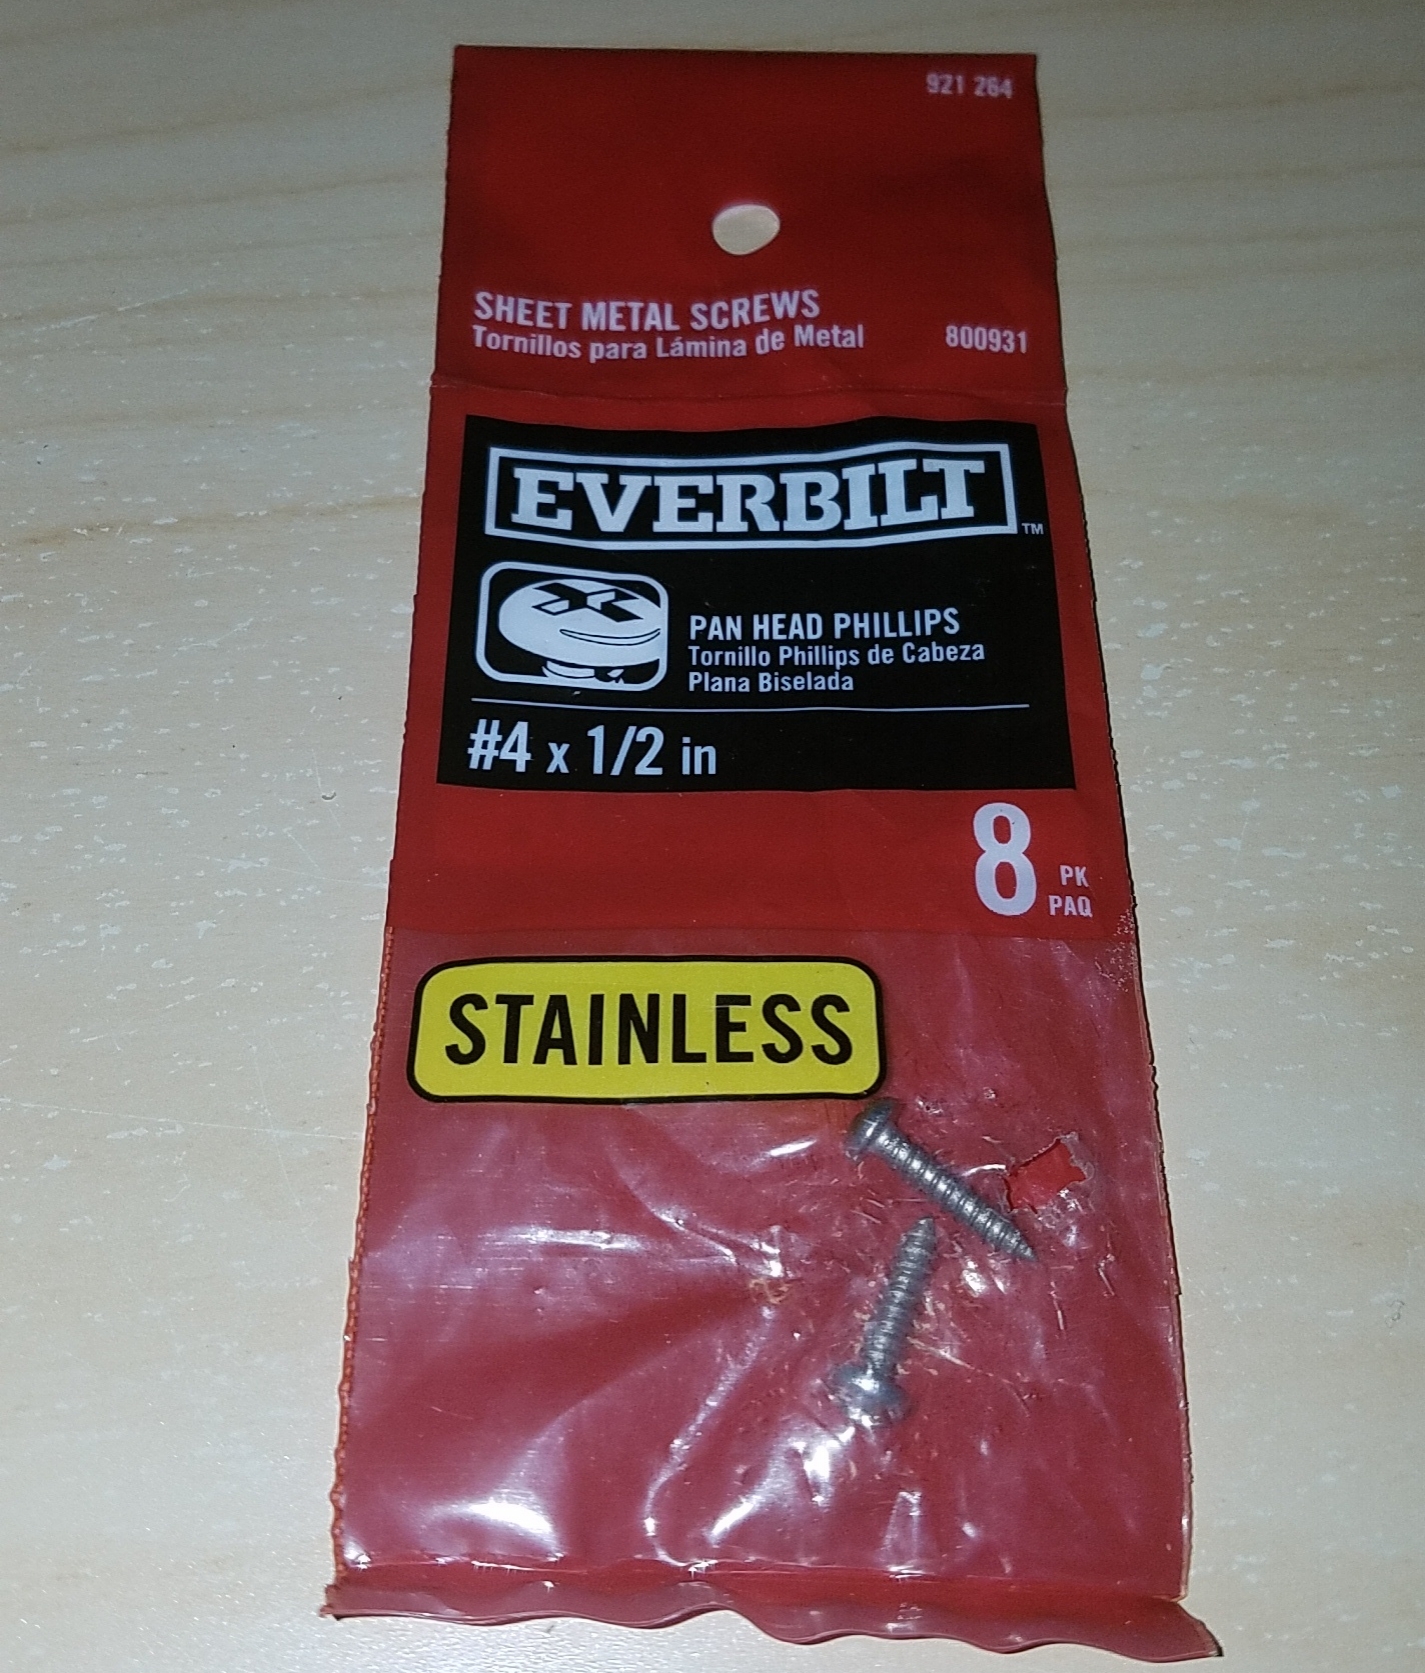
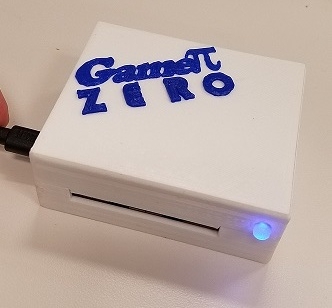
I started off the 3D design process by modeling the Raspberry Pi Zero, USB Hub, and HDMI adapter in 123D Design. I designed a case around the parts and made holes for all of the ports. The Pi simply sits in a set of 4 holes on the bottom of the enclosure. Hot glue can be used to keep it in place but I didn't find that it was required. I made two versions of the case. One version is screwless and fits together snugly. I found that it stays together pretty well but glue can be added to keep it together more permanently. The second version I designed just adds a single #4 x 1/2" screw to keep the case together. Both versions have an LED and No LED option. Once the print was finished, I cleaned it up with a dremel and some sand paper.
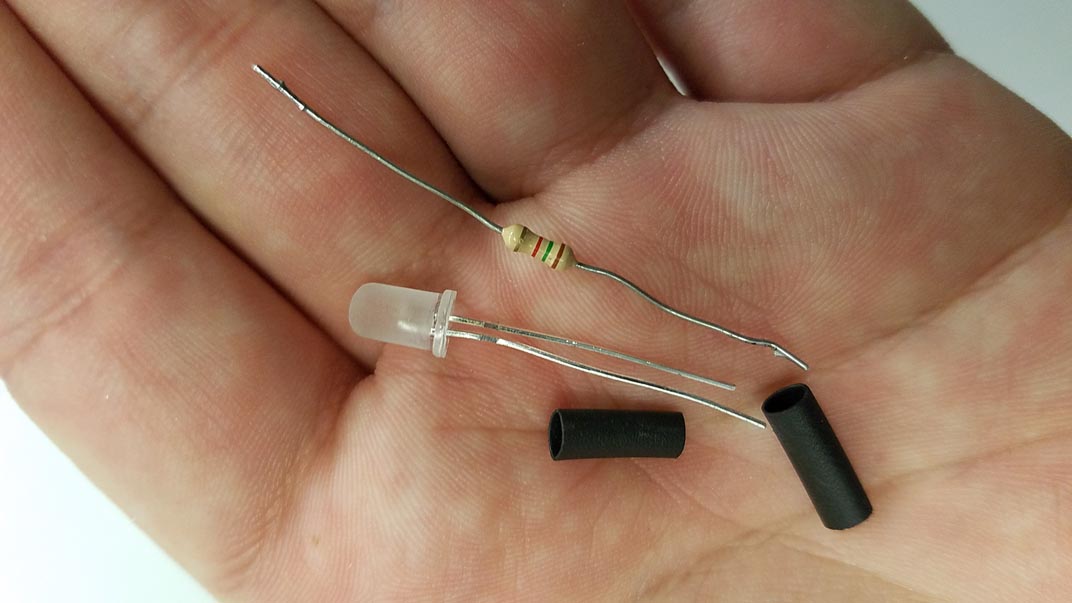
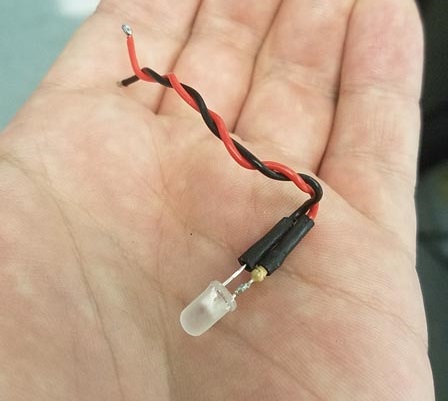
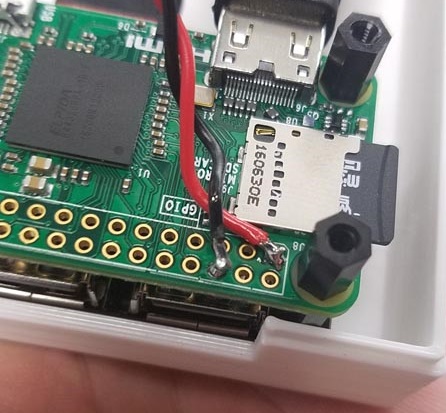
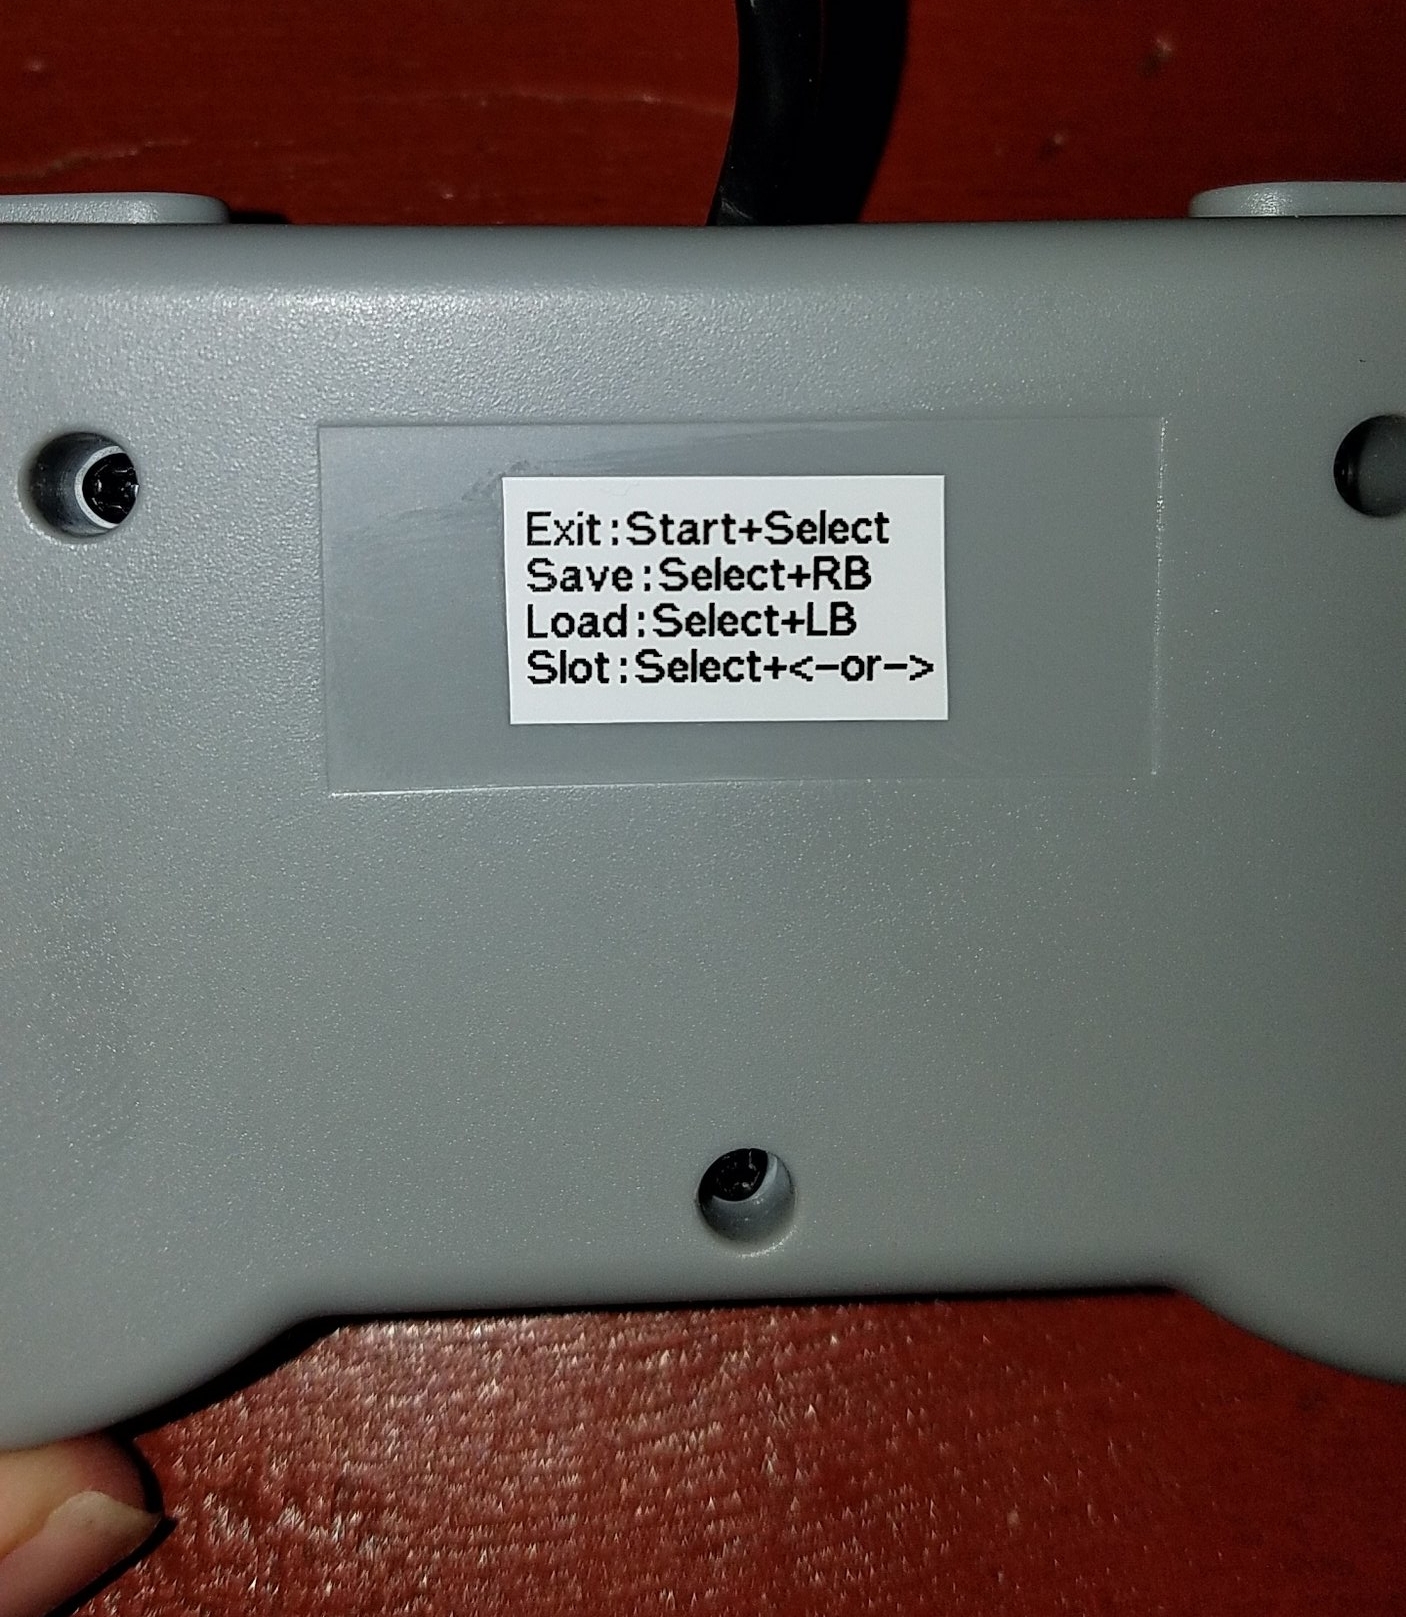
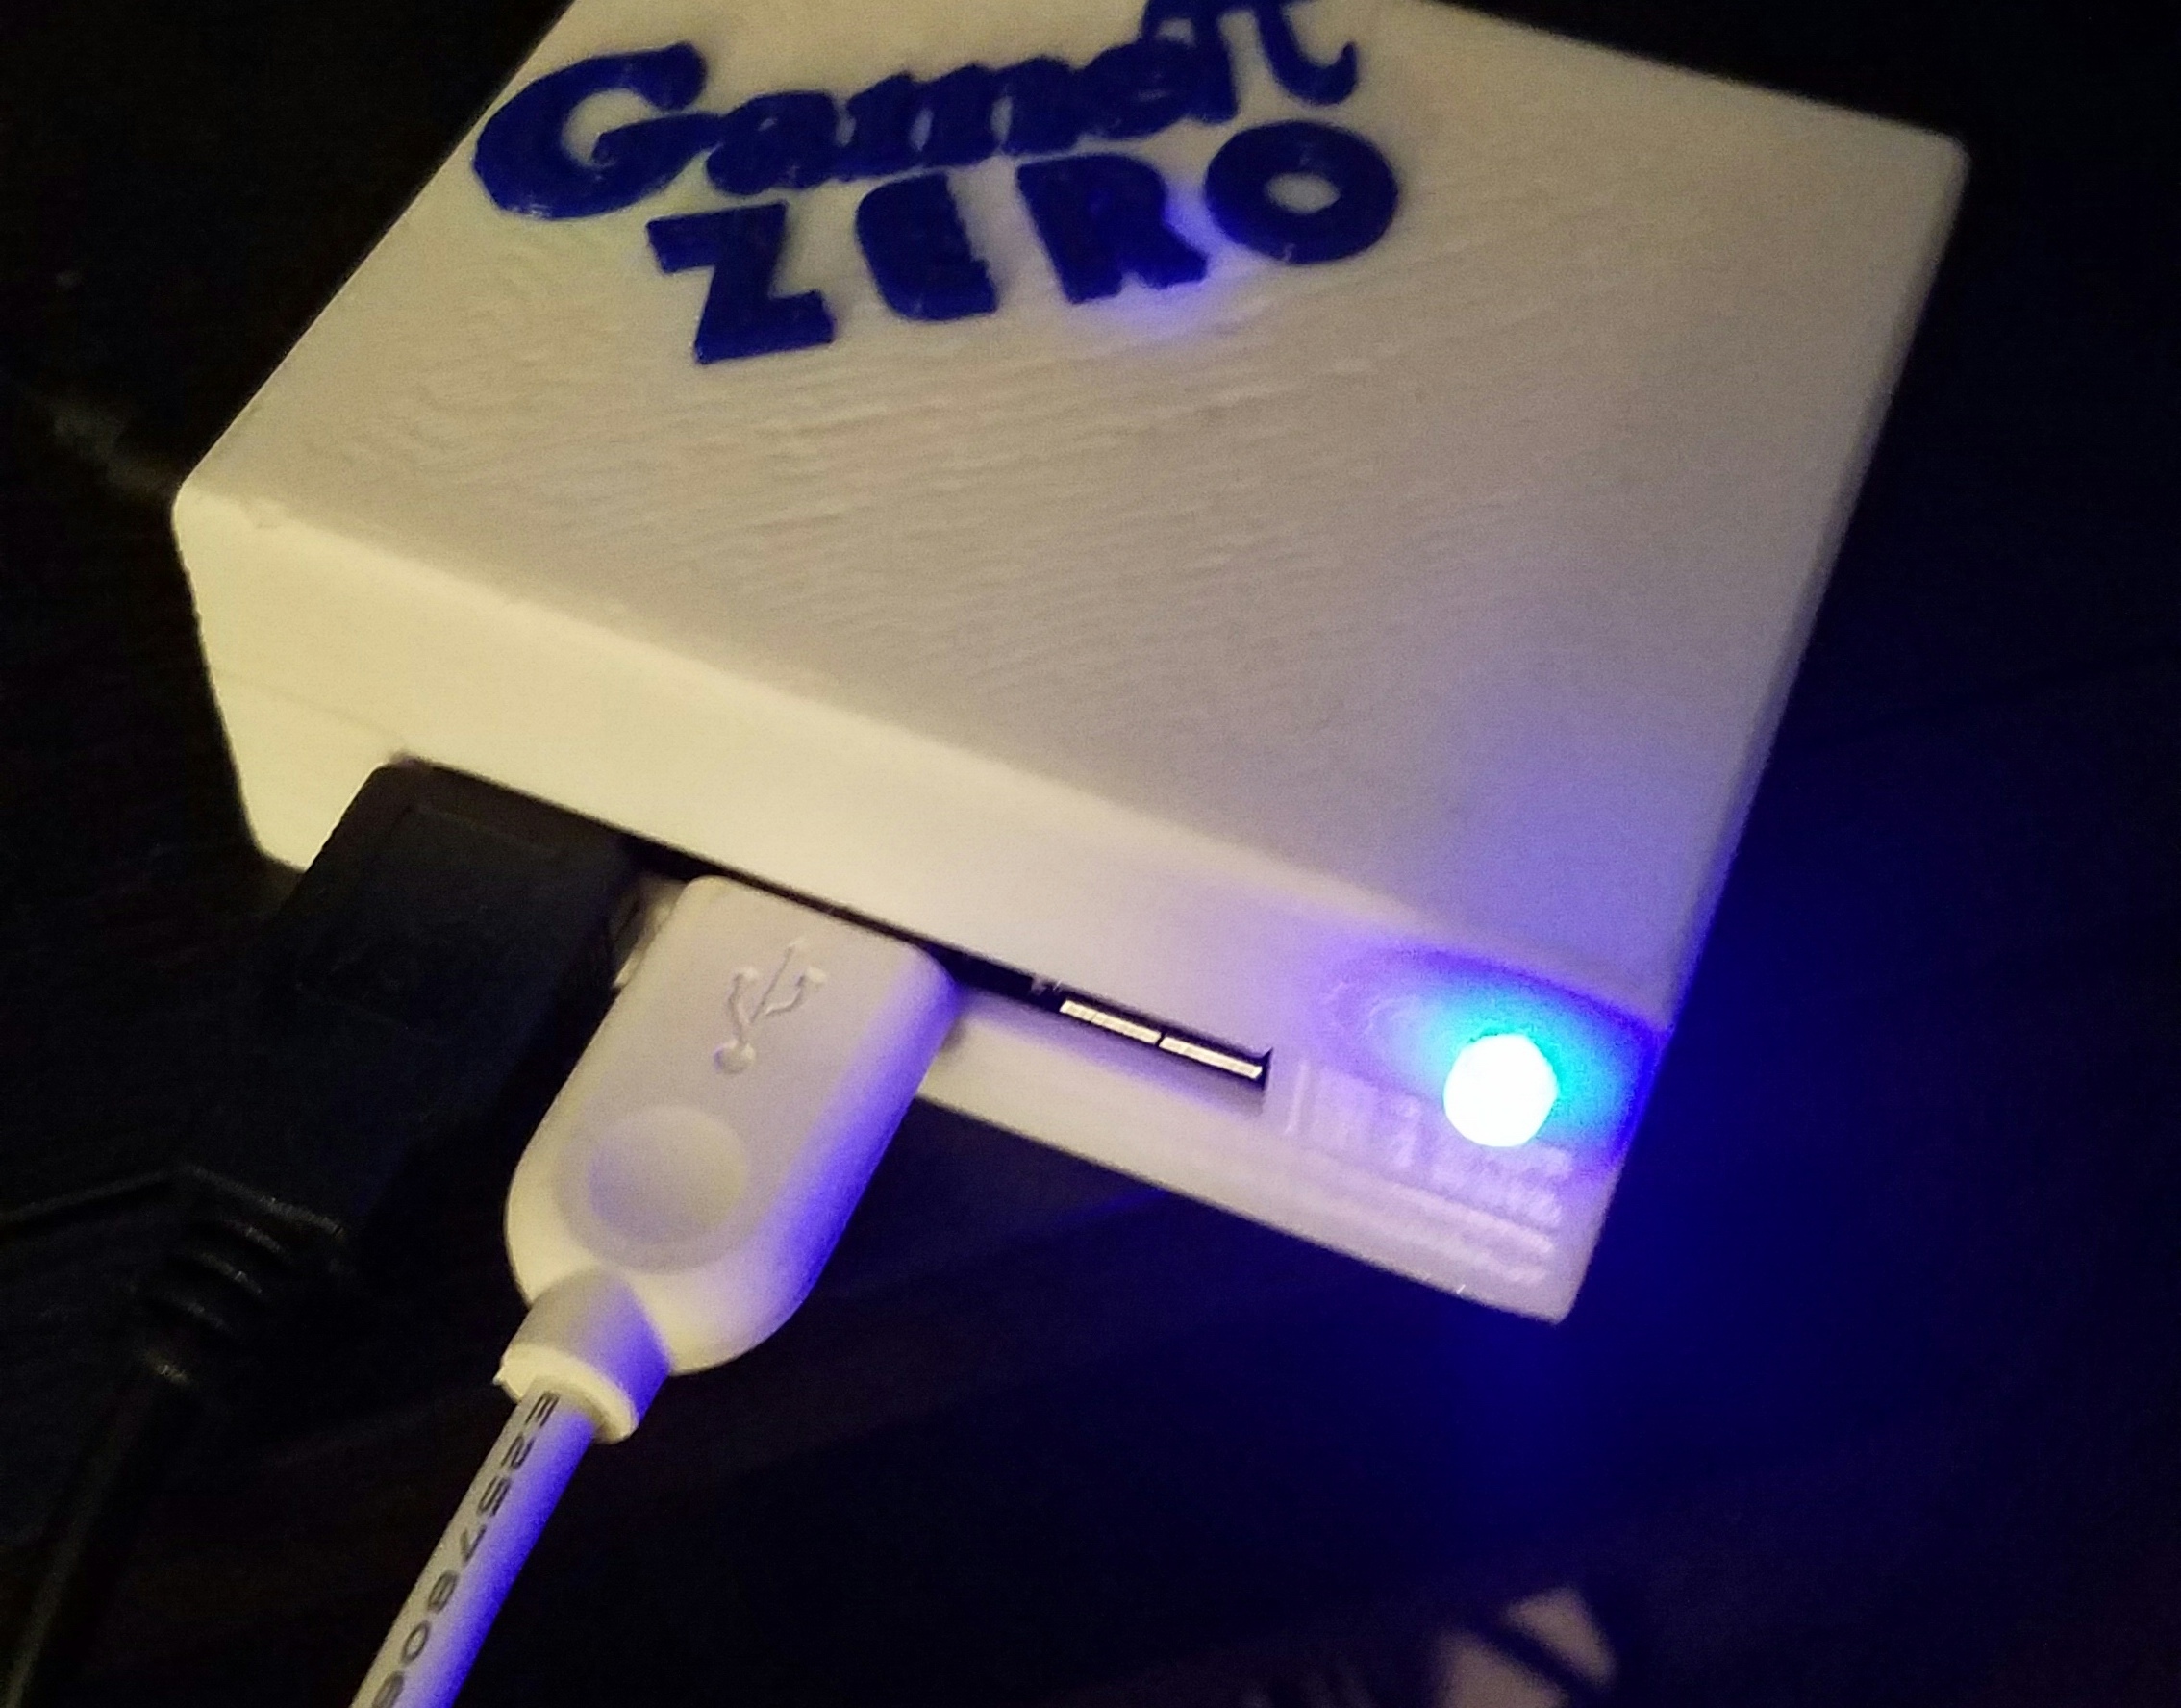
For the power indicator LED, I had a high intensity blue LED on hand. I used some 240 grit sandpaper to diffuse the LED and soldered on a 1.5kOhm resistor to the LED's positive lead and two wires. The LED is hooked up to the PCB pin holes pictured. This is the 3.3V line of the Pi Zero. I then pushed the LED through the case hole, folded over the wire, and fit the case together. For the controllers, I added a small label on the back with a few shortcuts for RetroPie. That's it! Super simple project, no soldering required if you choose the No LED option, and everything is plug and play! The files are hosted here: http://www.thingiverse.com/thing:2104969
