Alcohol Bottle Lamp
/Back in college I found a tutorial online on how to light up a glass bottle with some LEDs and crushed glass and started making them for friends and family. I've modified and optimized the original process to make it a bit easier. Here's a list of the required materials:
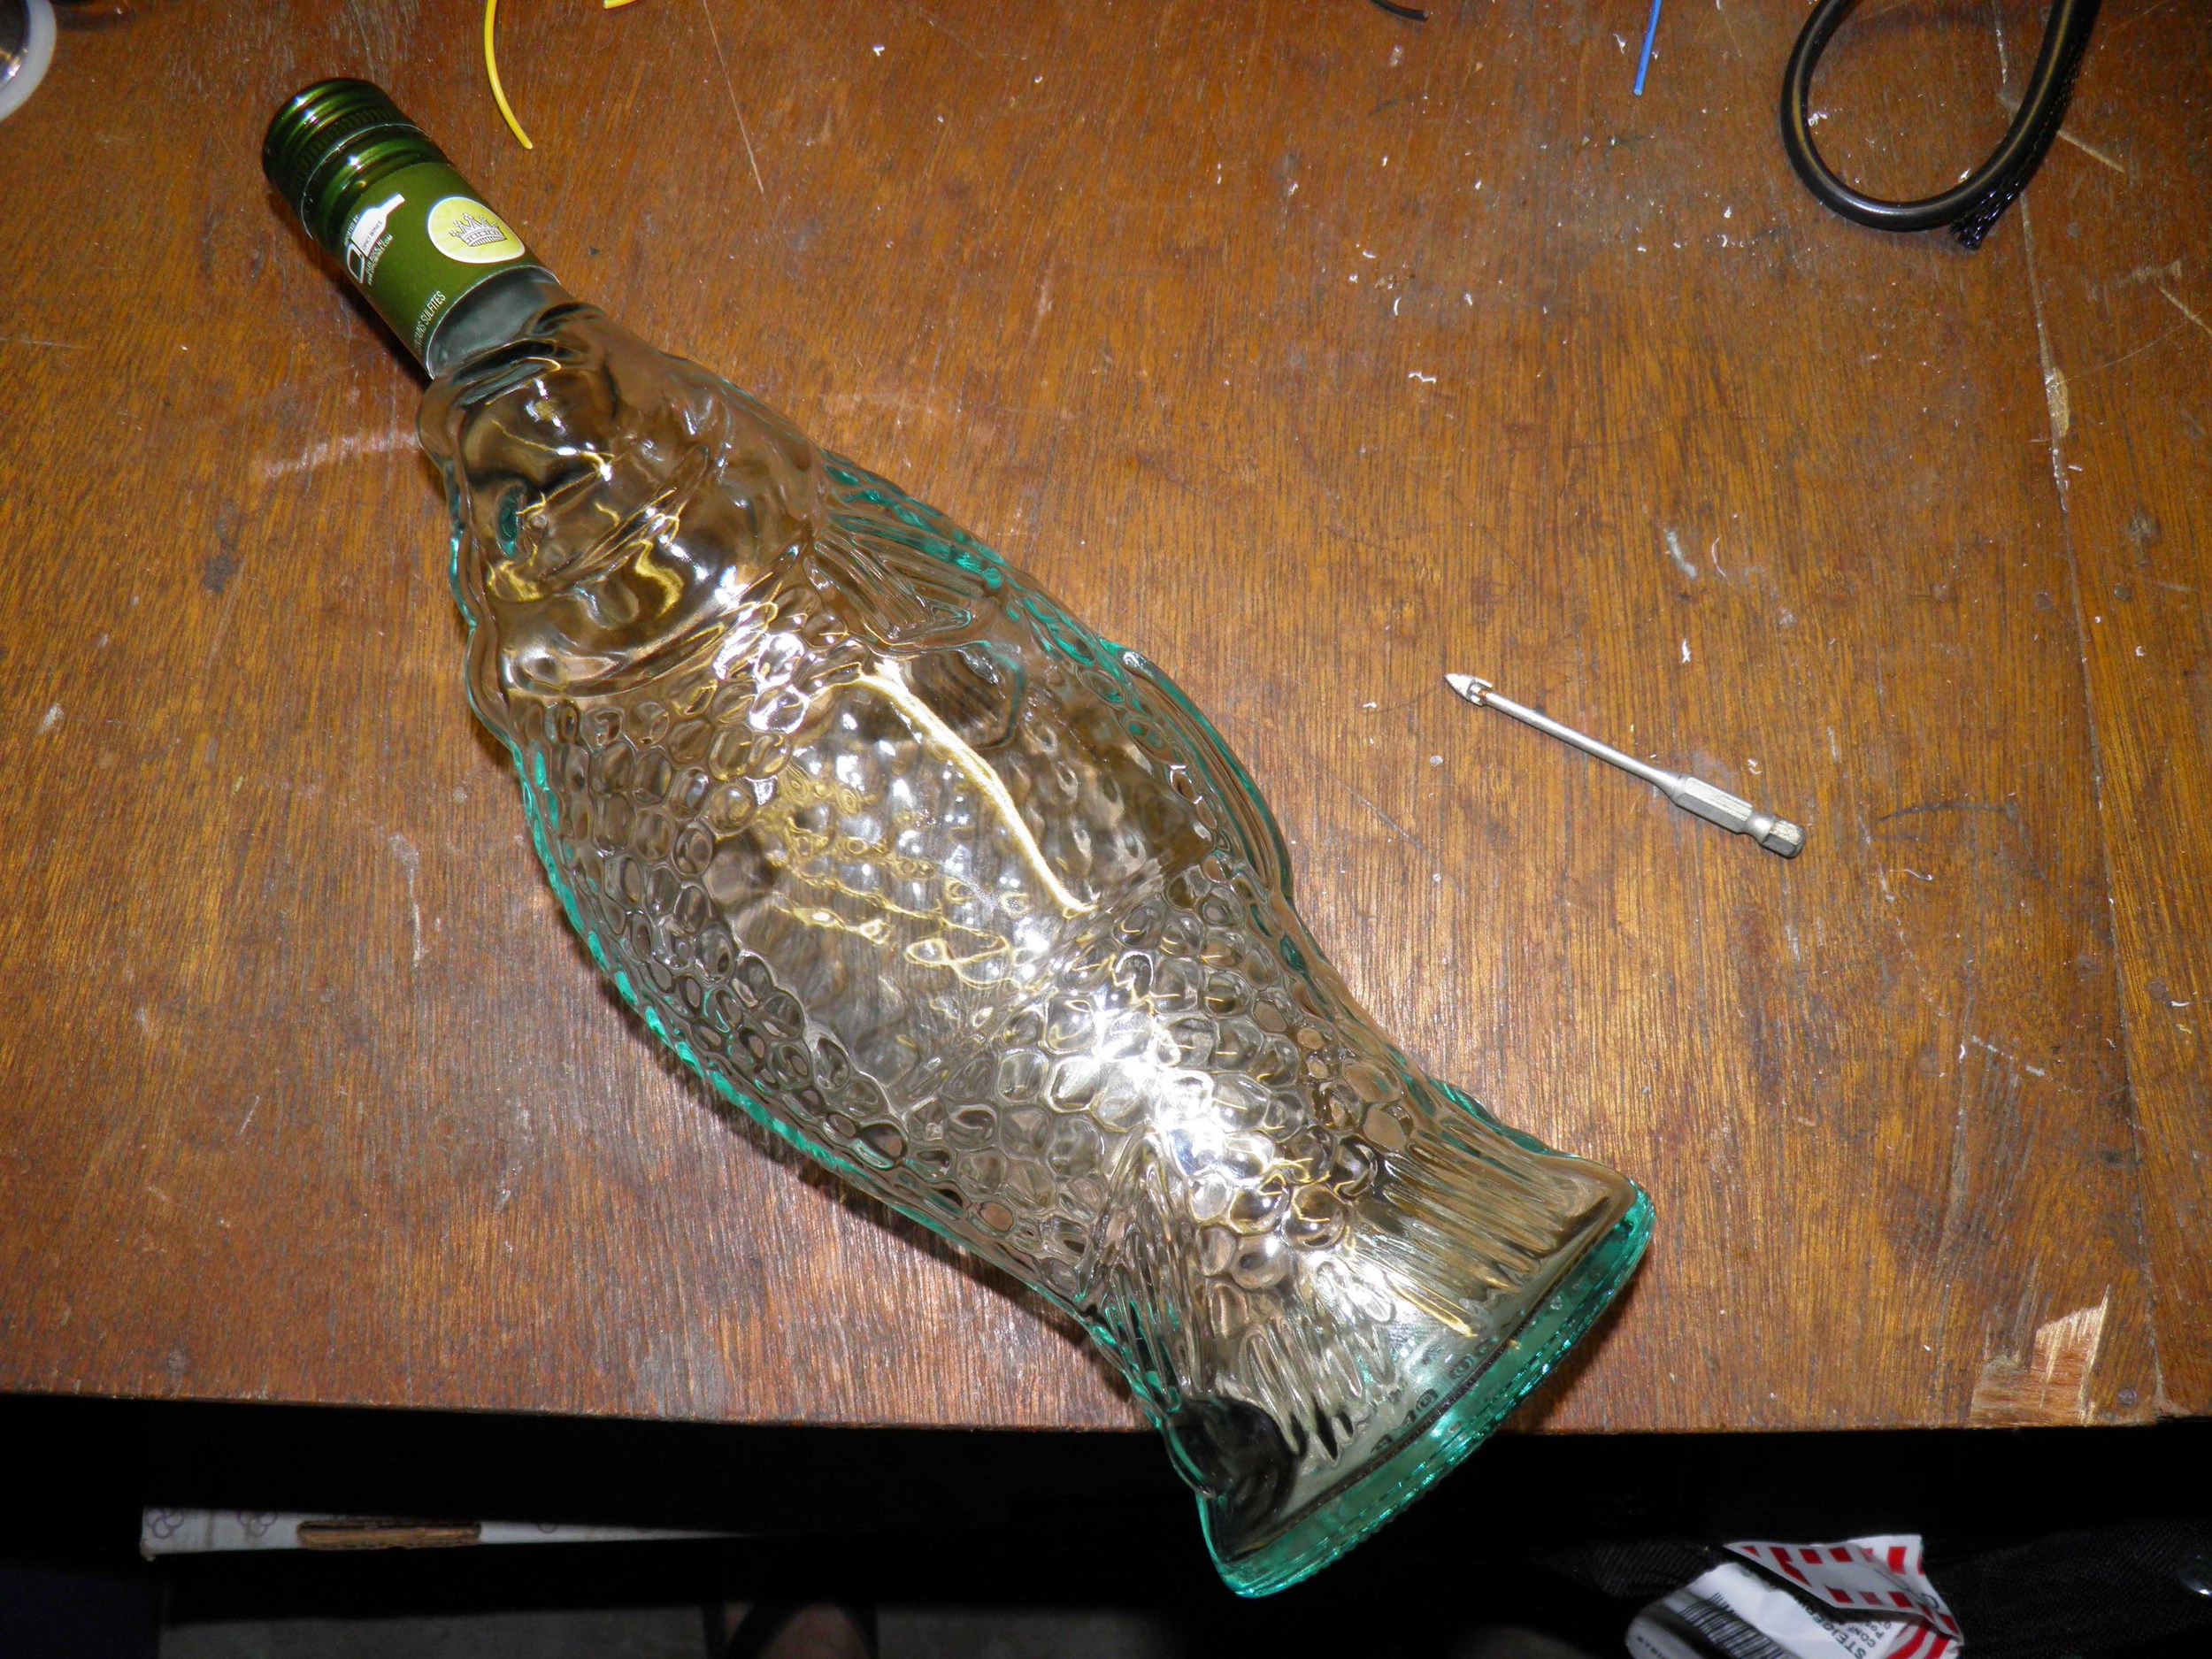
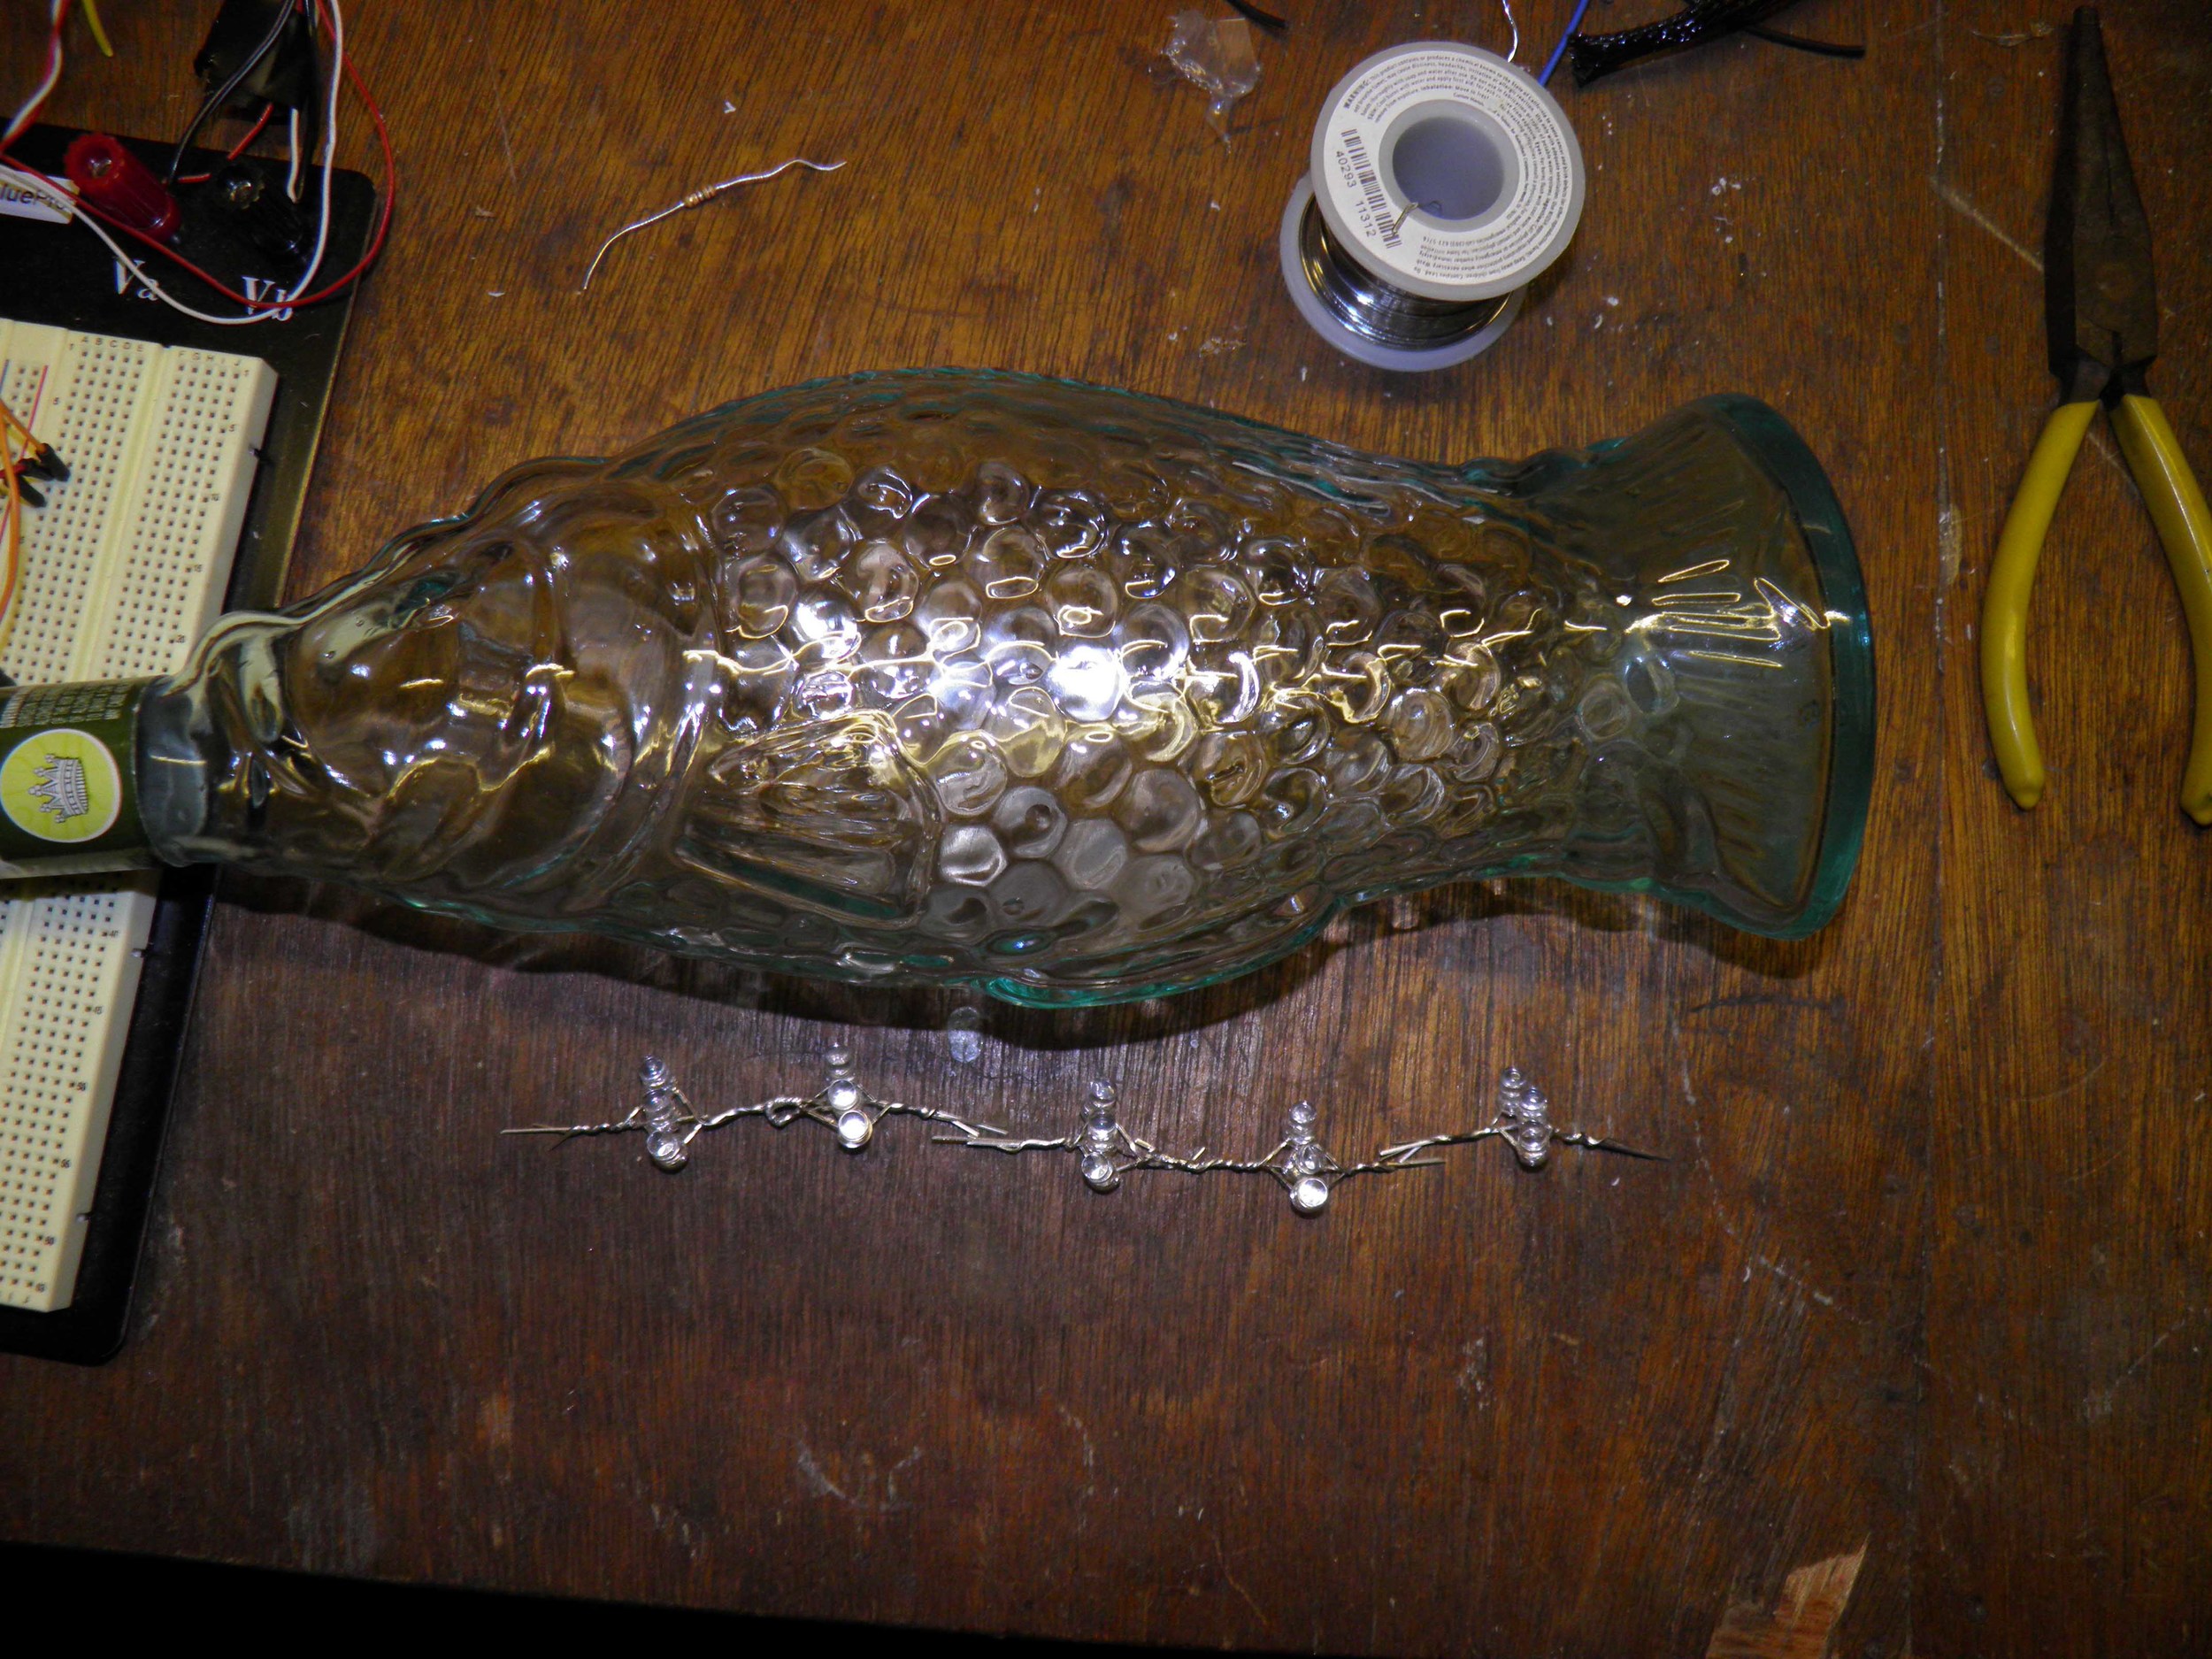
- A Bottle to Light Up (I used a wine bottle in the shape of a fish)
- LEDs of the Color You Want (Ebay has cheap and bright LEDS, 10,000+ MCD, from China)
- Various Wire Lengths (I used red and black for easy polarity checks)
- Solder/Soldering Iron
- Helping Hands (Optional but Recommended)
- Current Limiting Resistor (Optional - Value found by using this online calculator)
- AC/DC Power Converter (5-8 volt DC output)
- Shattered Glass (I used shattered tempered glass)
- Drill and Glass Drill Bit (1/4" - $6)
- Bamboo Skewer With Loop of Wire on One End
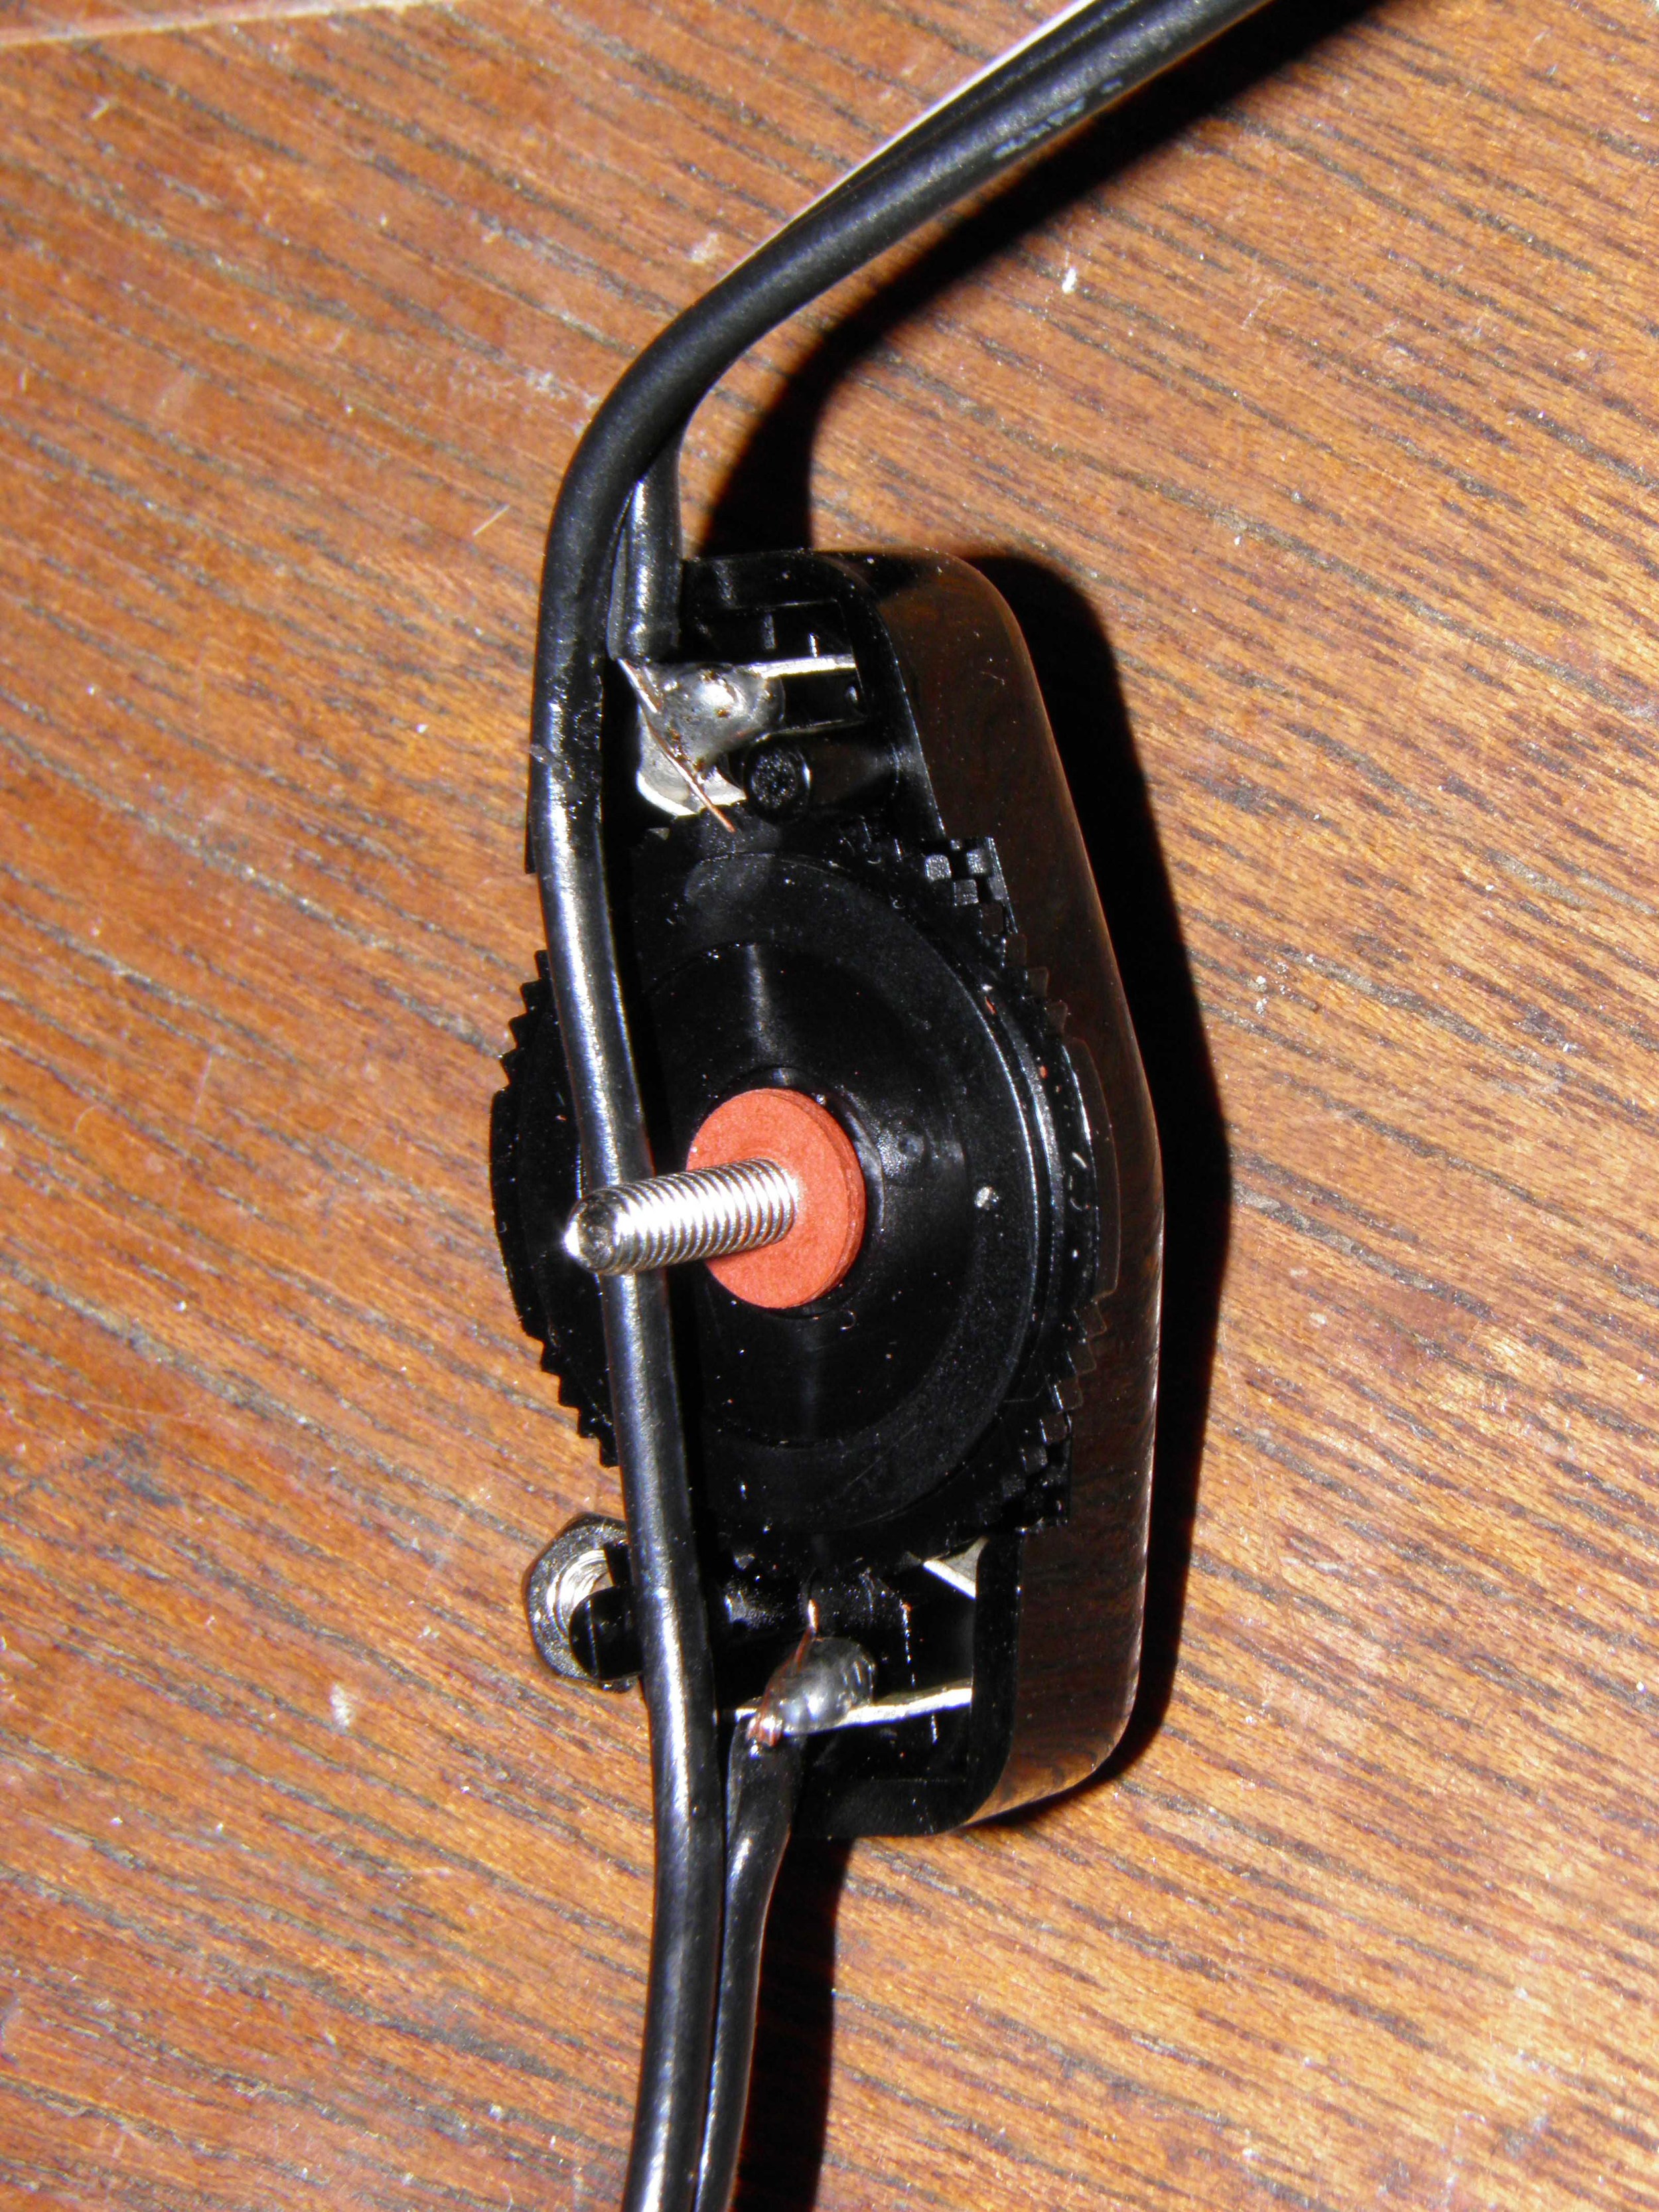
- Lamp Switch (Optional)
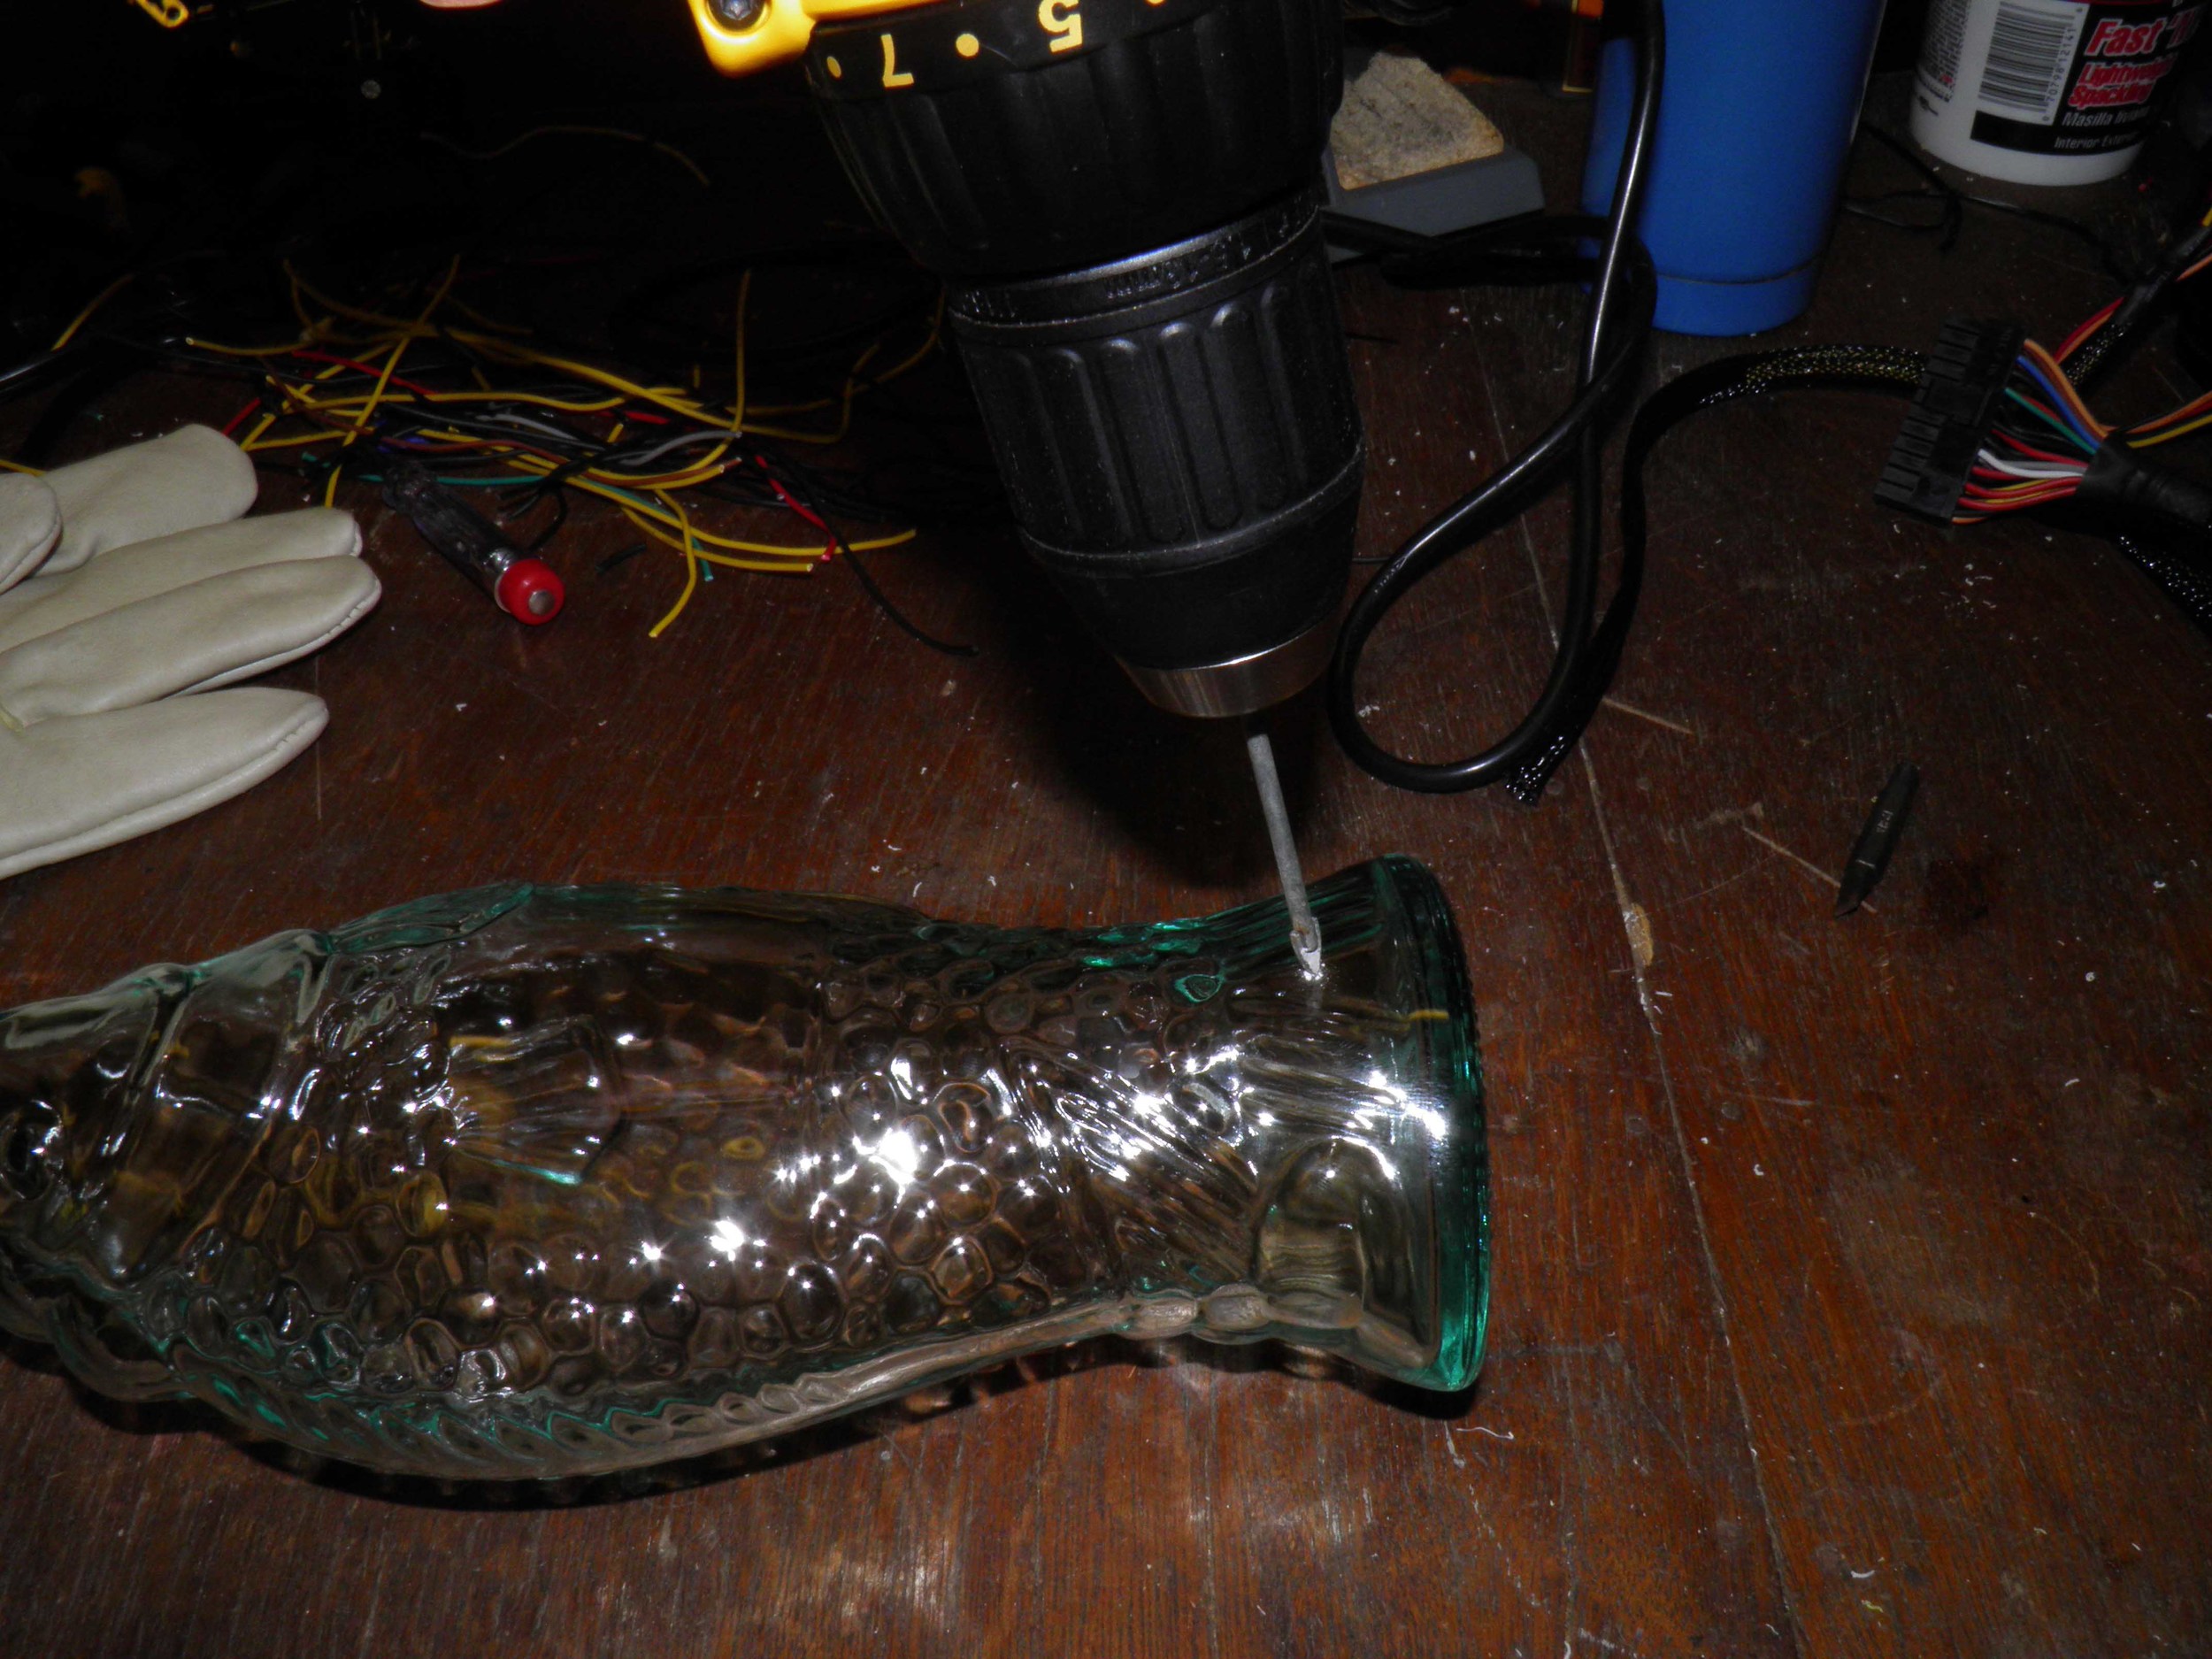
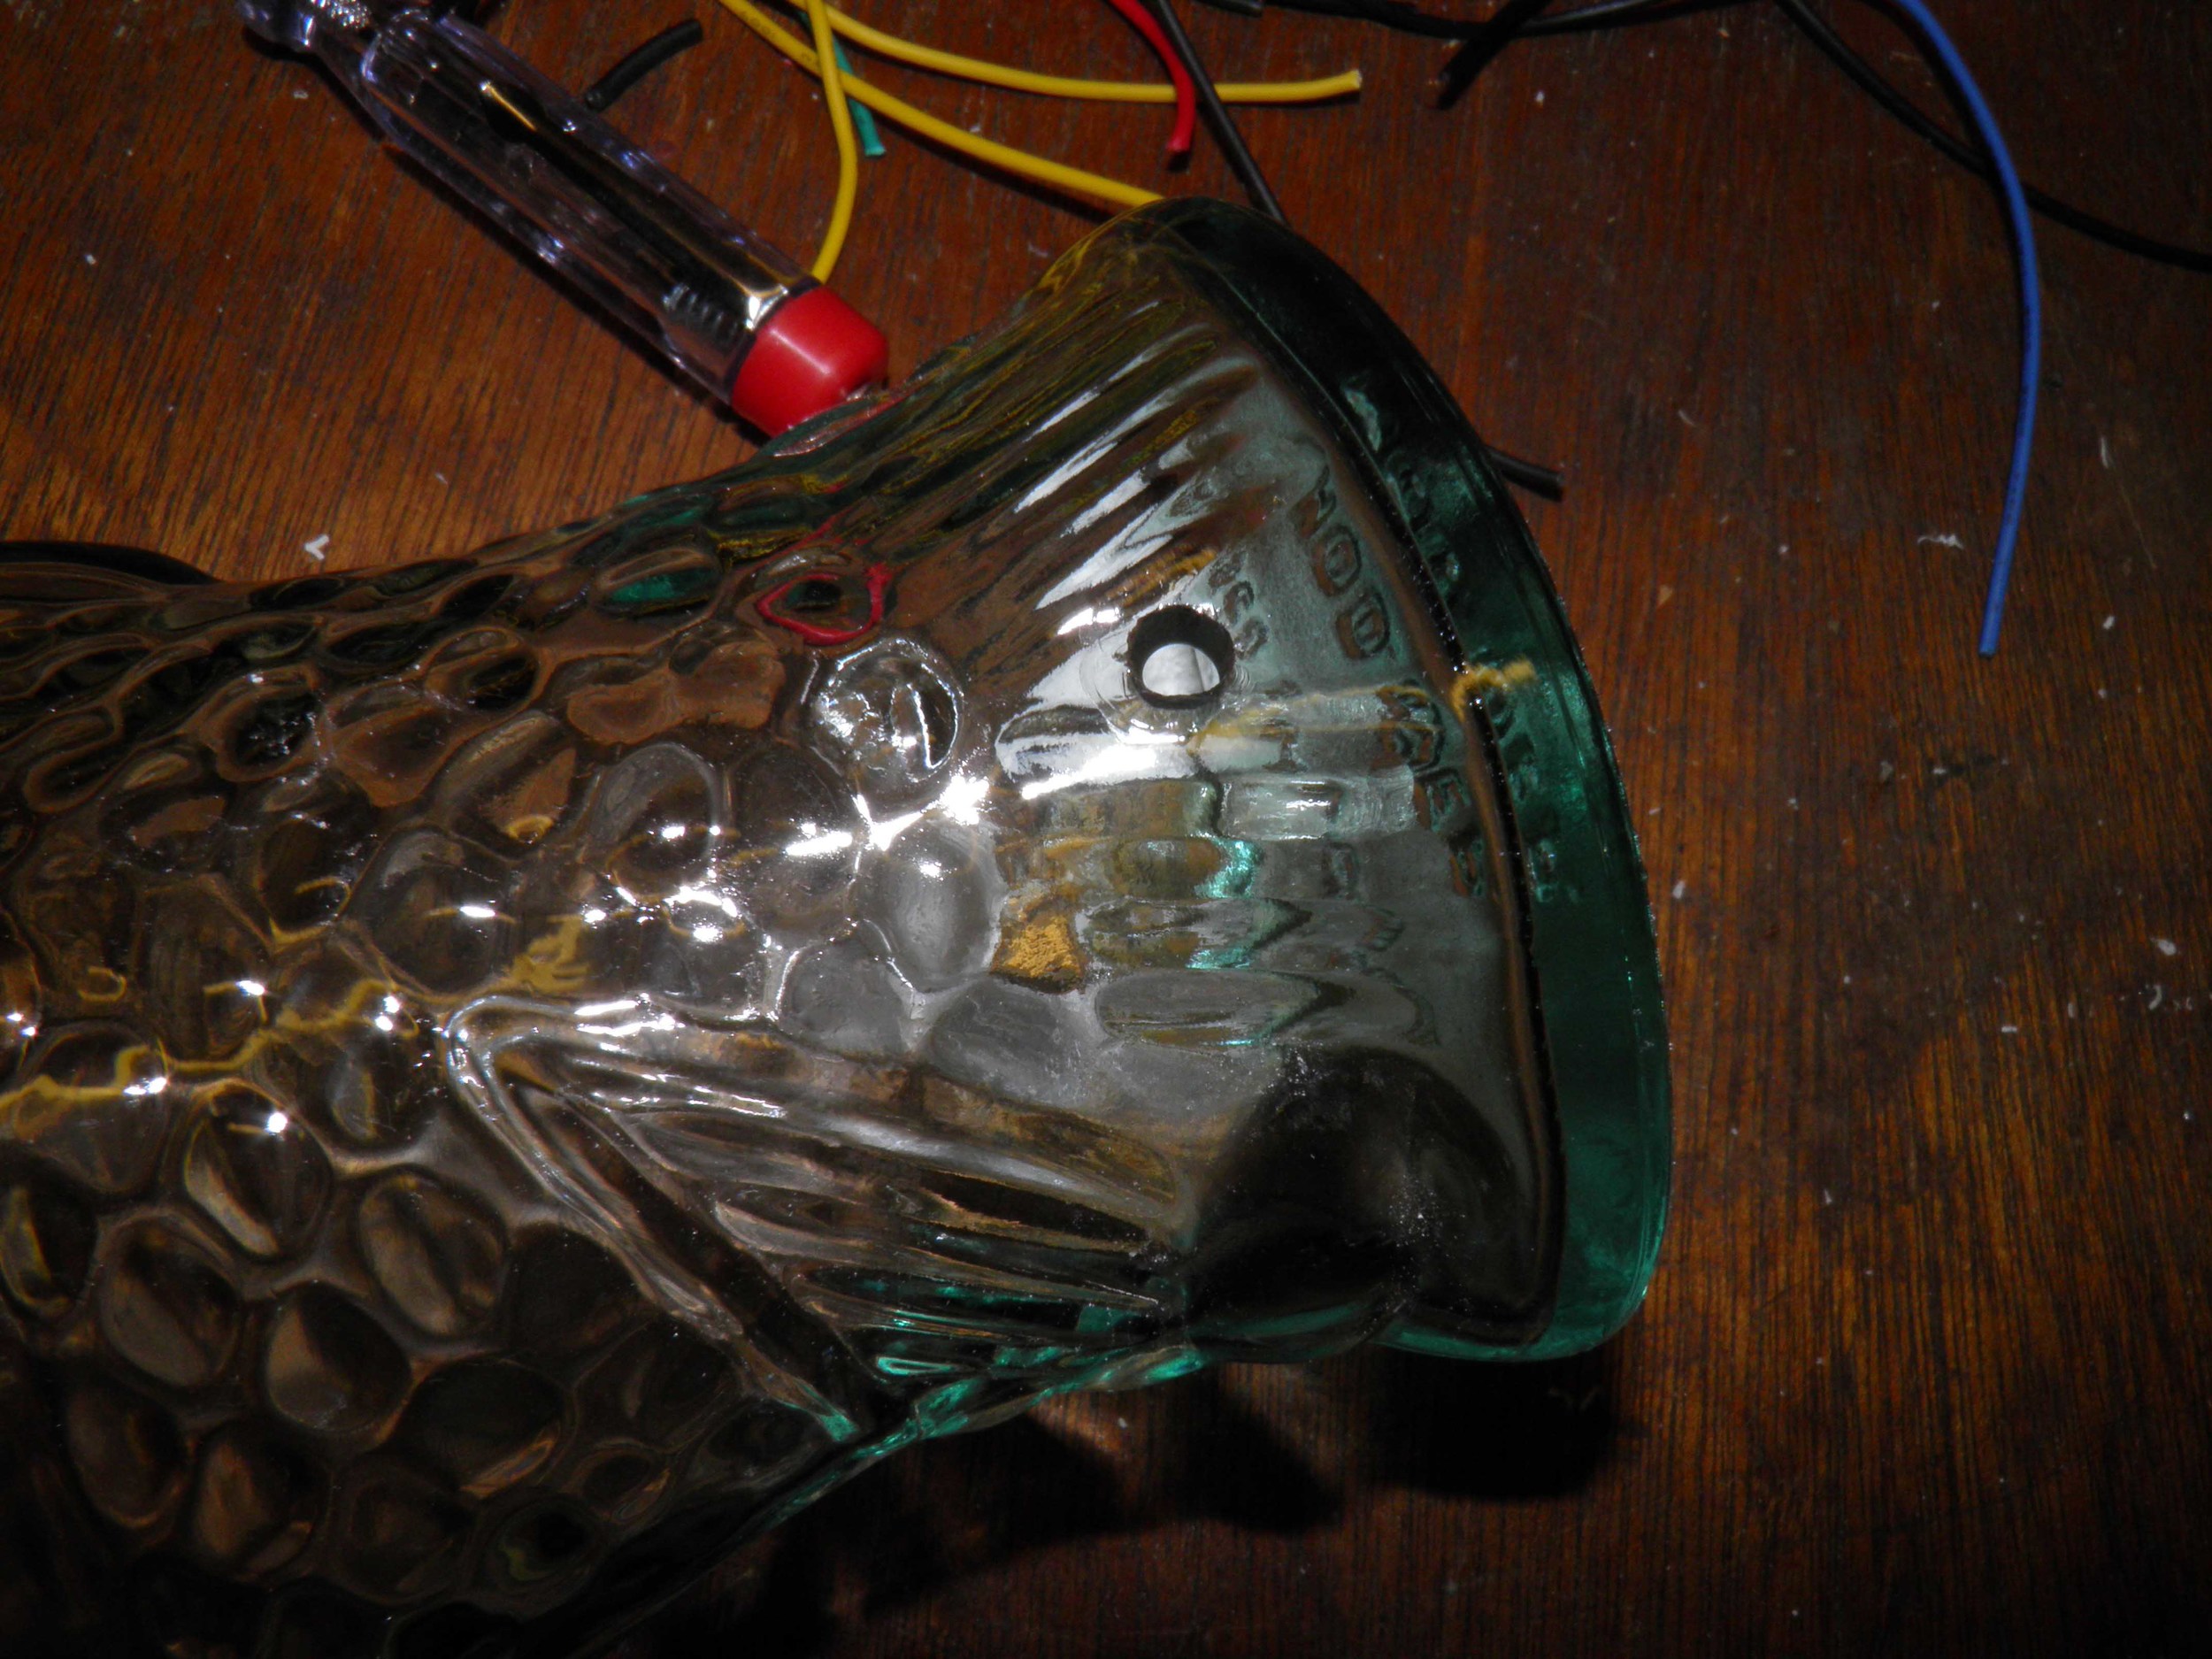
Step 1 -- Drilling the Bottle
Start by drilling a hole in the back of the bottom of the your bottle for your power cord to fit through. I believe I used a 1/4" bit. You want to take it slow so you don't build up too much heat and crack the glass. I use a damp paper towel to wipe off excess powdered glass produced by the drilling process. When it starts to get loud, you know you're close to the finish. Make sure not to press down too hard on the drill at this point.
Step 2 -- Soldering up the LED Light Strip
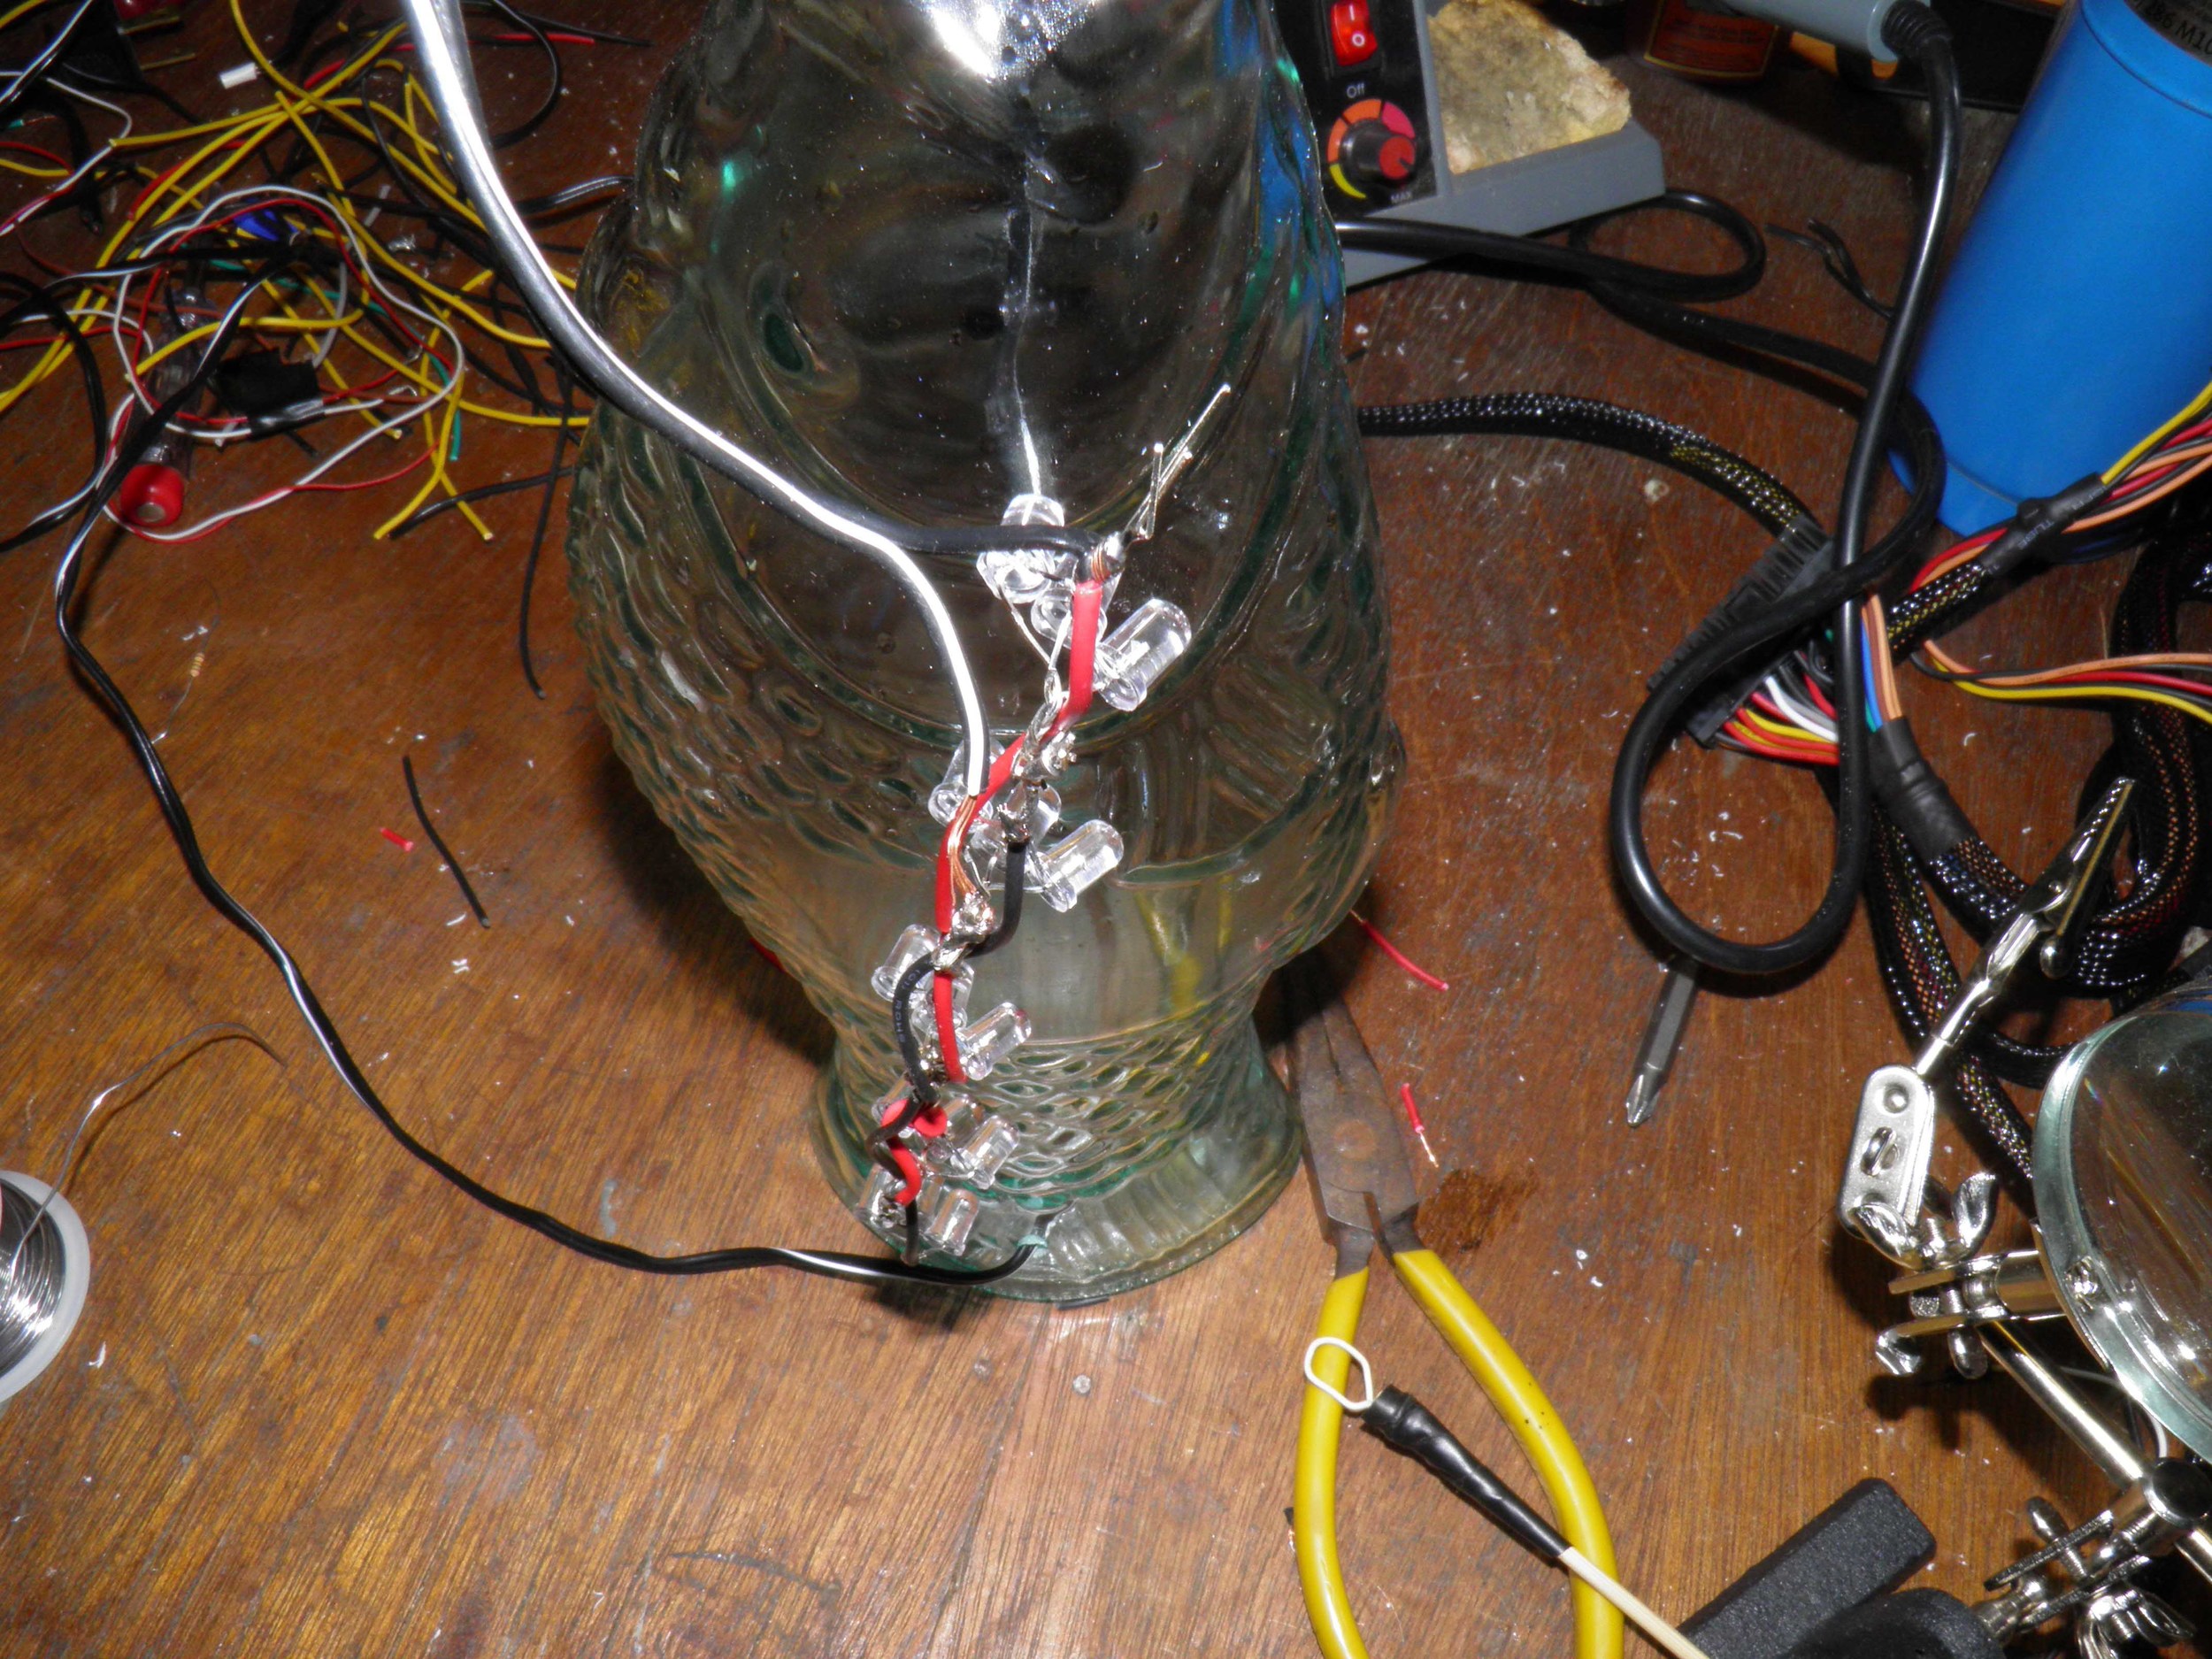
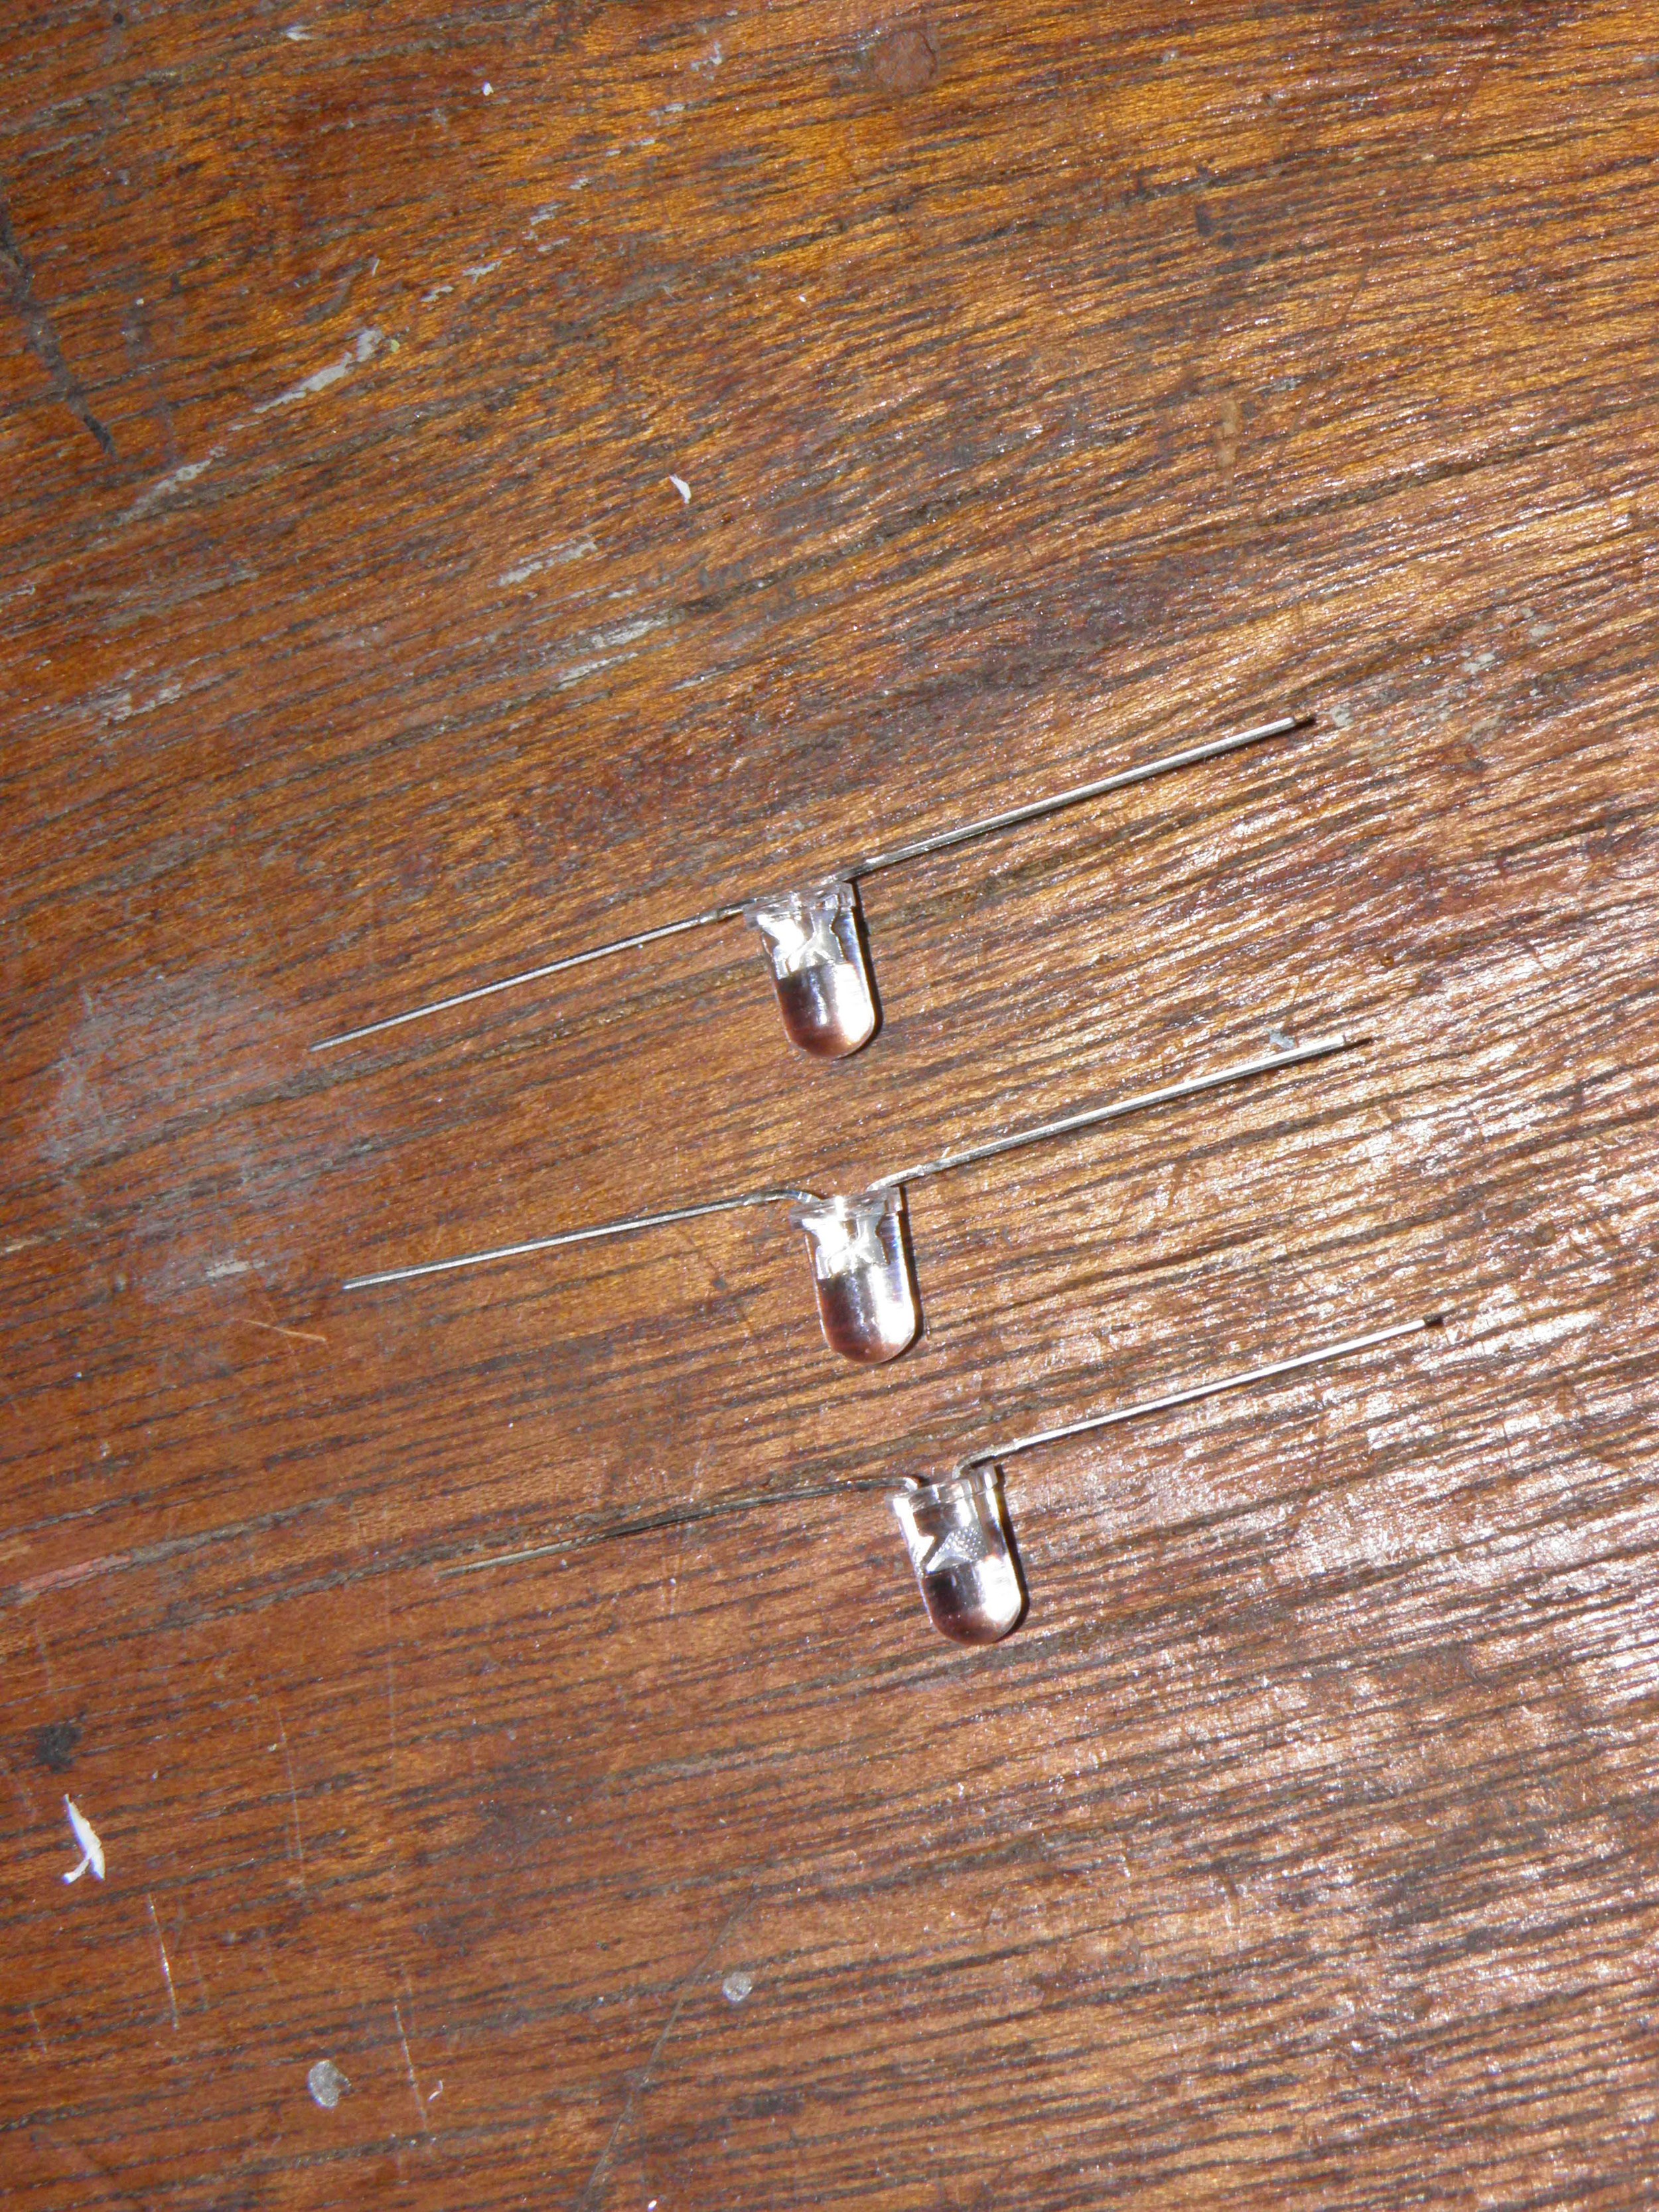
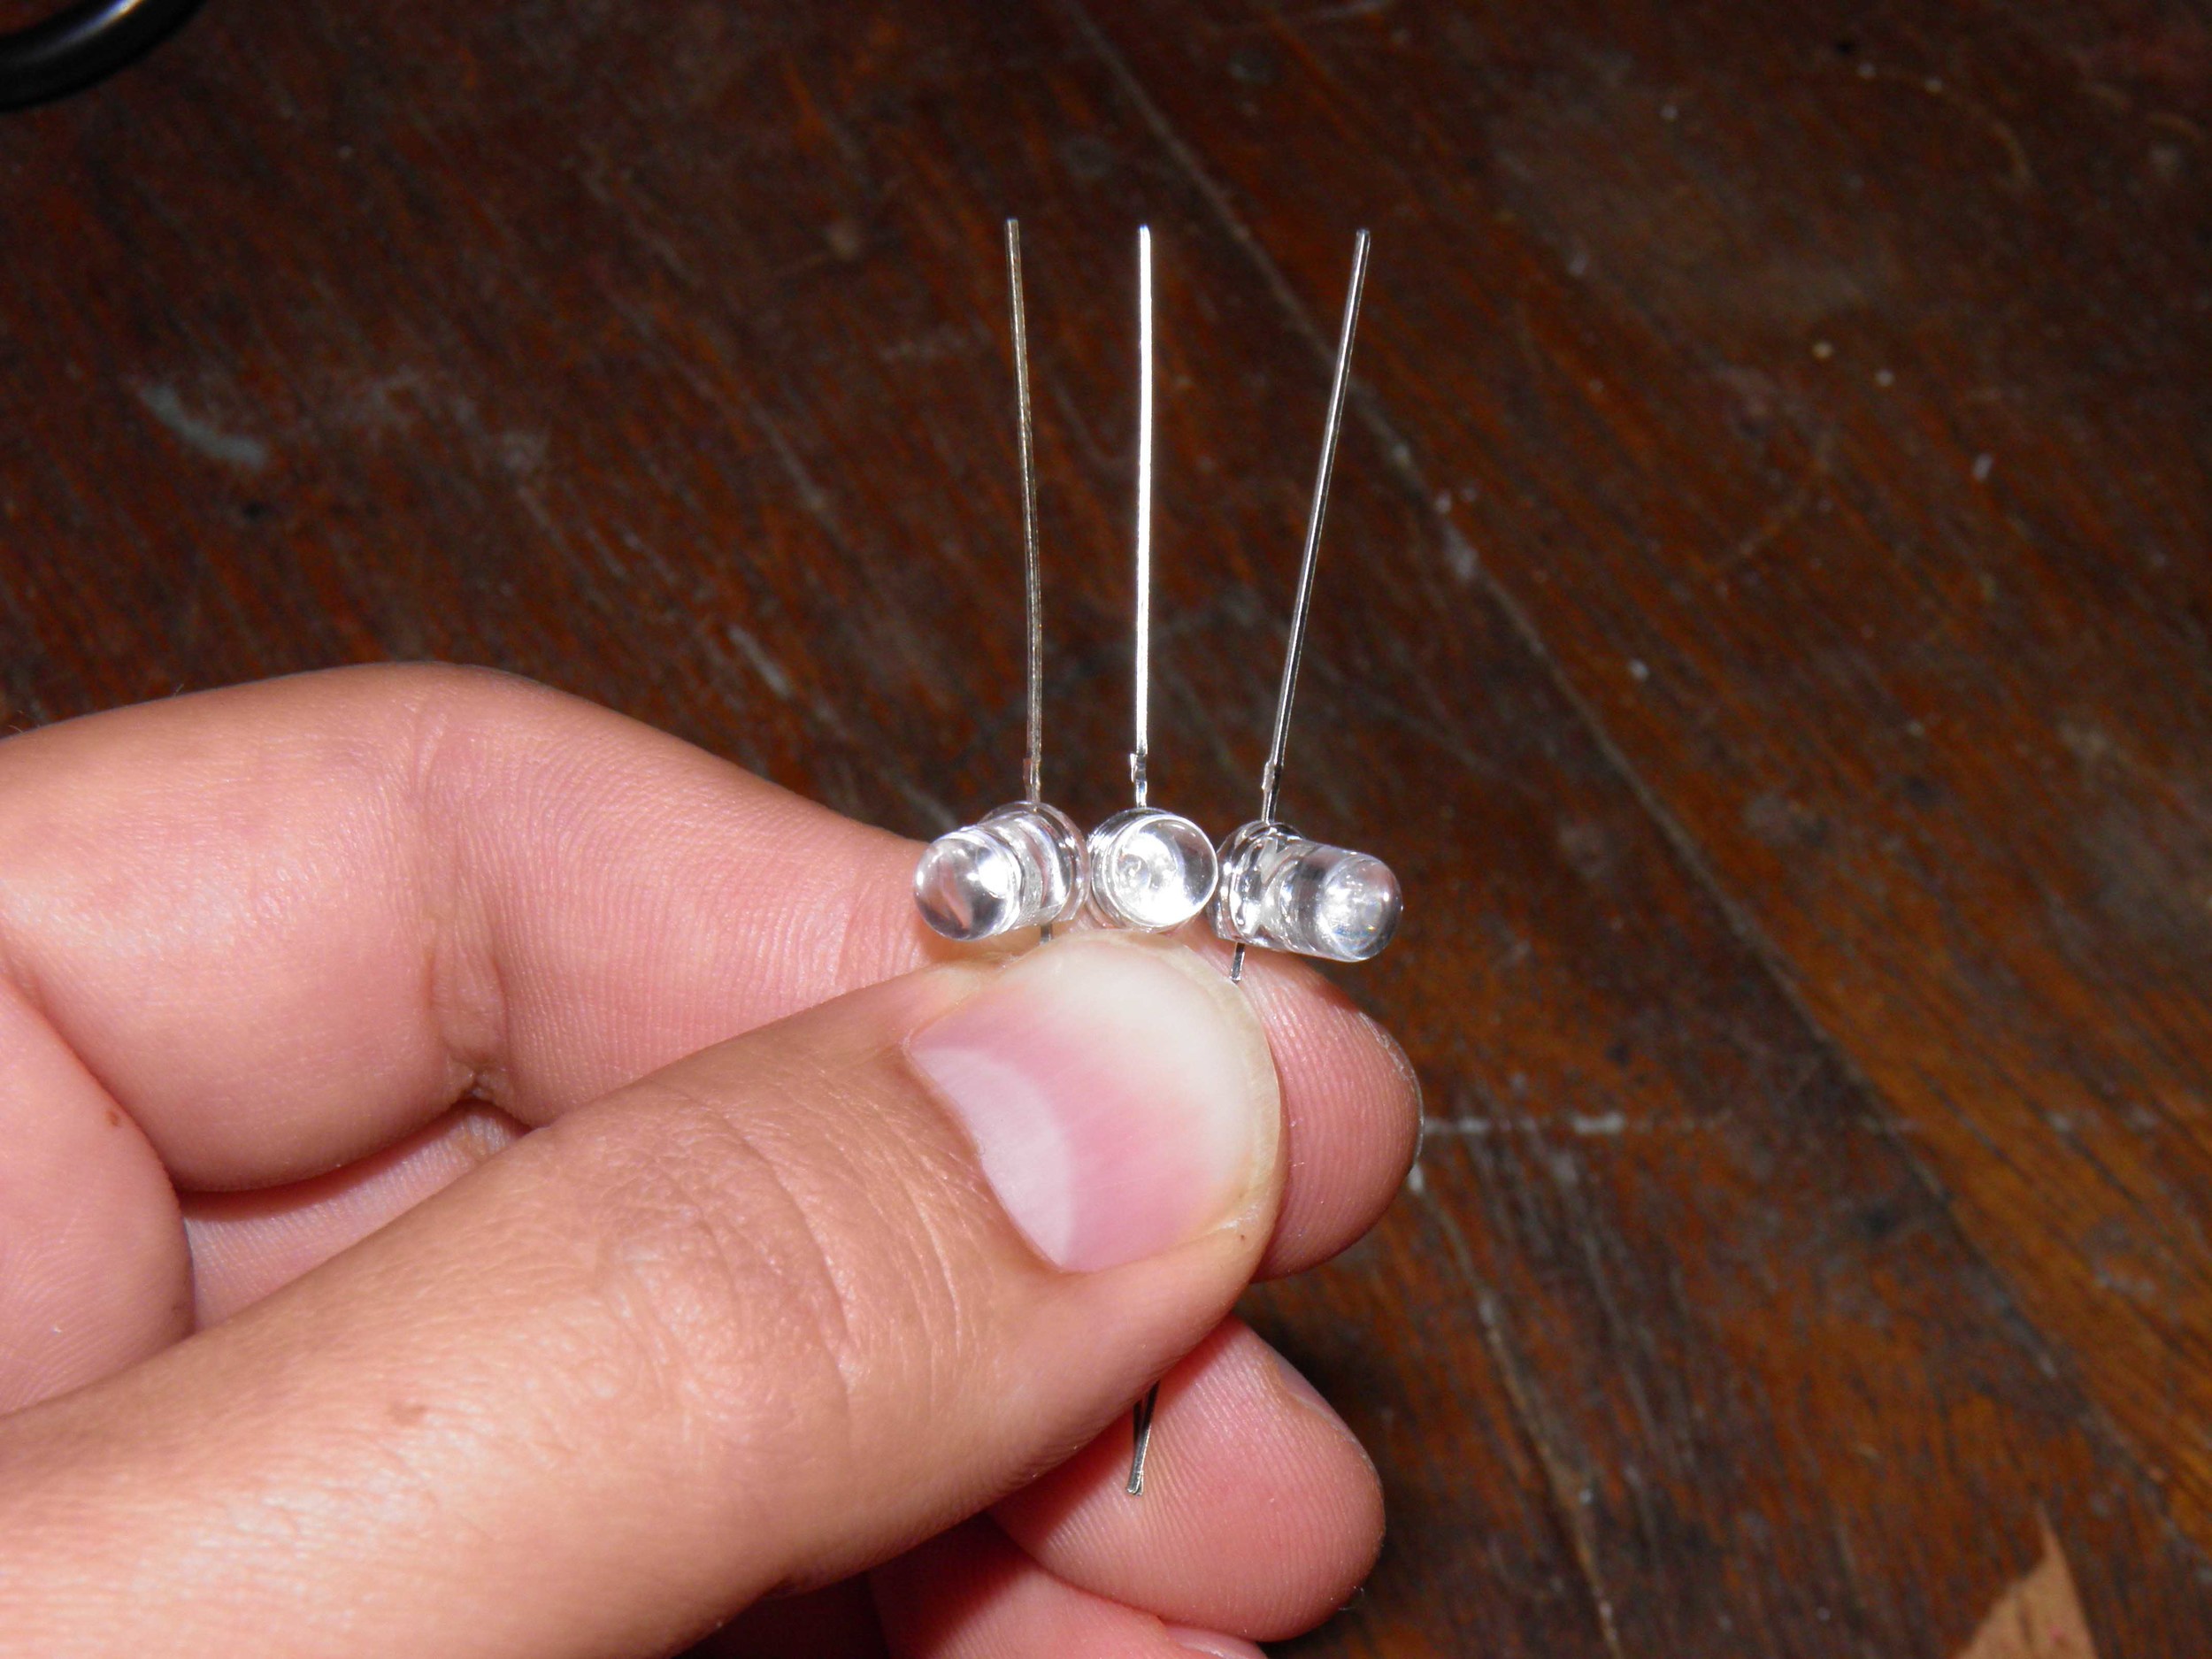
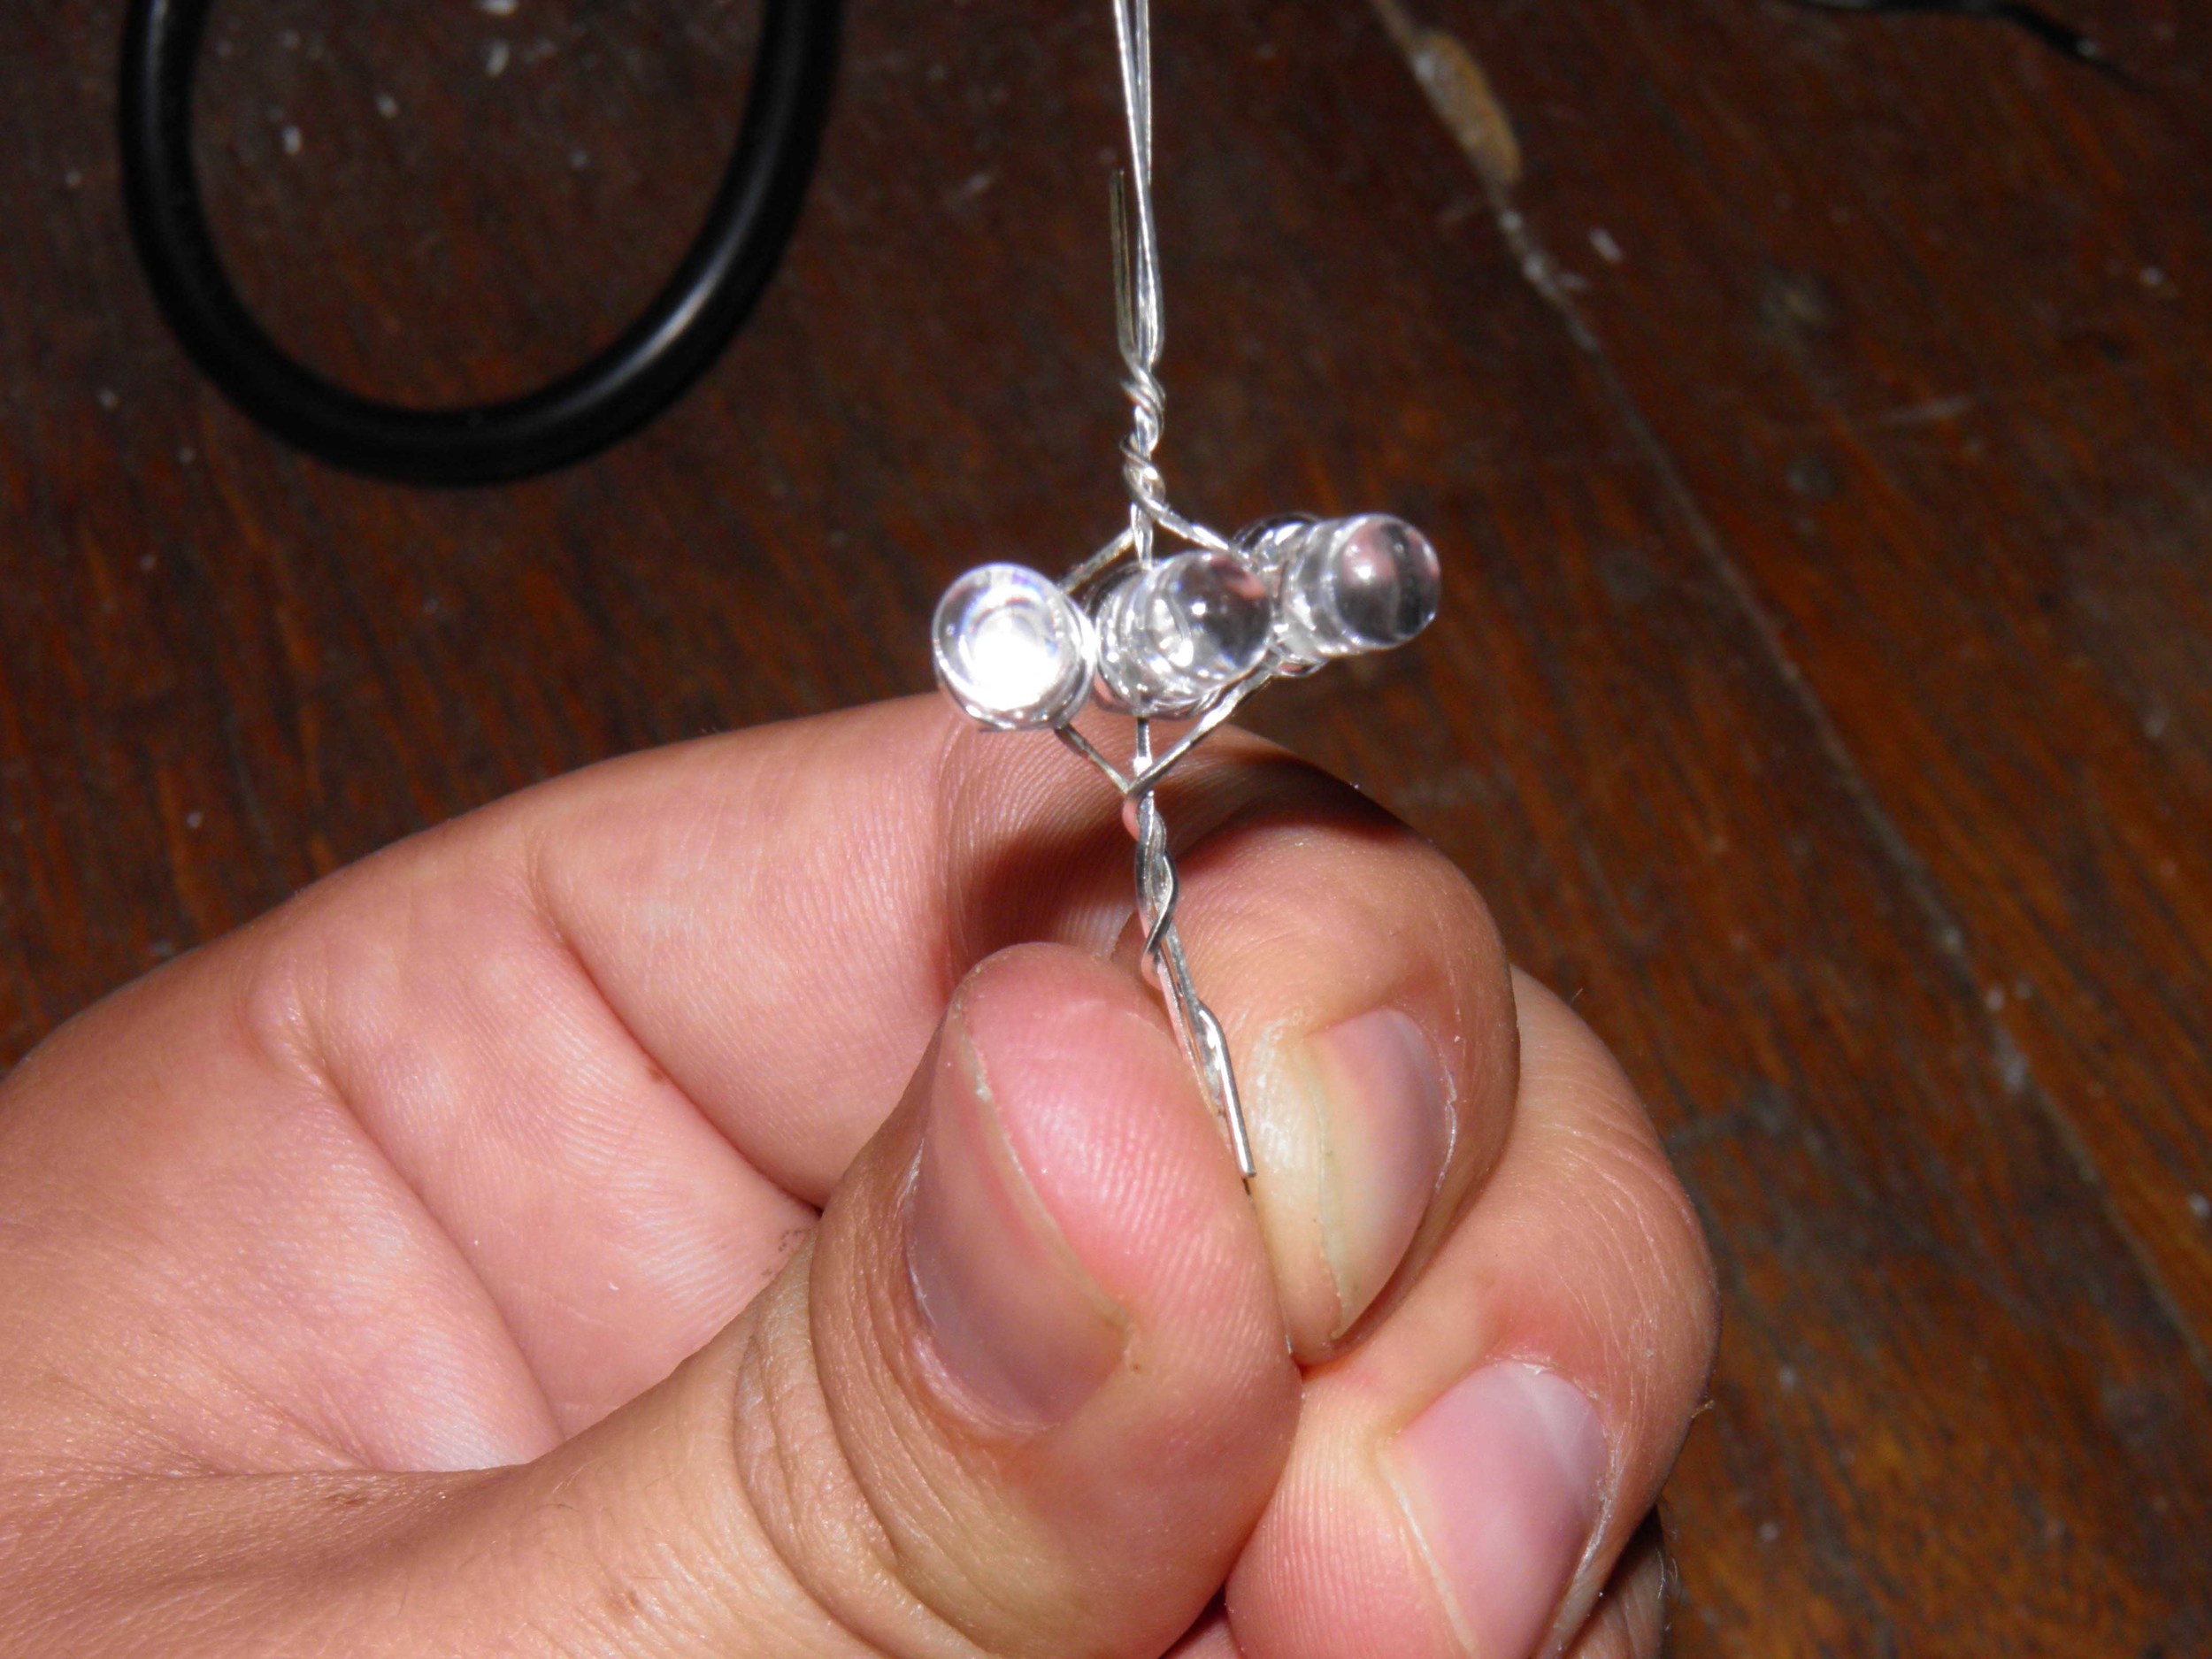
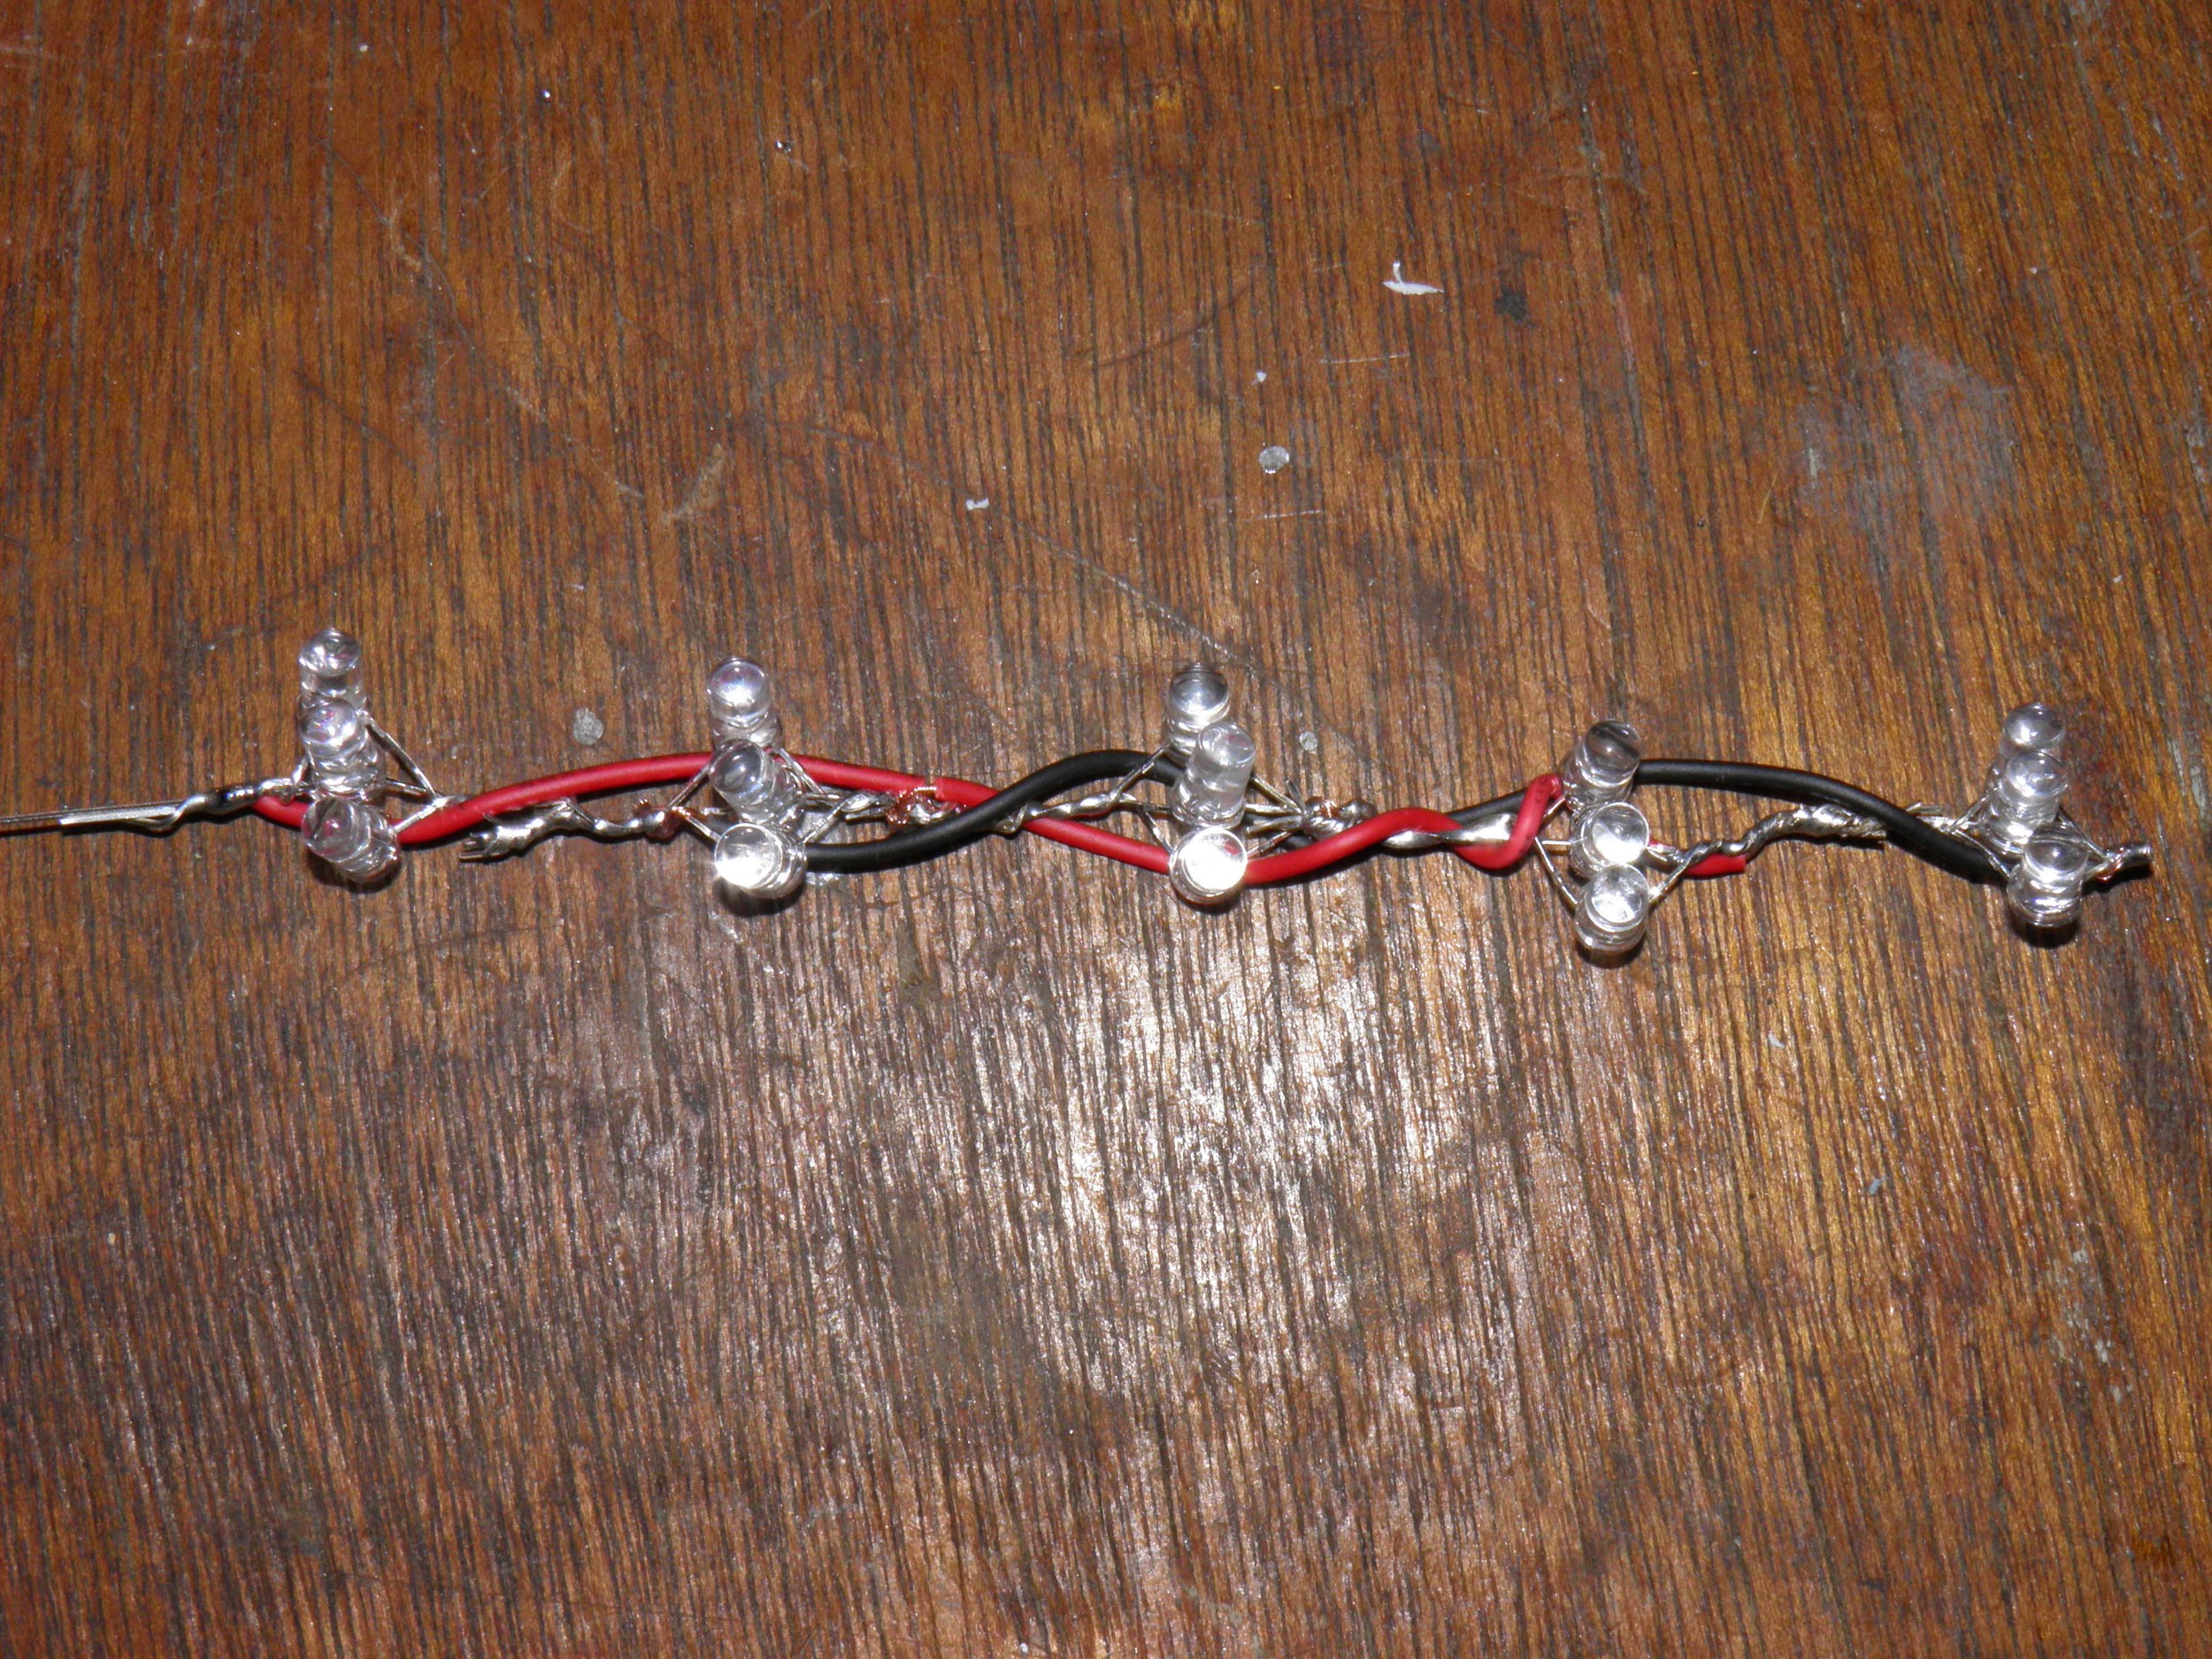
Now that the bottle is drilled, it's time to solder up your LEDs. I use multiple clusters of 3 LEDs wired up in series/parallel to provide maximum light coverage. One LED faces straight ahead, and the other two are angled off in either direction. Test each LED and each cluster!! You don't wan to solder up 15 LEDs and find out one's brunt out. You're going to make around 5 clusters. Straighten the LED leads, align them making sure you have all the polarities in the same direction, twist the leads together on either side, and solder. I made 4 clusters to start off with but ended up needing a 5th so they would go the length of the bottle.
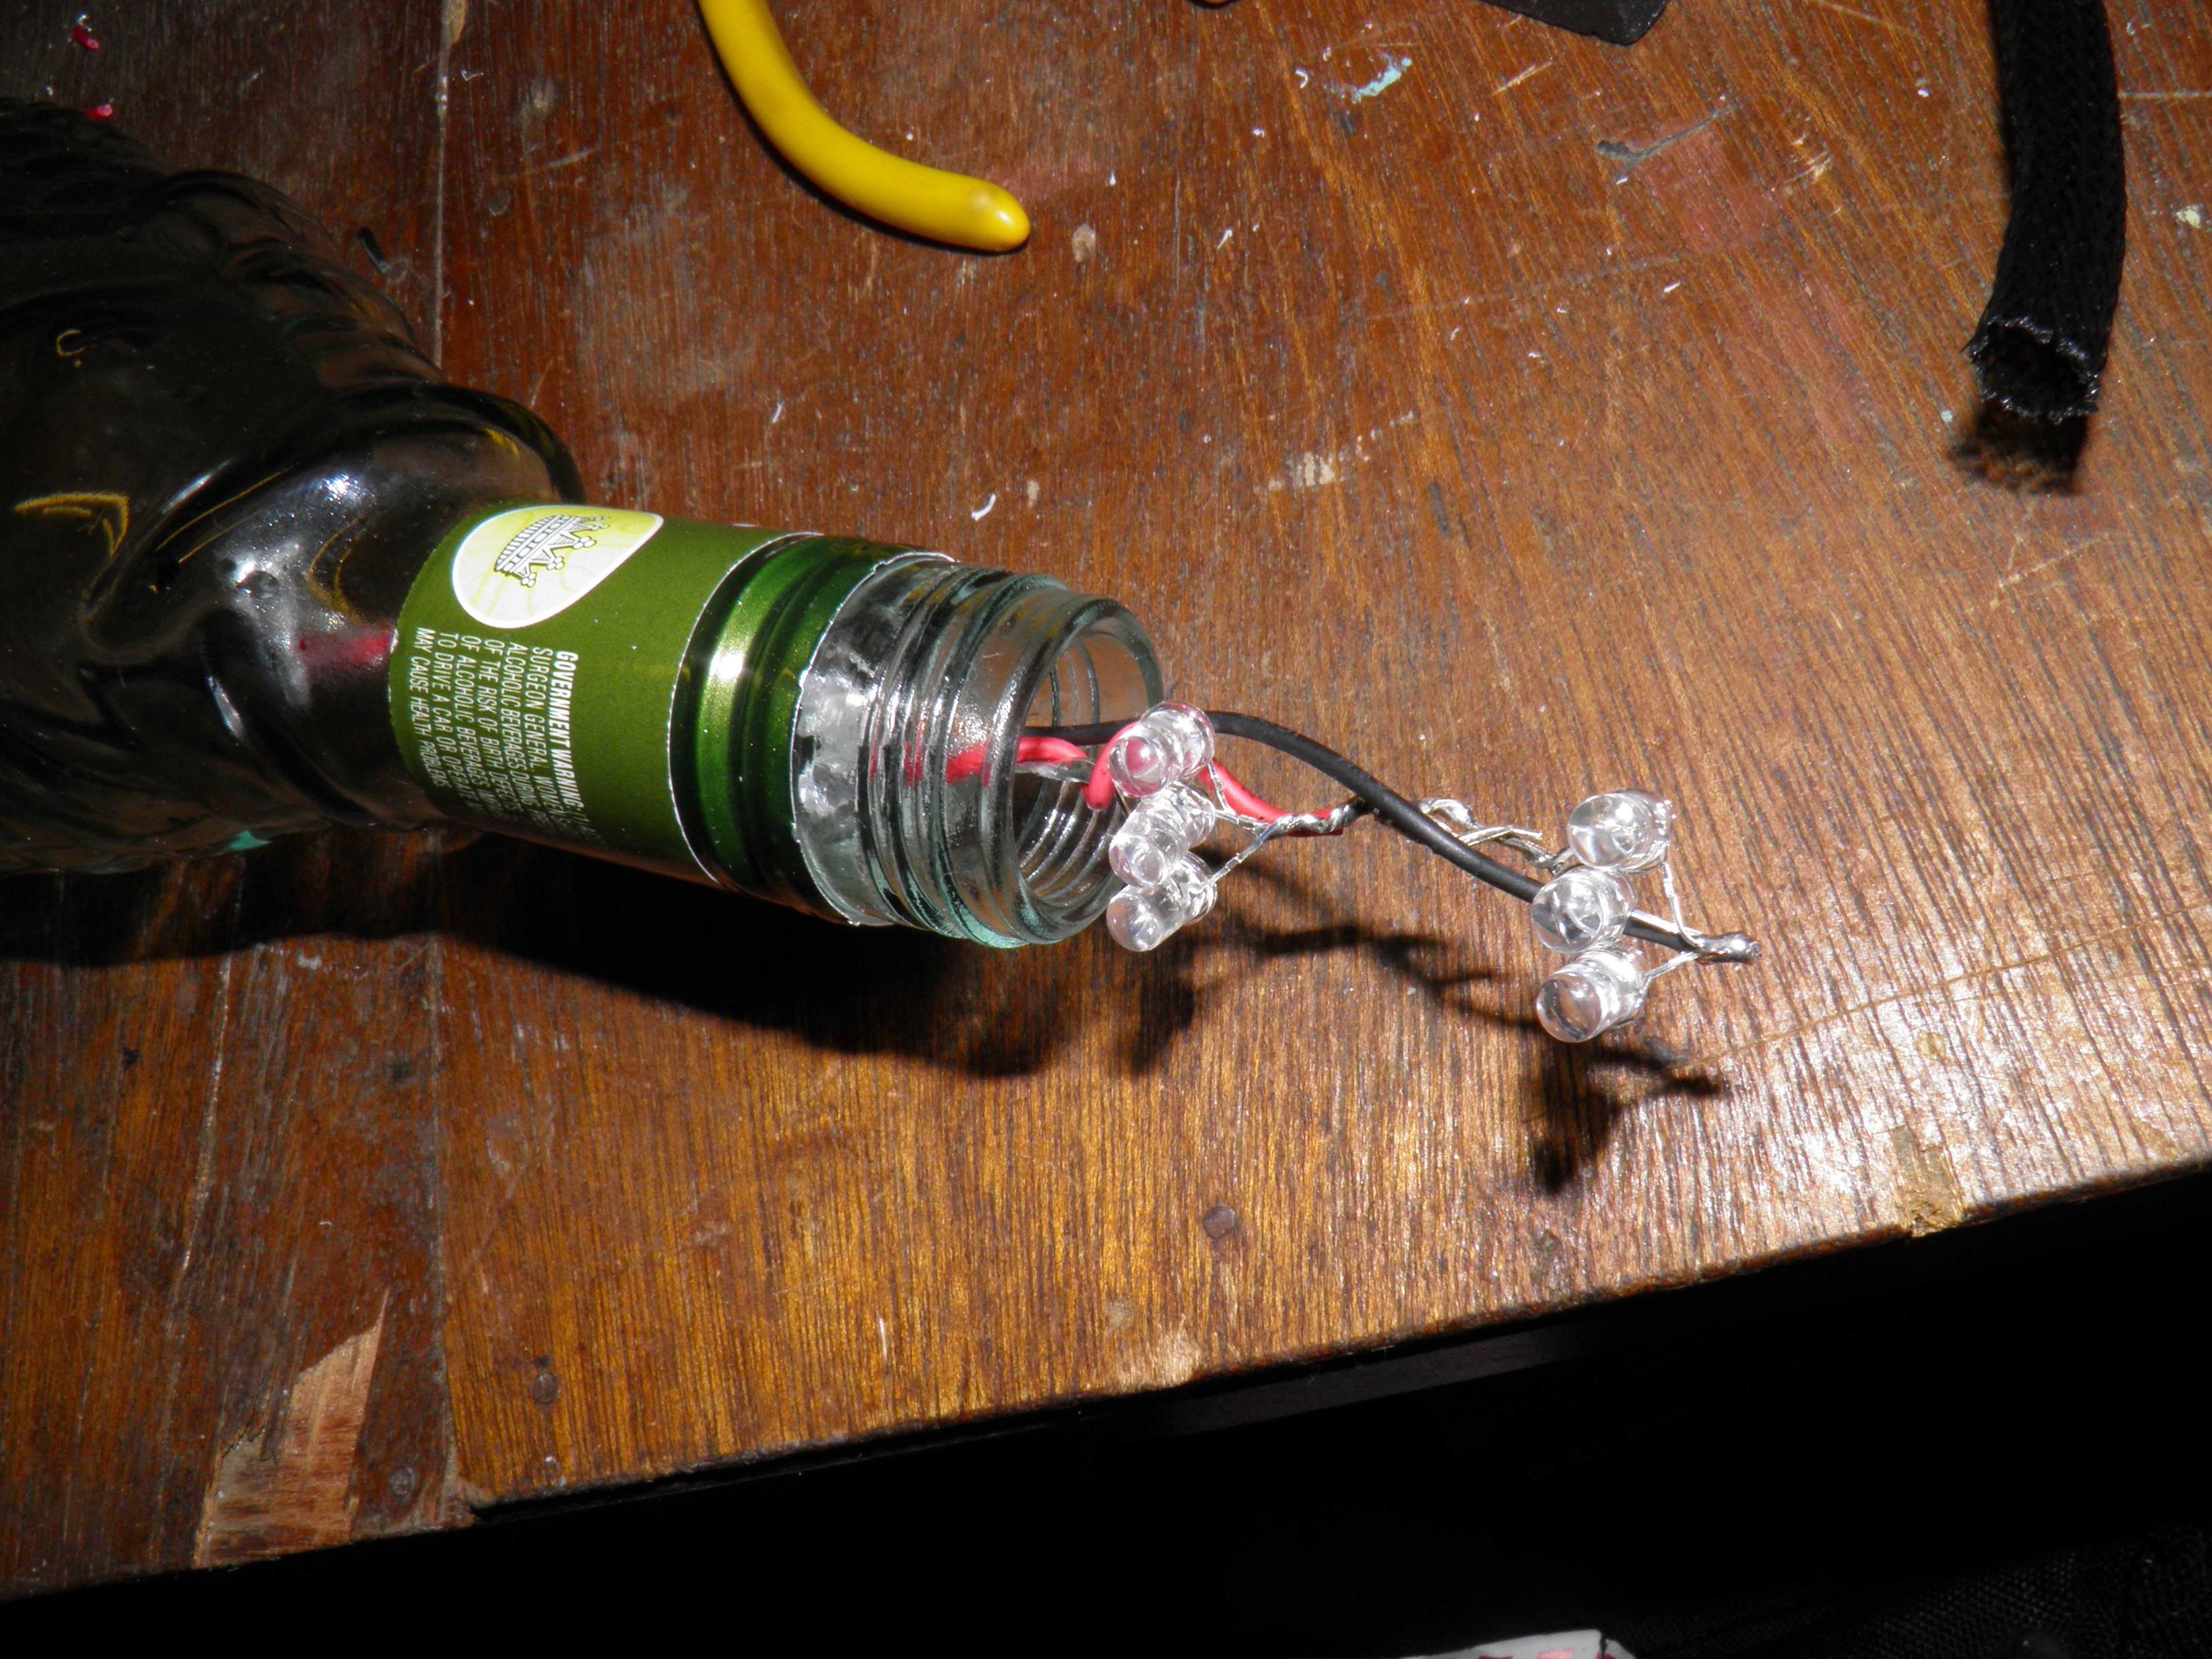
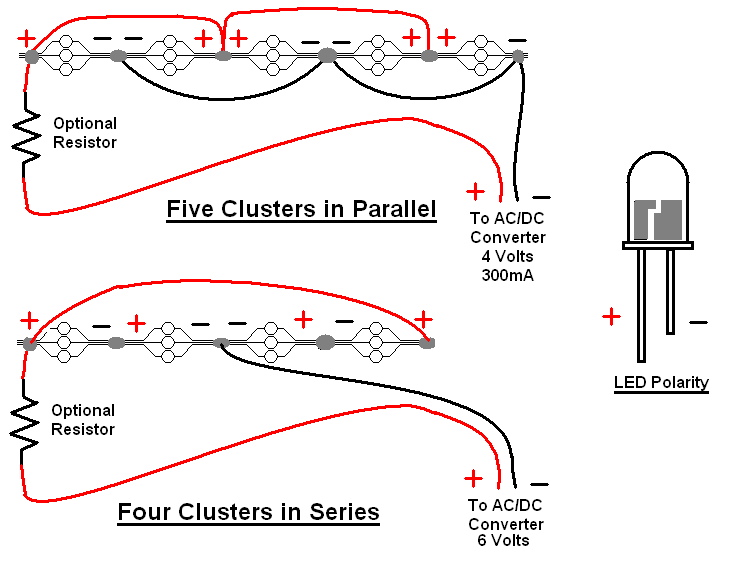
Once you have all the clusters soldered and checked, you need wire them up. The orientation you solder these up in depends on your AC/DC converter output. The AC/DC converter I used puts out around 4 volts at 300mA (right around where my LEDs operate at) so I had to wire up all of the clusters in parallel. If you had 6-7 volts, you would need to change the configuration and wire the clusters up so two sets of clusters are in series in order to expend the full 6-7 volts and not blow out your resistors/LEDs. A quick note on that, if you have to wire two groups in series, you want to keep the number of LEDs in each group equal, don't wire 3 clusters in one group and then 2 in another. Without doing this, one group's resistance will be lower than the other and you'll also blow out your LEDs. The link to the LED calculator above will help you out with this and I've included a wiring diagram of both configurations to try to explain this further. Also, a good practice here would be to use a resistor to limit the current. Since my AC/DC converter puts out barely enough current for my LED array, I didn't bother with the resistor. Test your whole strip with the AC/DC converter and make sure everything lights up nice. Also at this time, make sure your LED strip fits down the neck of your bottle.

Step 3 -- Hooking up the Power and Filling the Bottle with Glass
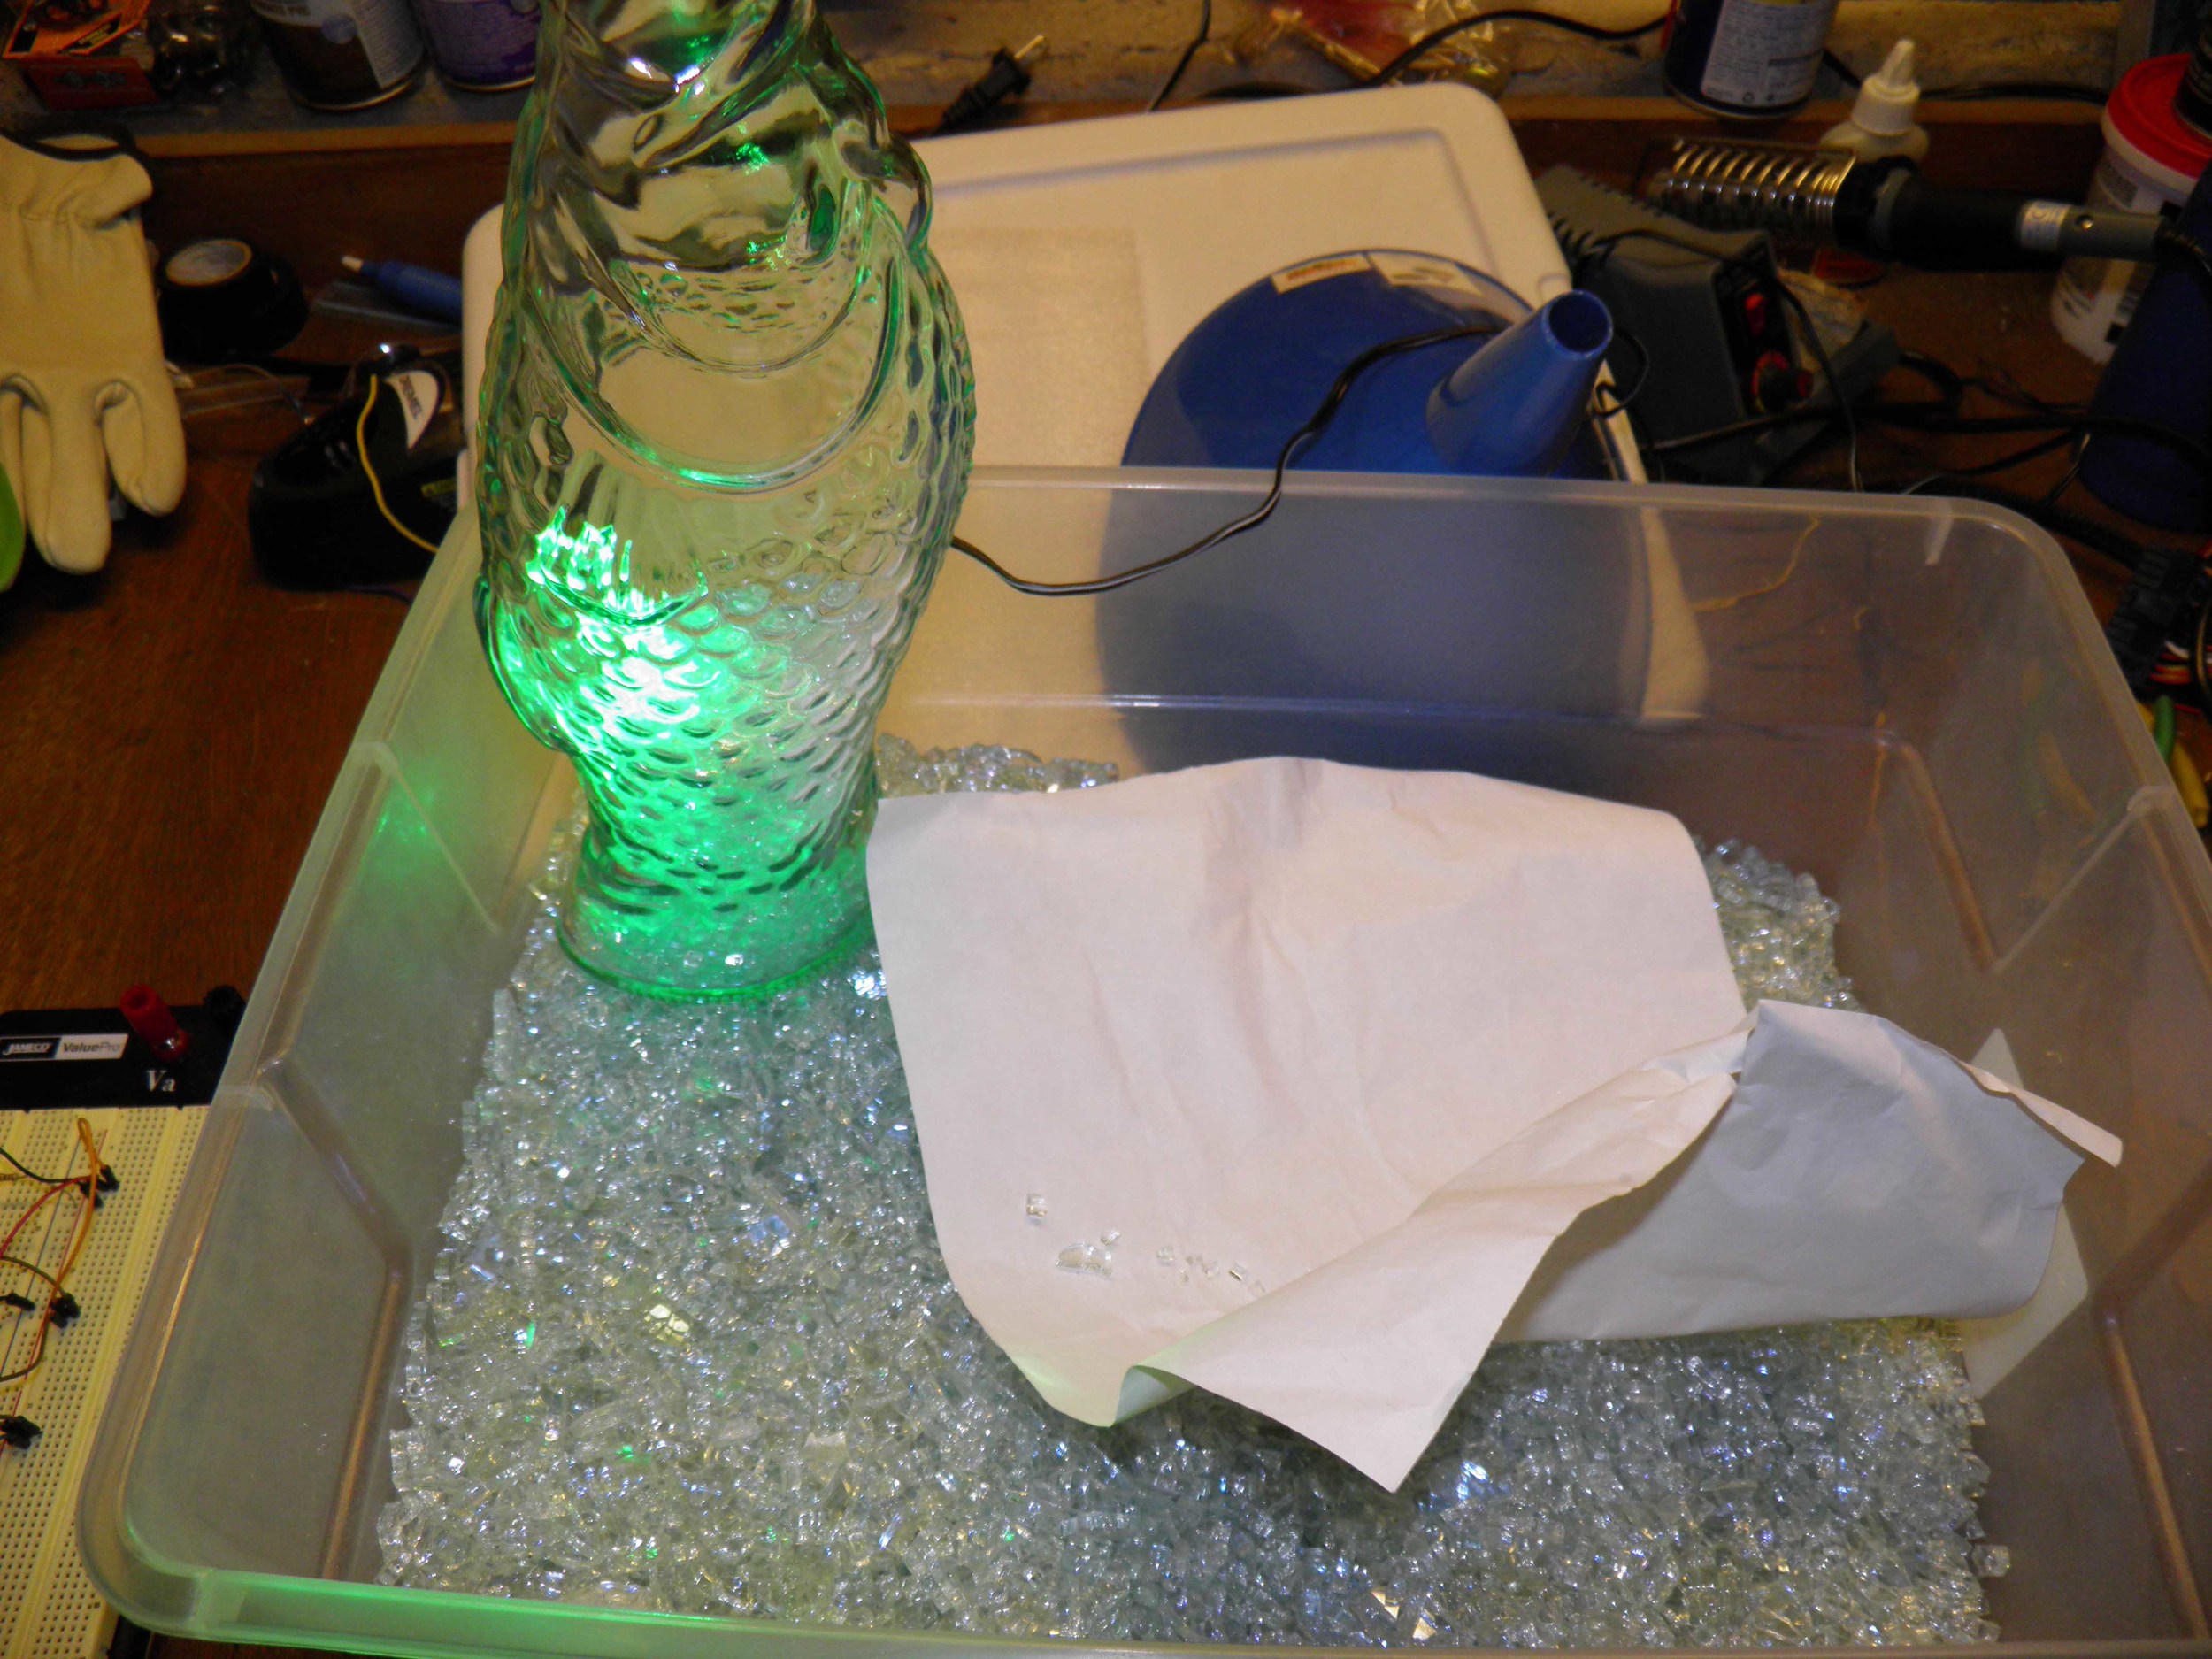
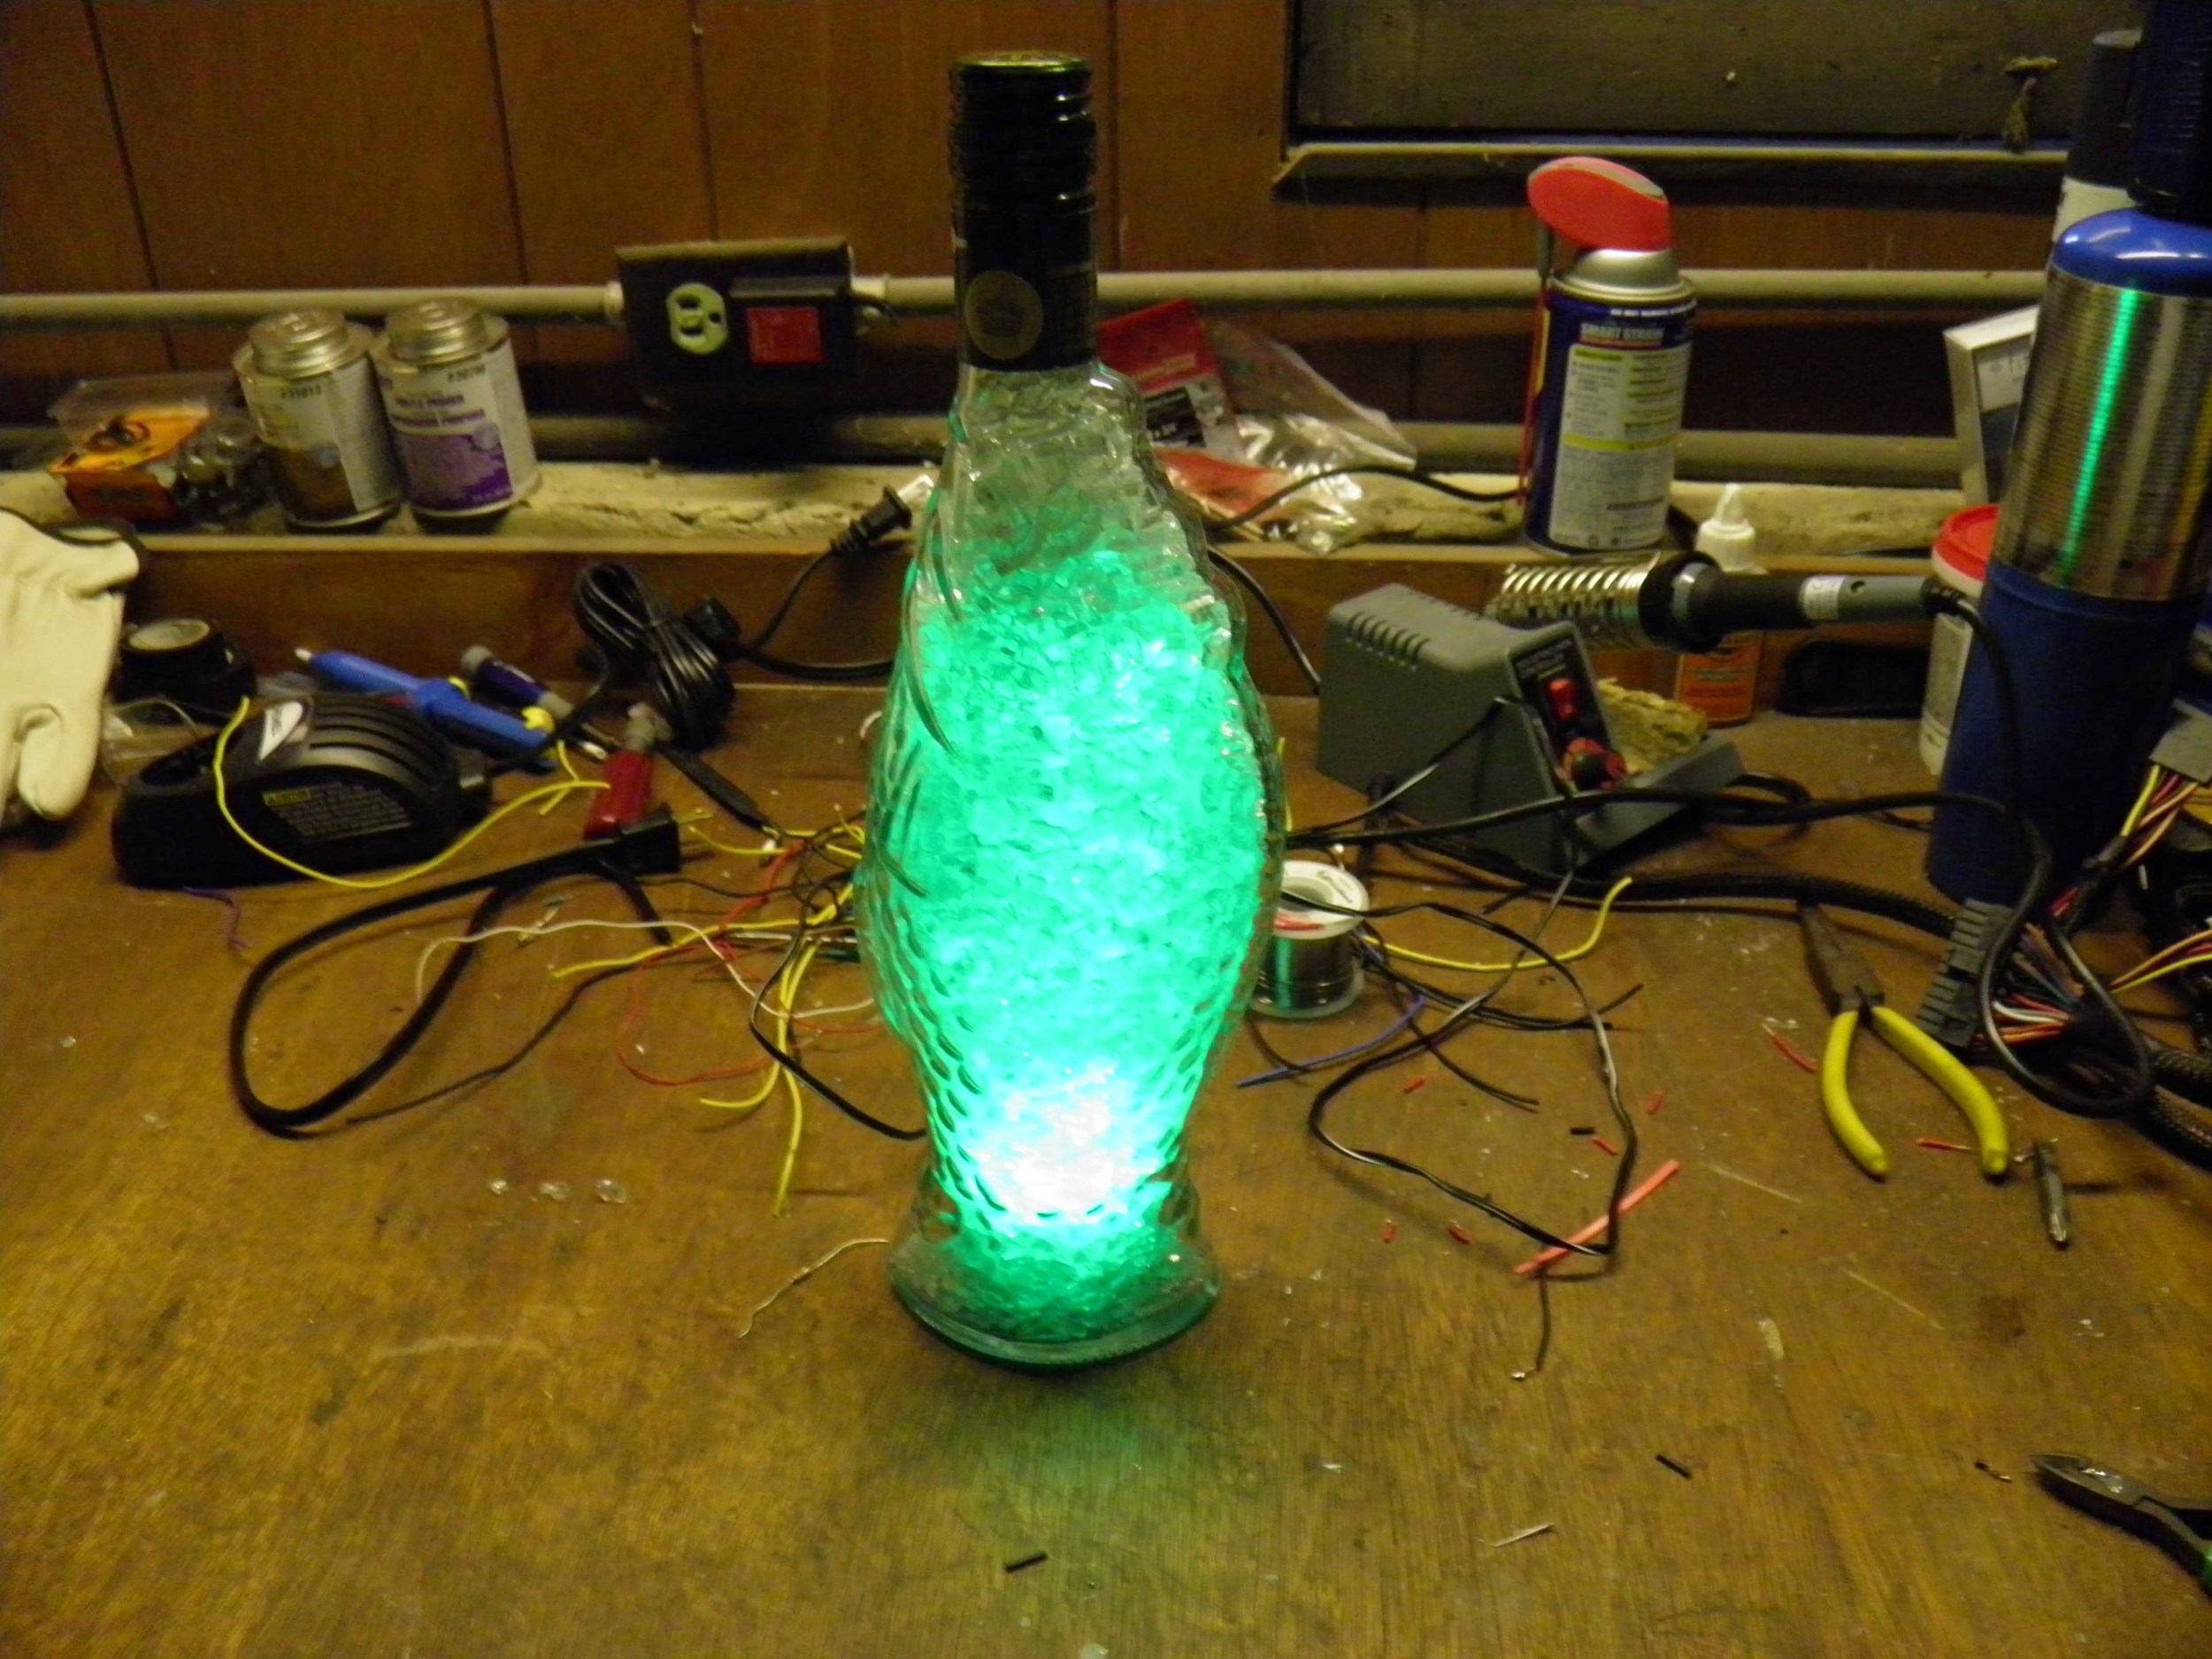
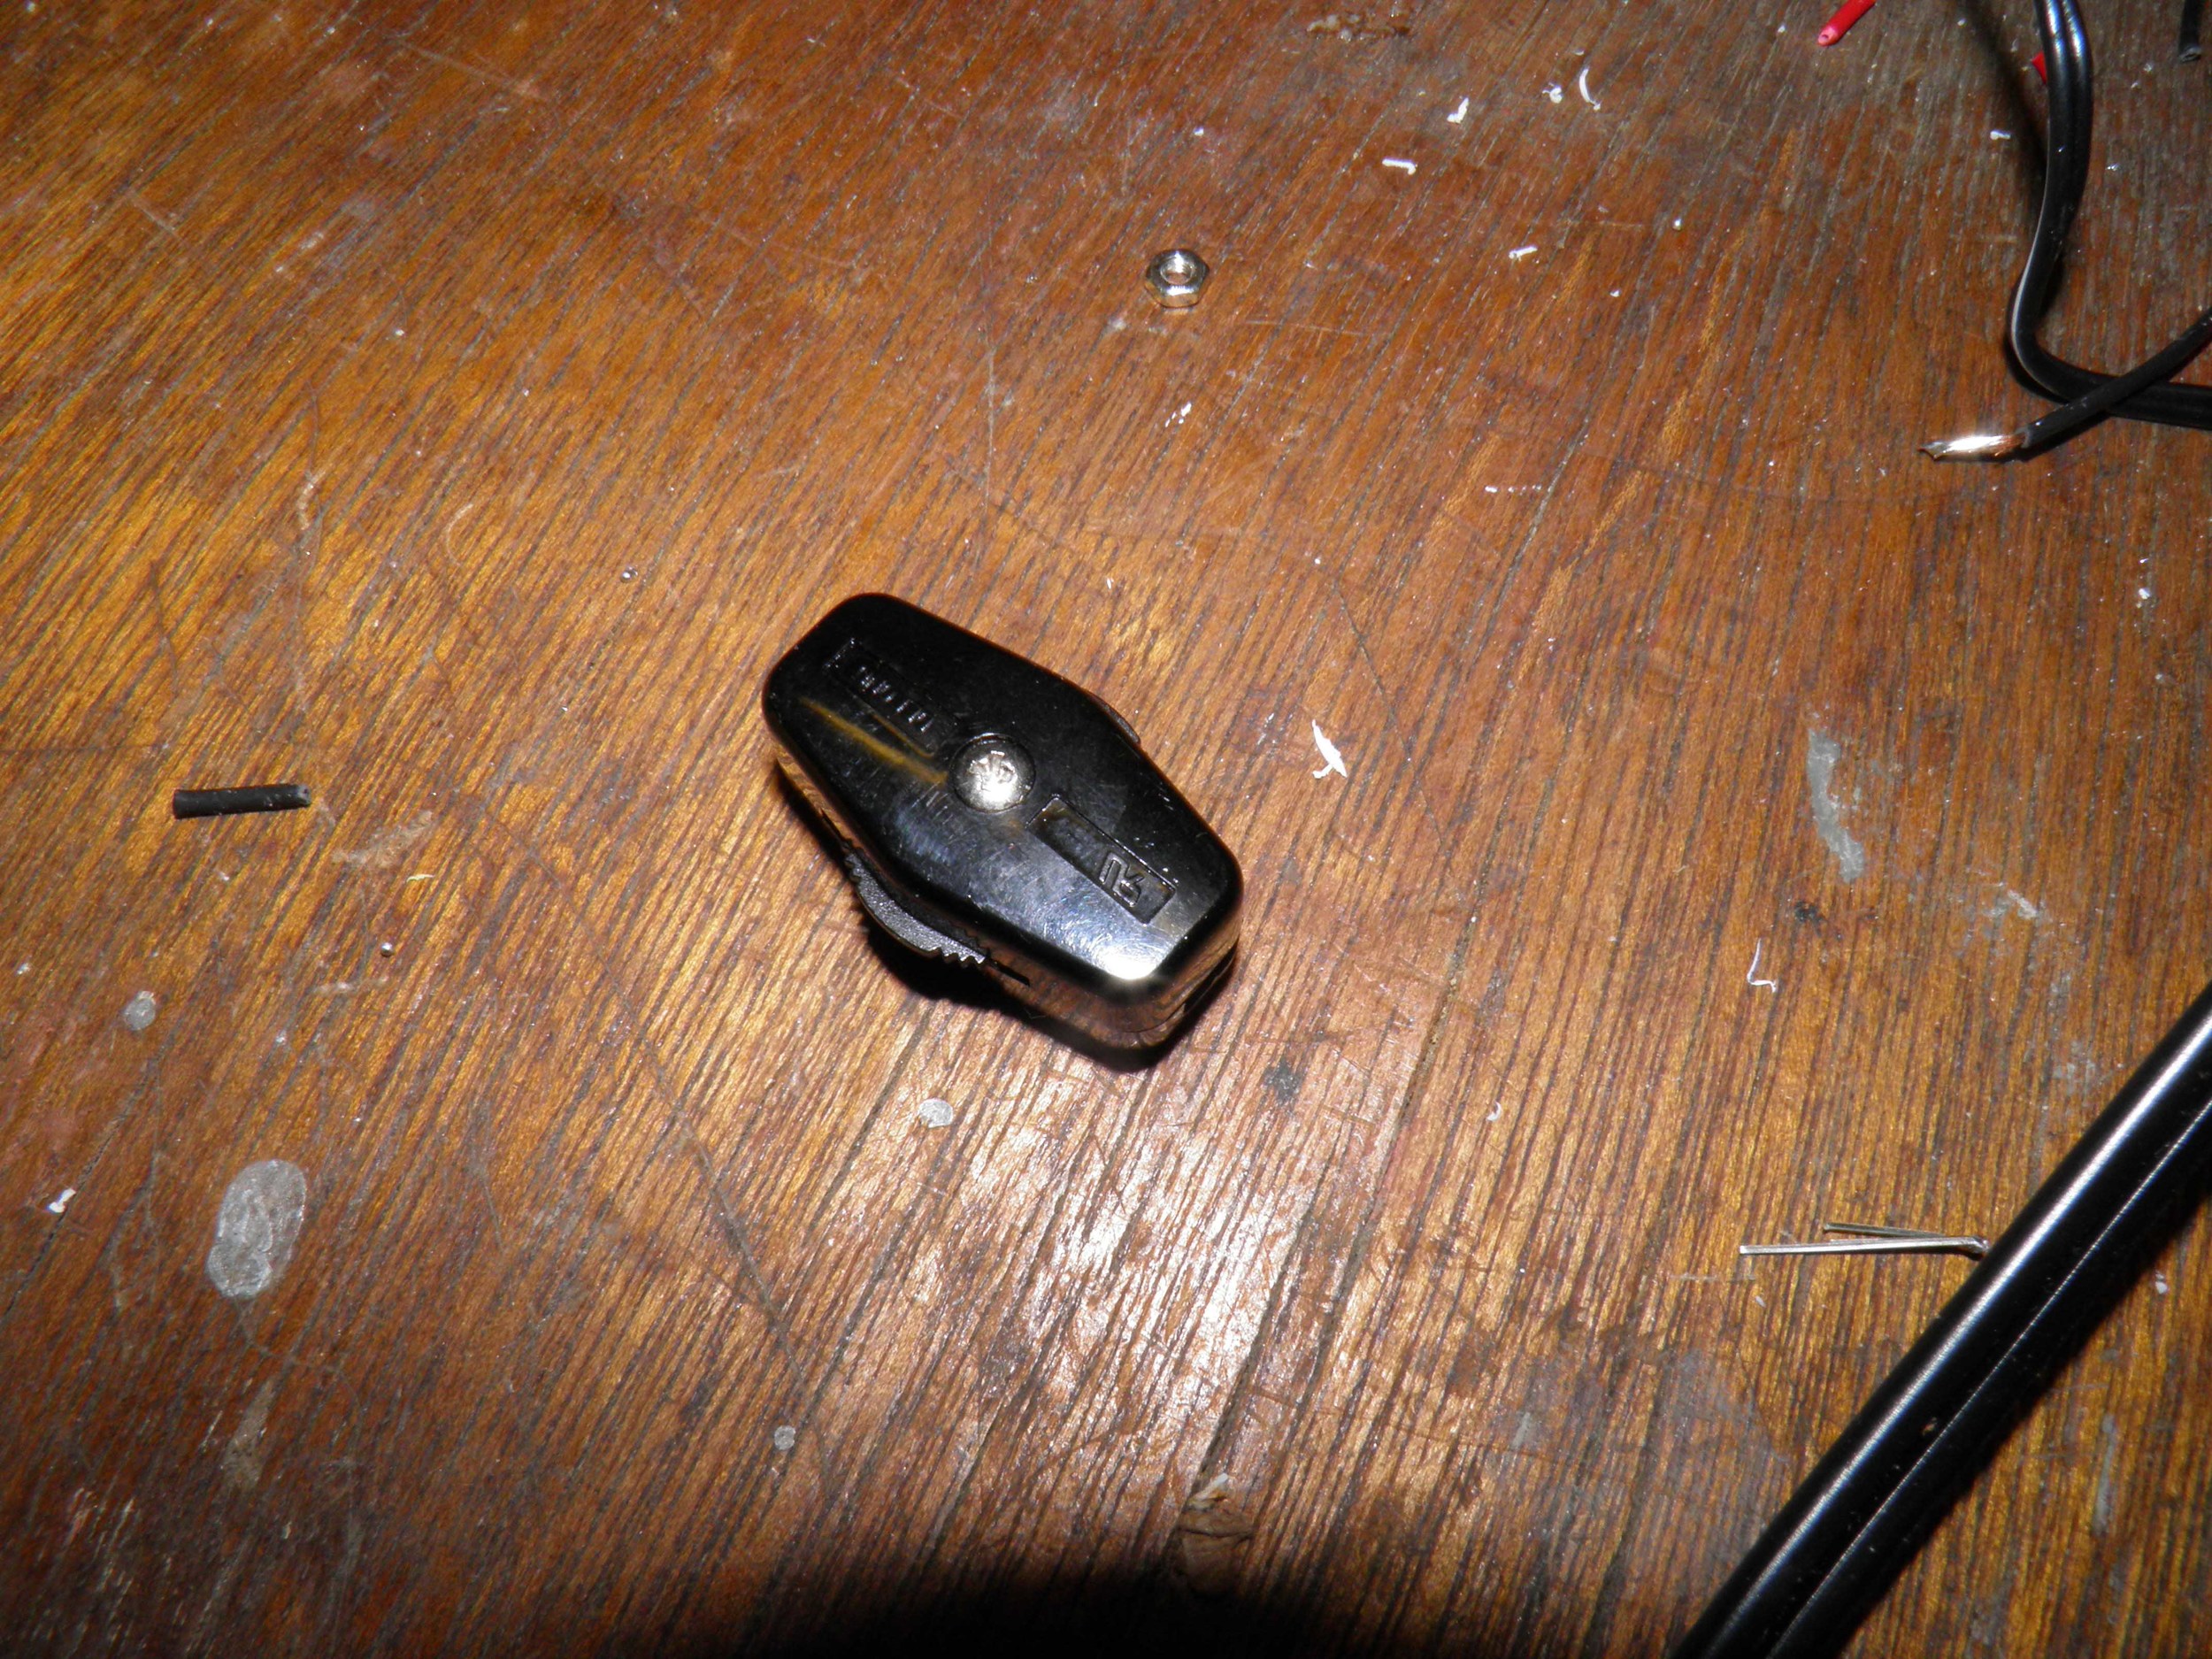
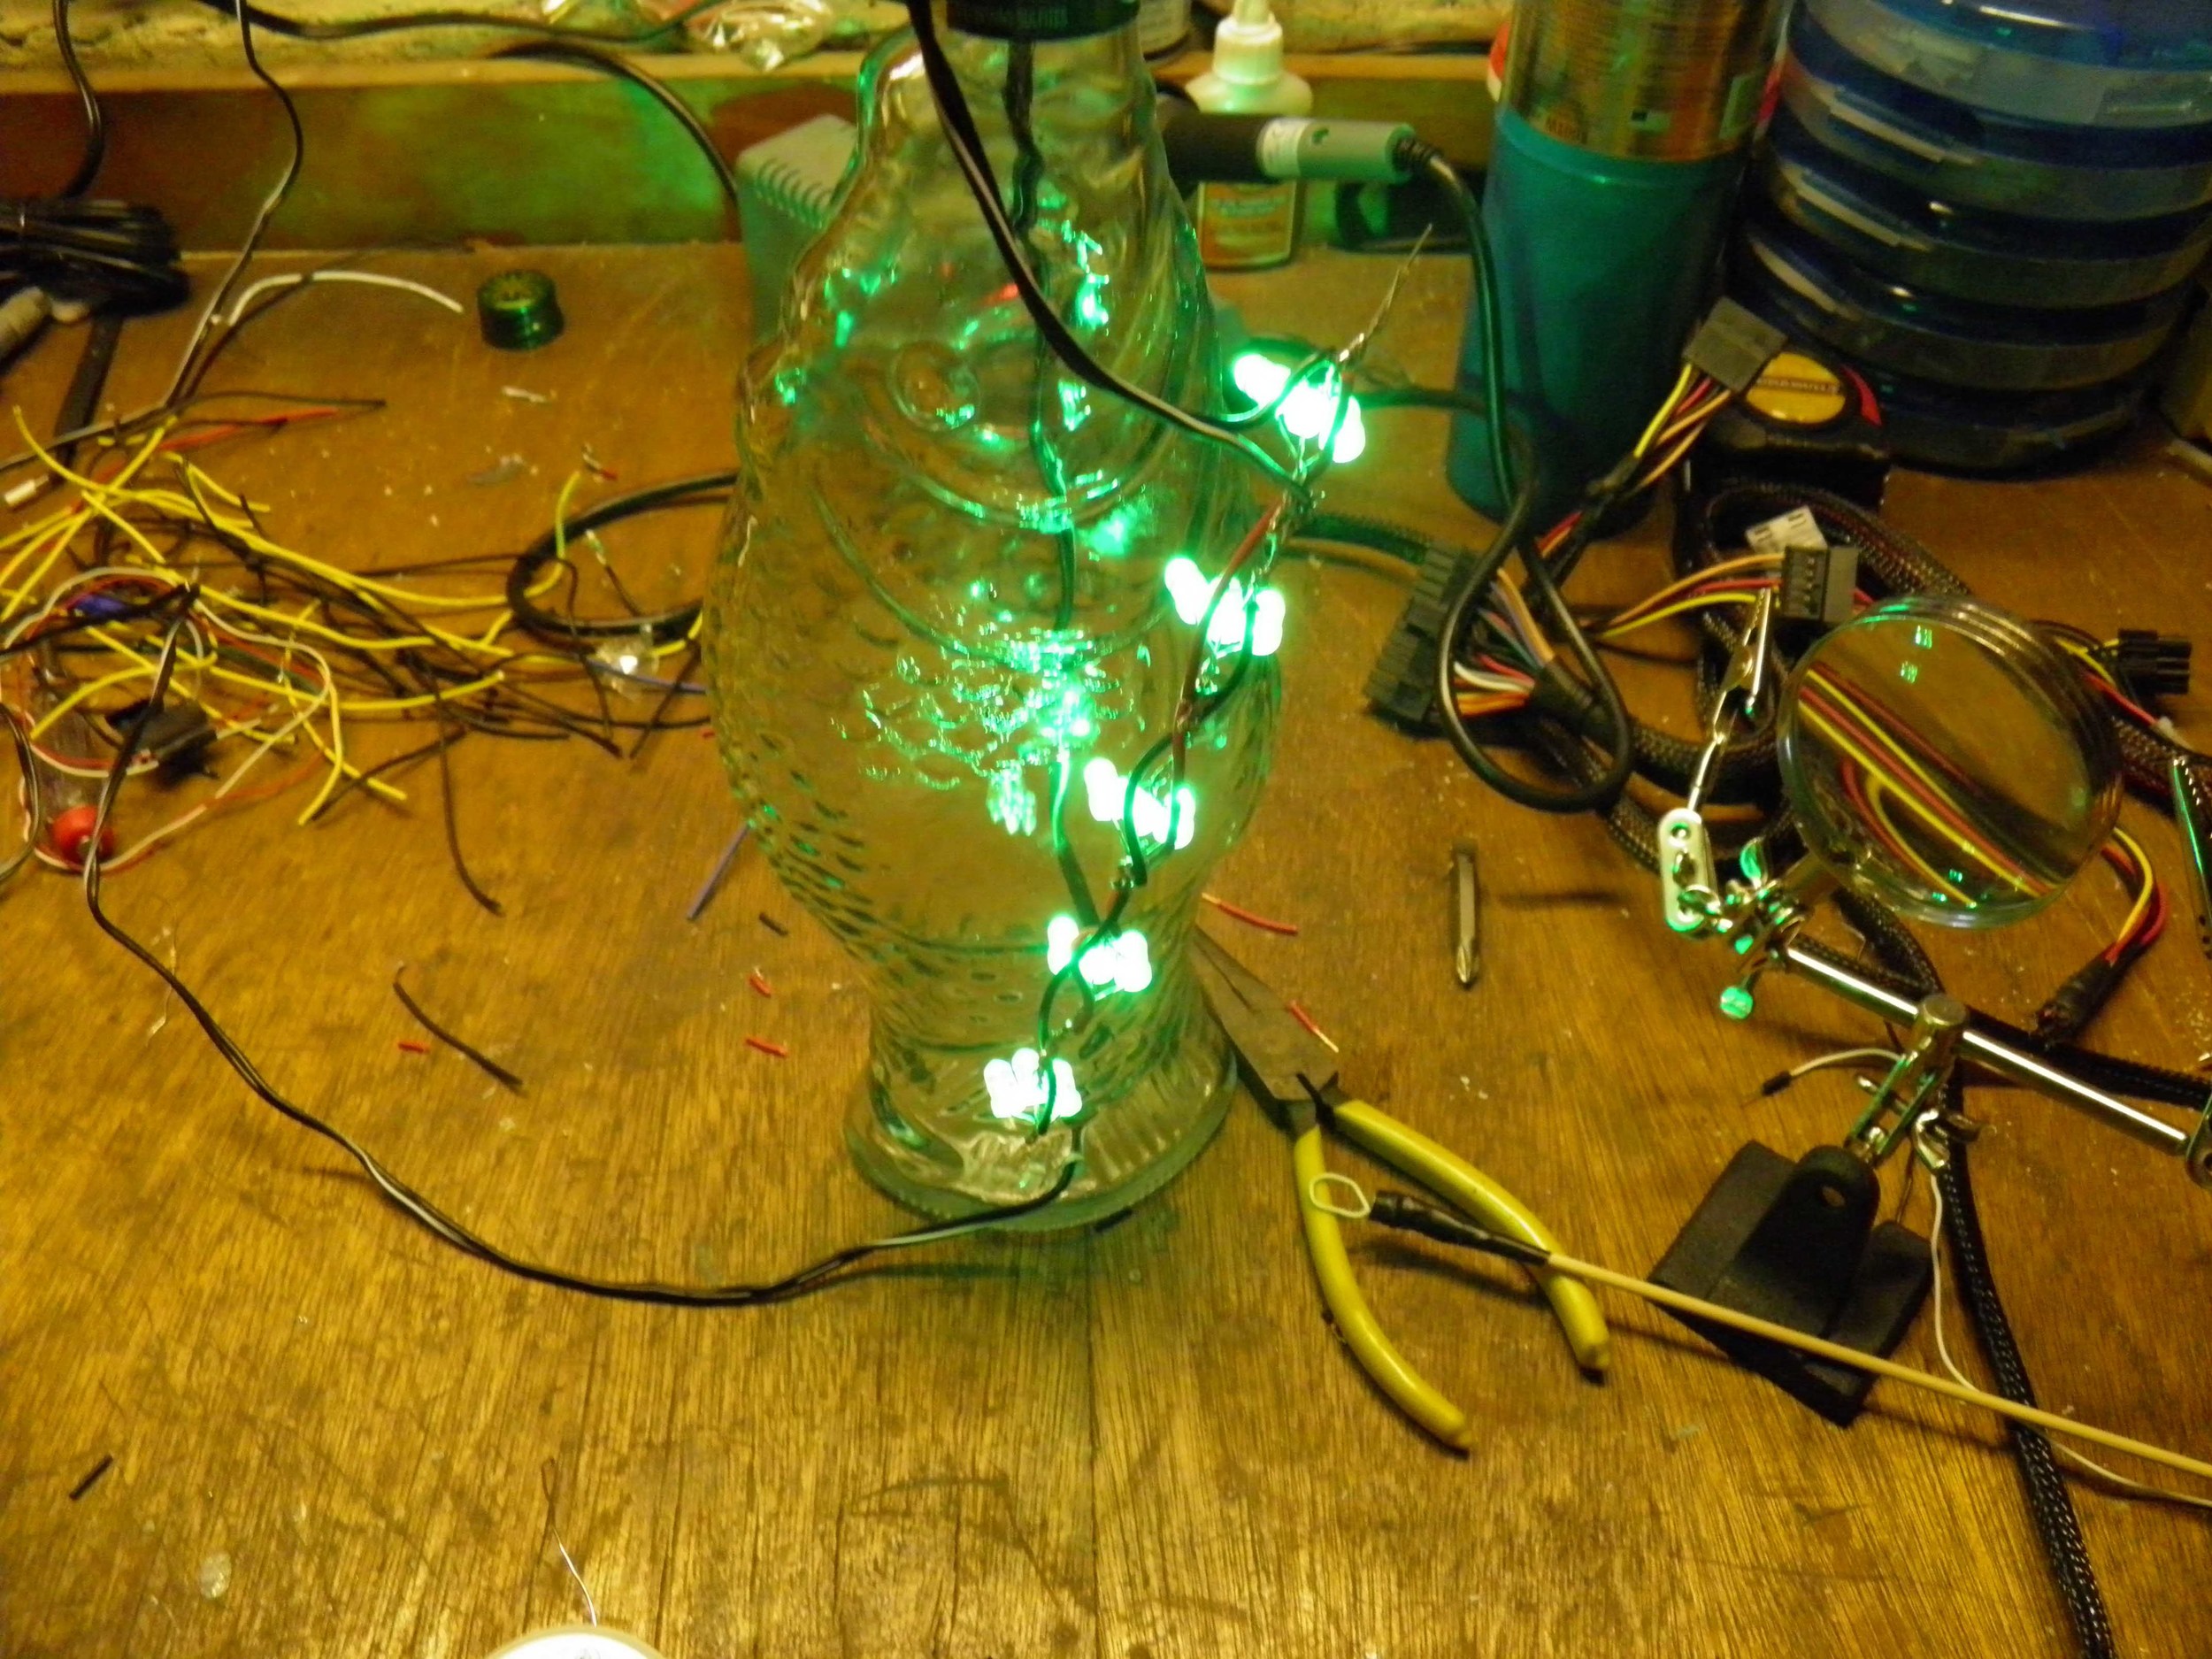
I use a bamboo skewer with a small loop of wire taped to the end to help hook the power cord and guide it up to the top. Once the cord is routed out of the bottle, split the wires and solder up the LED strip. Be careful to get the polarities correct. The original tutorial used shattered glass made from other bottles/jars. Although you can definitely do this, the process of shattering glass bottles and getting small enough pieces to fit into another bottle is a pretty tedious and sharp. I used tempered glass since it shatters into small uniform pieces that can be handled without getting cut. I found large panes of tempered glass at a local surplus junk store for $7 each. I wrapped one in large towel and hit the corner with a hammer. The entire sheet shattered into perfect little 1/4" x 1/4" pieces. Once you have your glass, you're going to need to position your LEDs and fill up your bottle. Pull the power cable and LED strip back down through the neck of the bottle and use the bamboo skewer/wire to position the strip as you slowly add glass. Keep the LEDs on during this process so you can adjust the direction of light as you go and verify it looks all right. With a little patience you should have a nice, uniformly lit, bottle lamp. I sometimes add a lamp rocker switch to my completed lamps. To use a rocker switch, unscrew the switch, measure the length between the two terminals, snip out the same length of wire from the power cord, and solder the ends to the switch. Screw back on the cover and test to make sure it's working.