Beer Can Mini Quad
/When my WLToys V939 quadcopter stopped performing well, I didn't want to just scrap it. I wanted to salvage the flight controller and try my hand at building a custom frame. The pager motors used on most mini/micro quadcopters are only rated for a certain amount of hours before they lose their strength and functionality. The batteries also wear out with moderate use. I put in an order for some replacement motors and batteries and got to work building a mini quadcopter from the ground up.

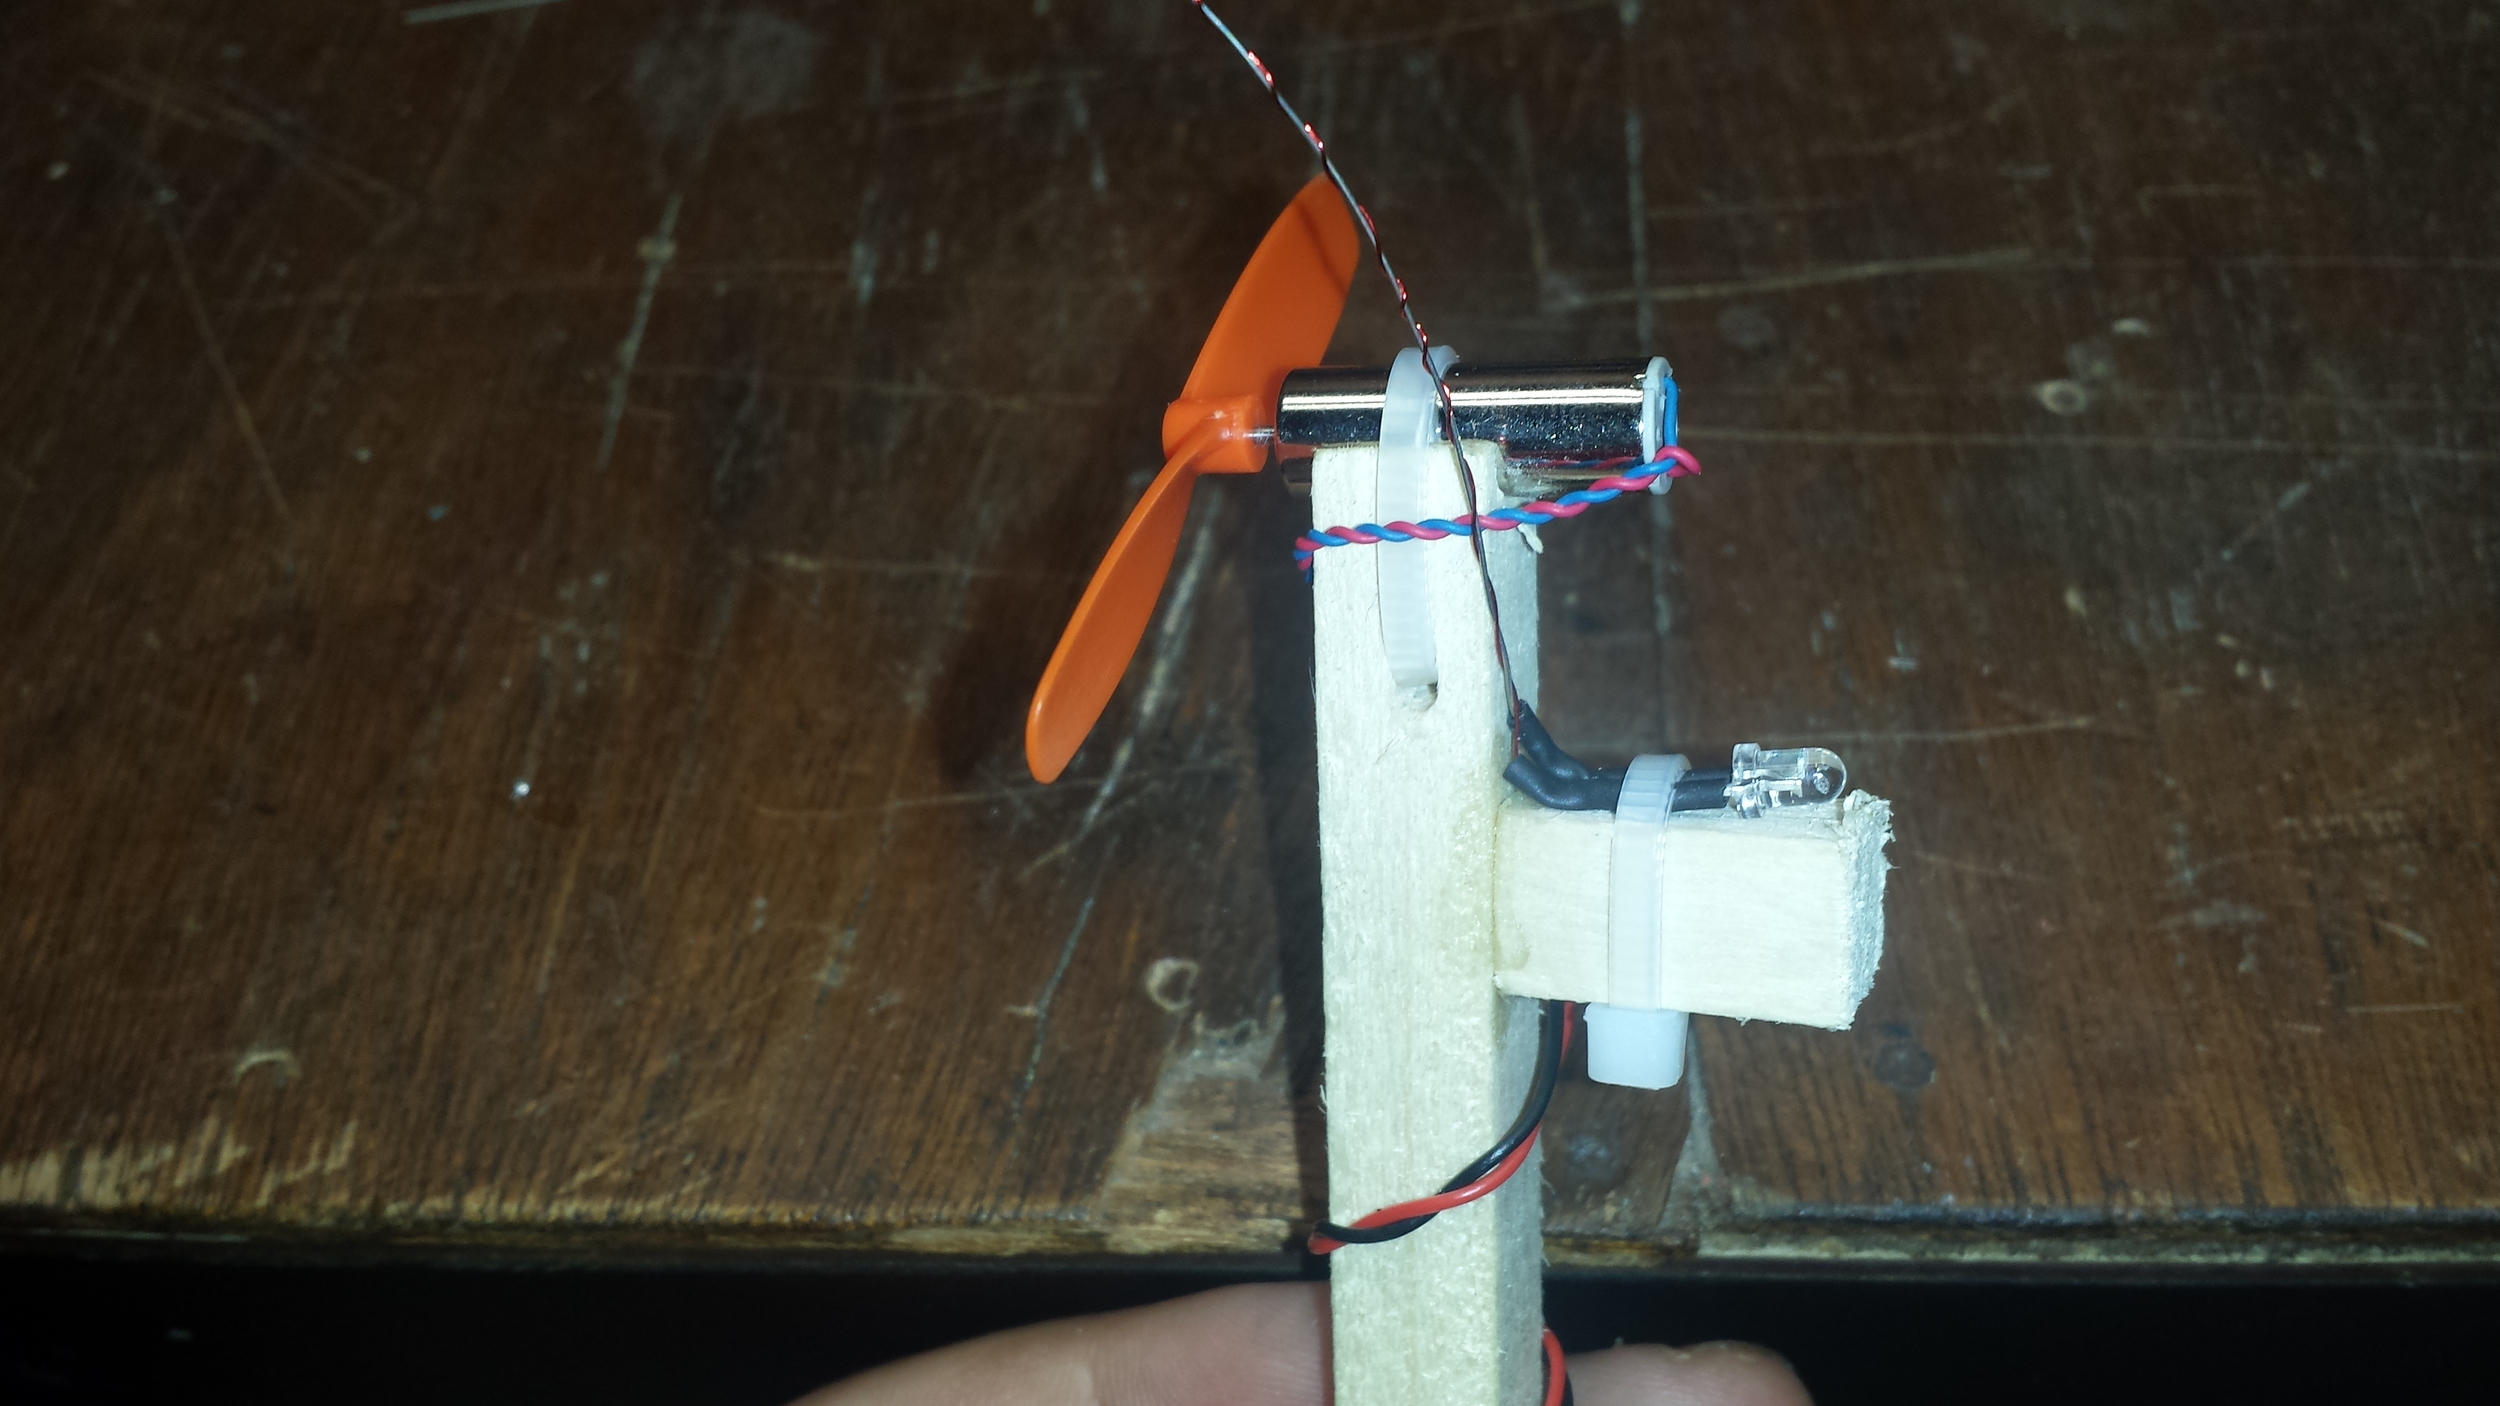
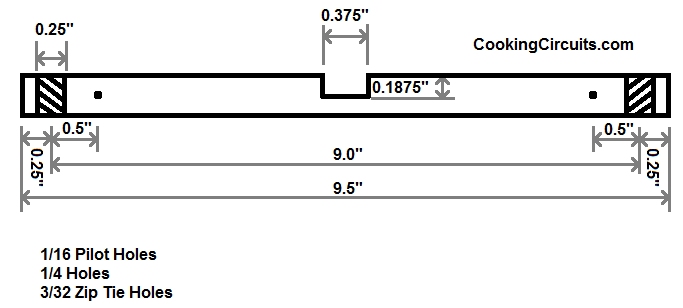
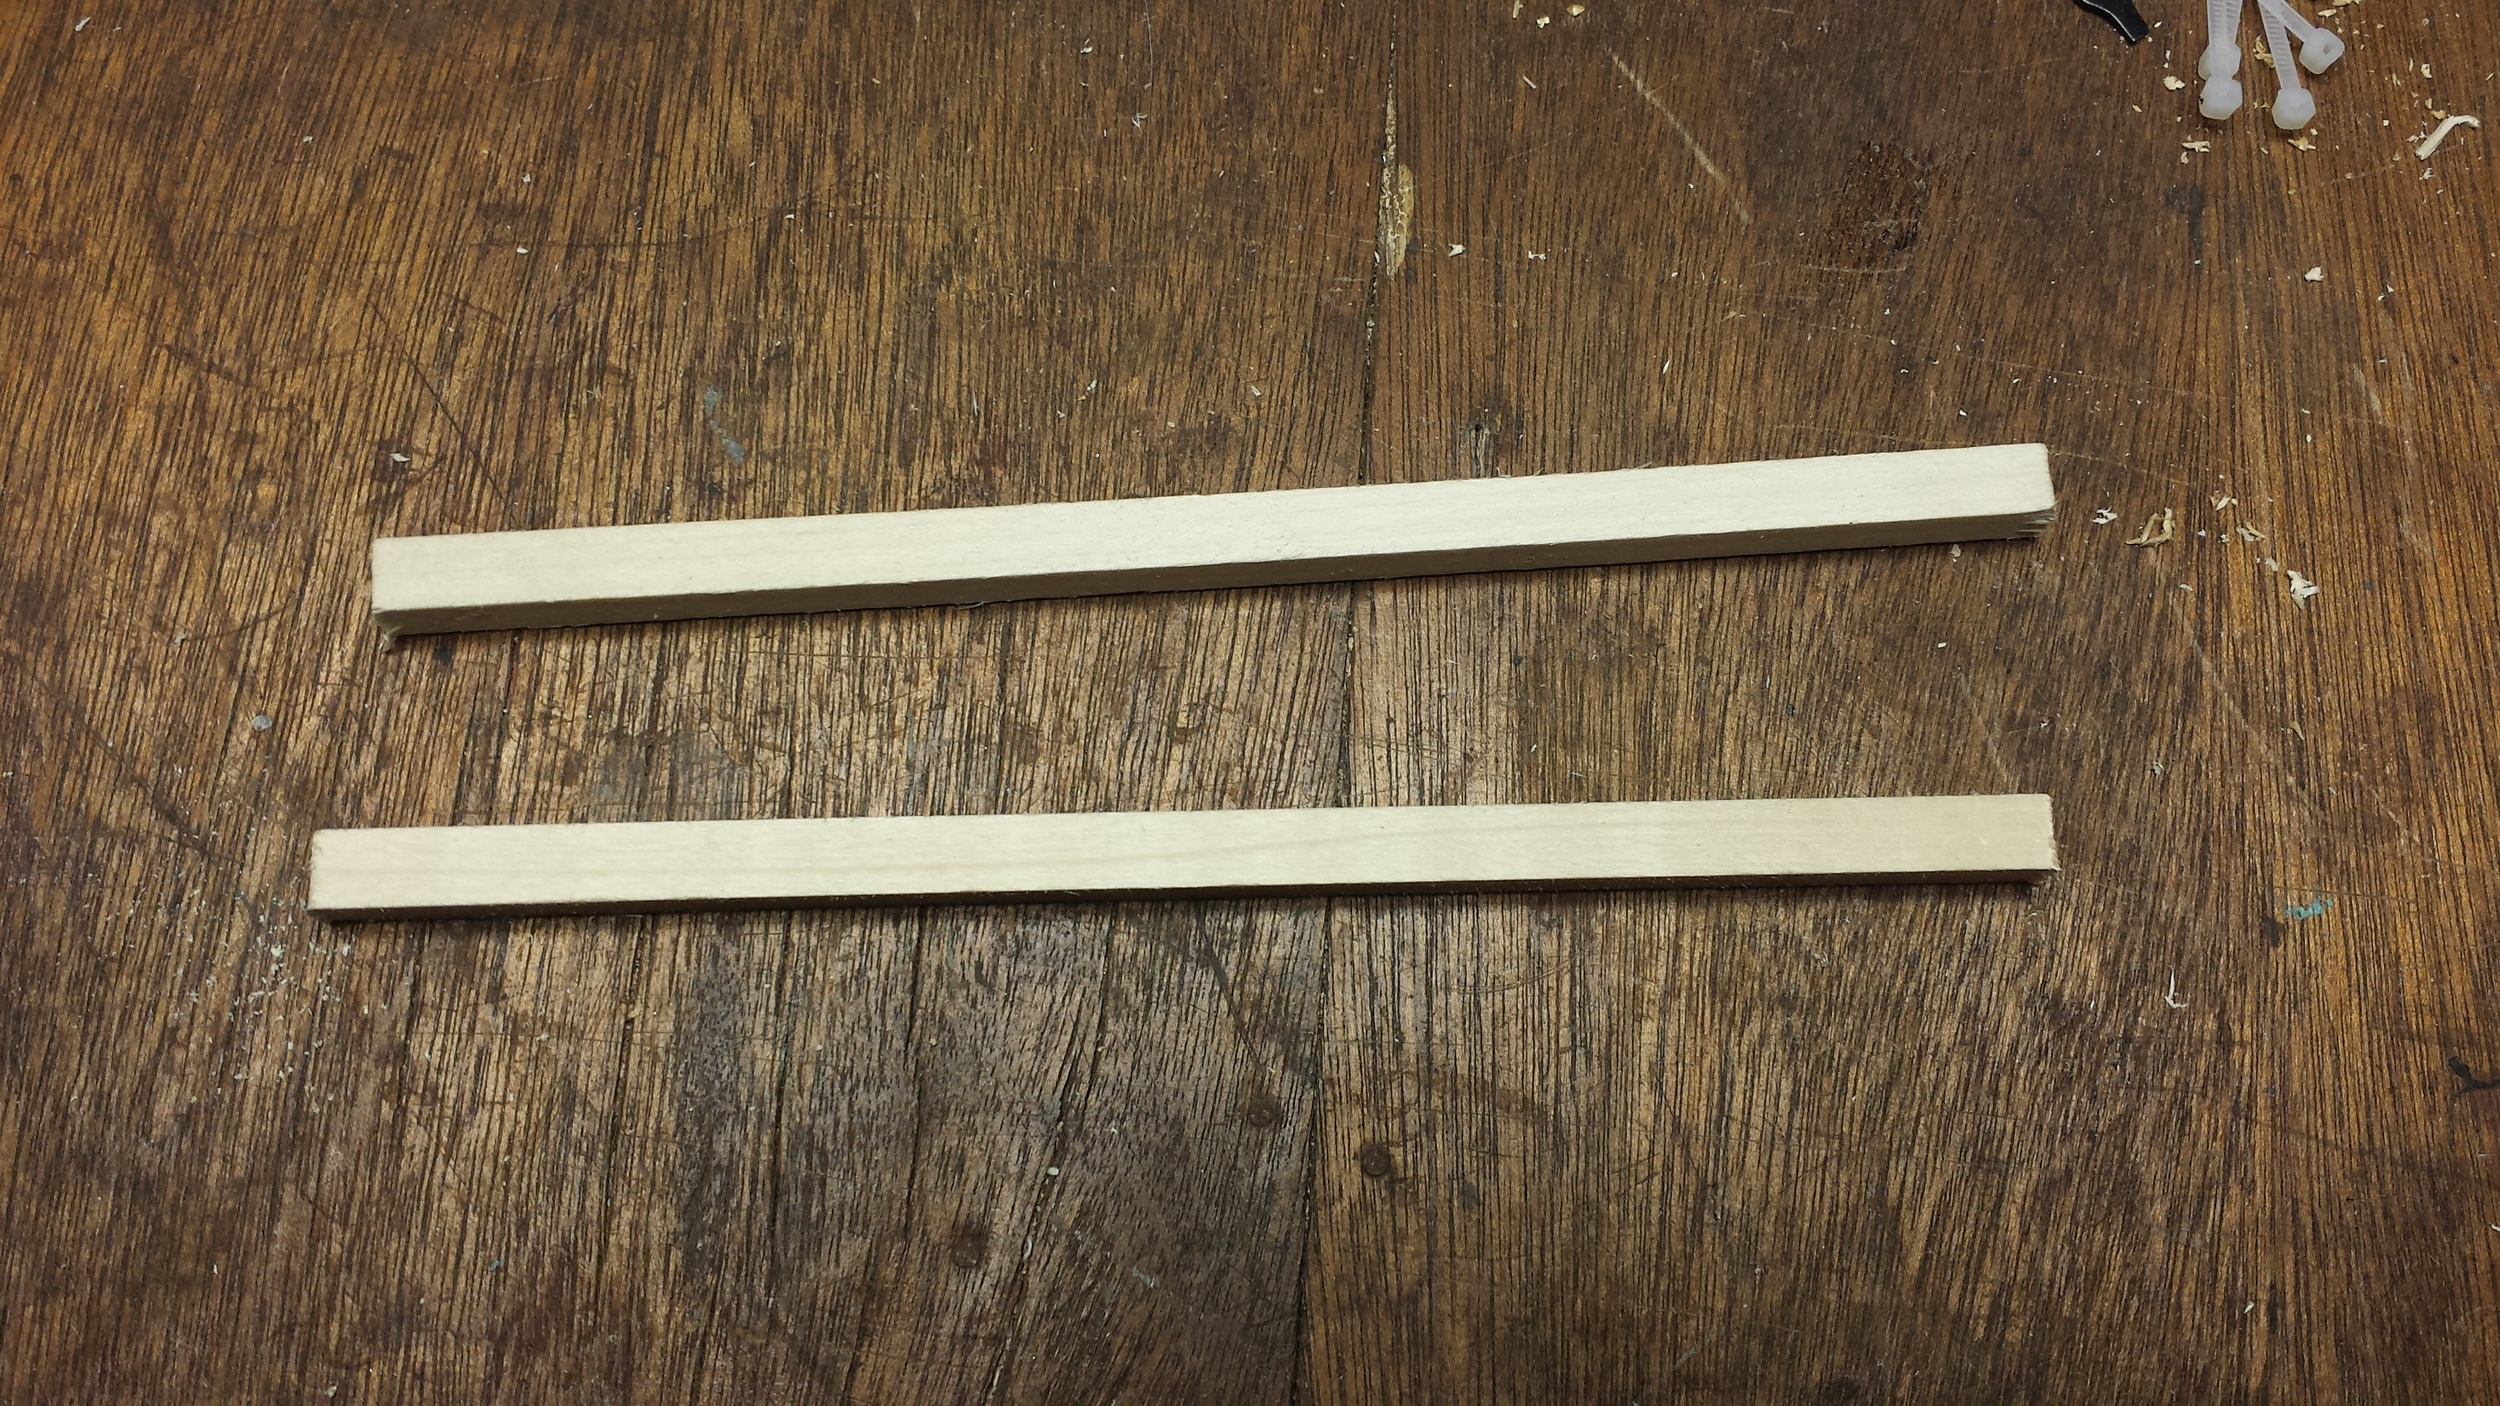
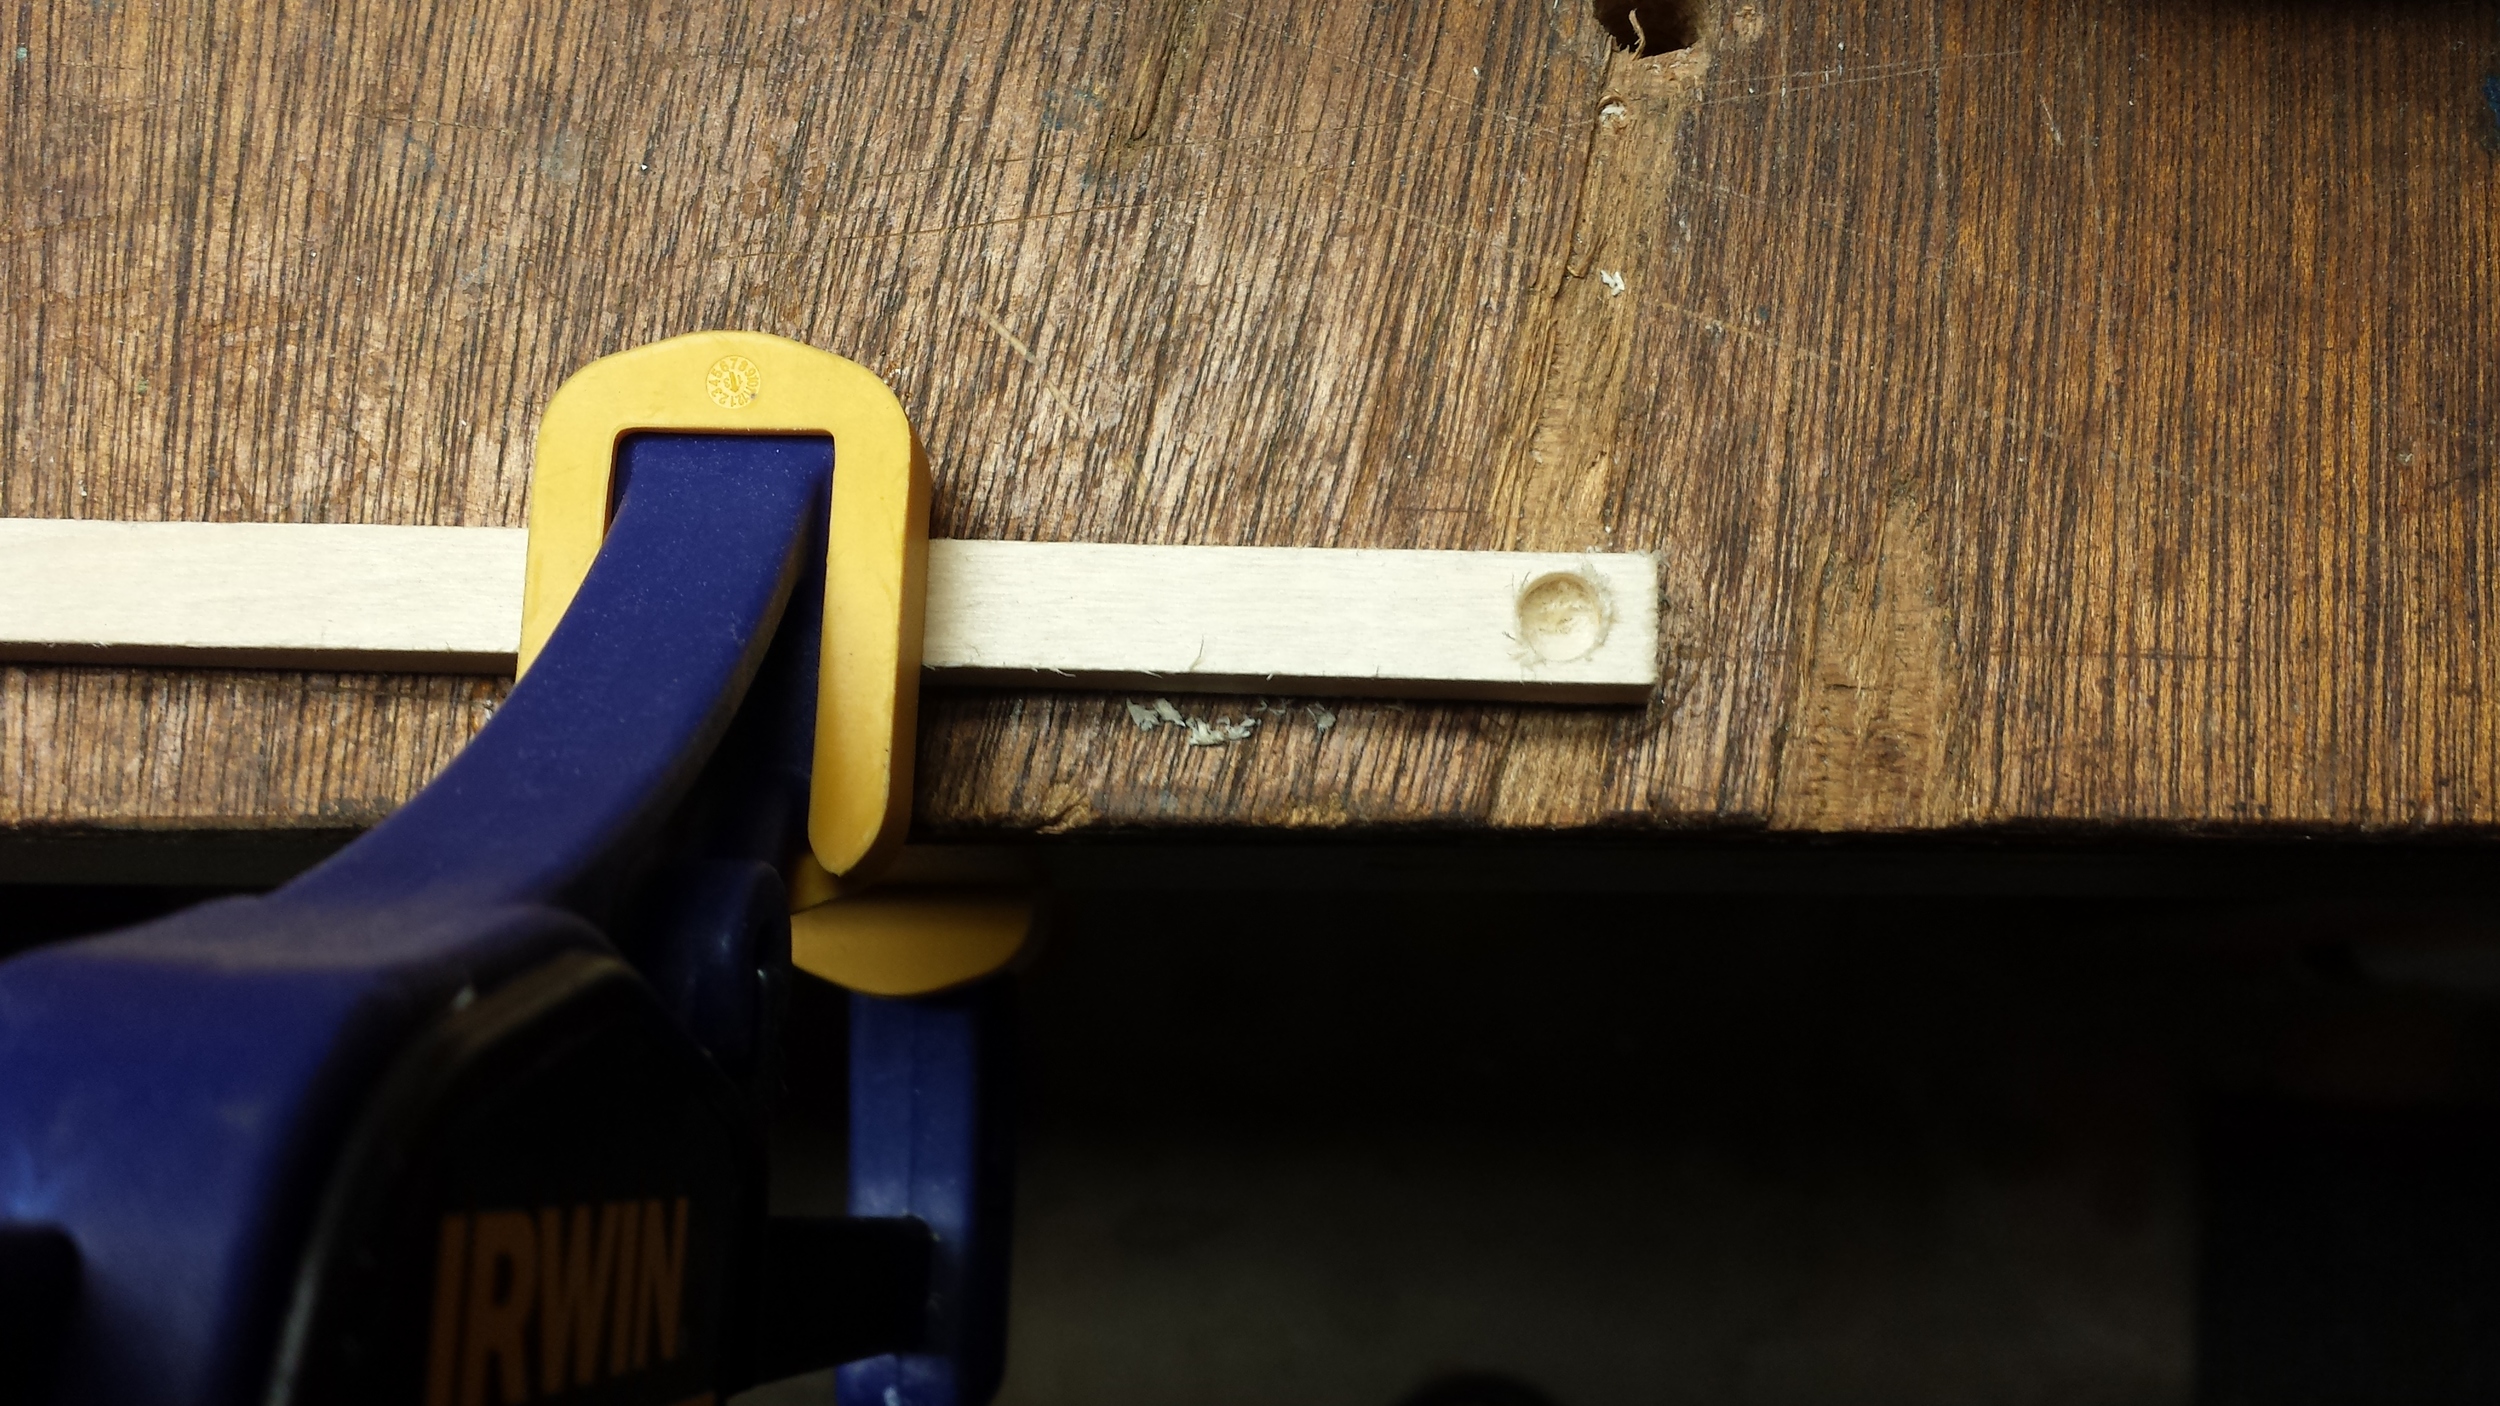
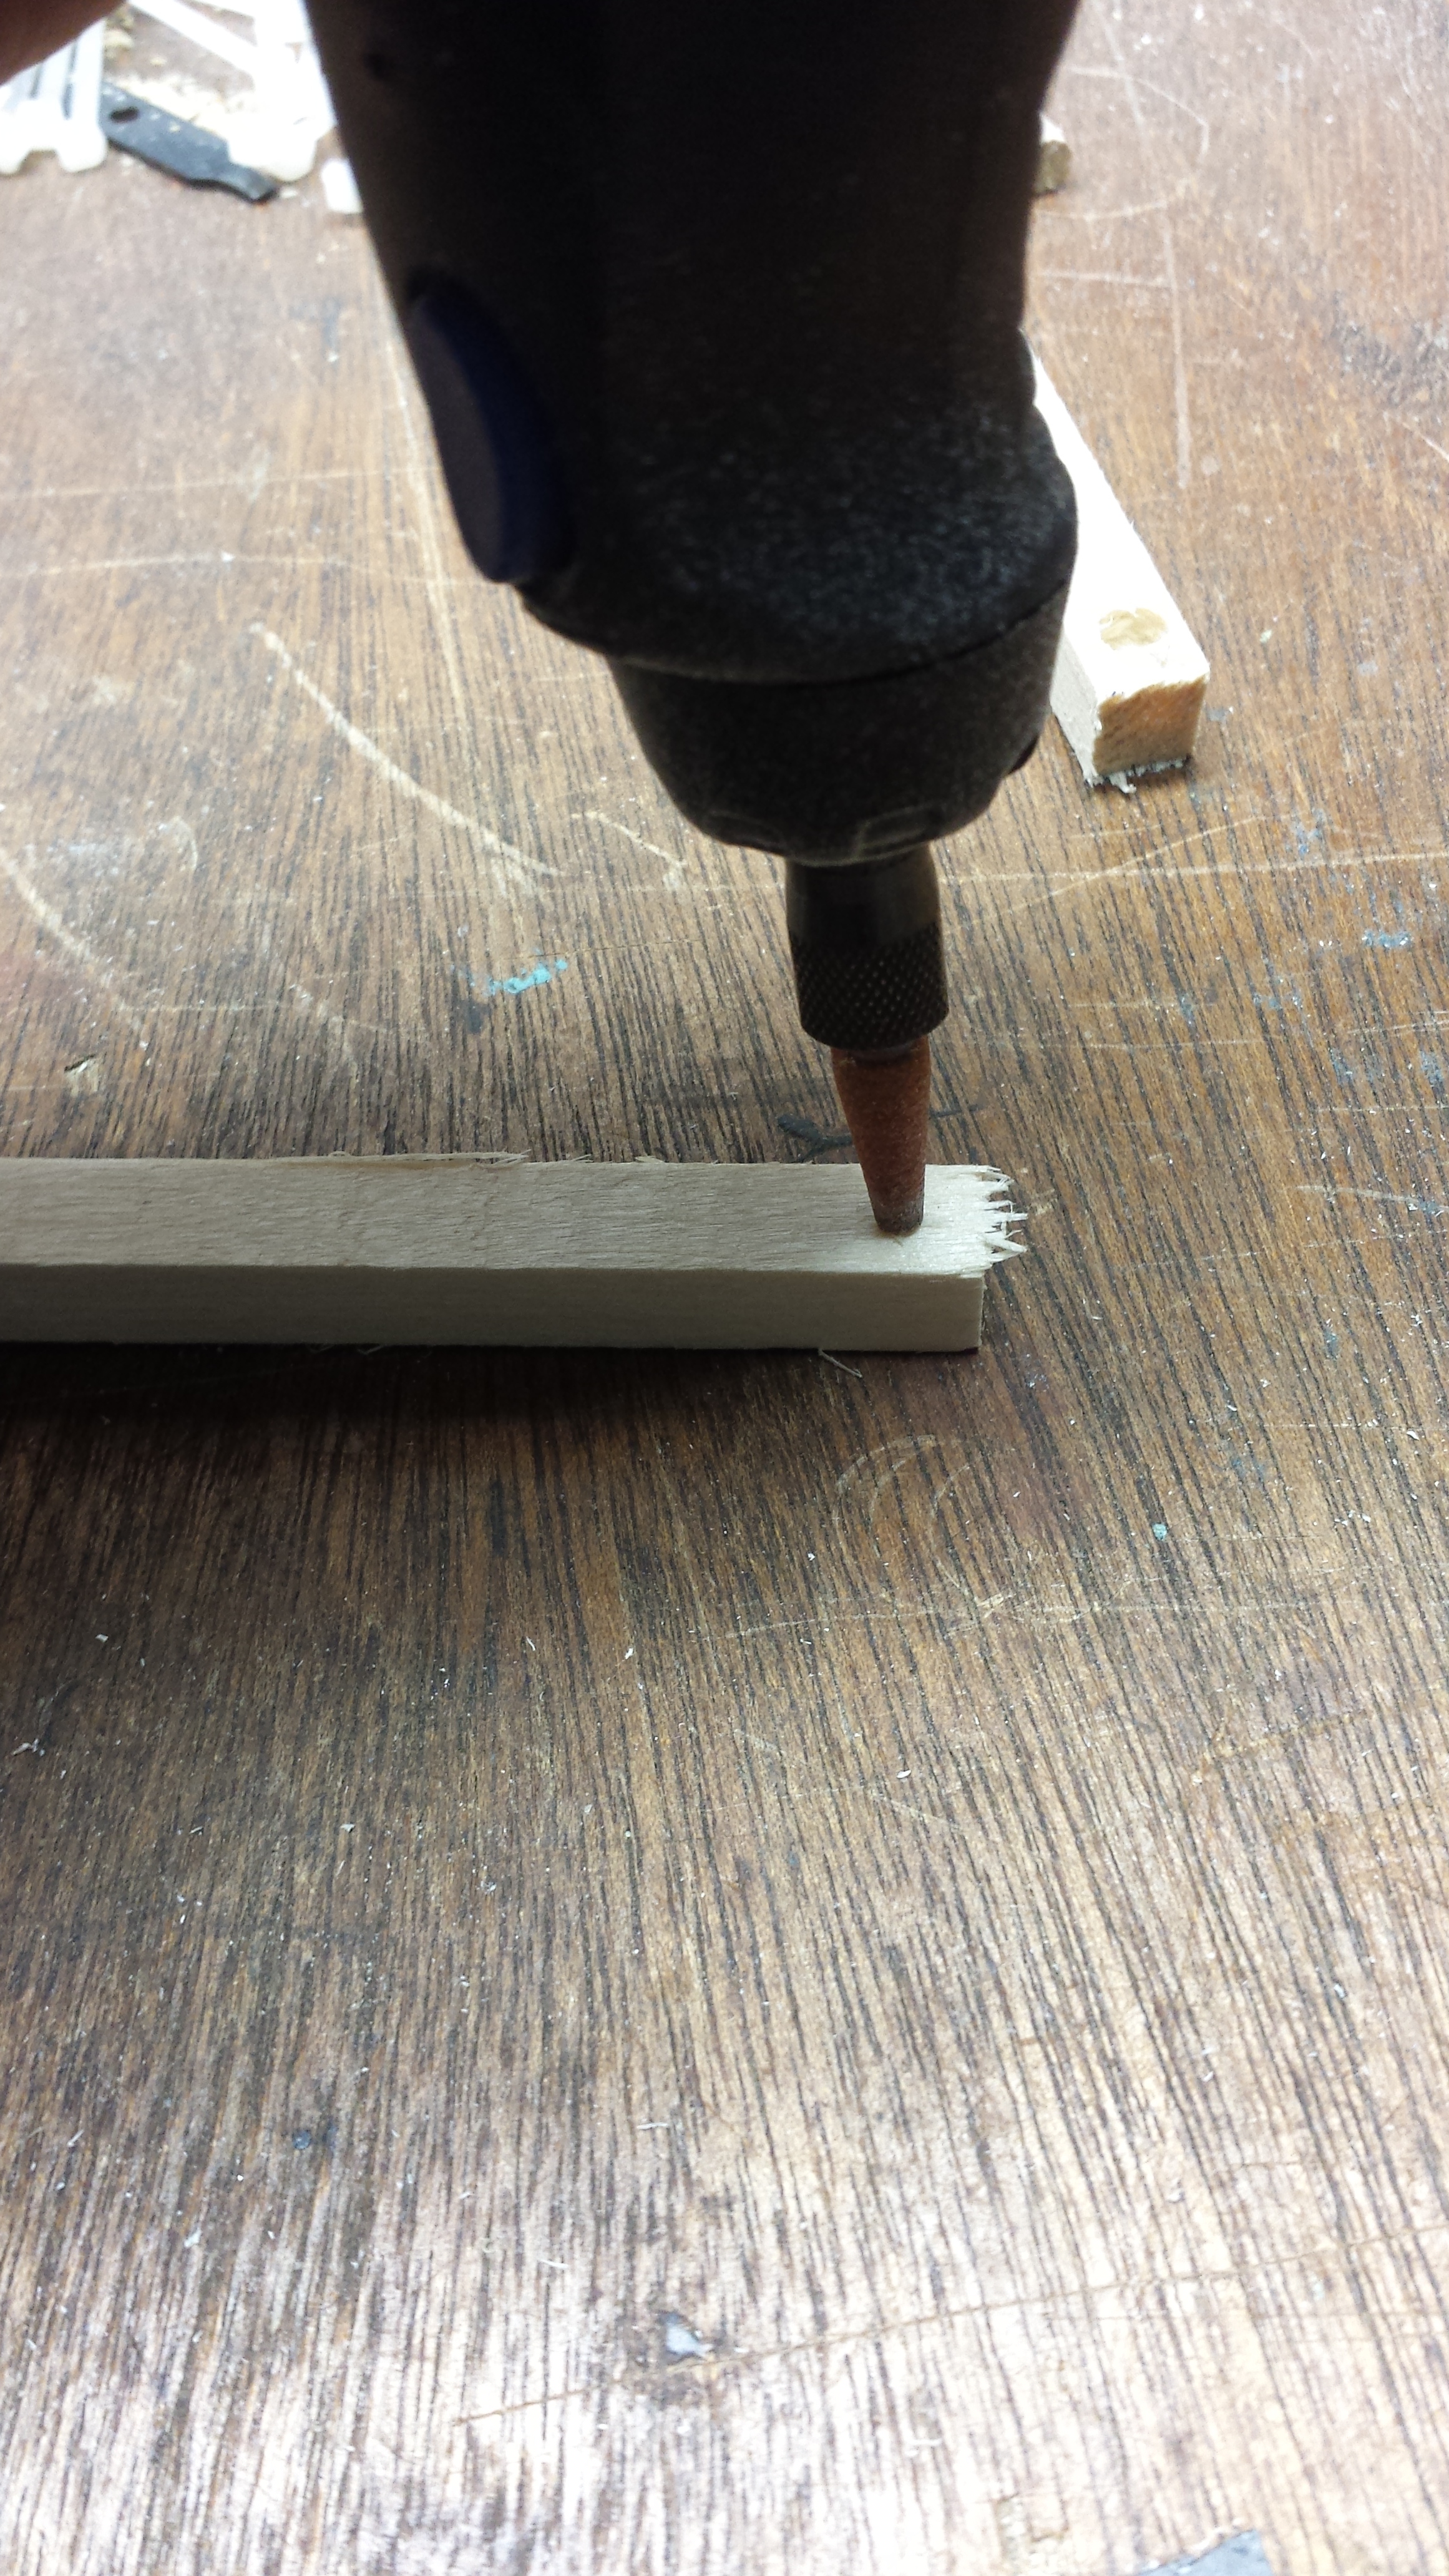
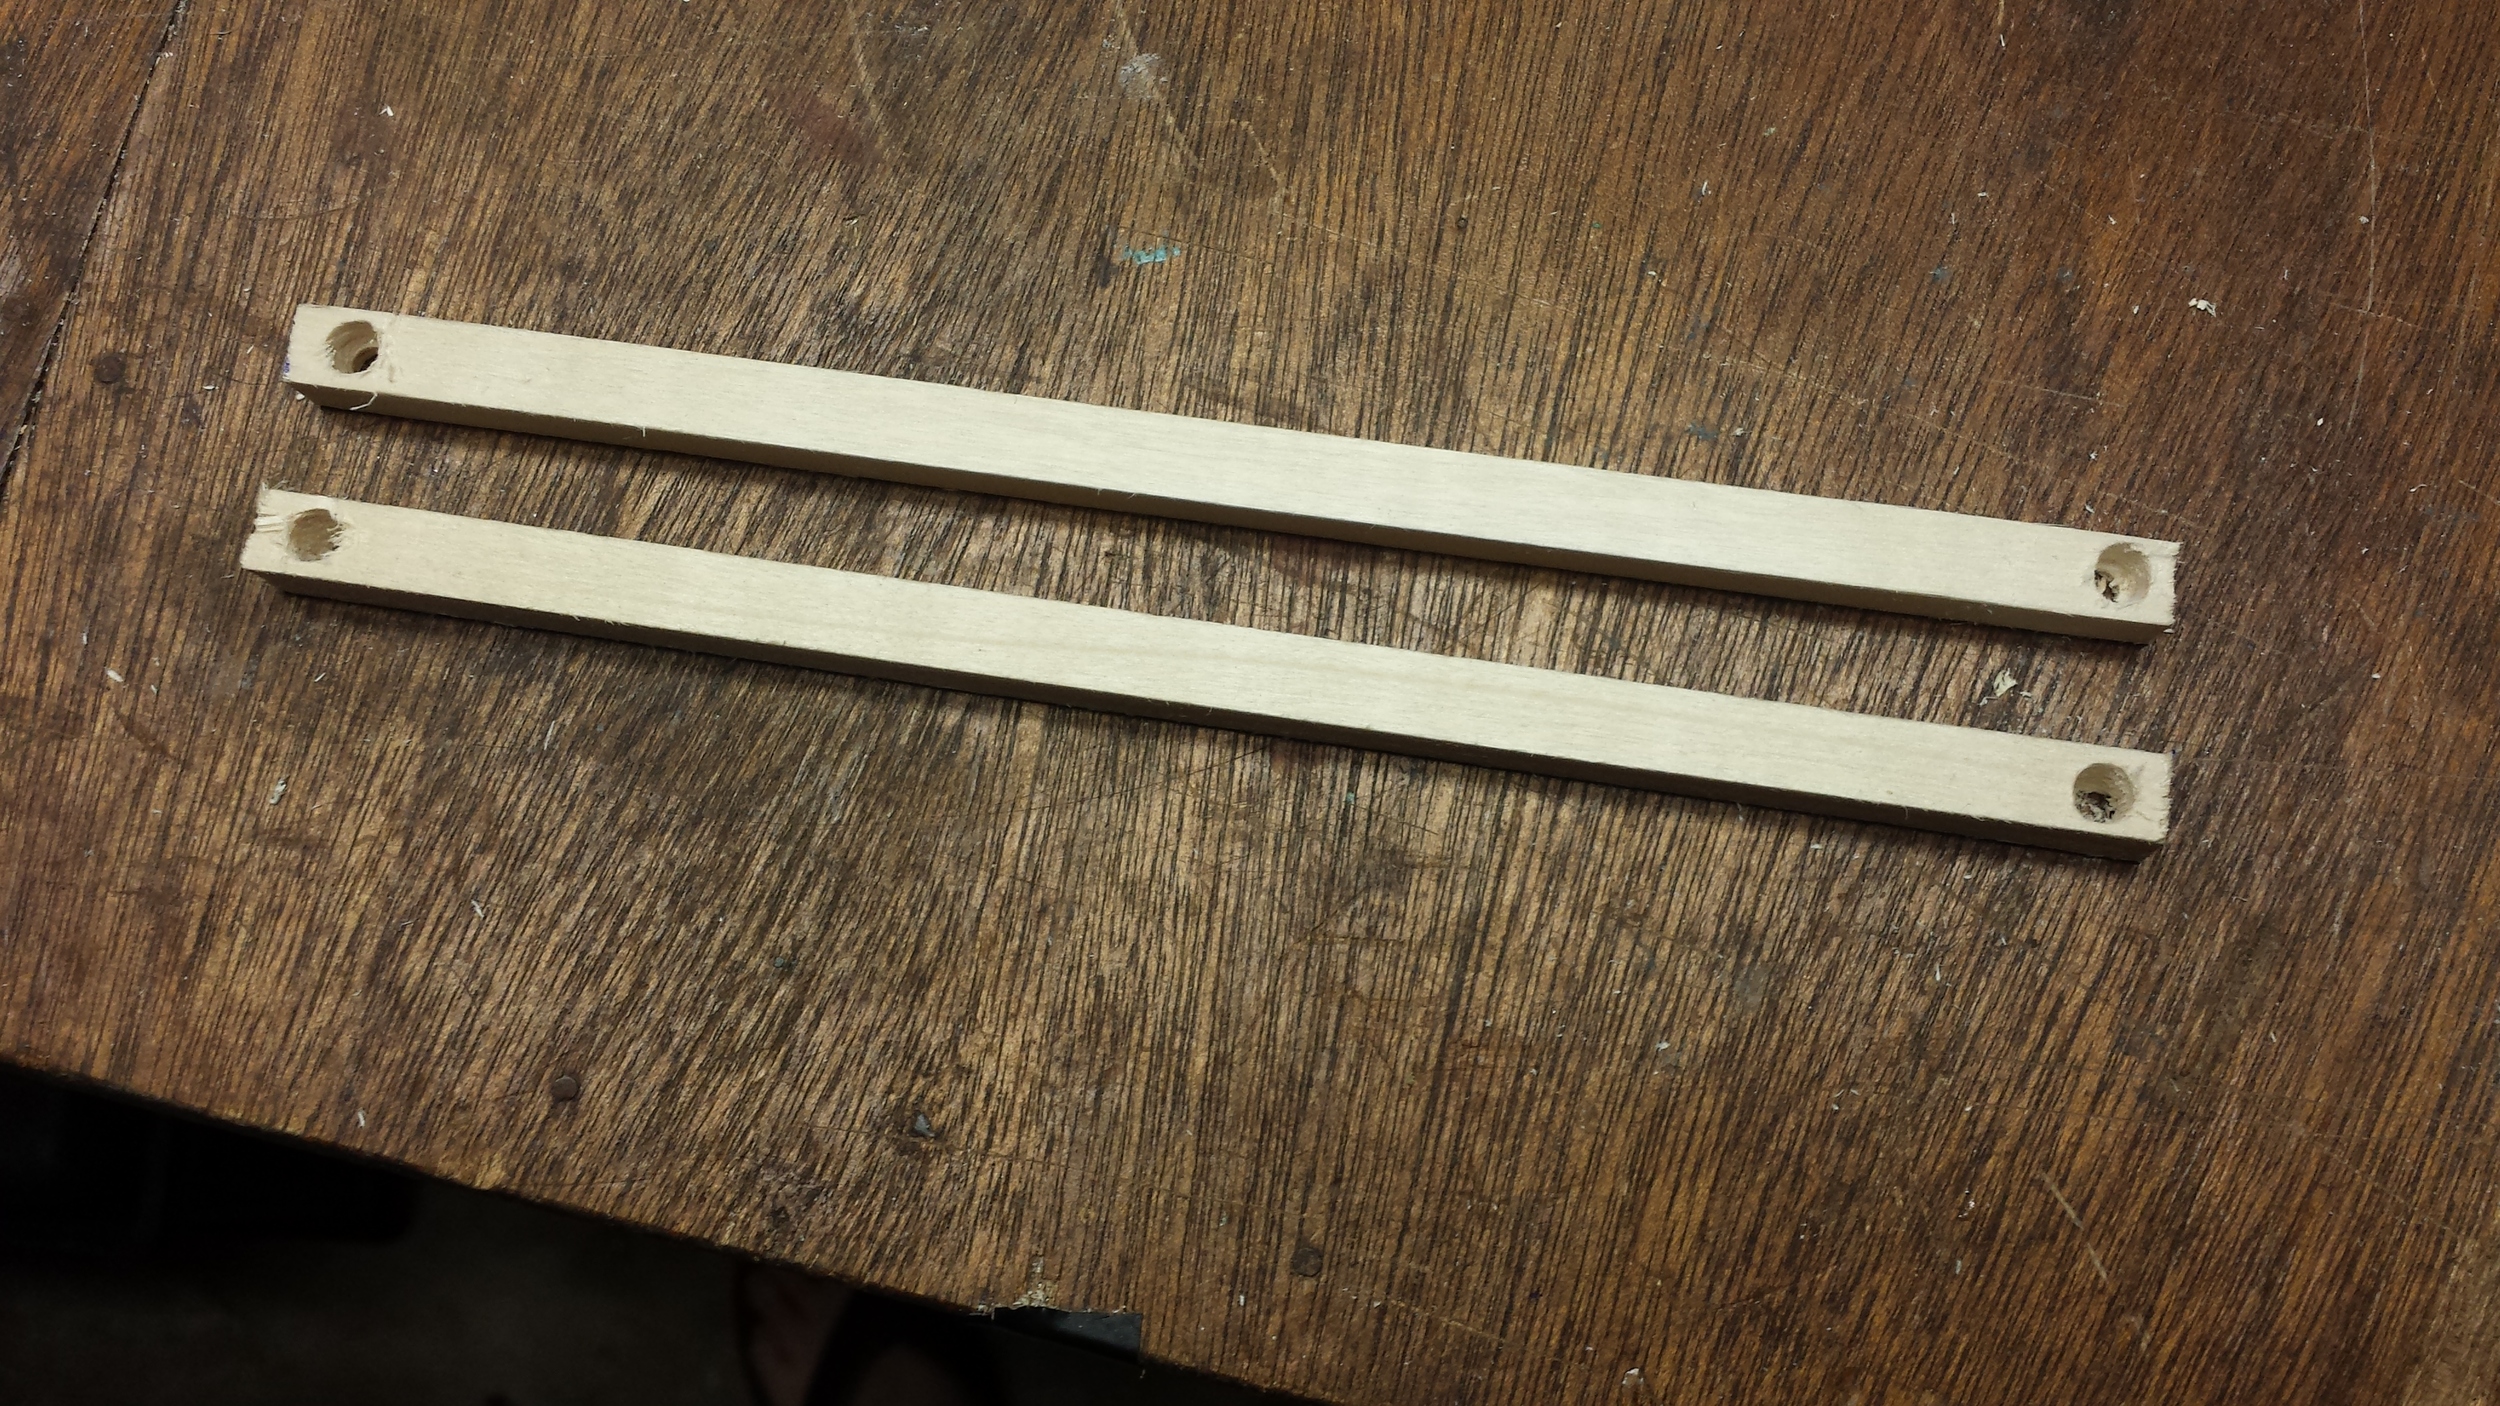
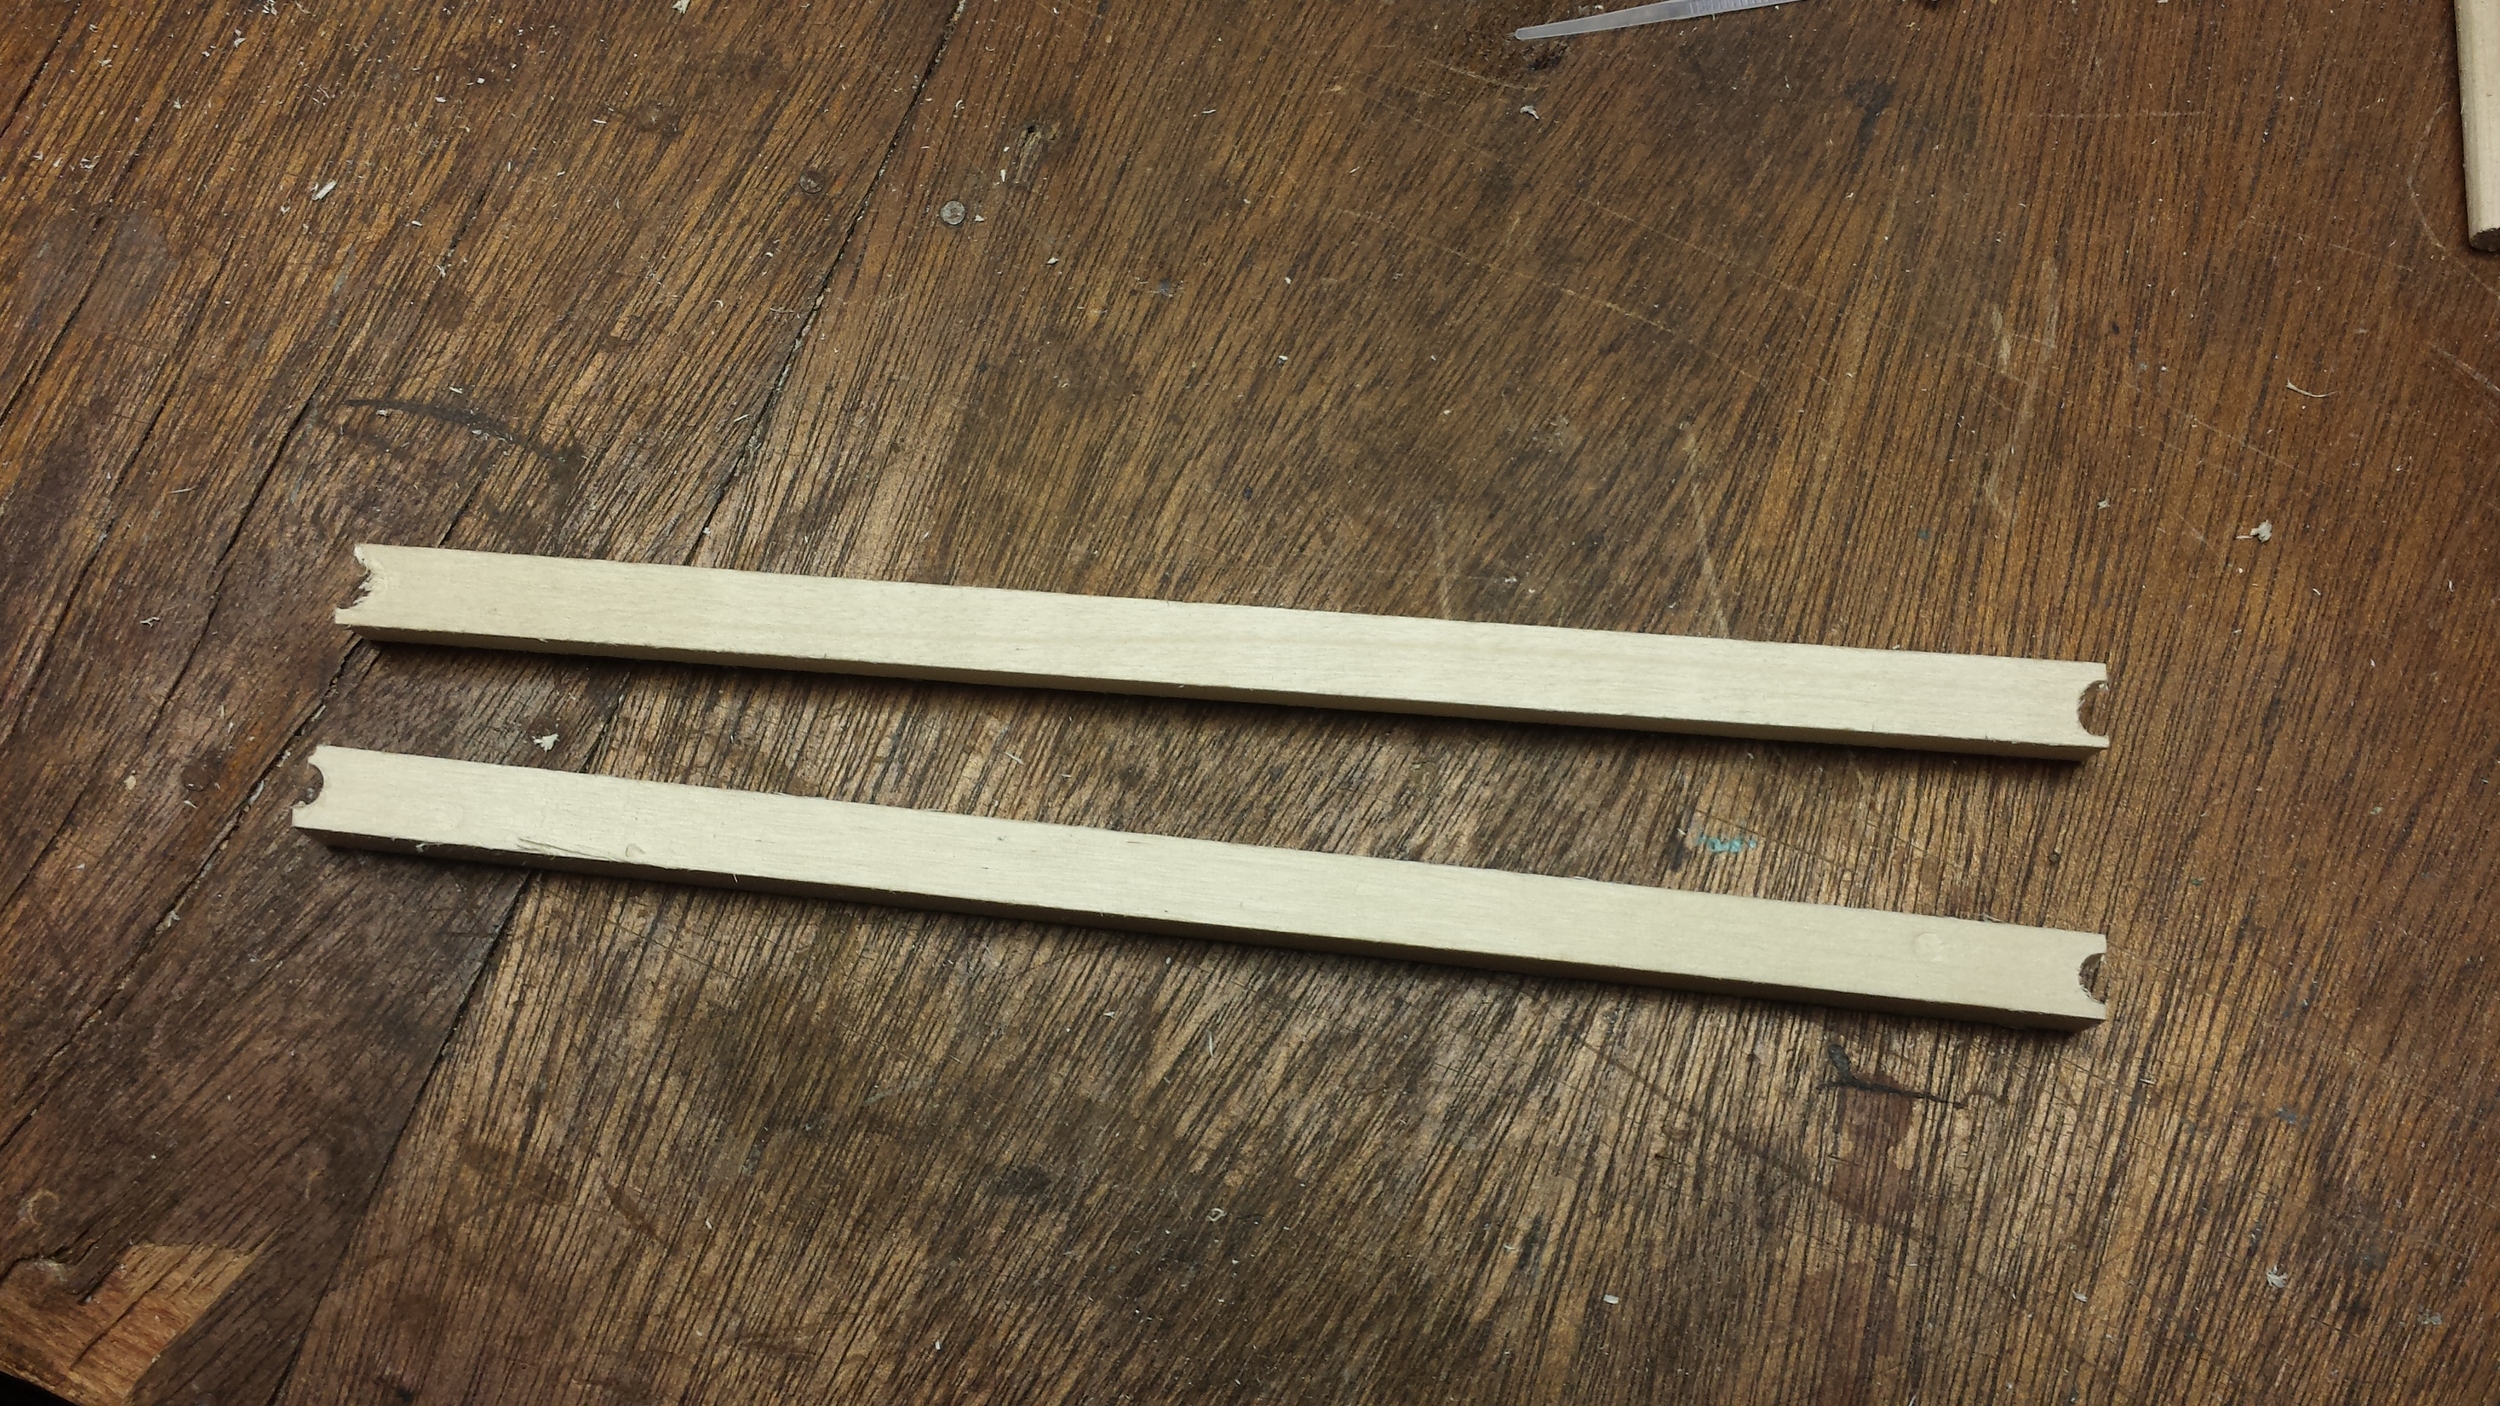
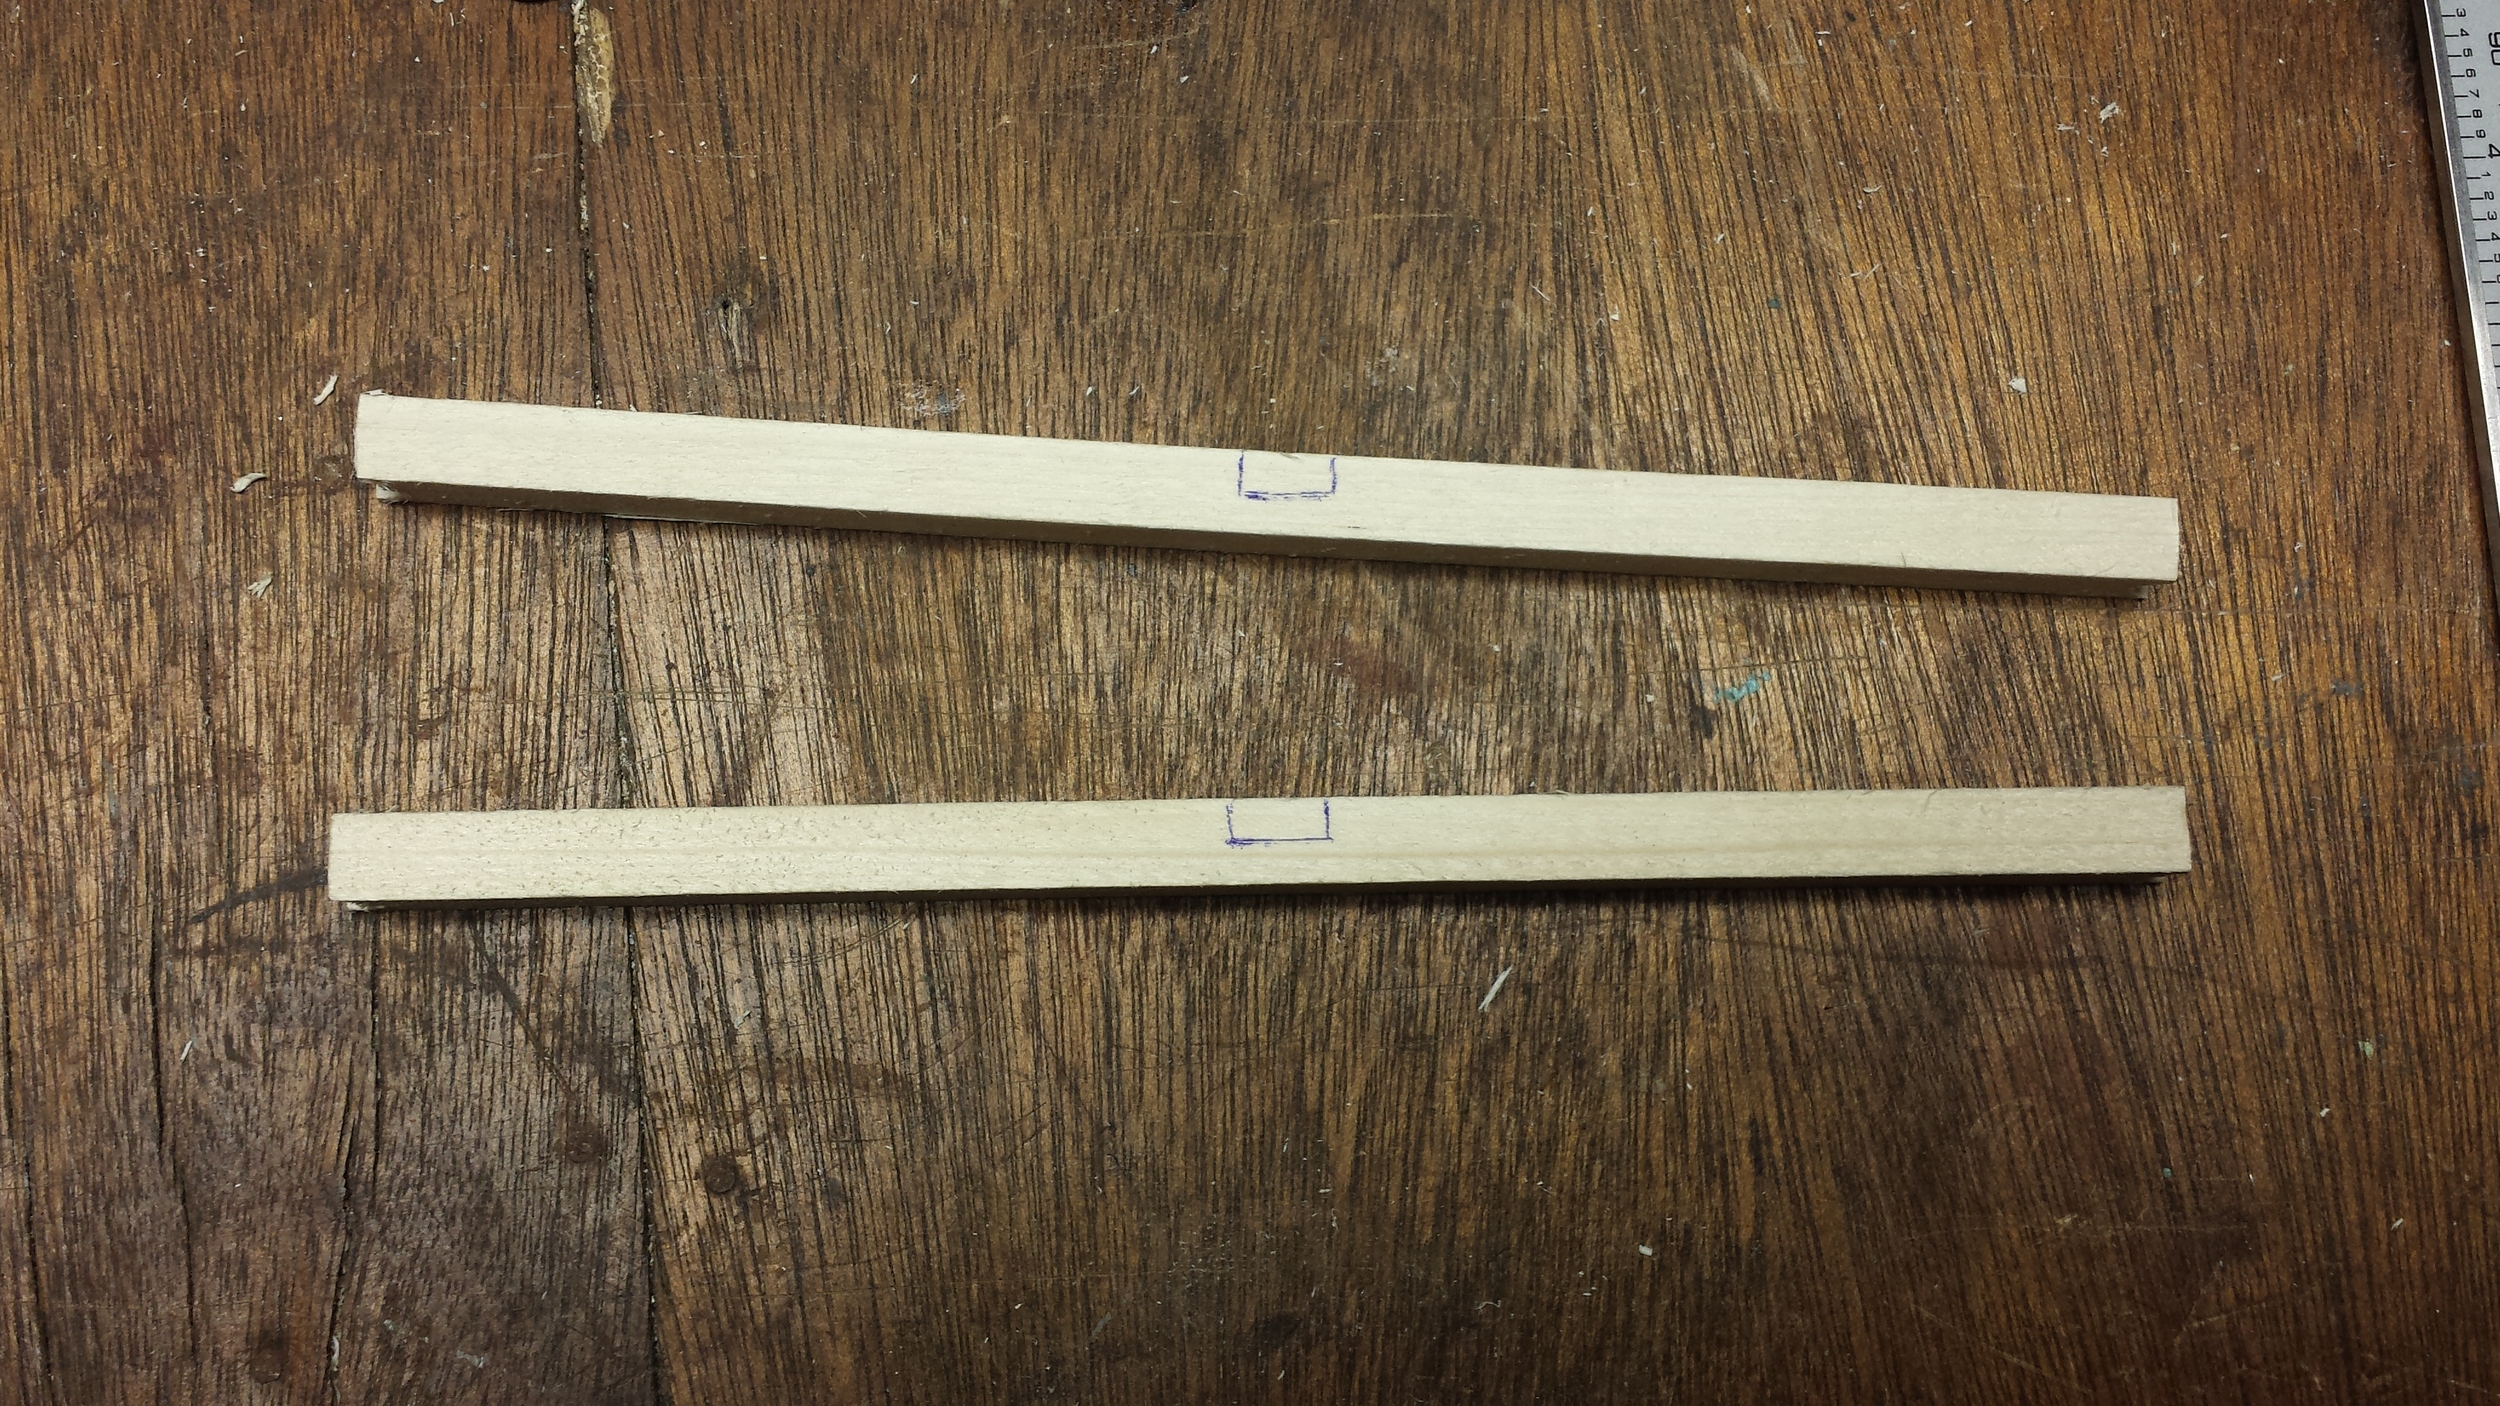
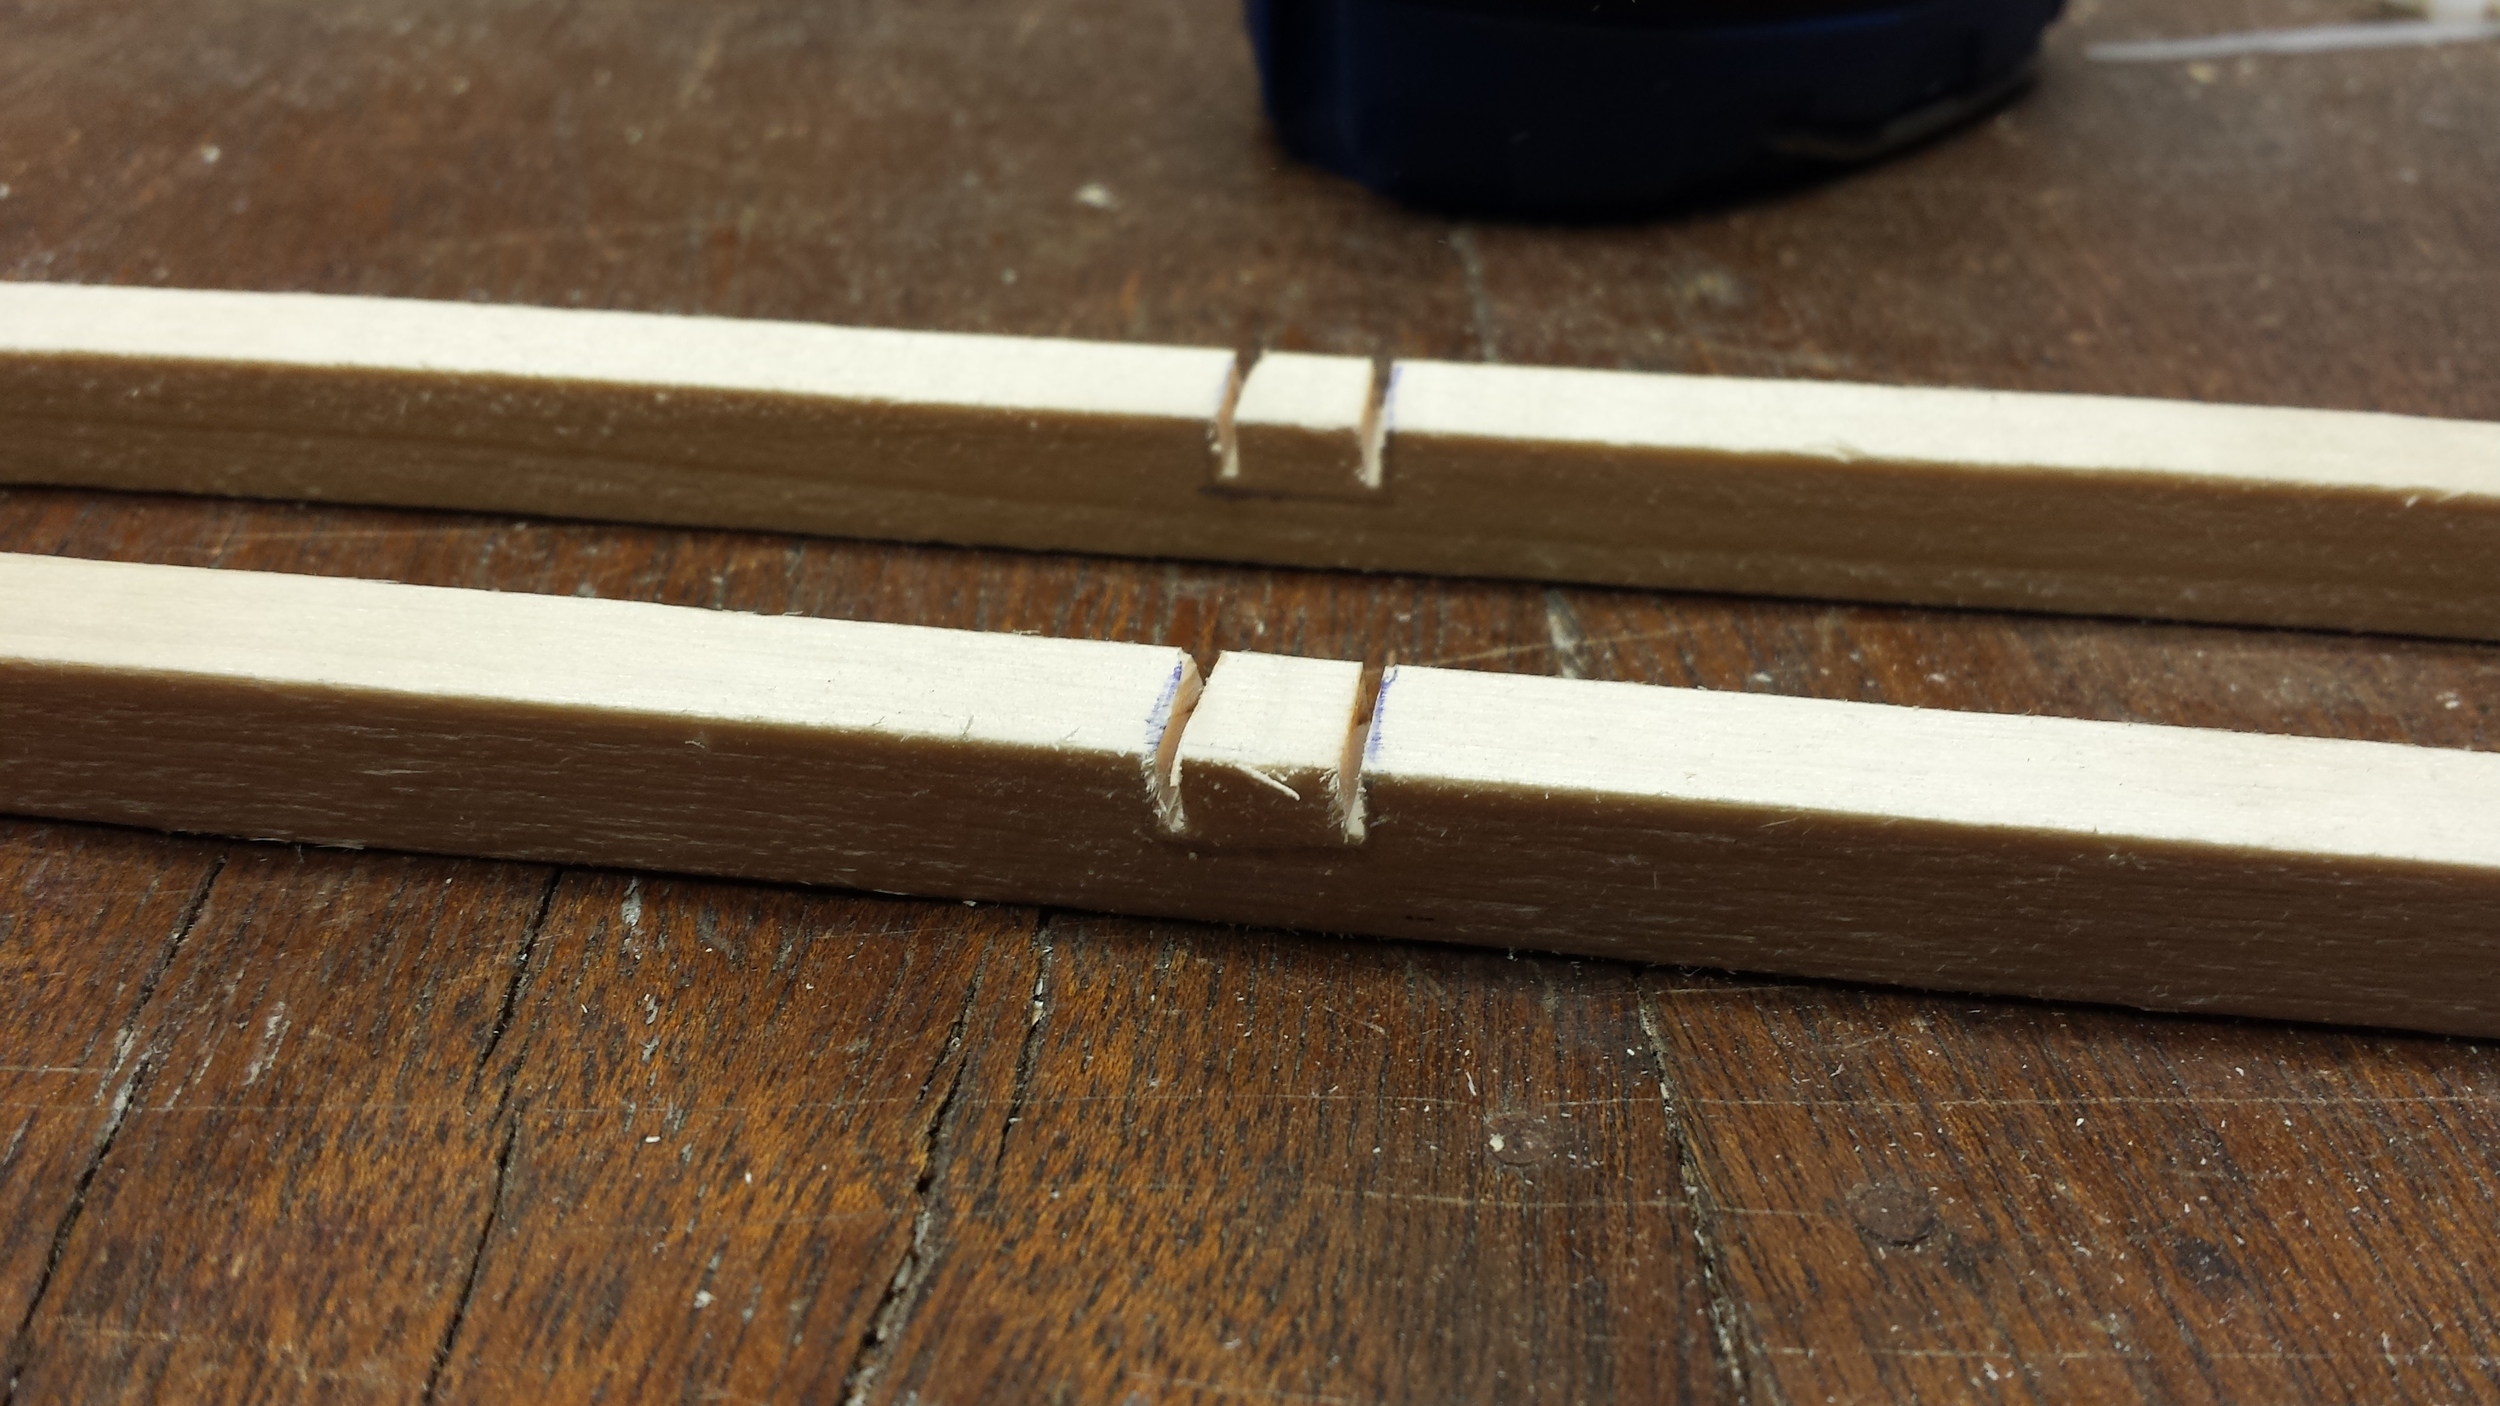
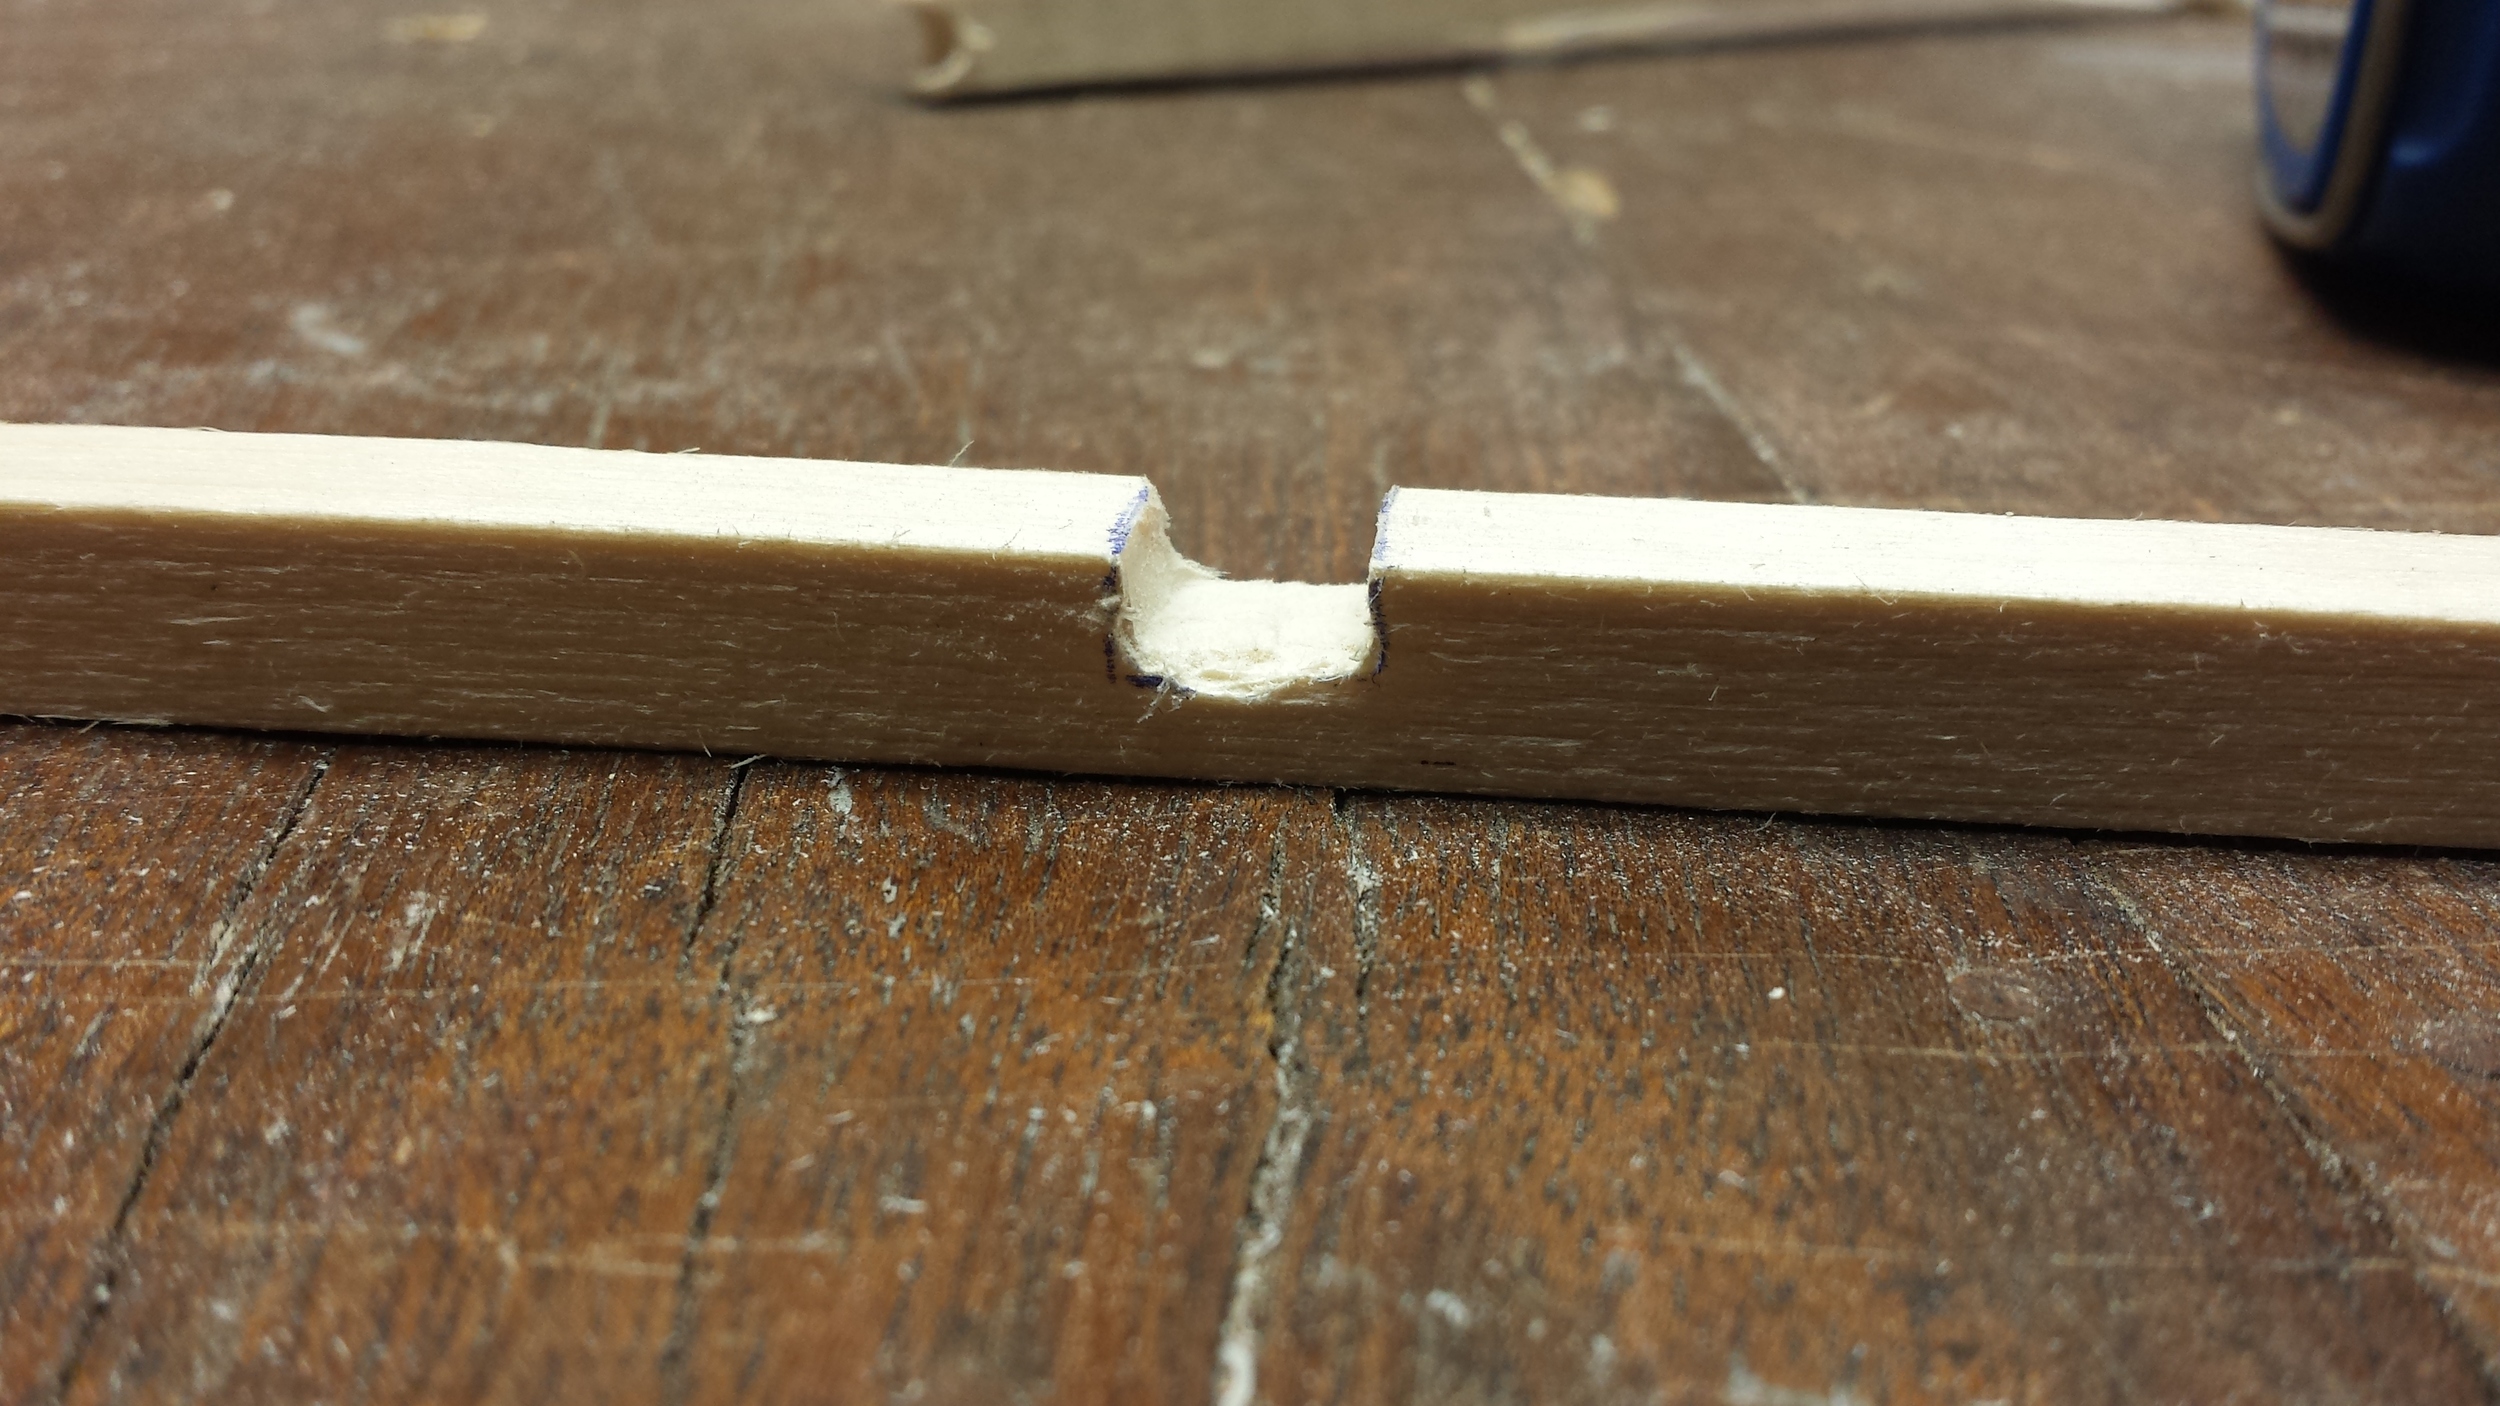
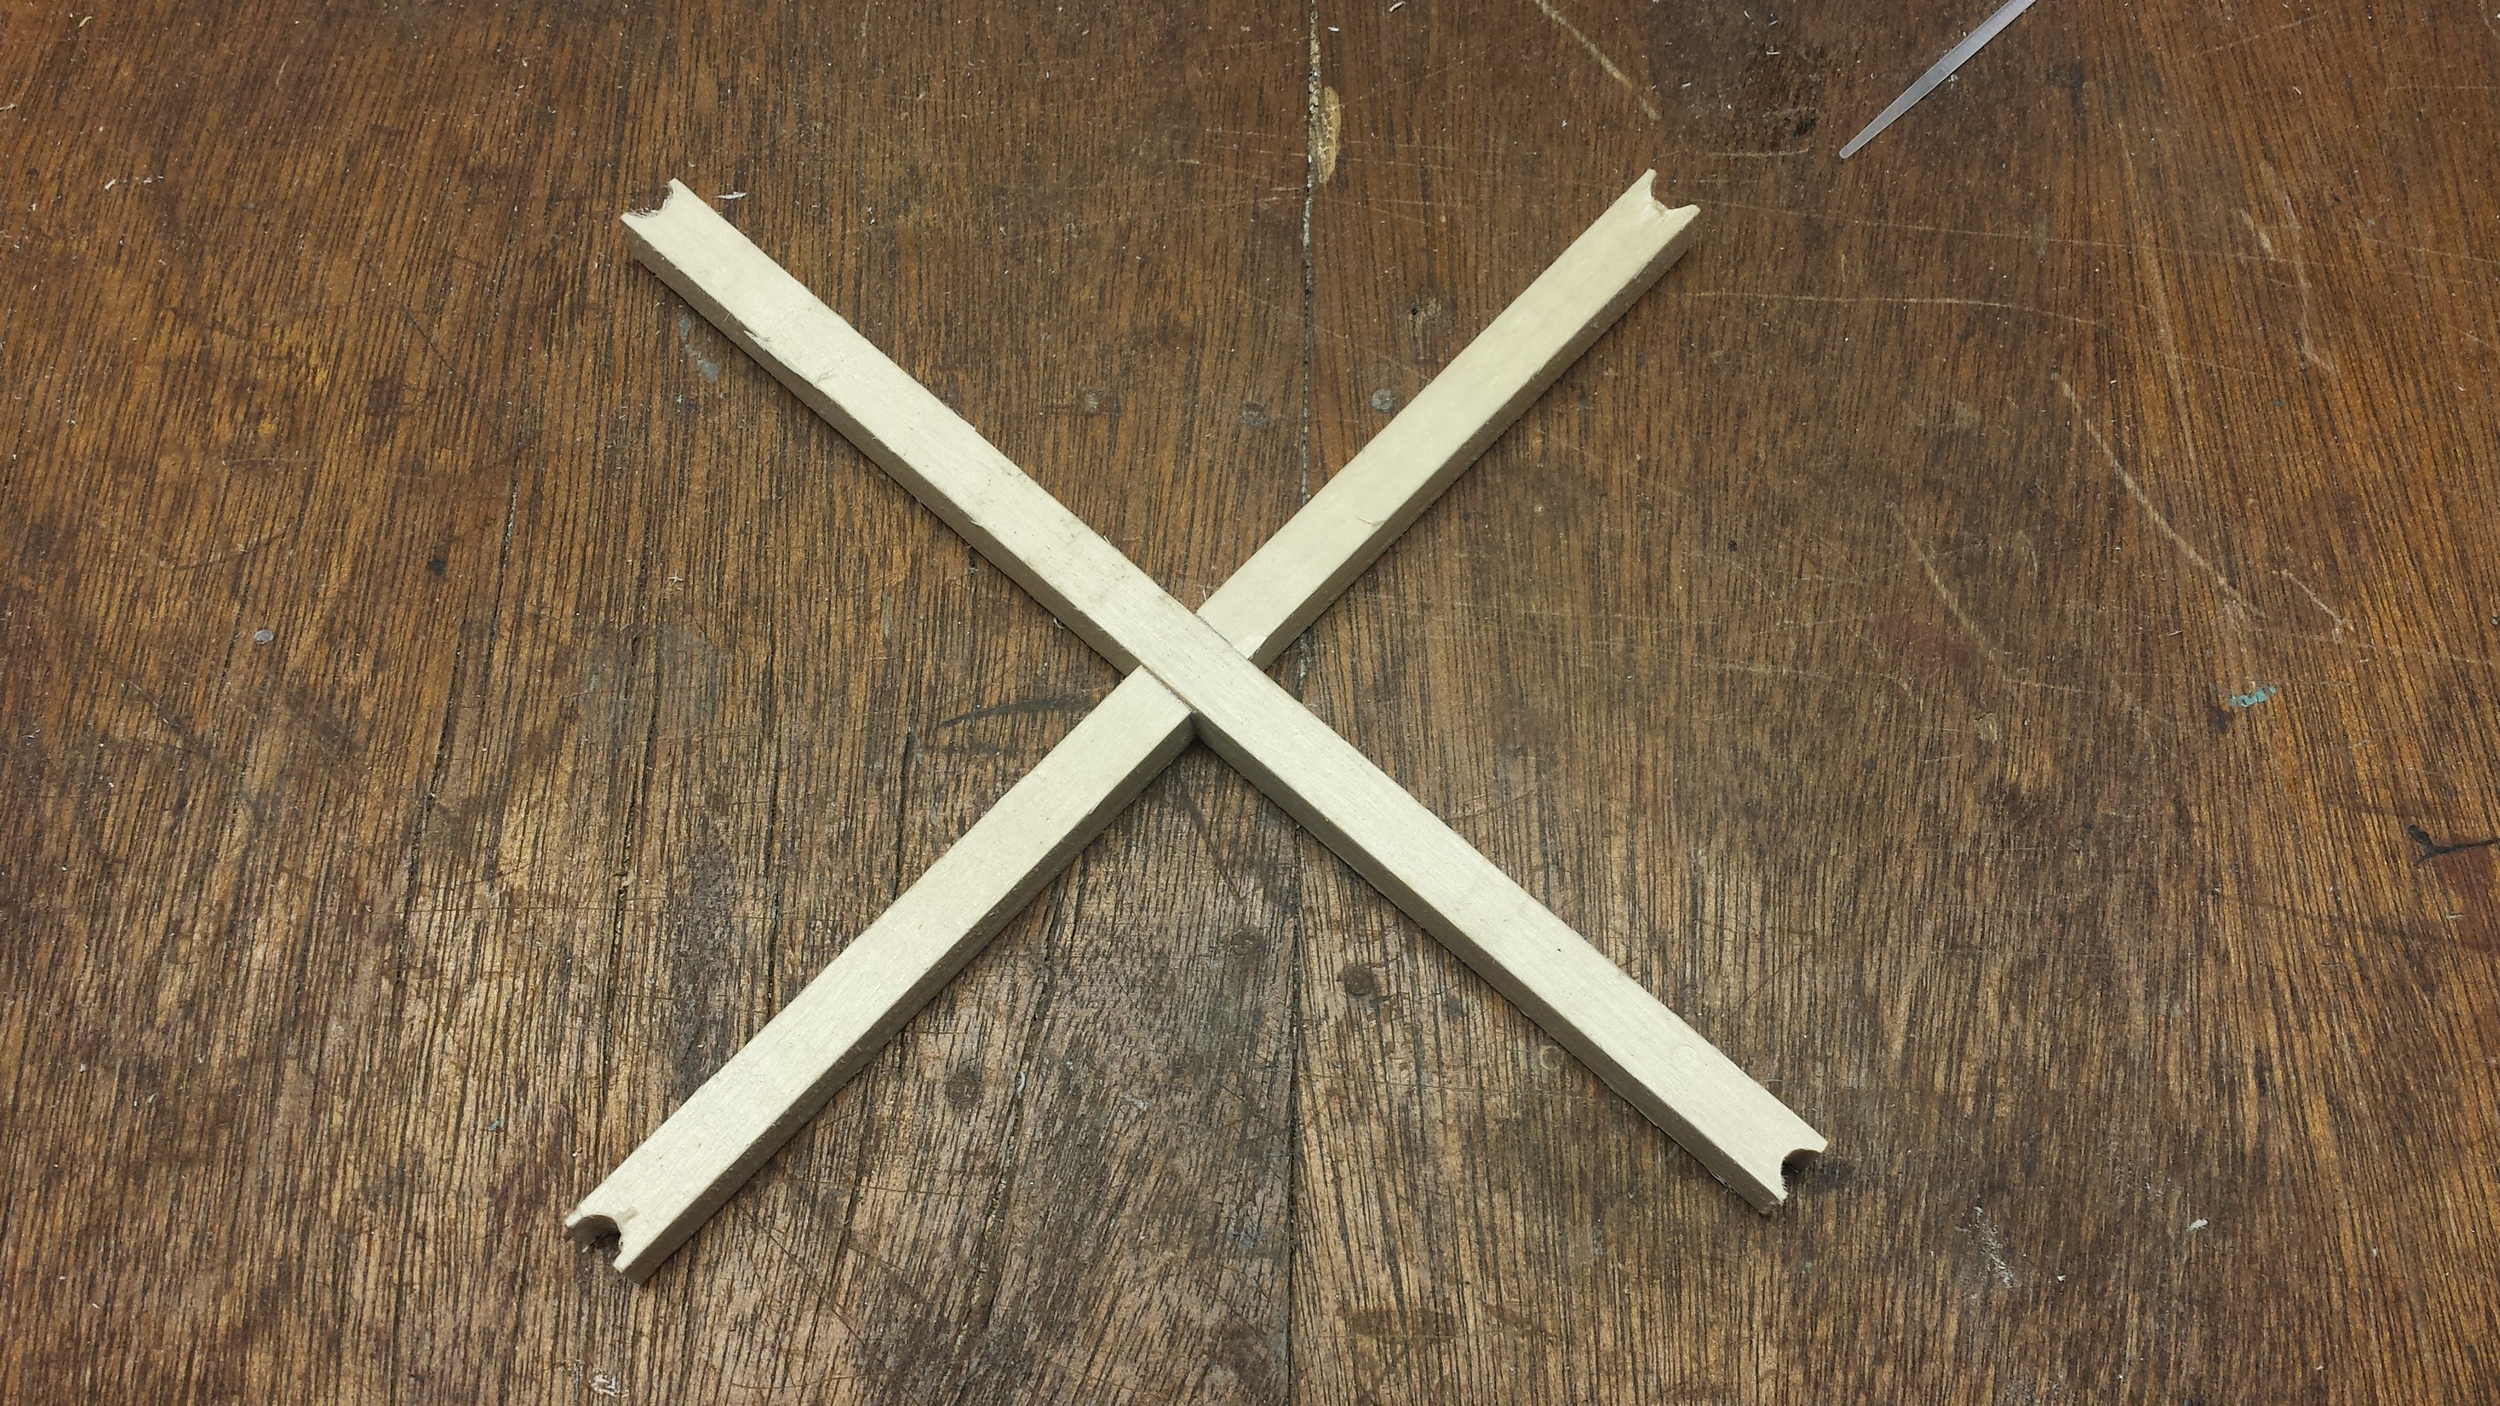
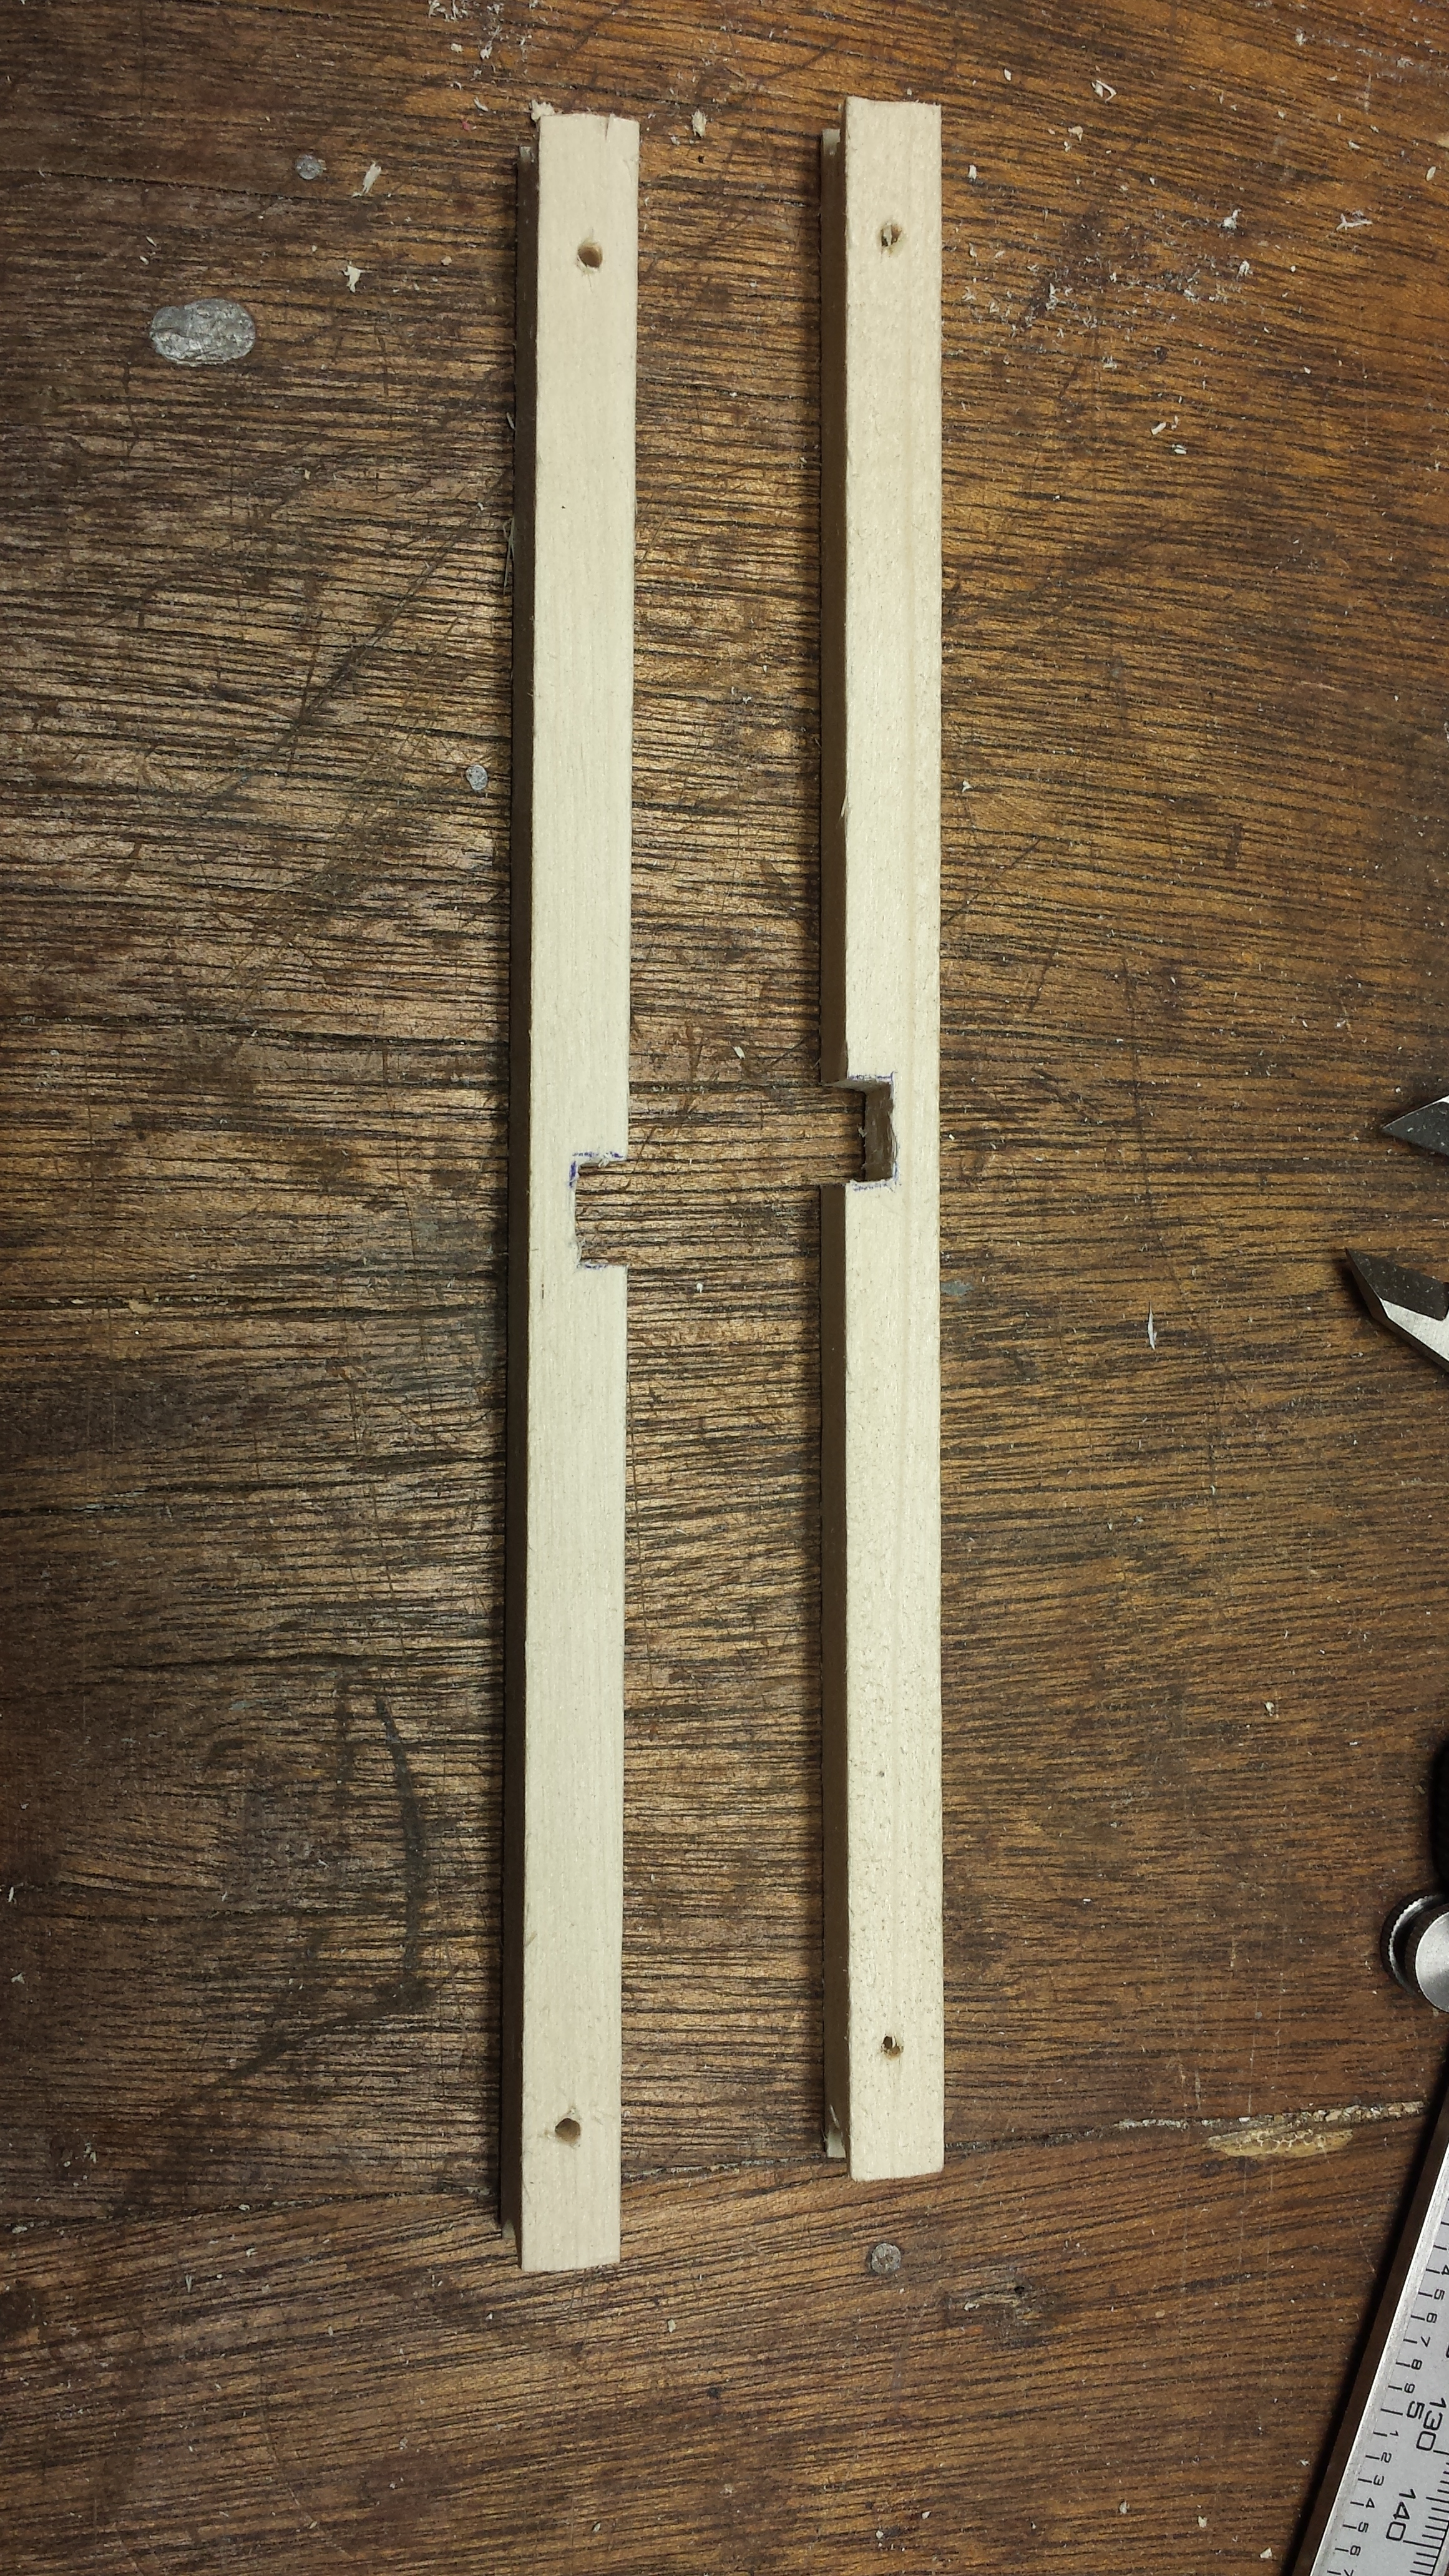
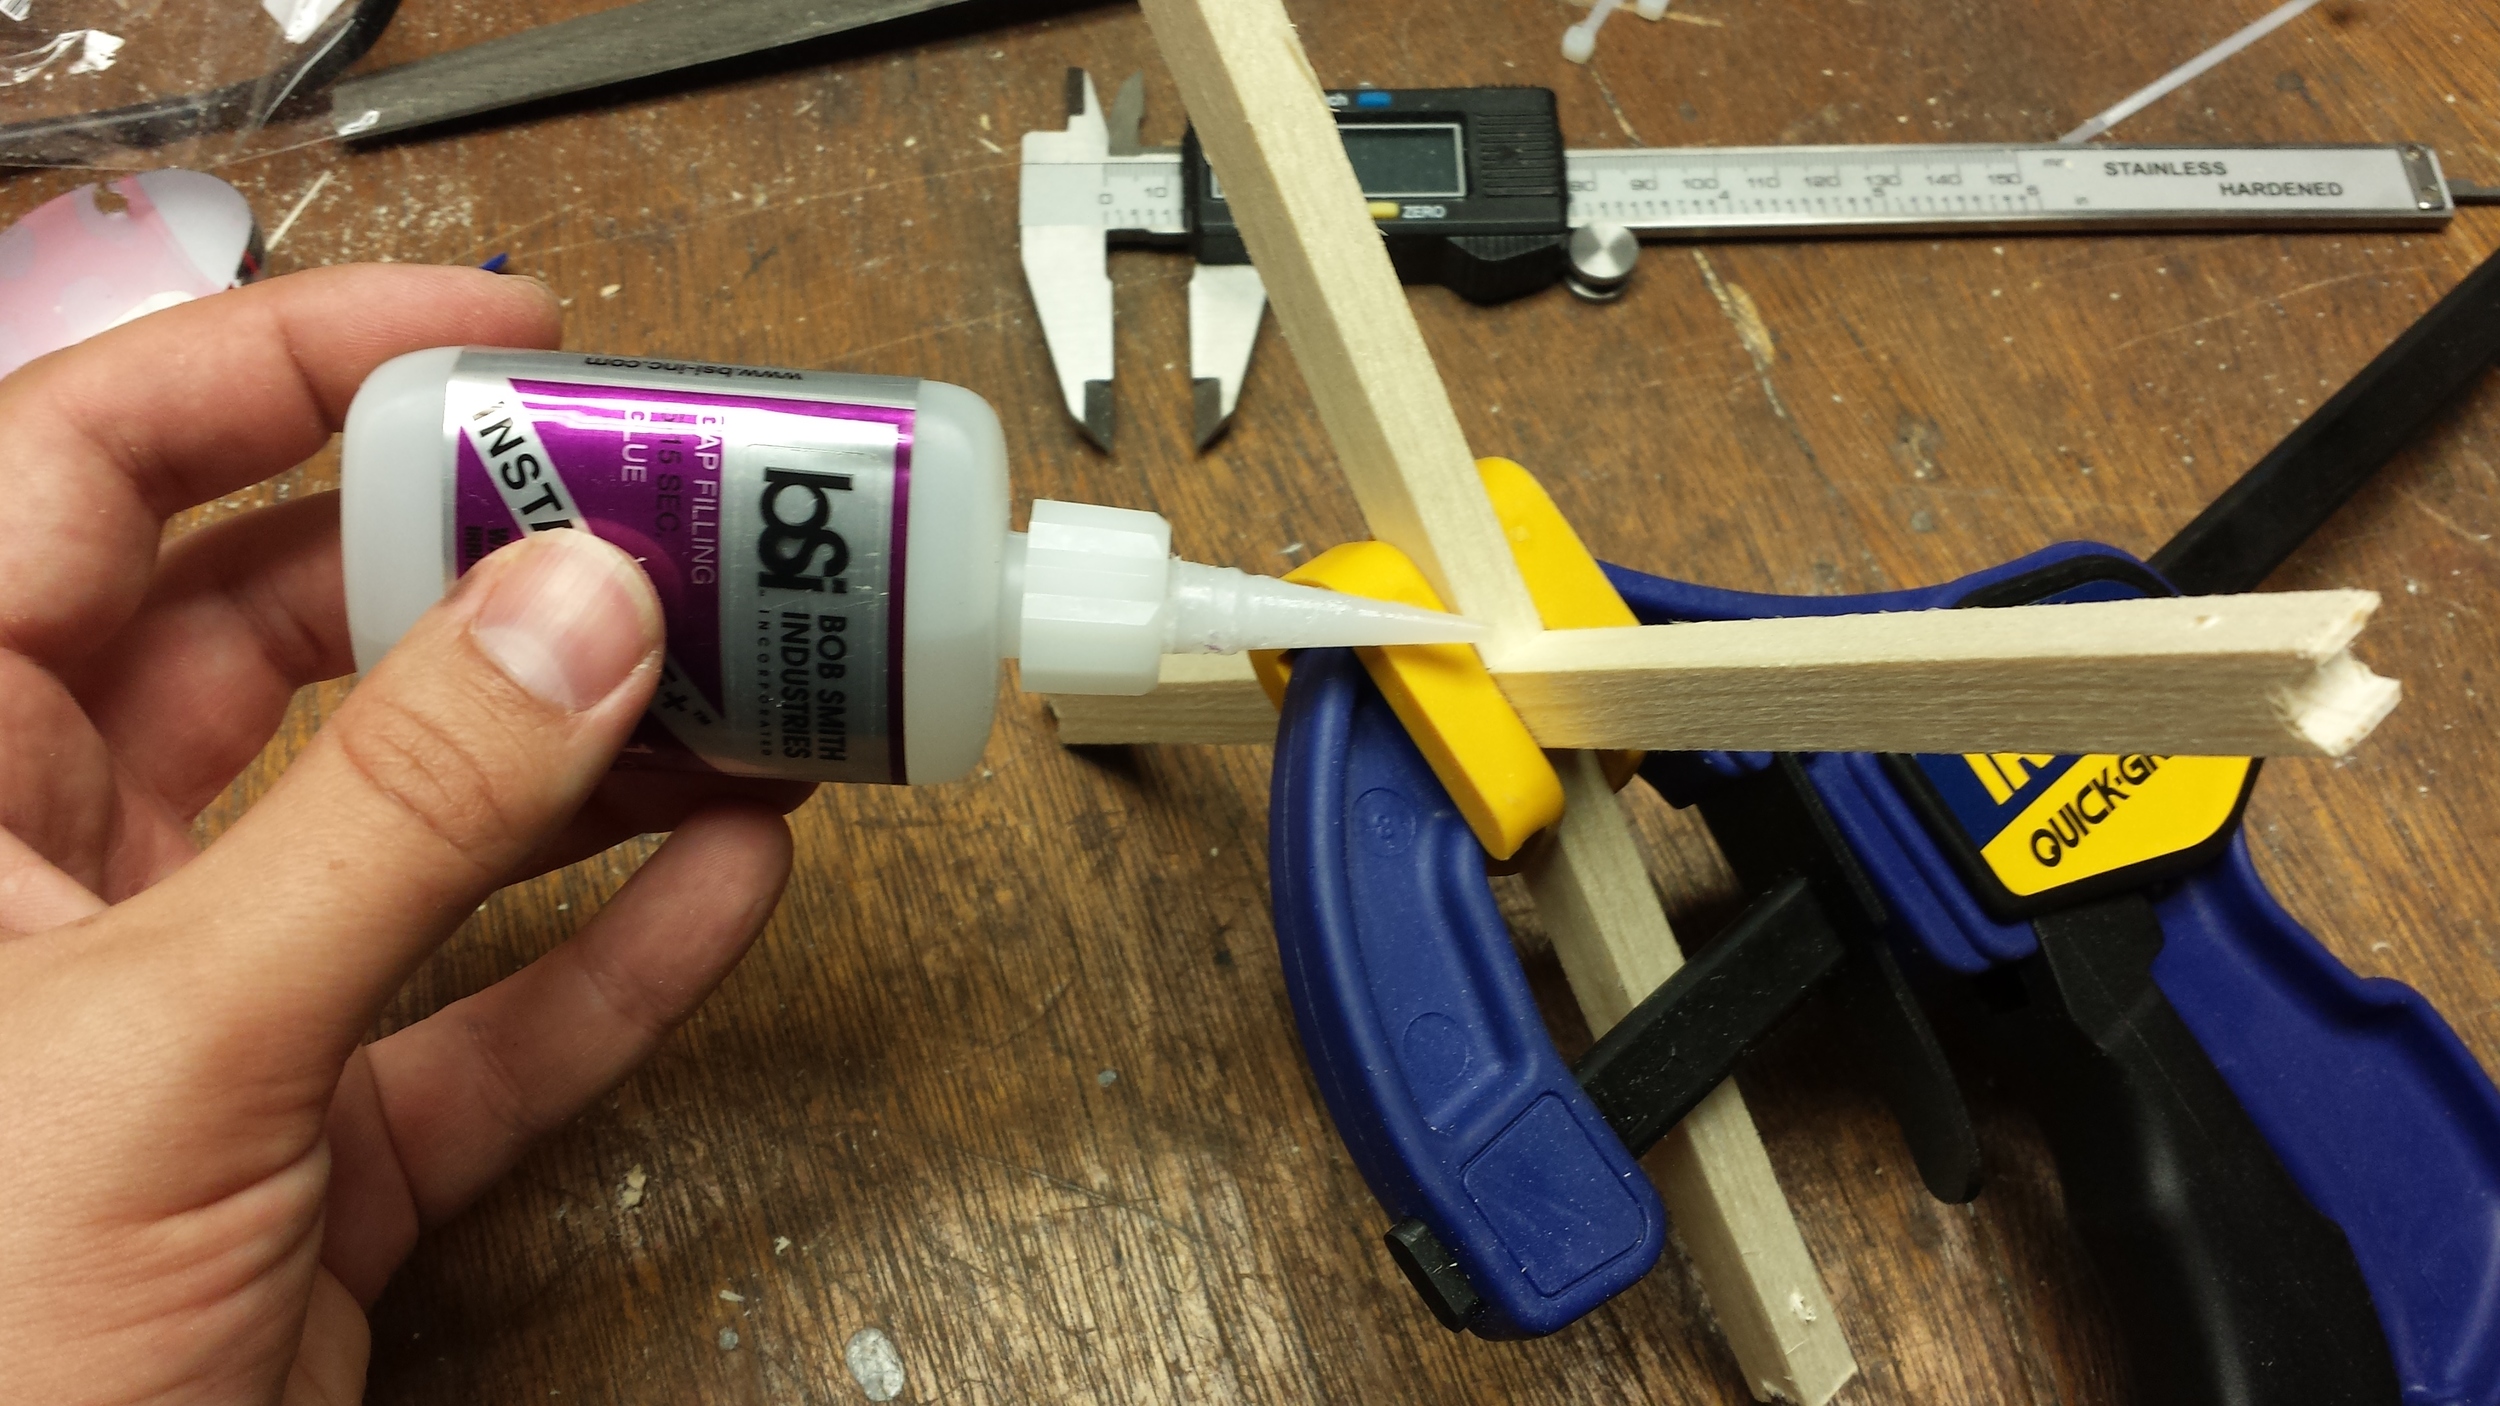
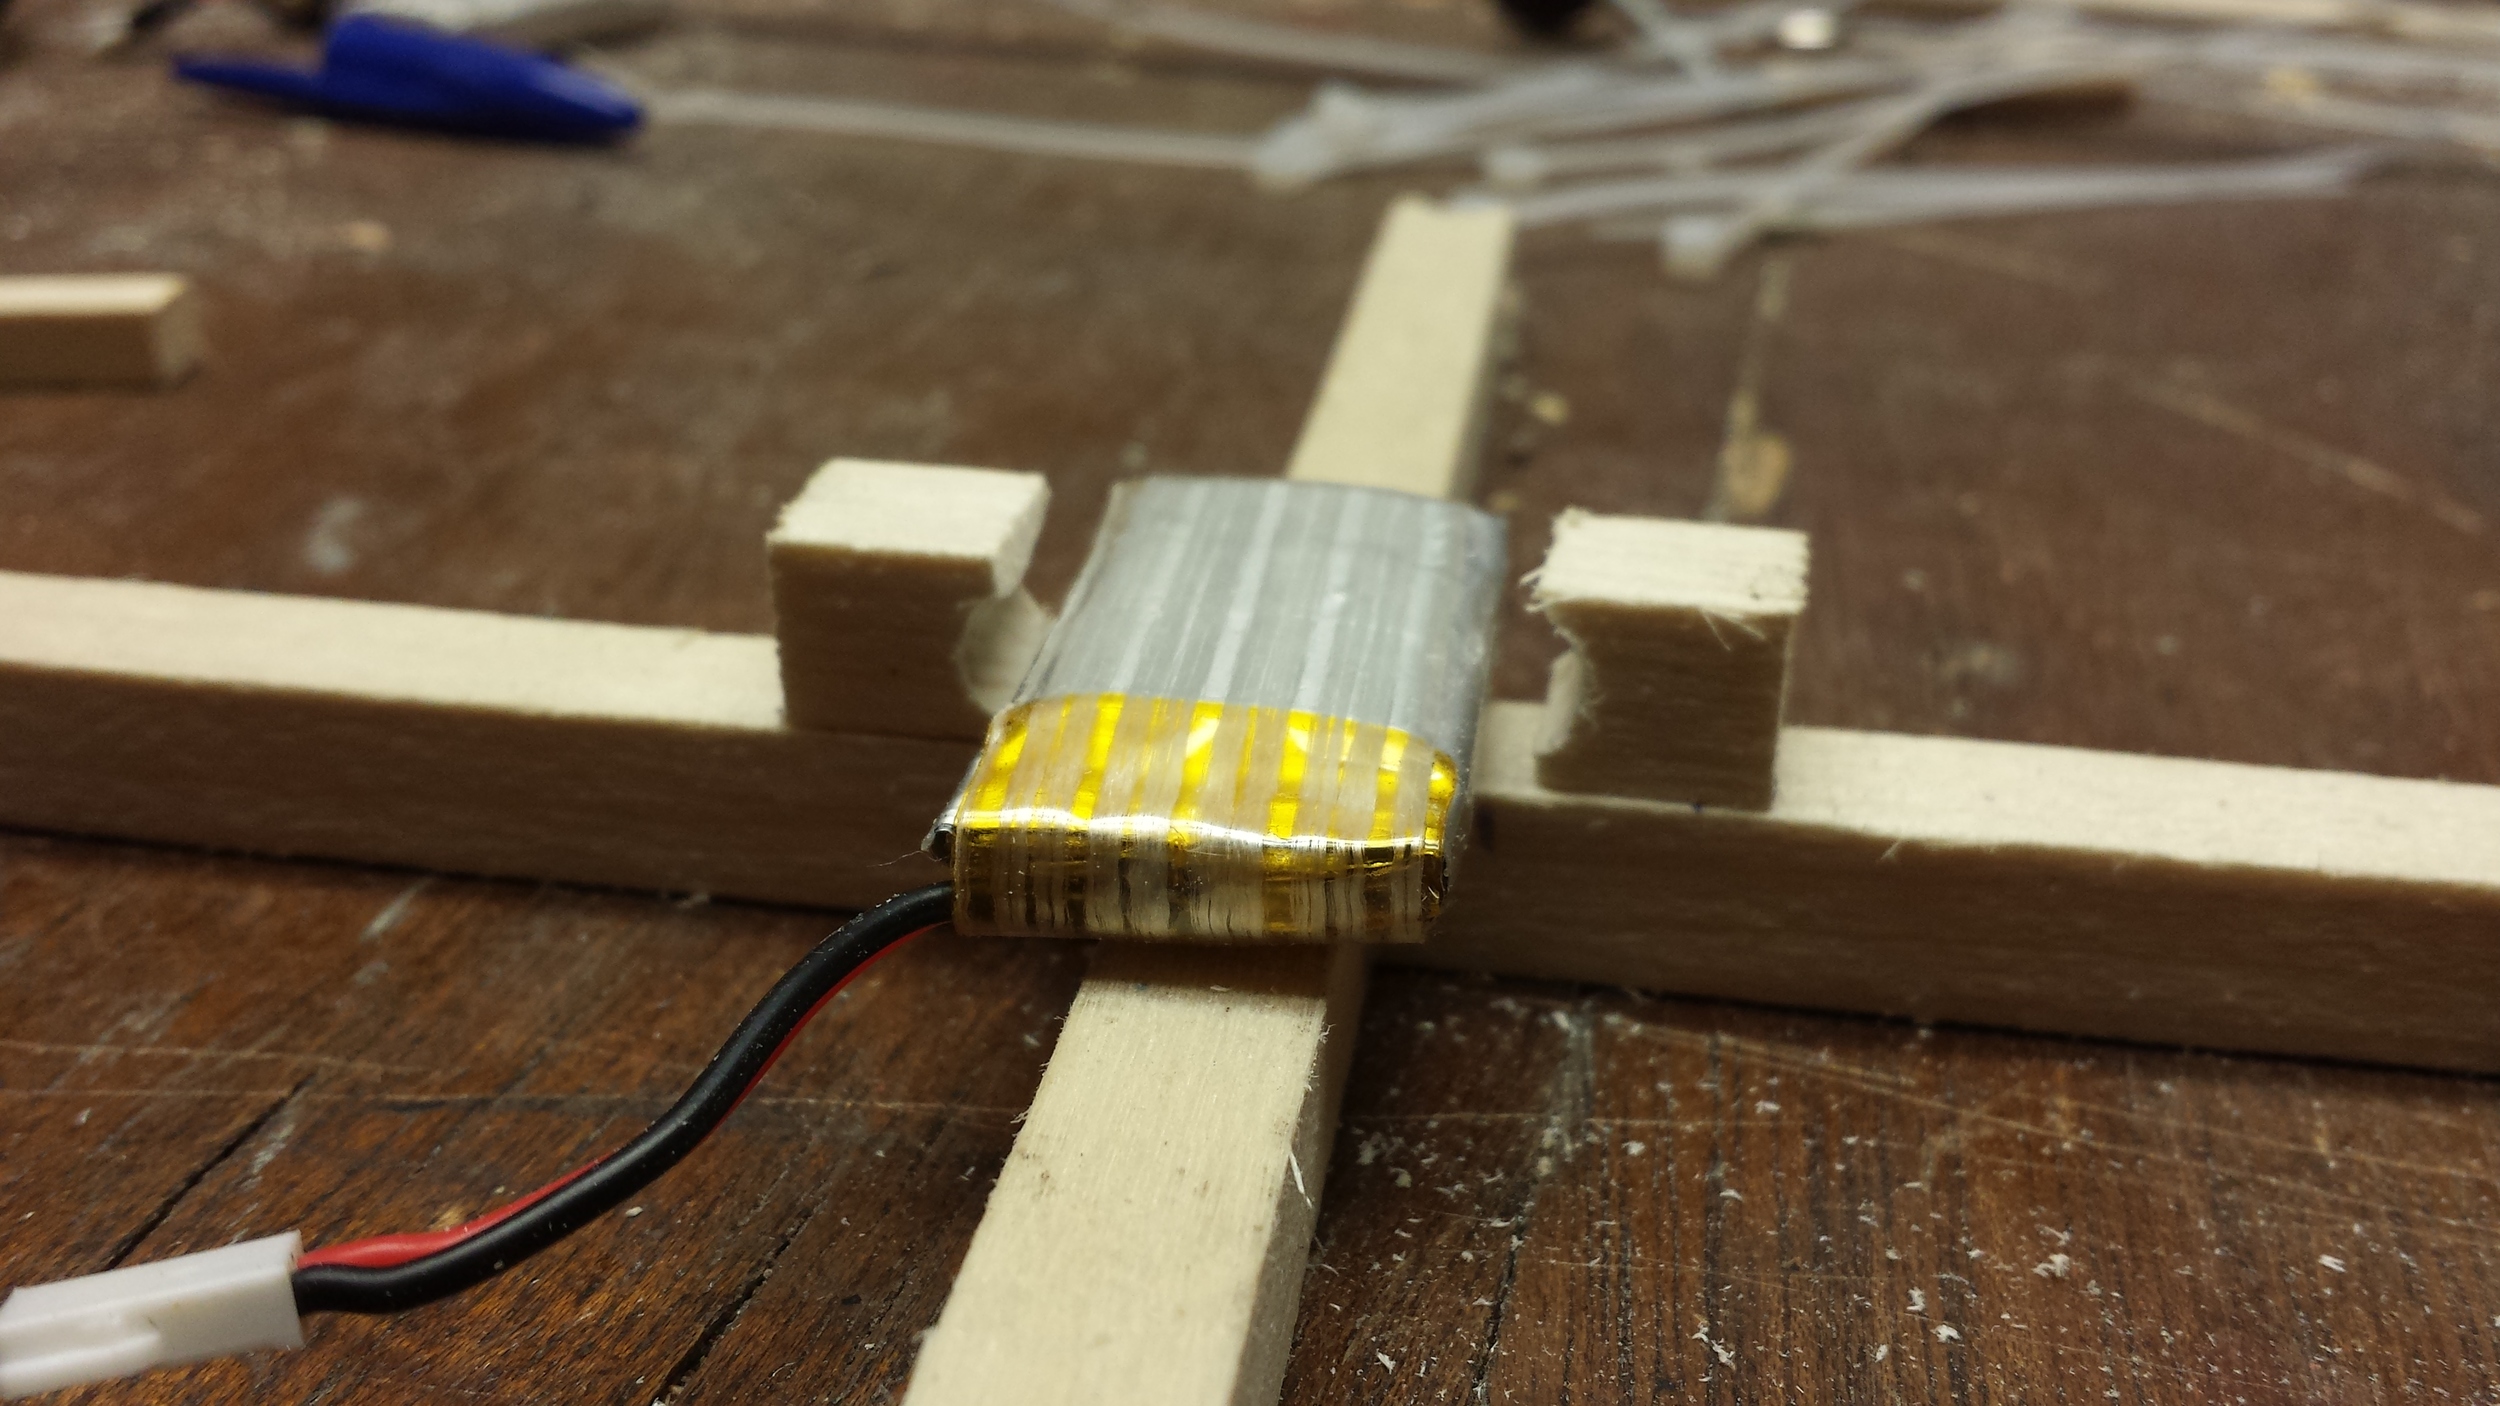
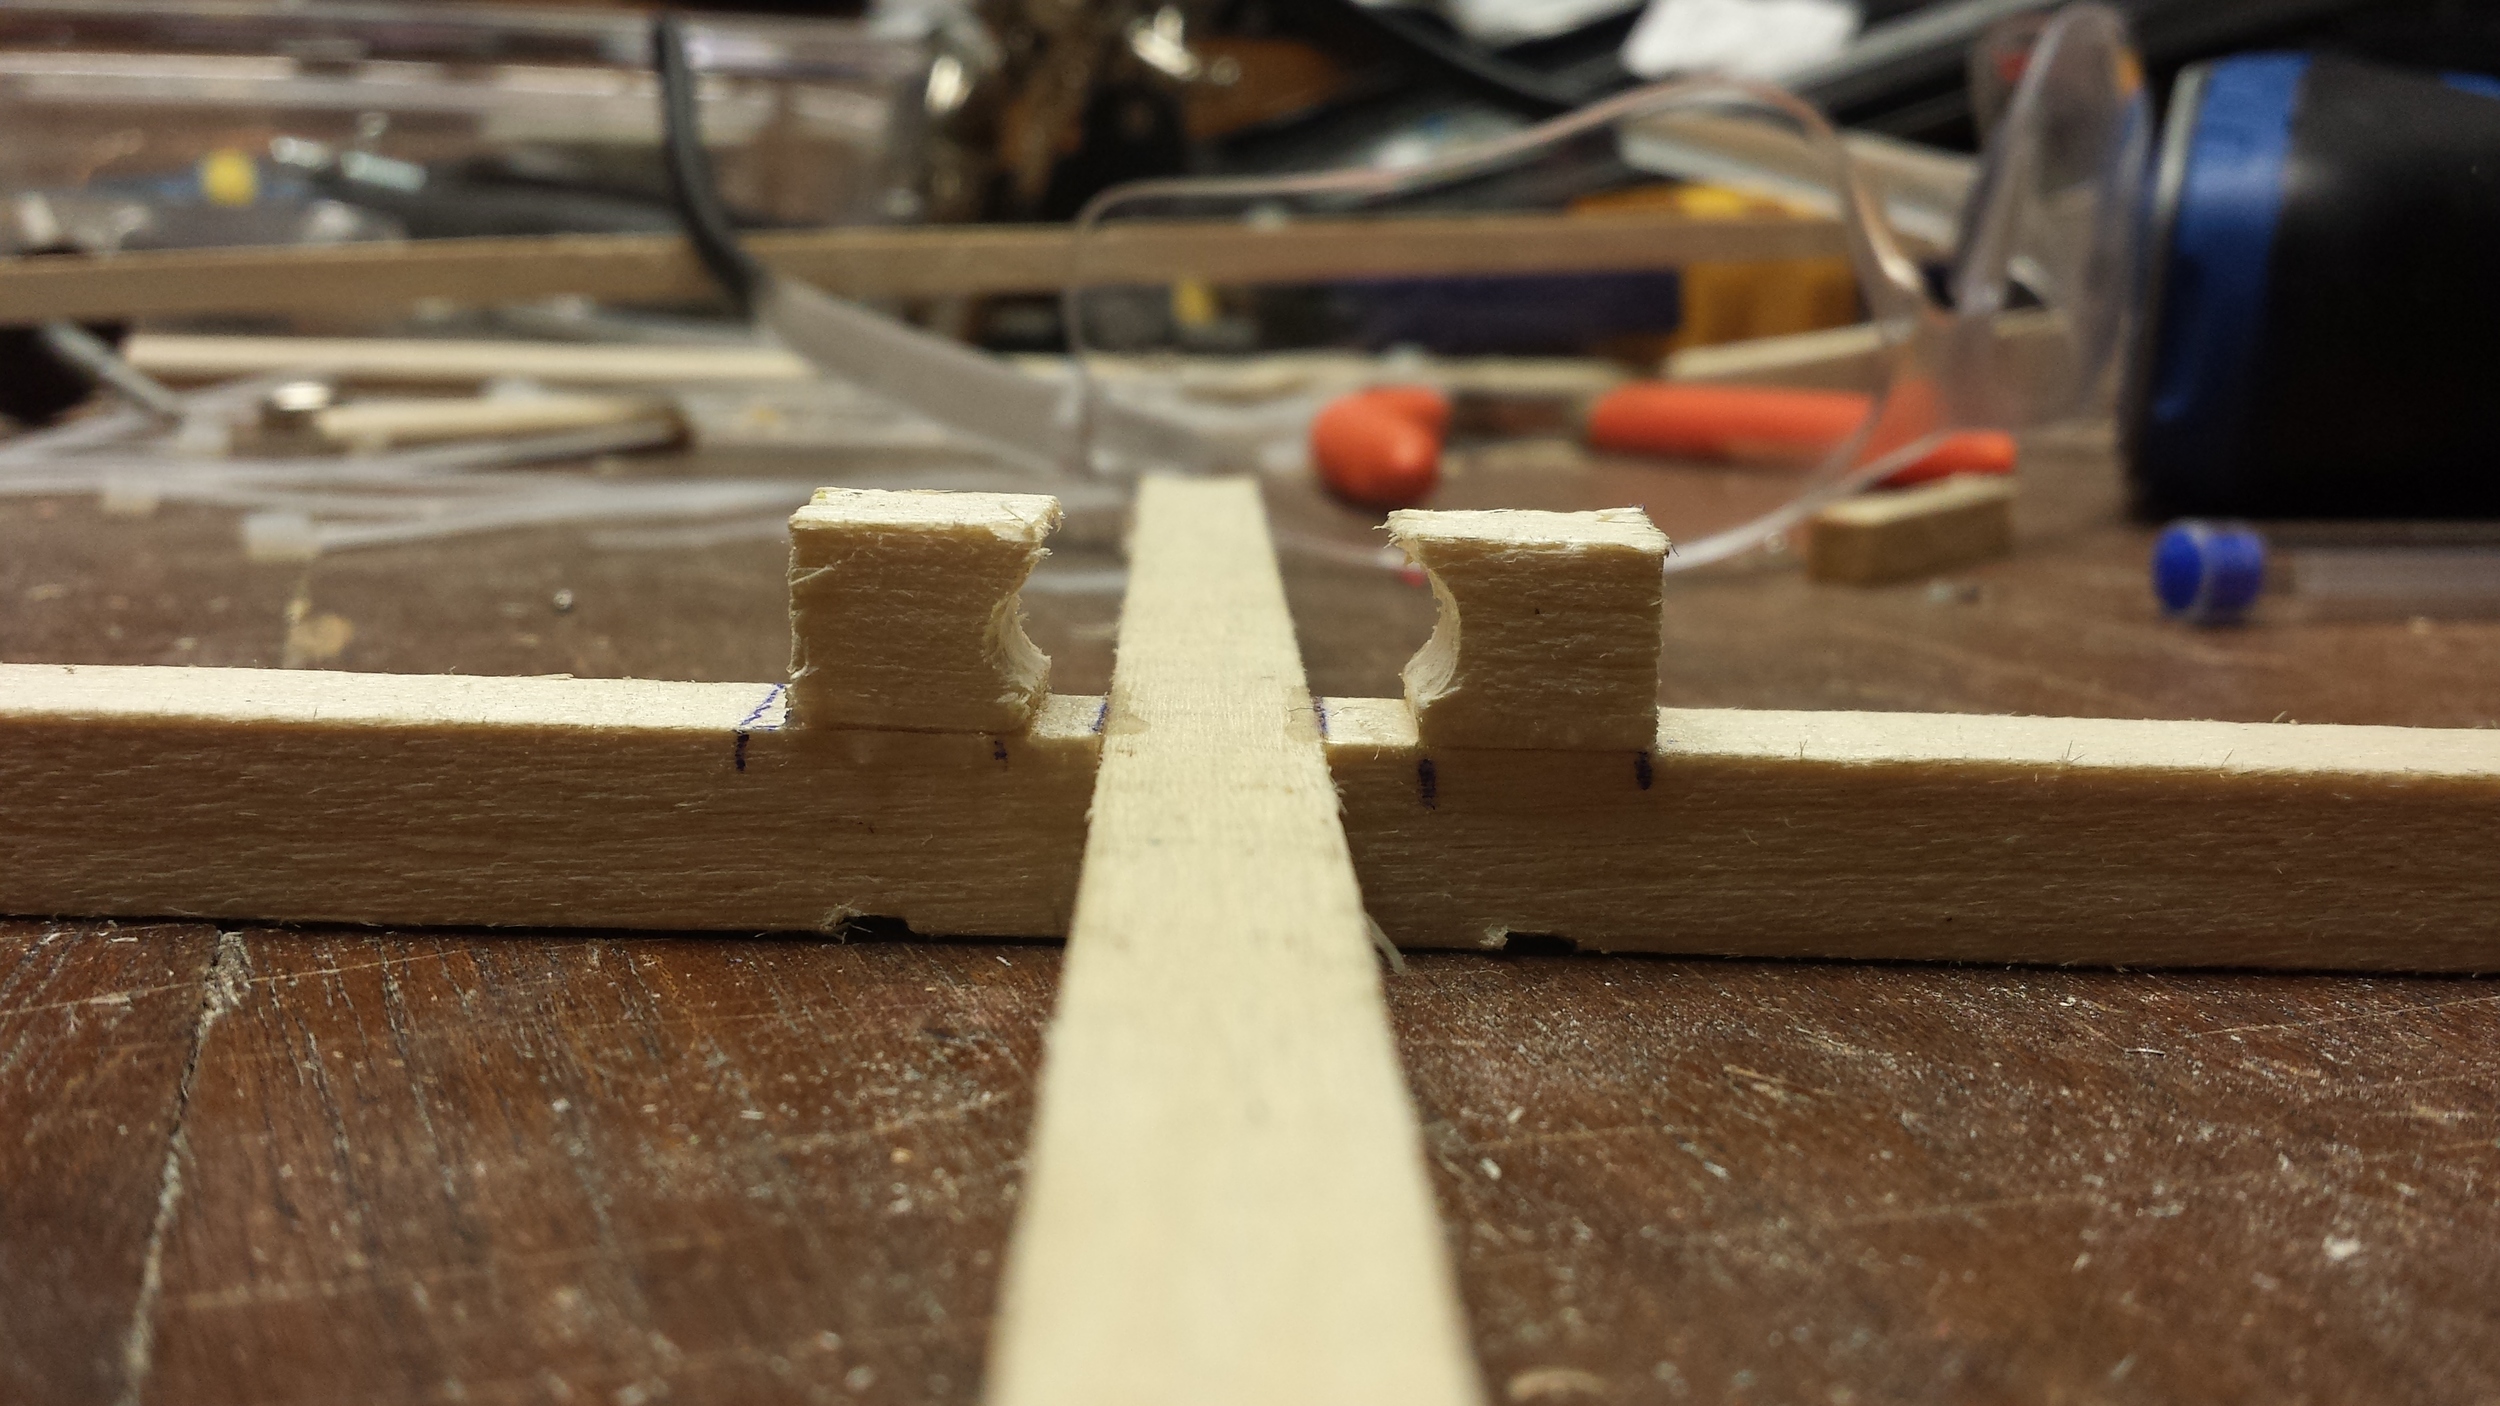
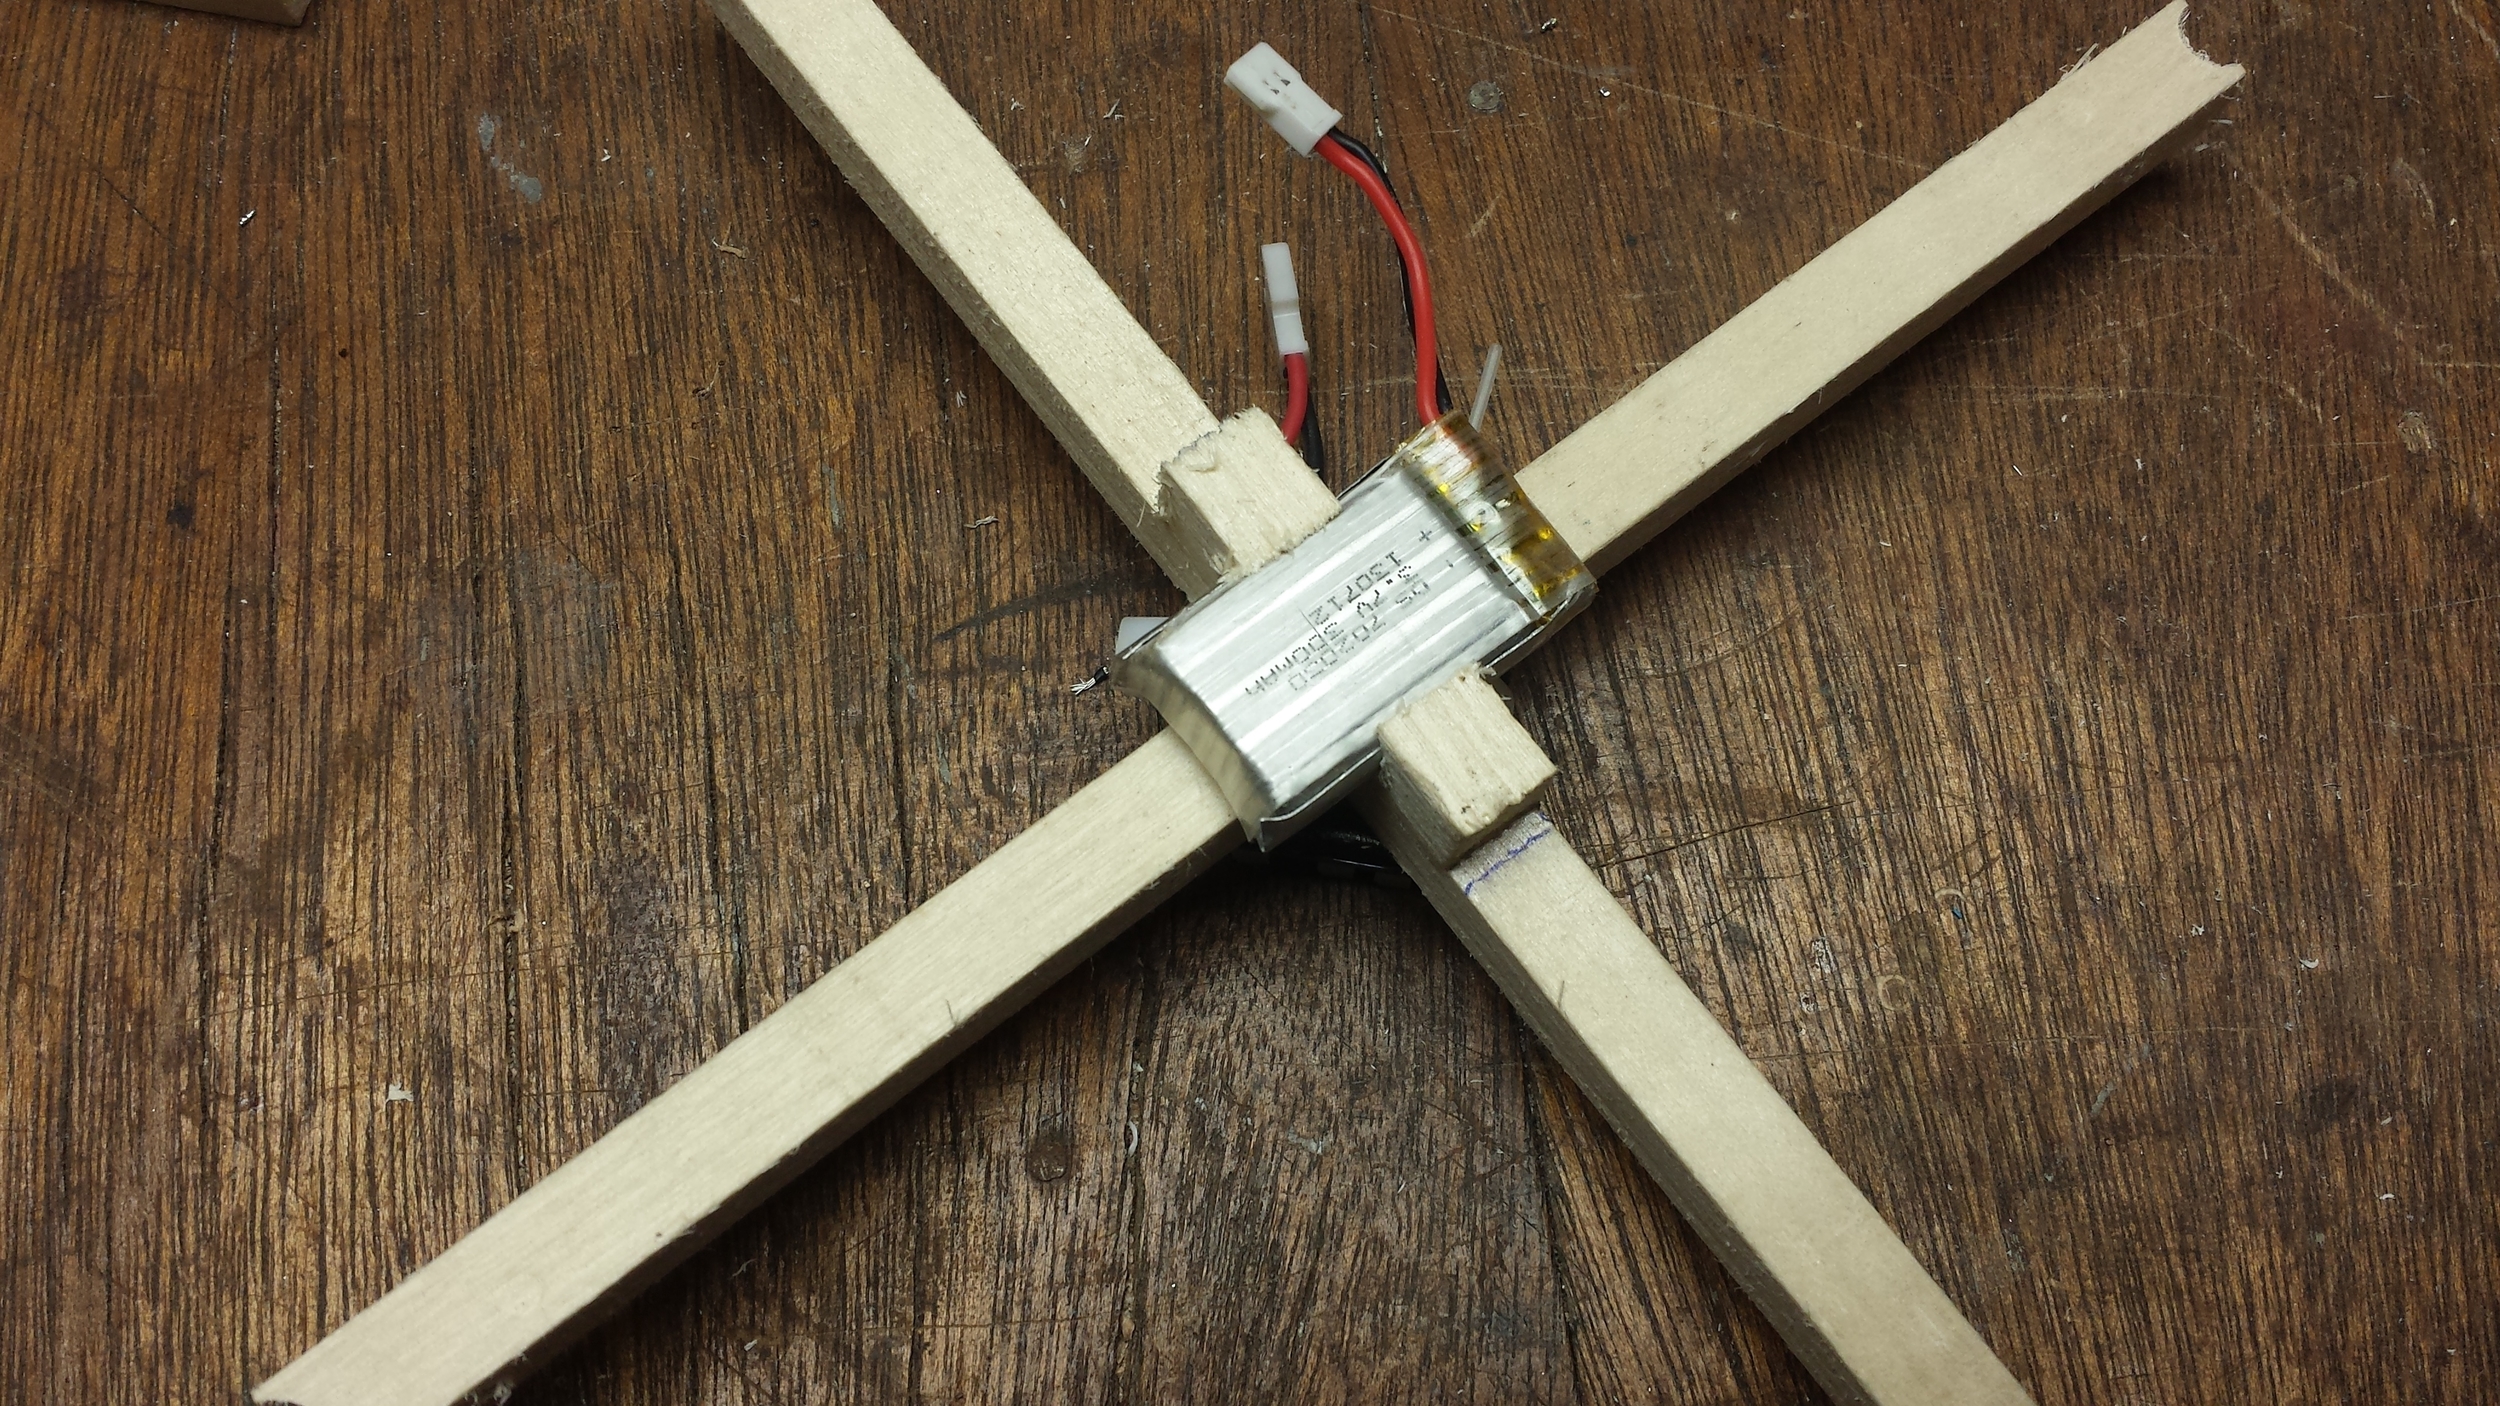
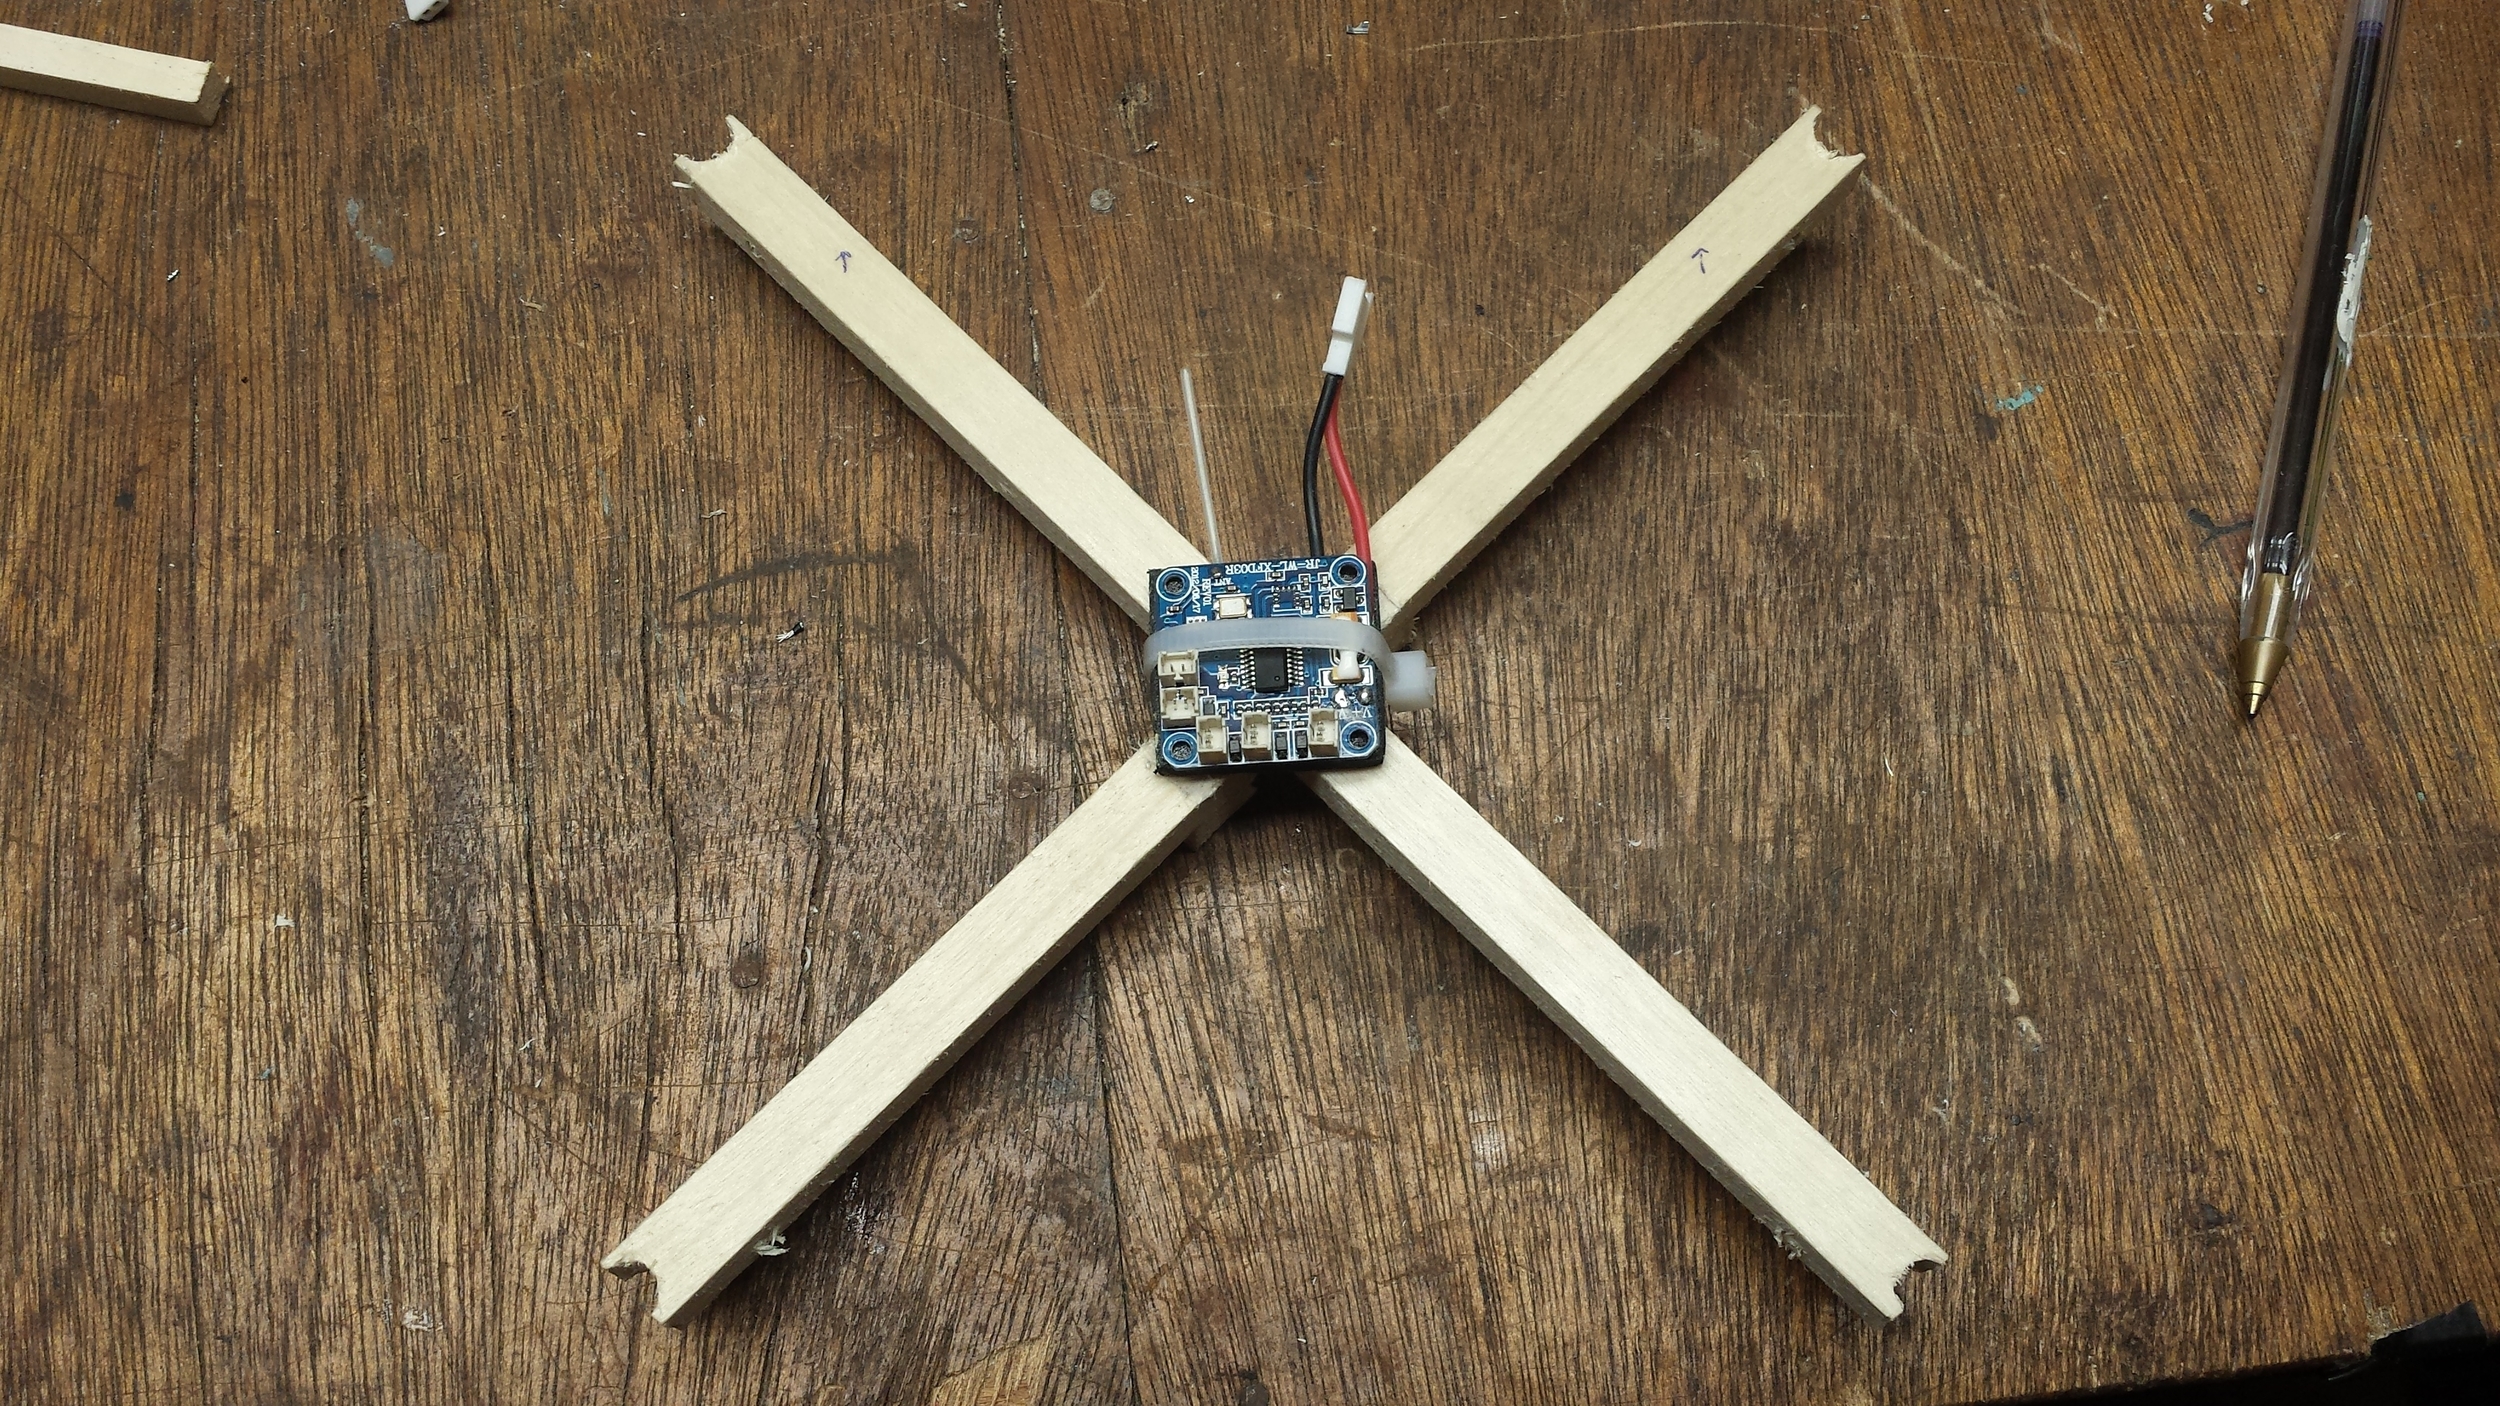
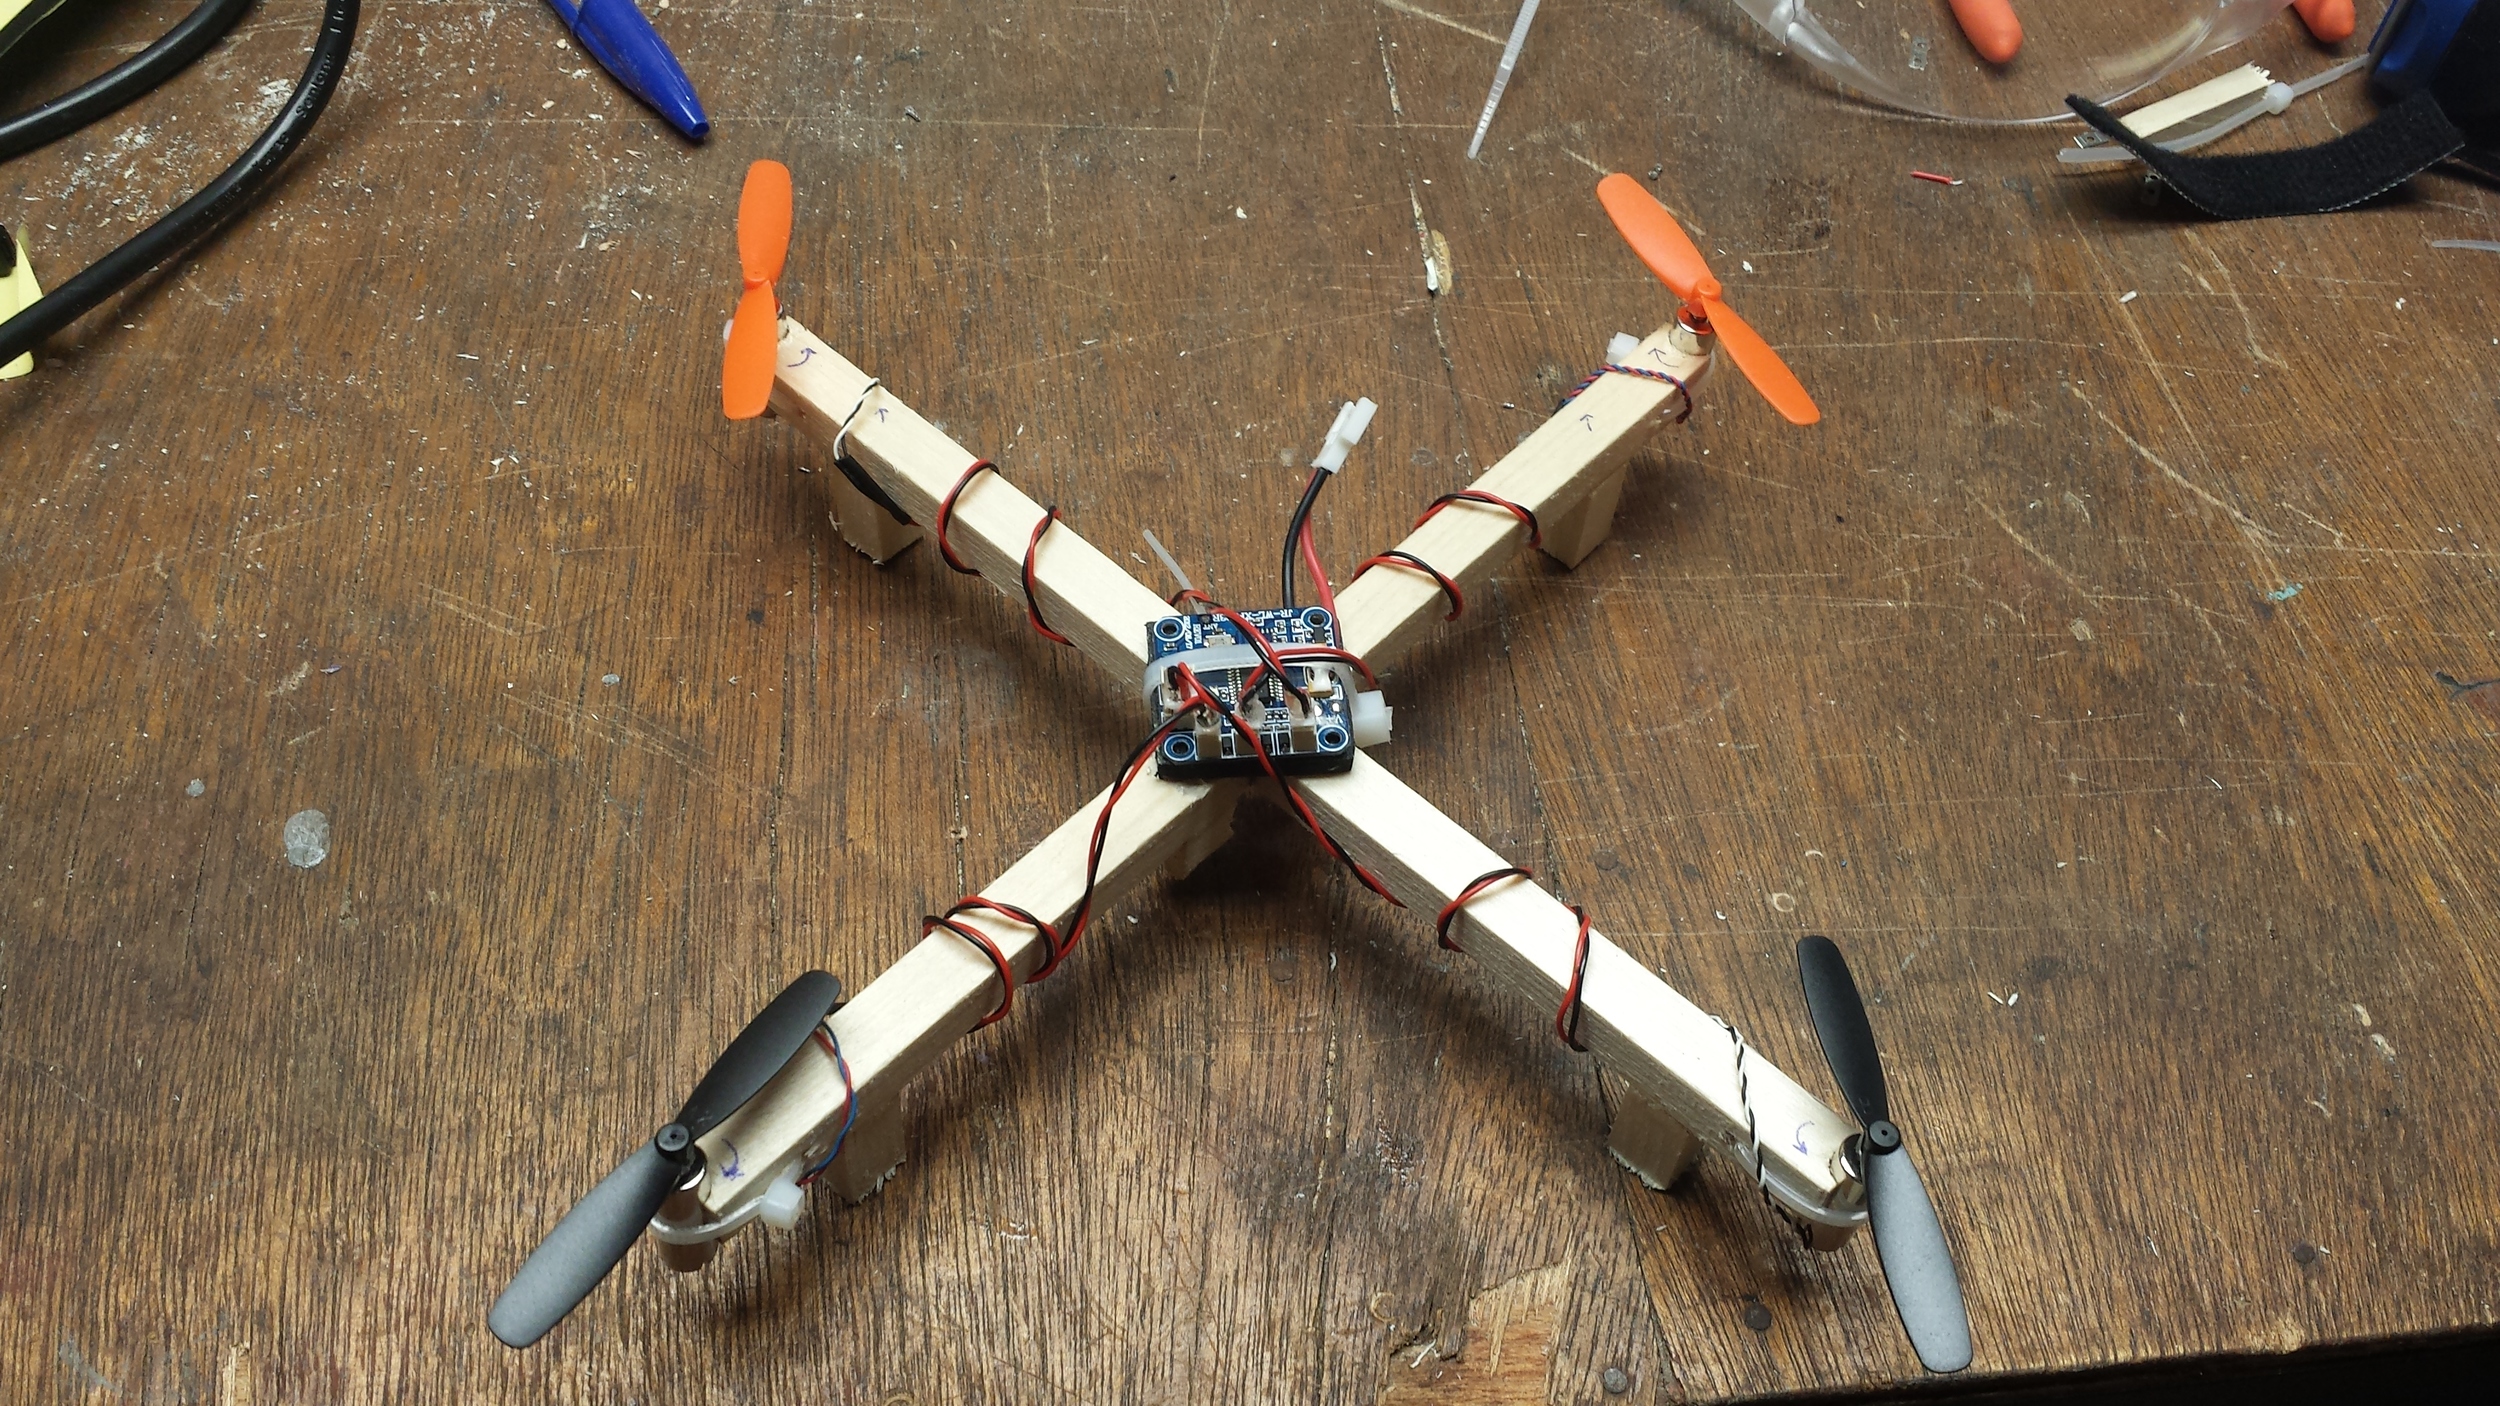
The first step was making the frame. I measured out and cut two 9.5" long pieces of 3/8" balsa square dowel. I drilled two 1/16" pilot holes 1/4" from each end on both arms. I then drilled the two 1/4" motor mount holes on each arm. I stopped just shy of going all the way through the dowel and used a Dremel tool to finish the holes to avoid any punch through damage to the wood. After the motor holes were drilled, I cut them in half to provide a good surface for the motors to mate against. I then notched the middle of each arm with a 3/8" by 3/16" grove. Lastly, 1/4" perpendicular from the center of the motor mount holes, I drilled a 3/32" Zip Tie Hole for each motor. The two pieces are then glued together and left to set.

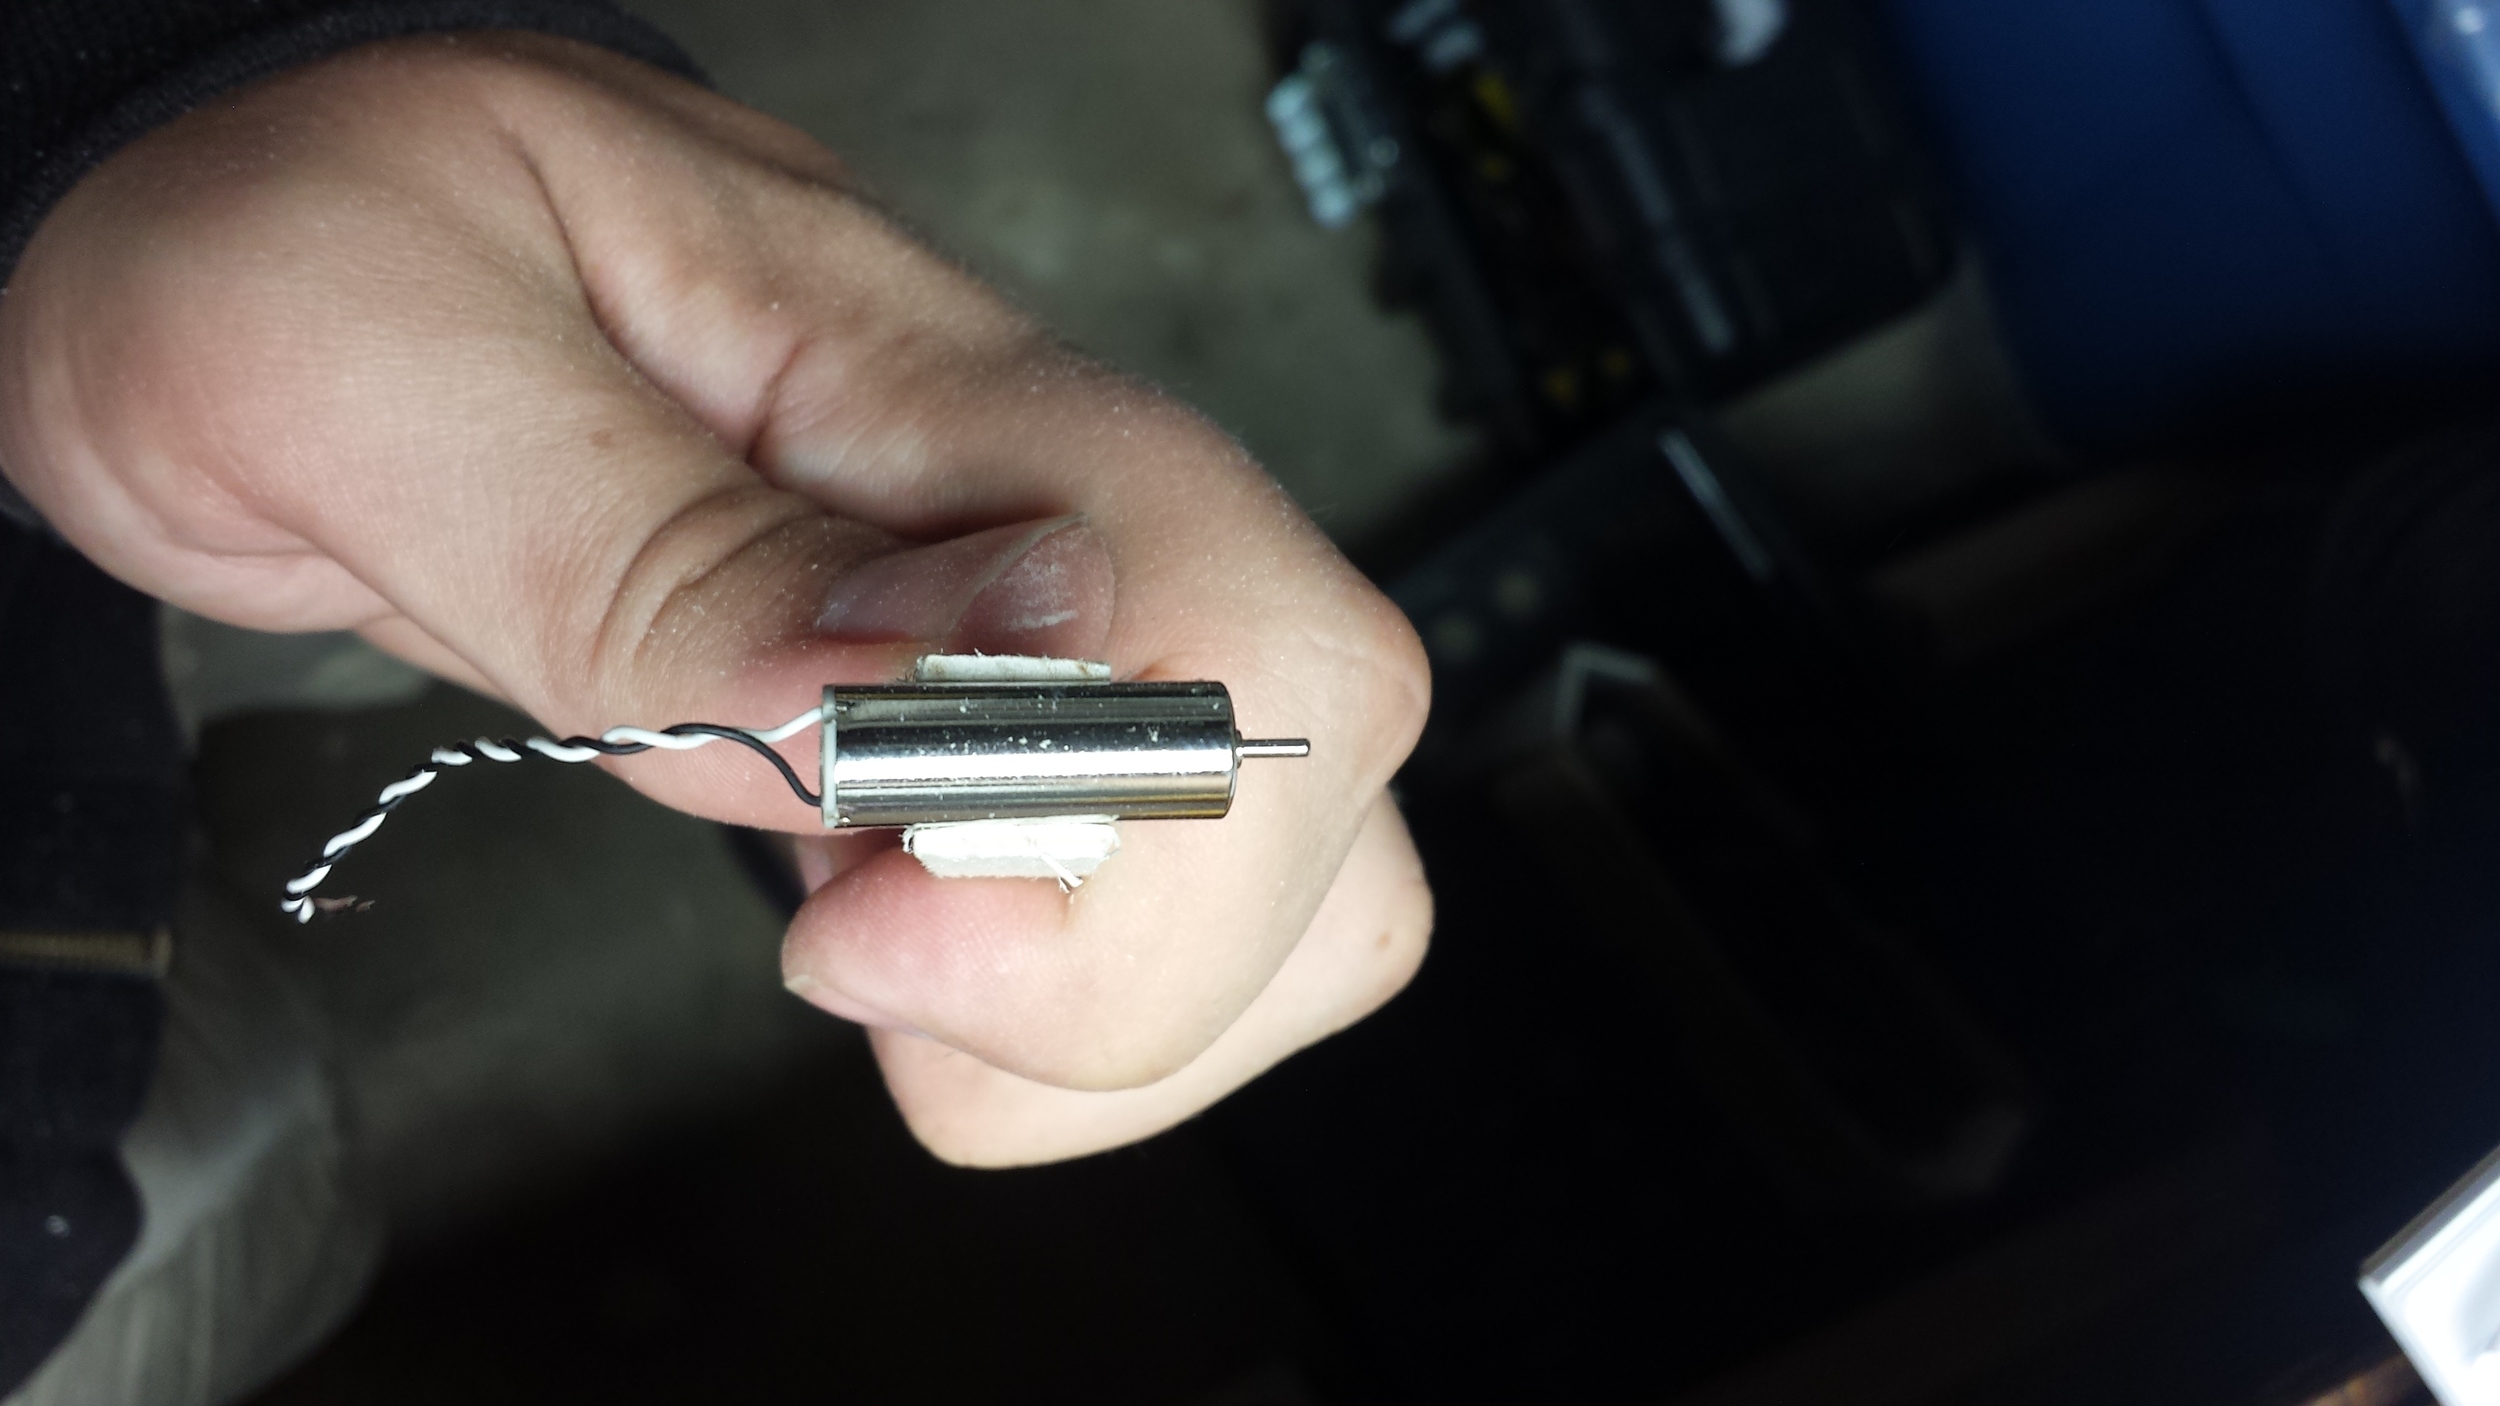
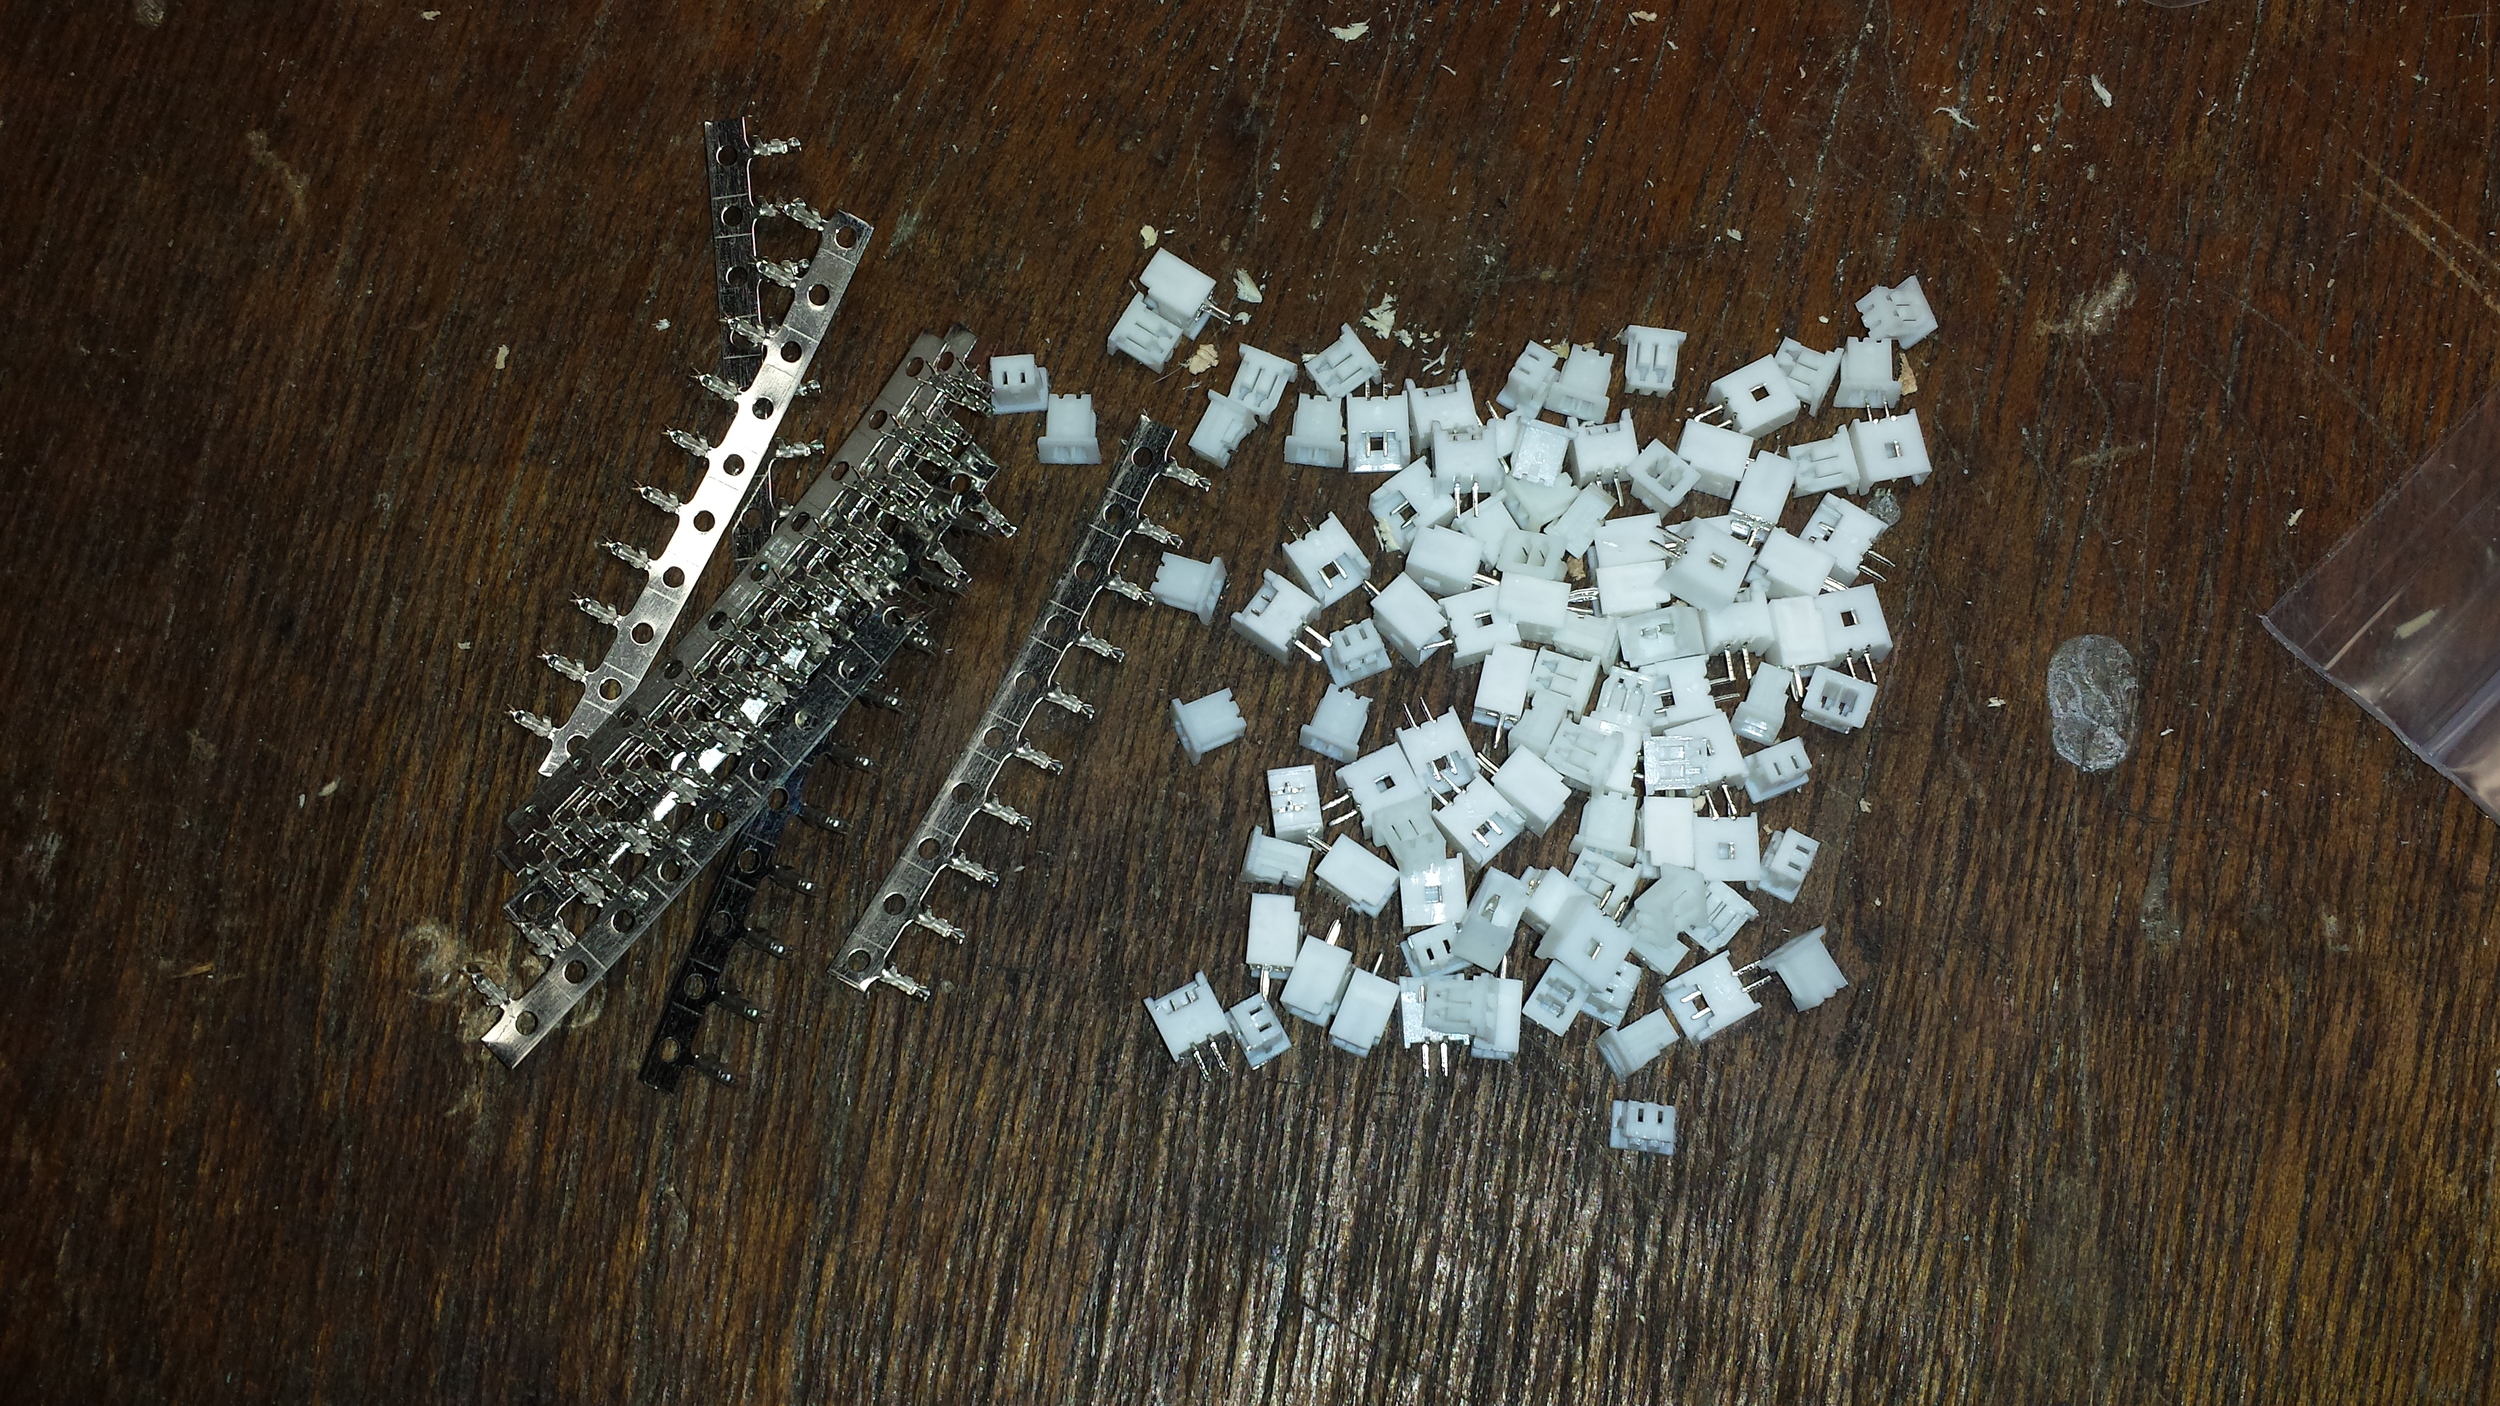
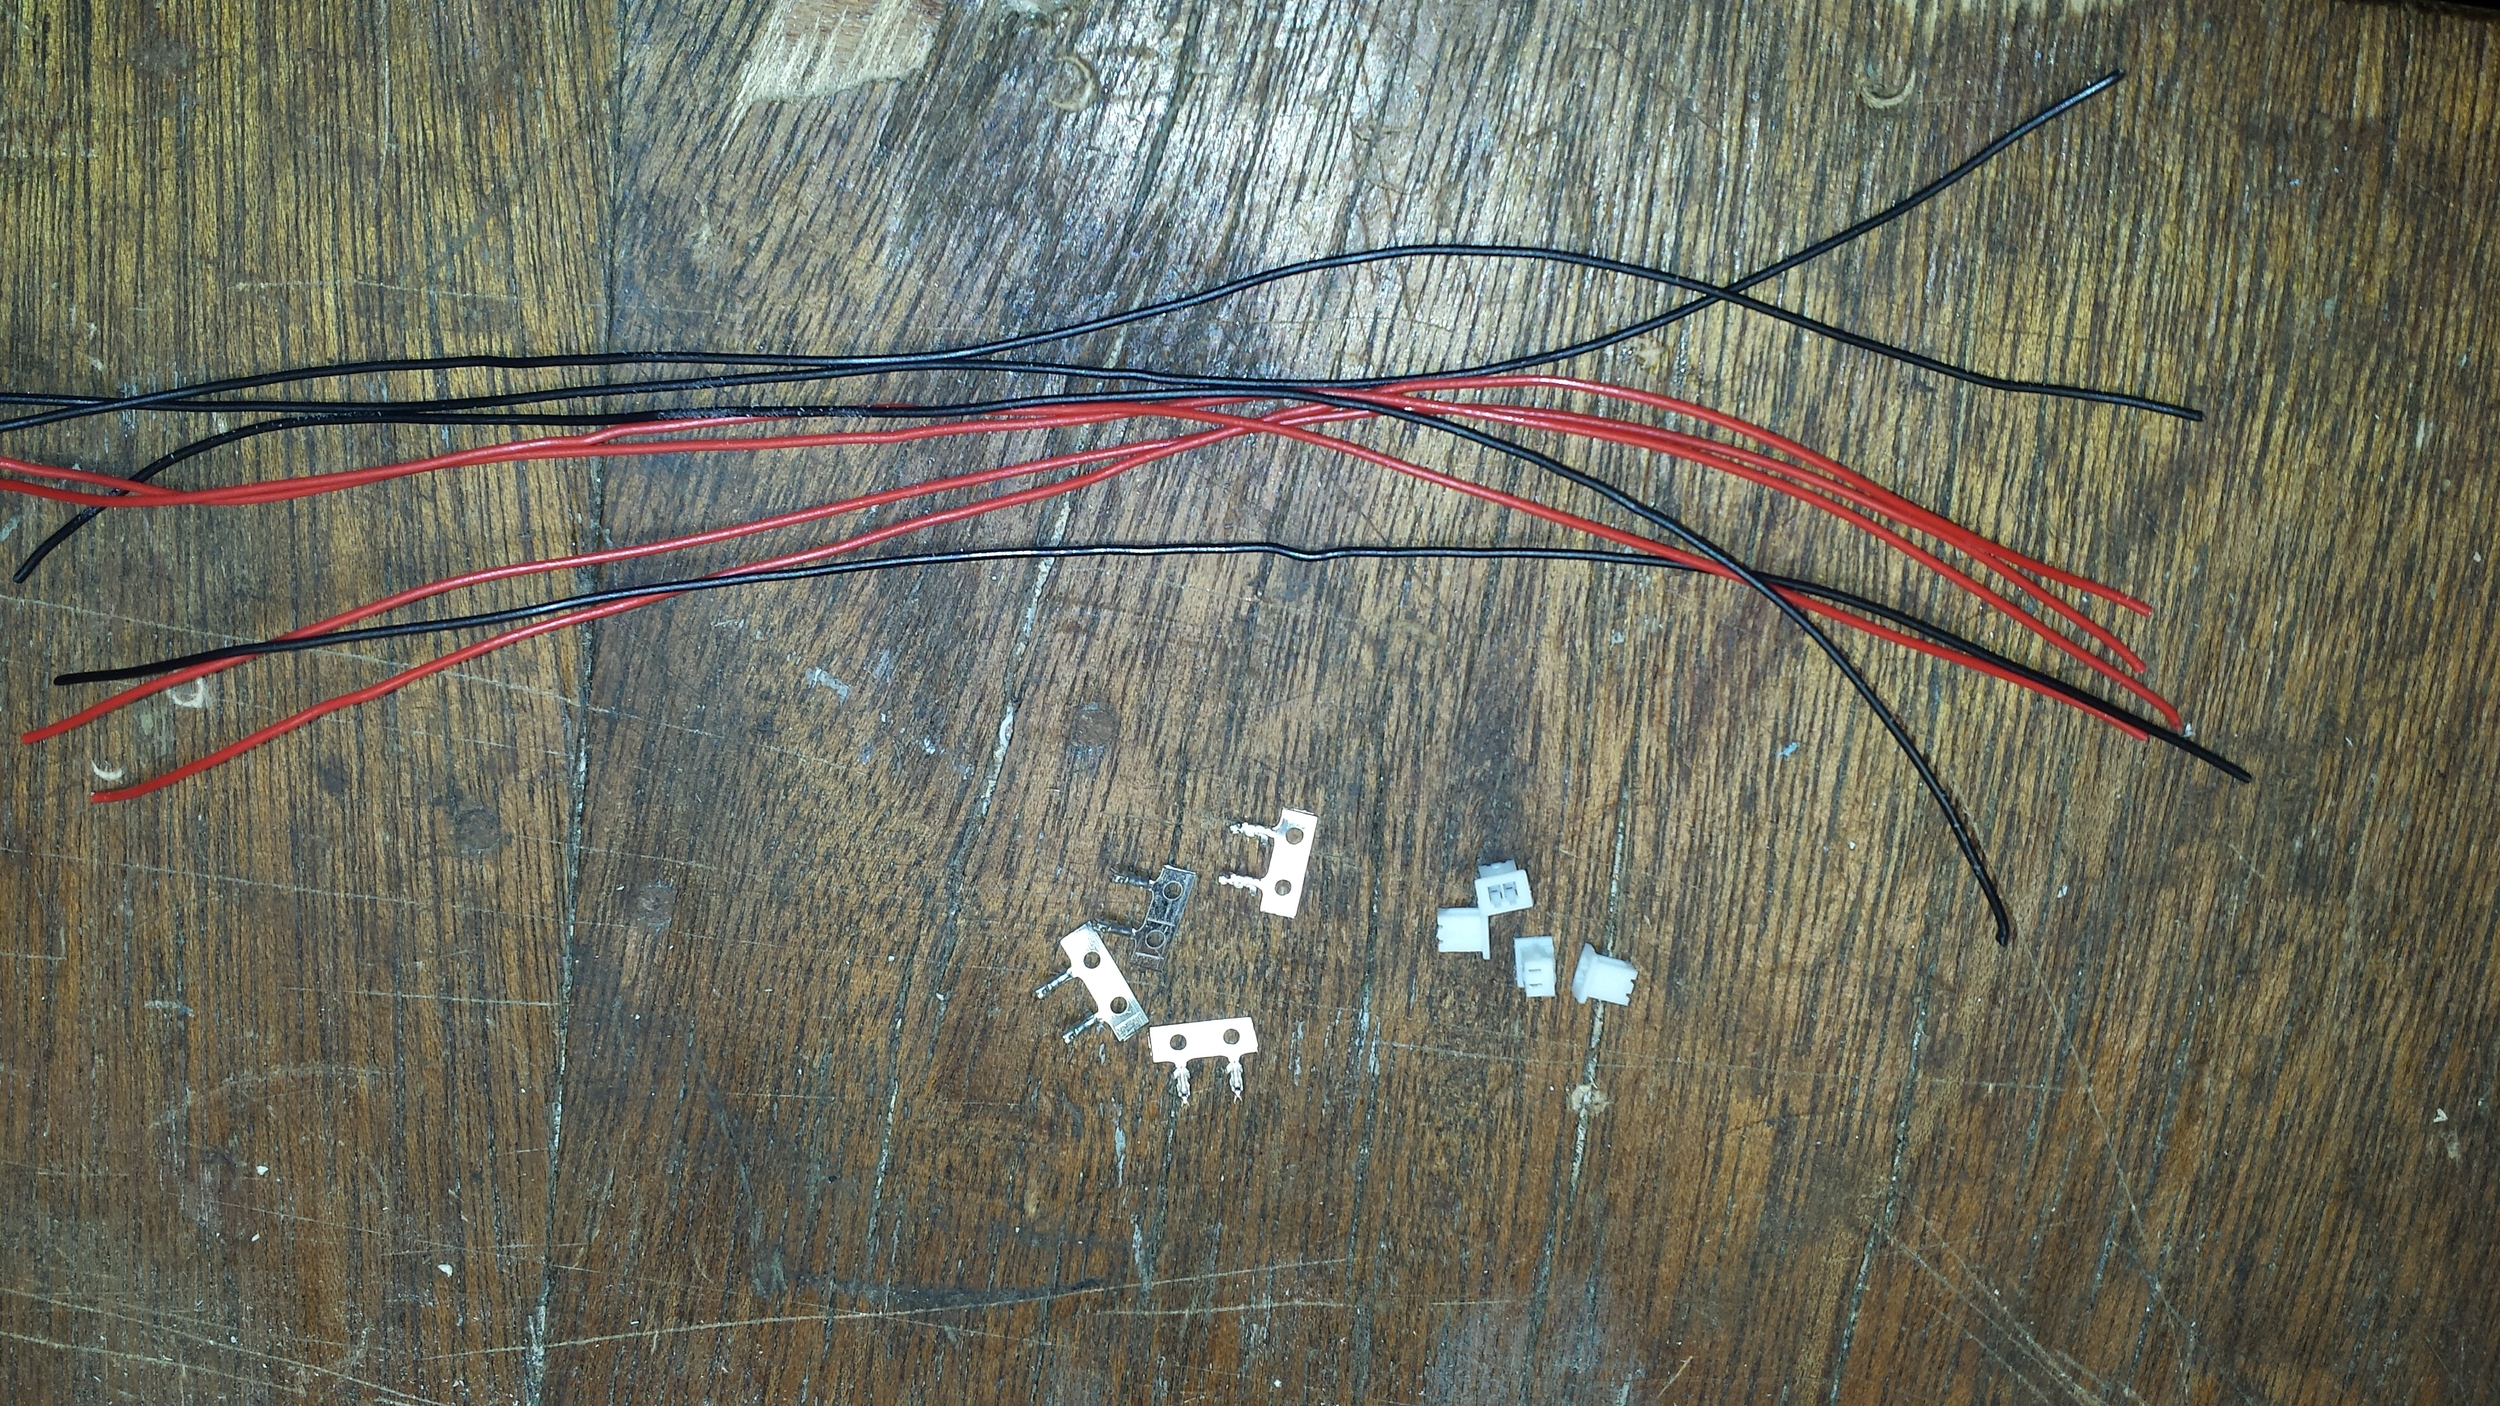
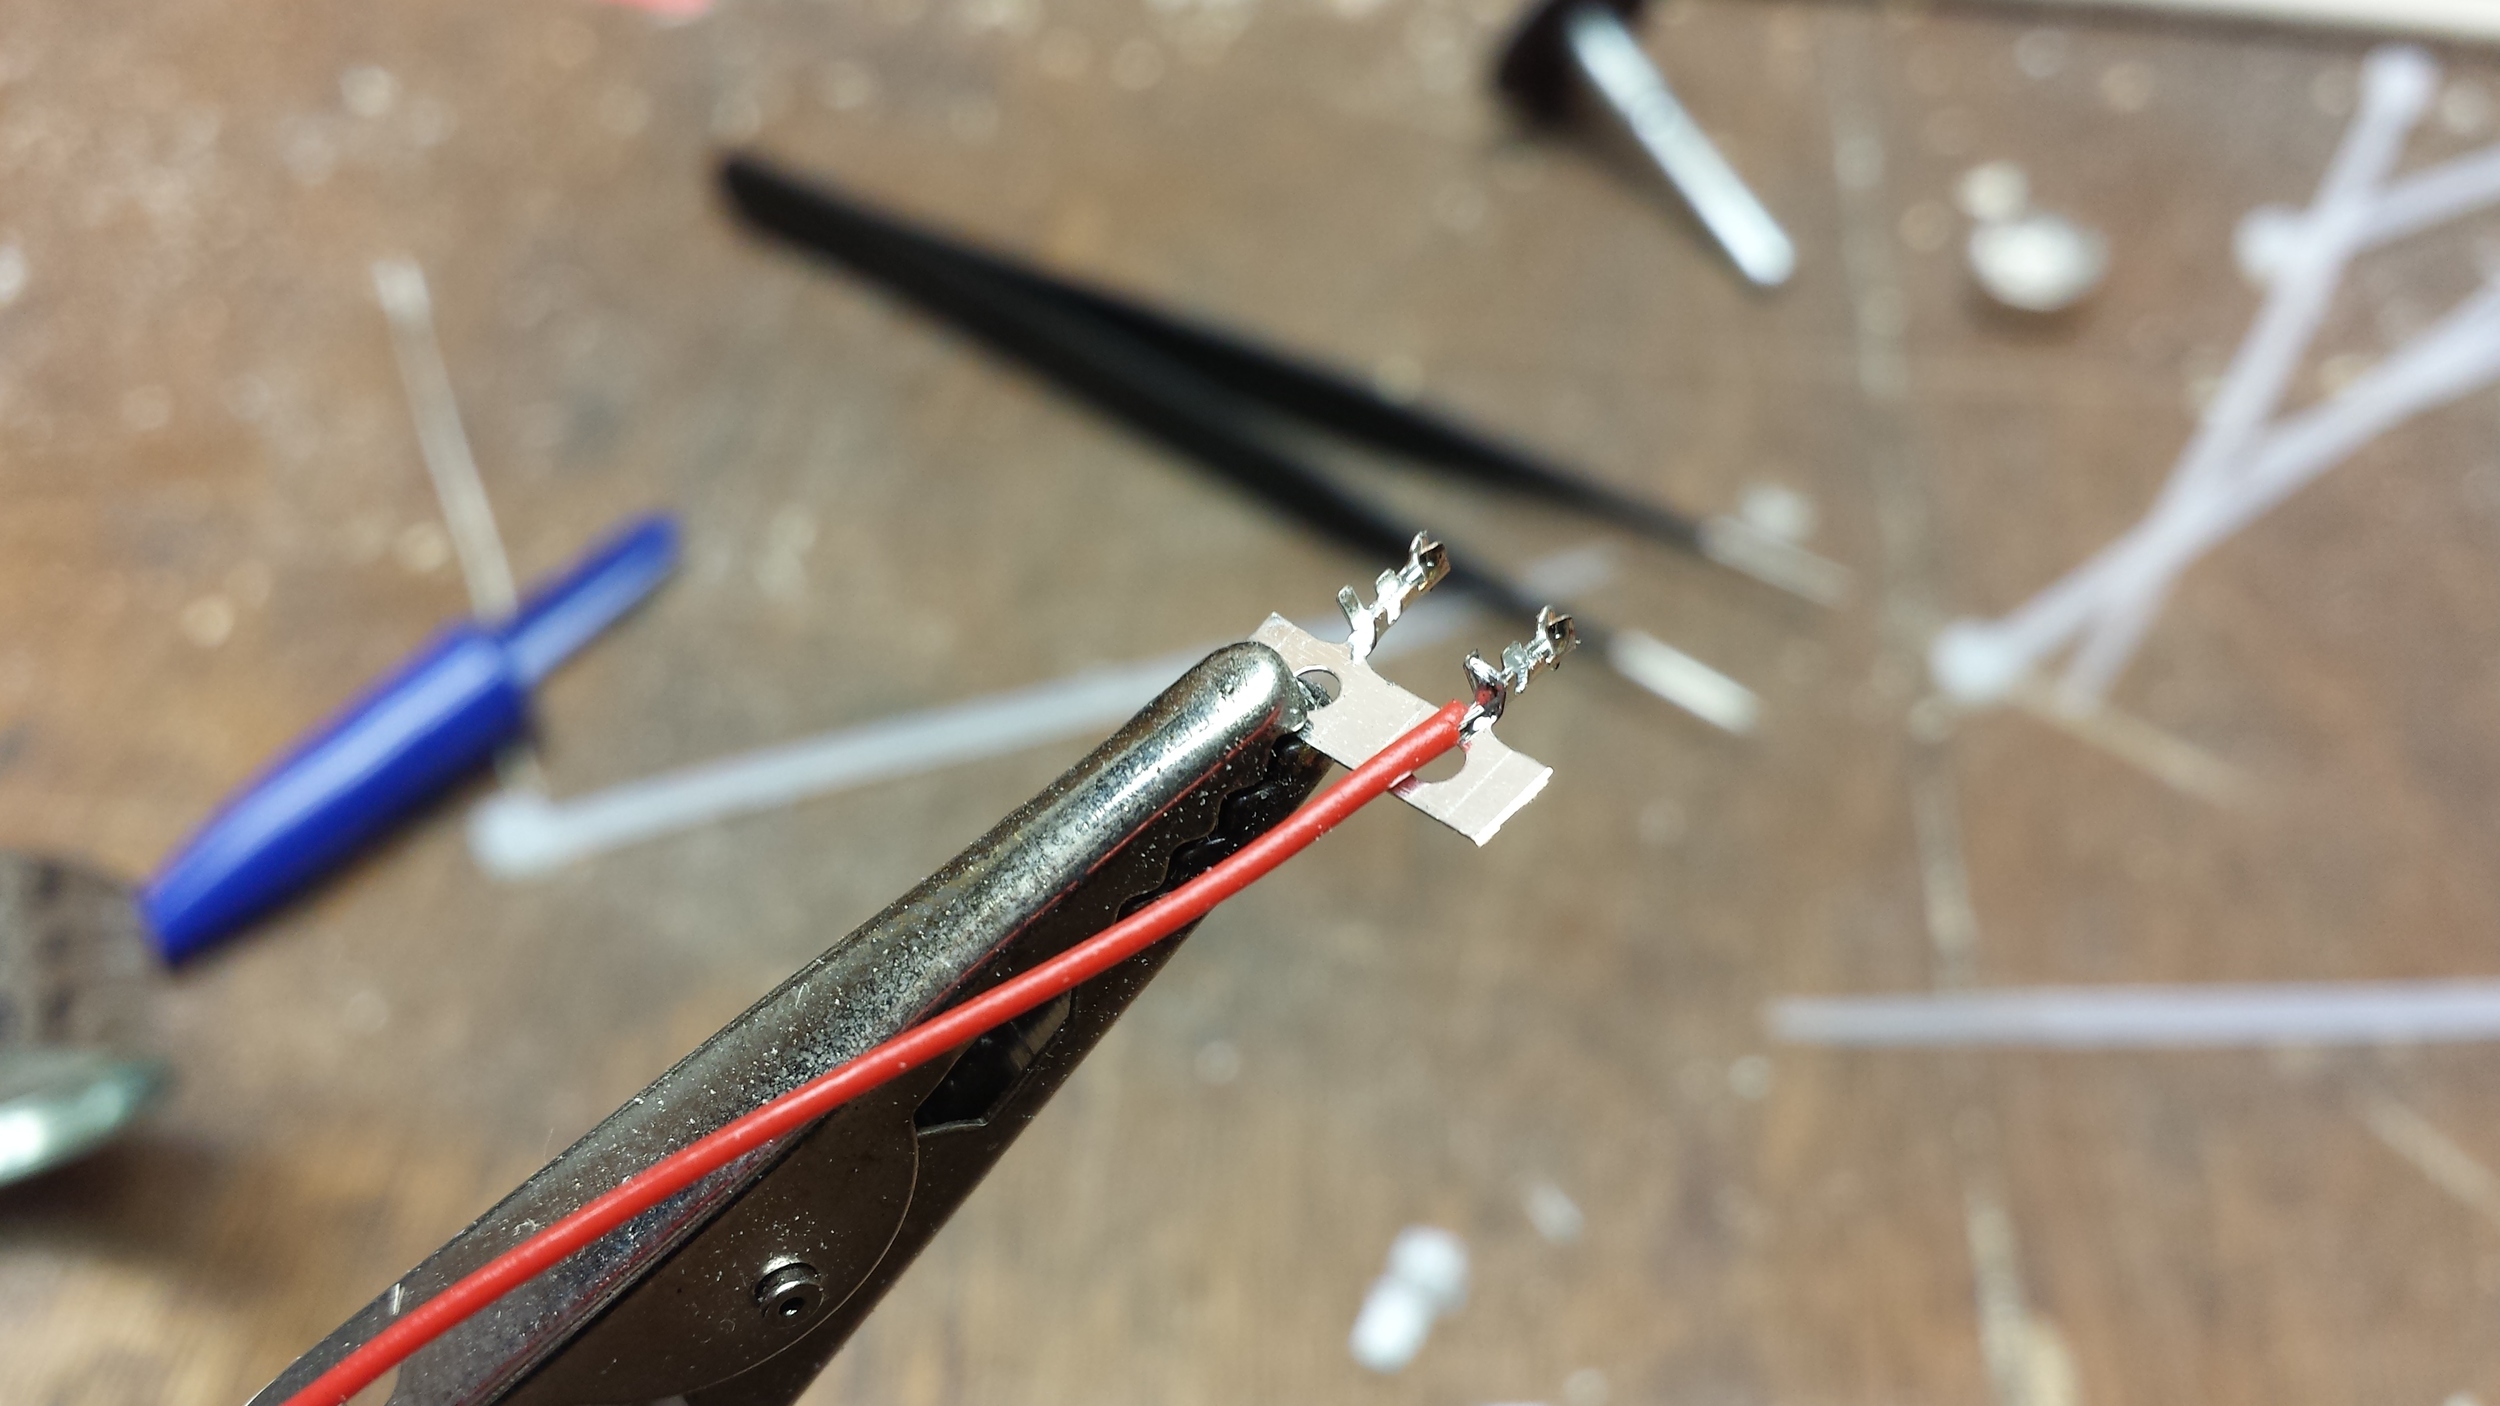
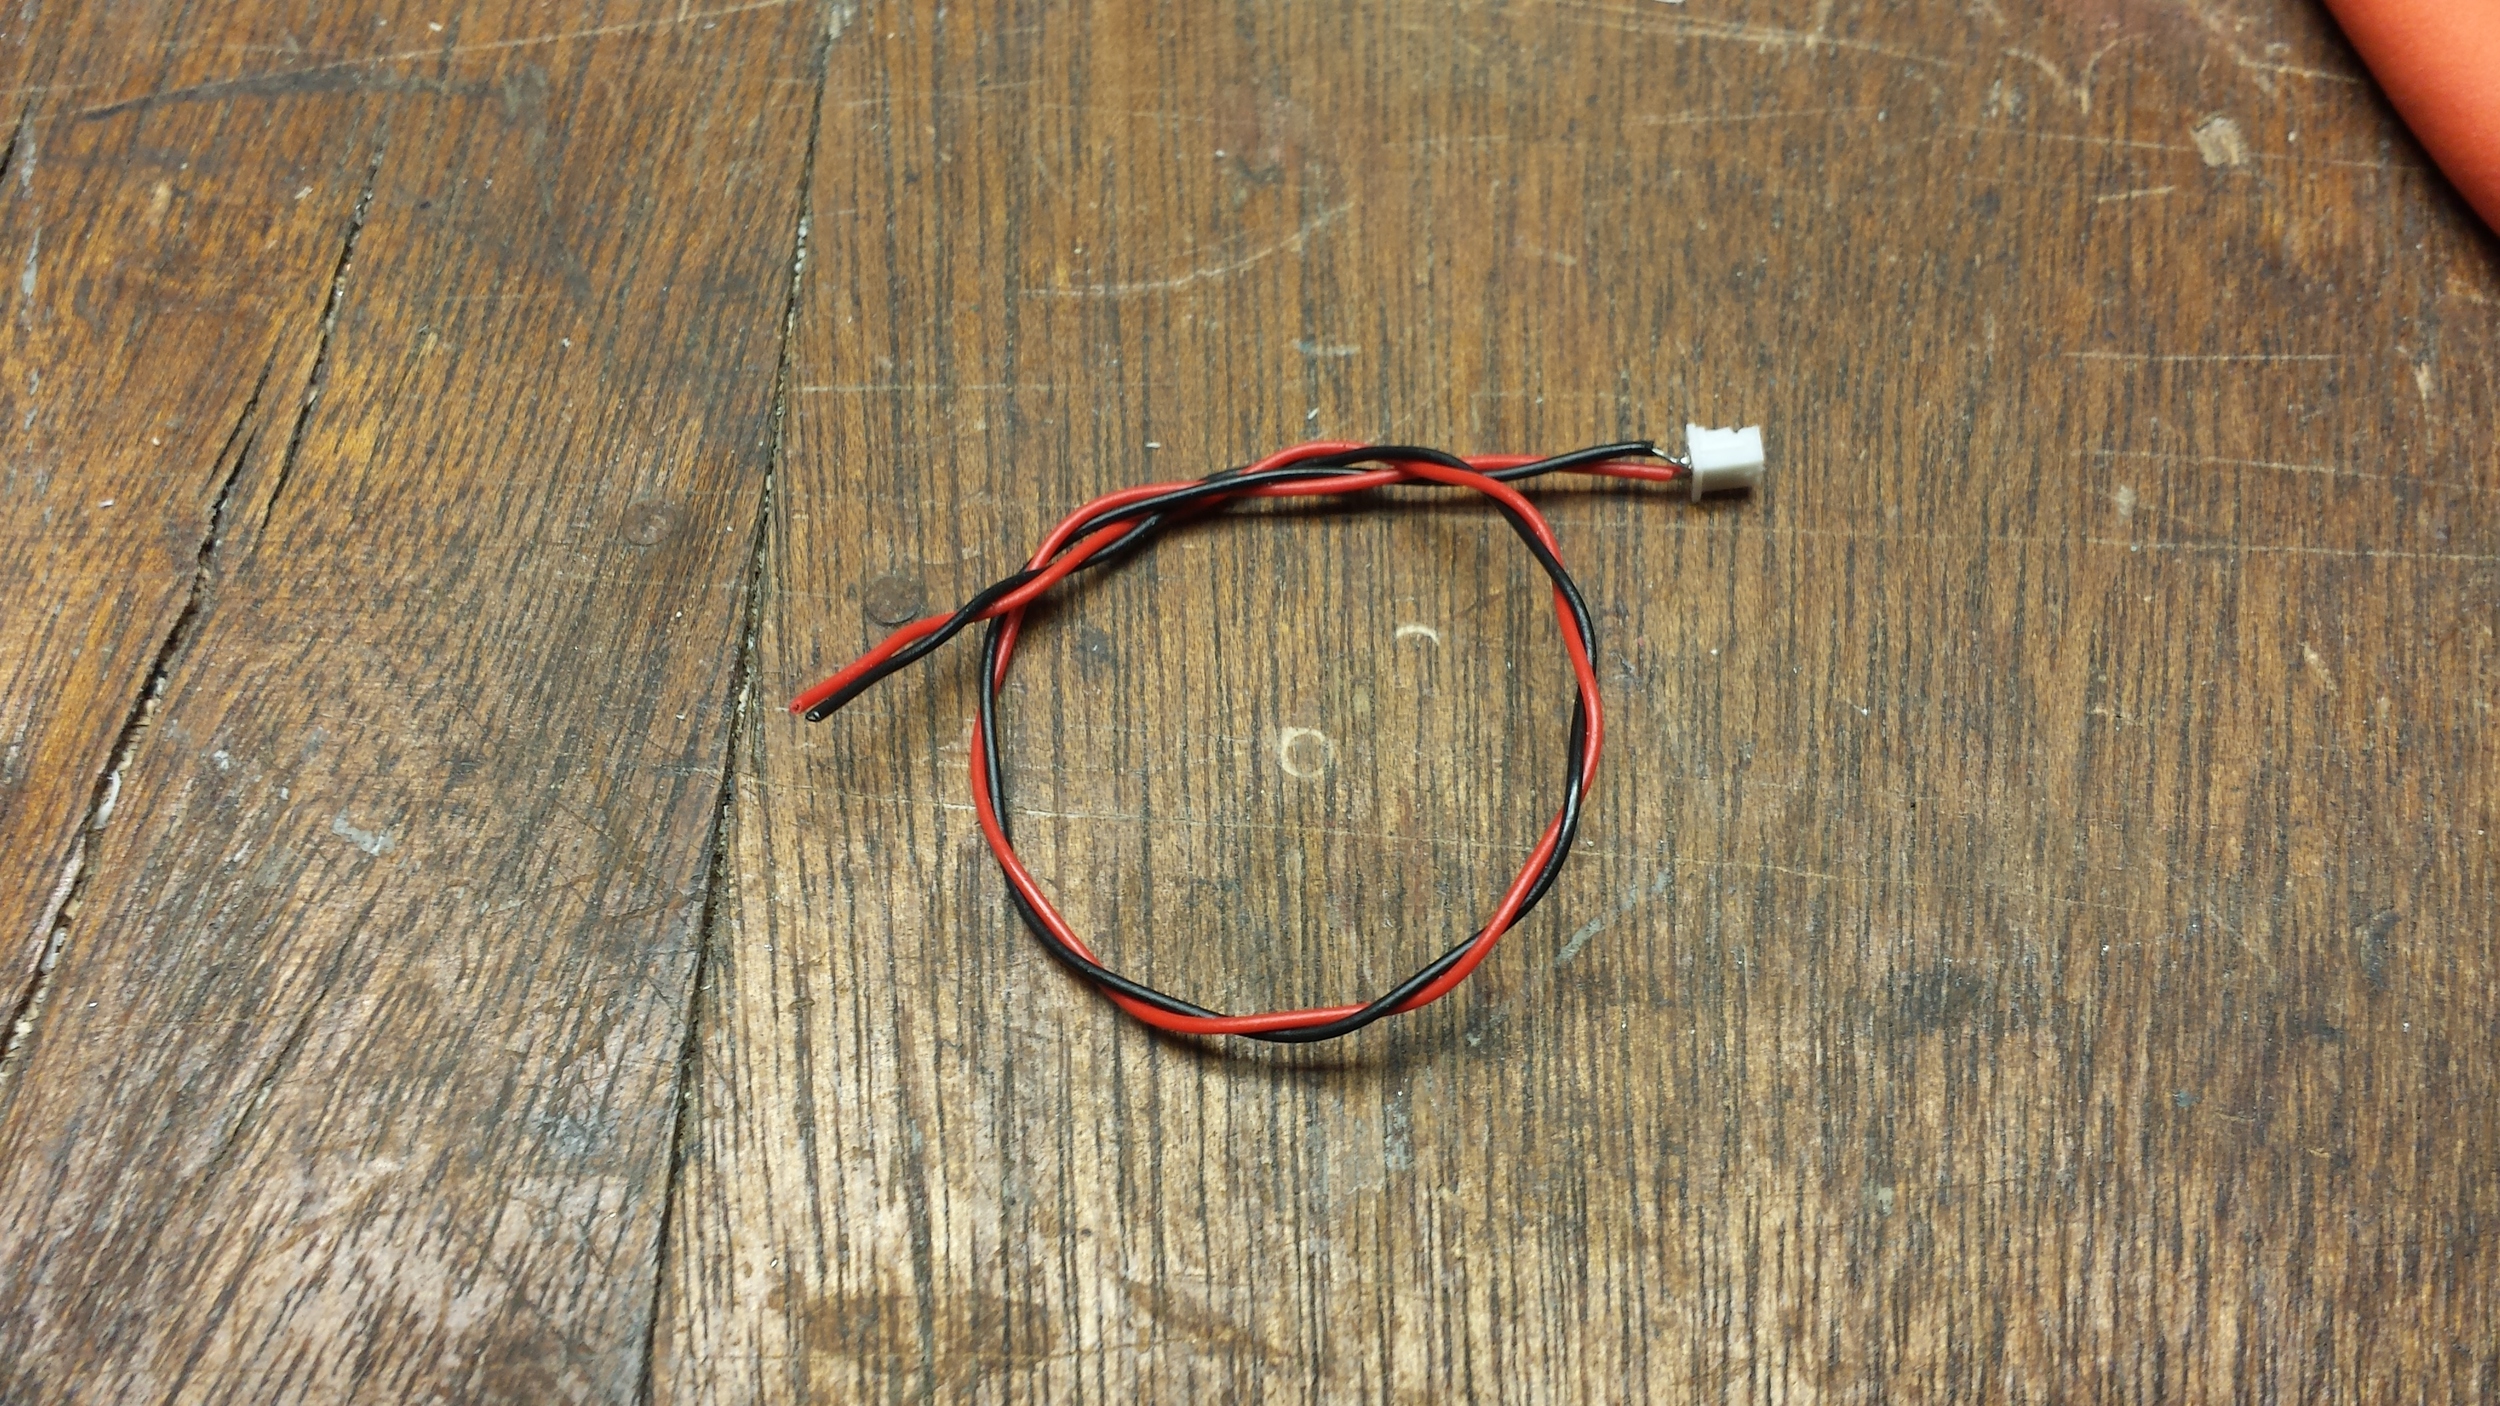
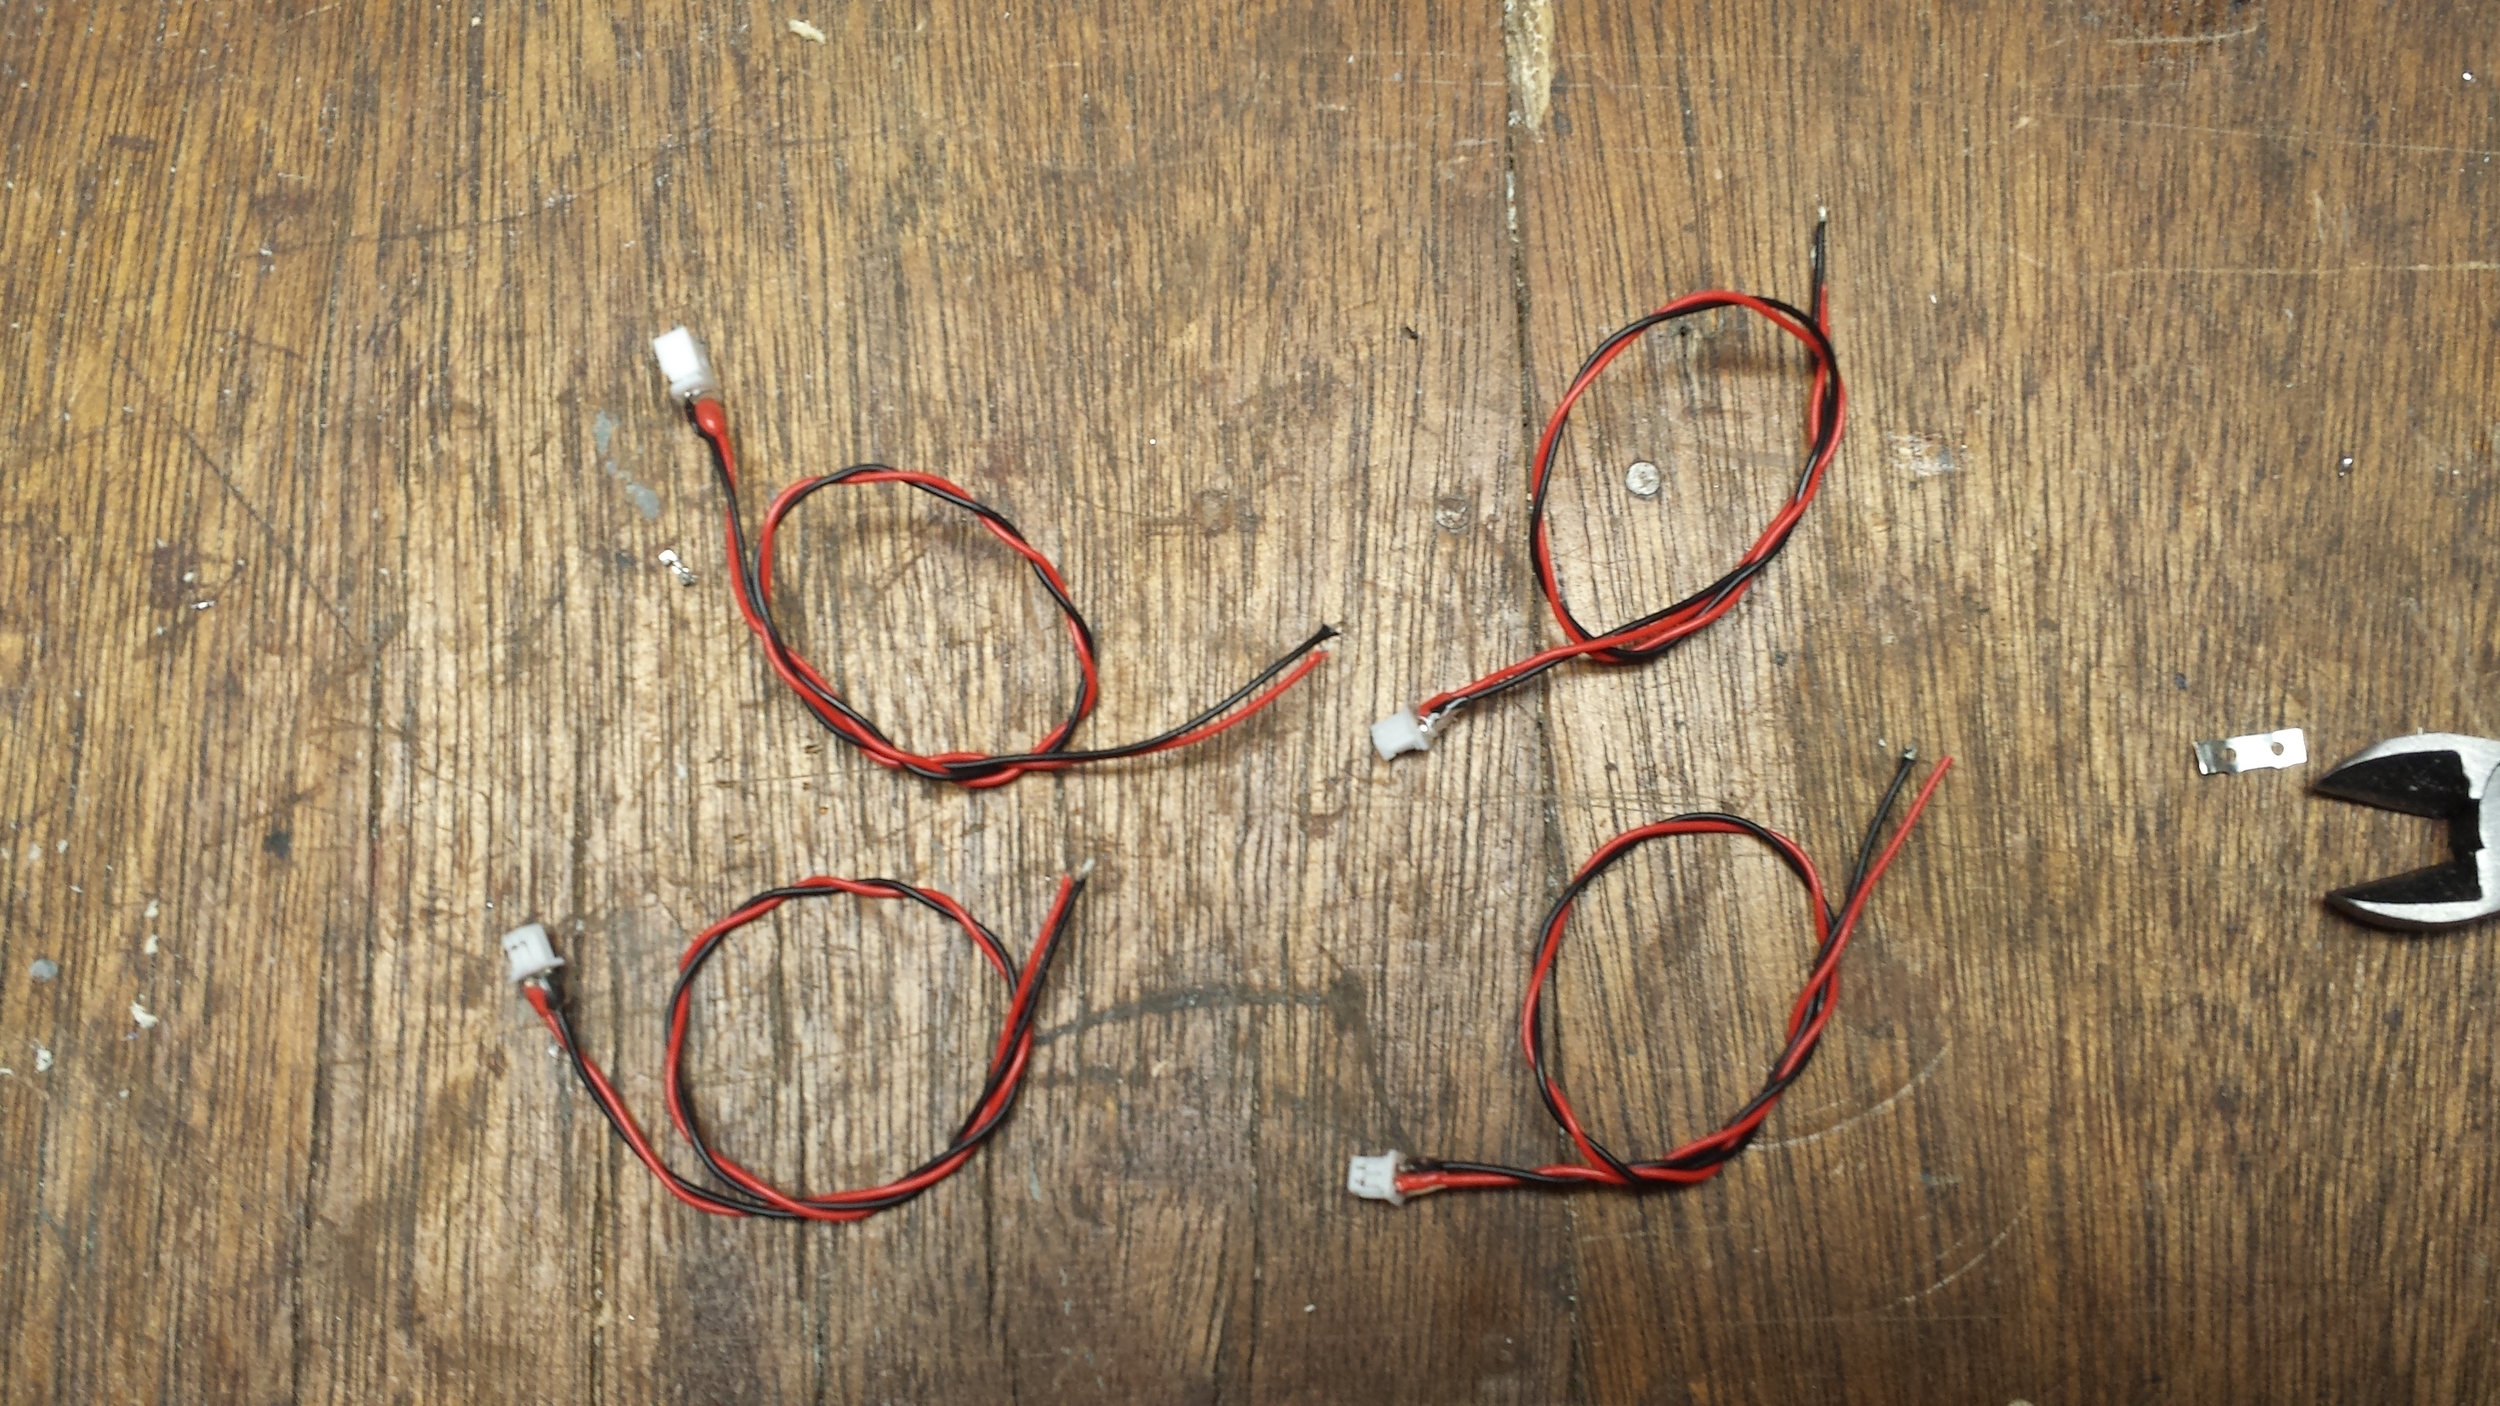
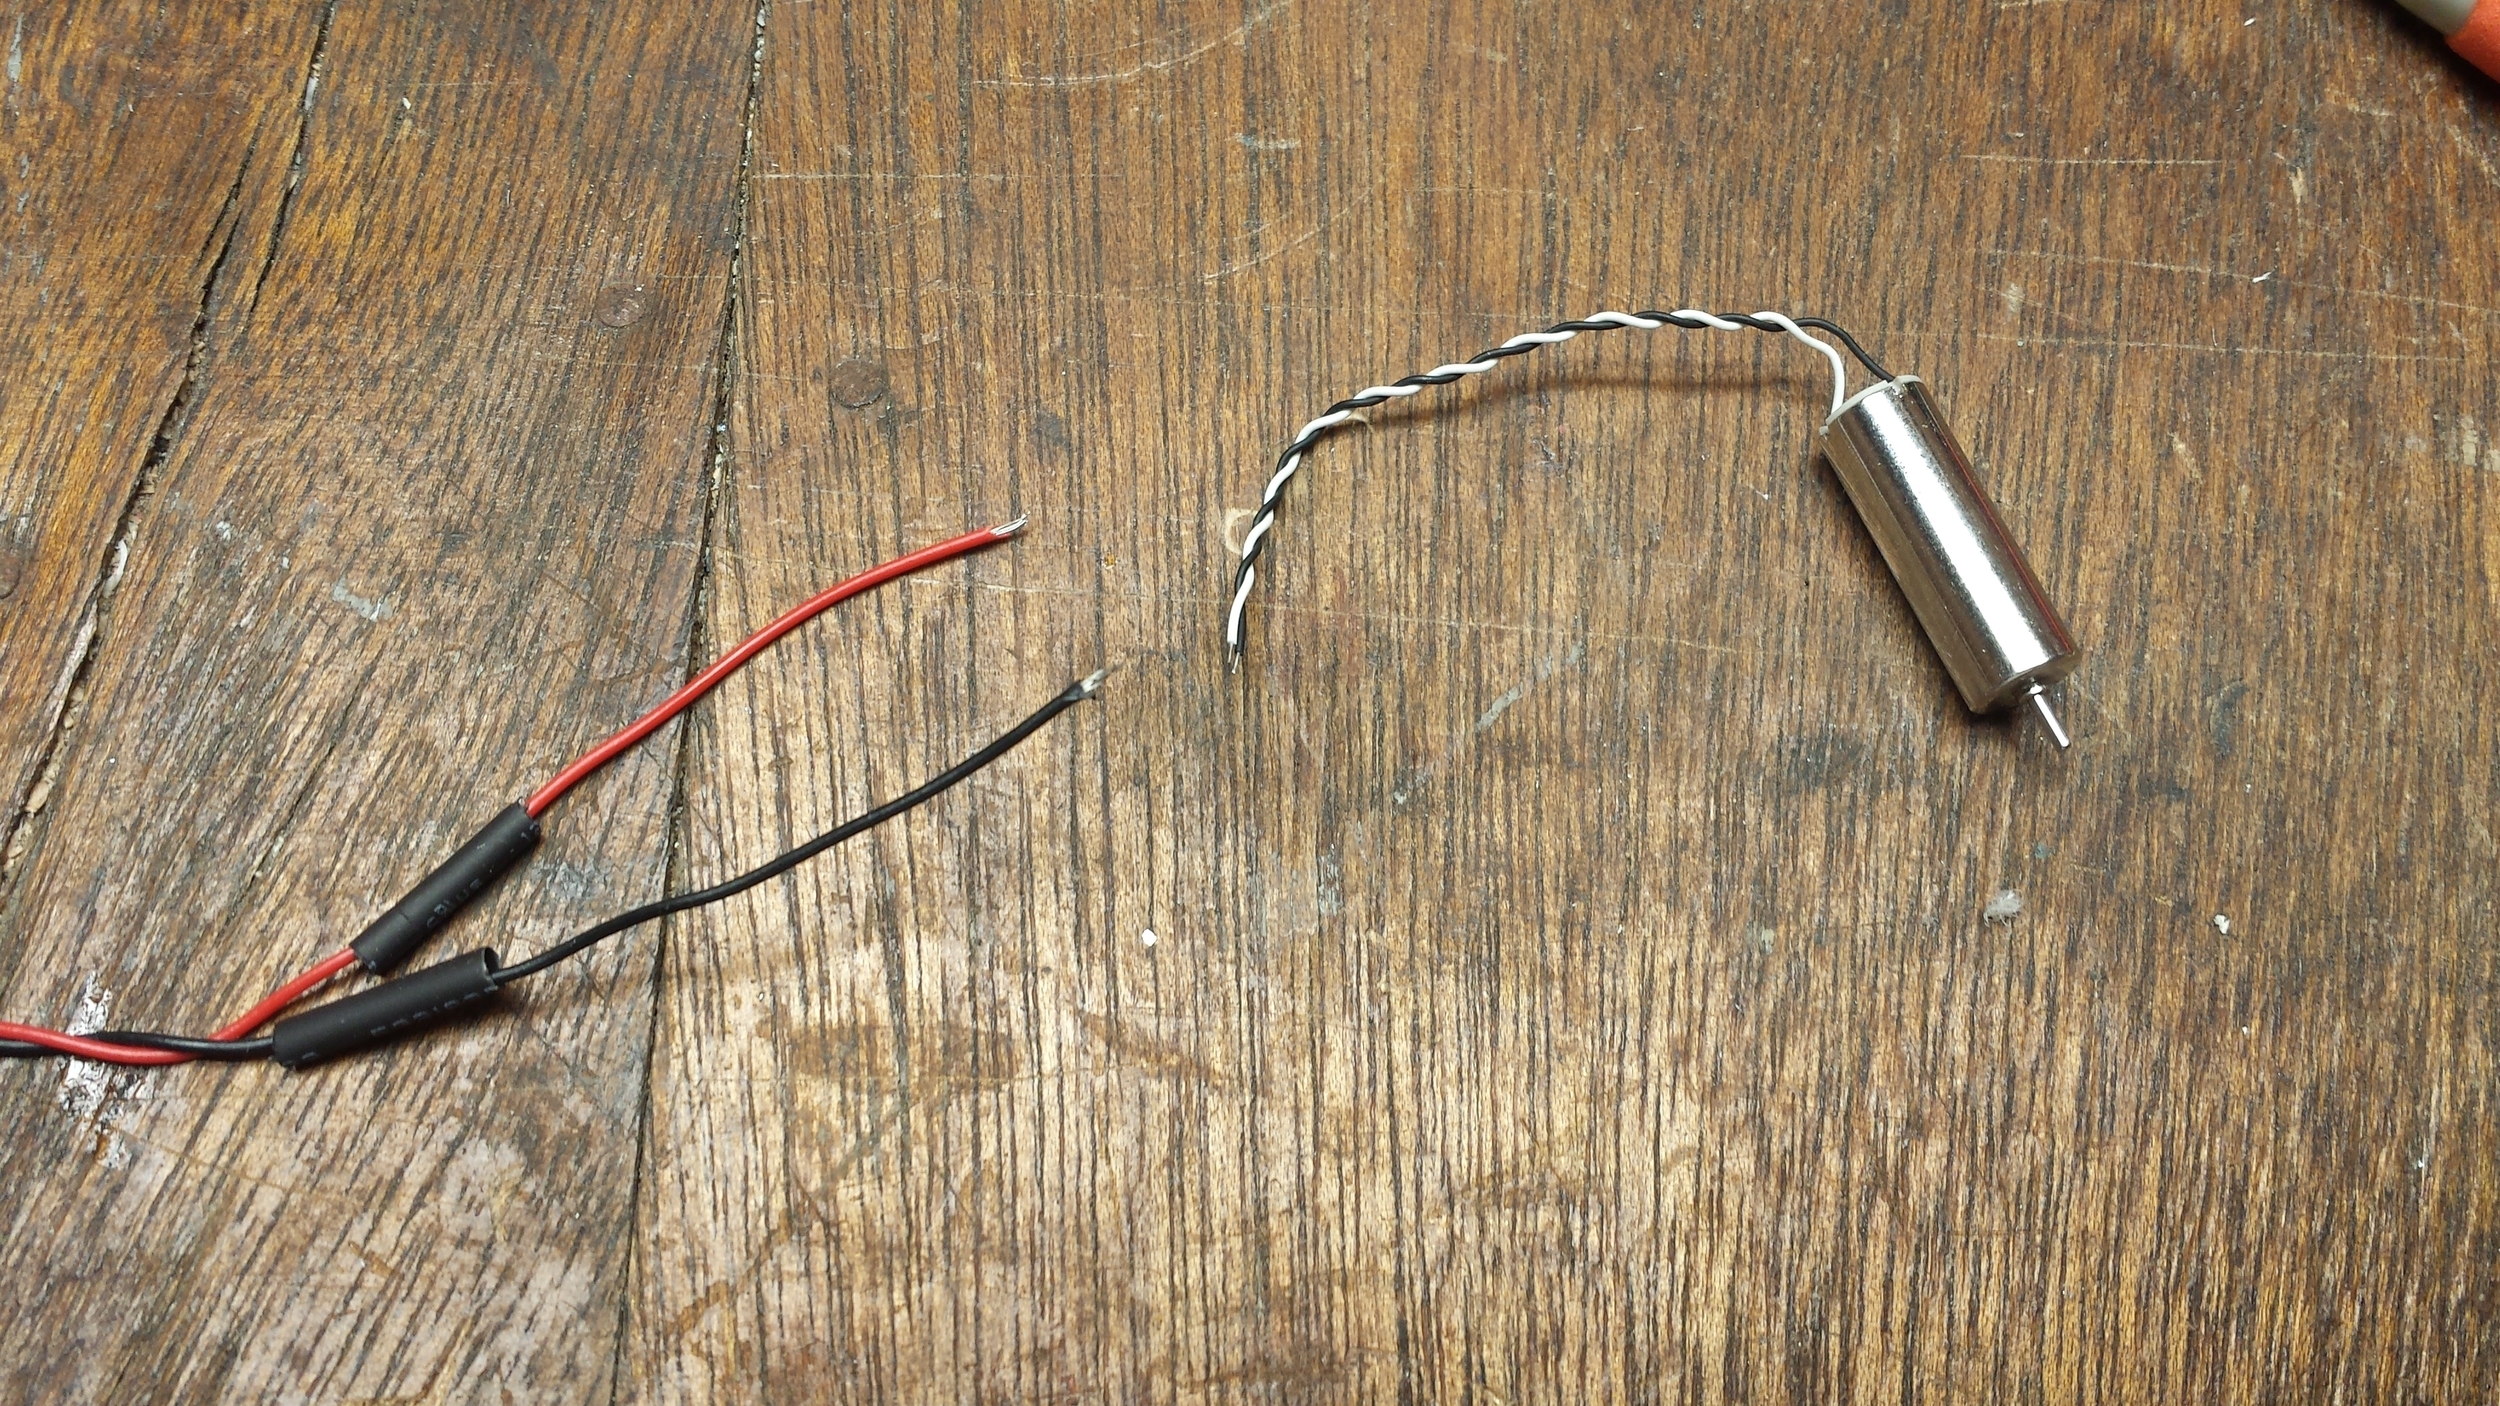
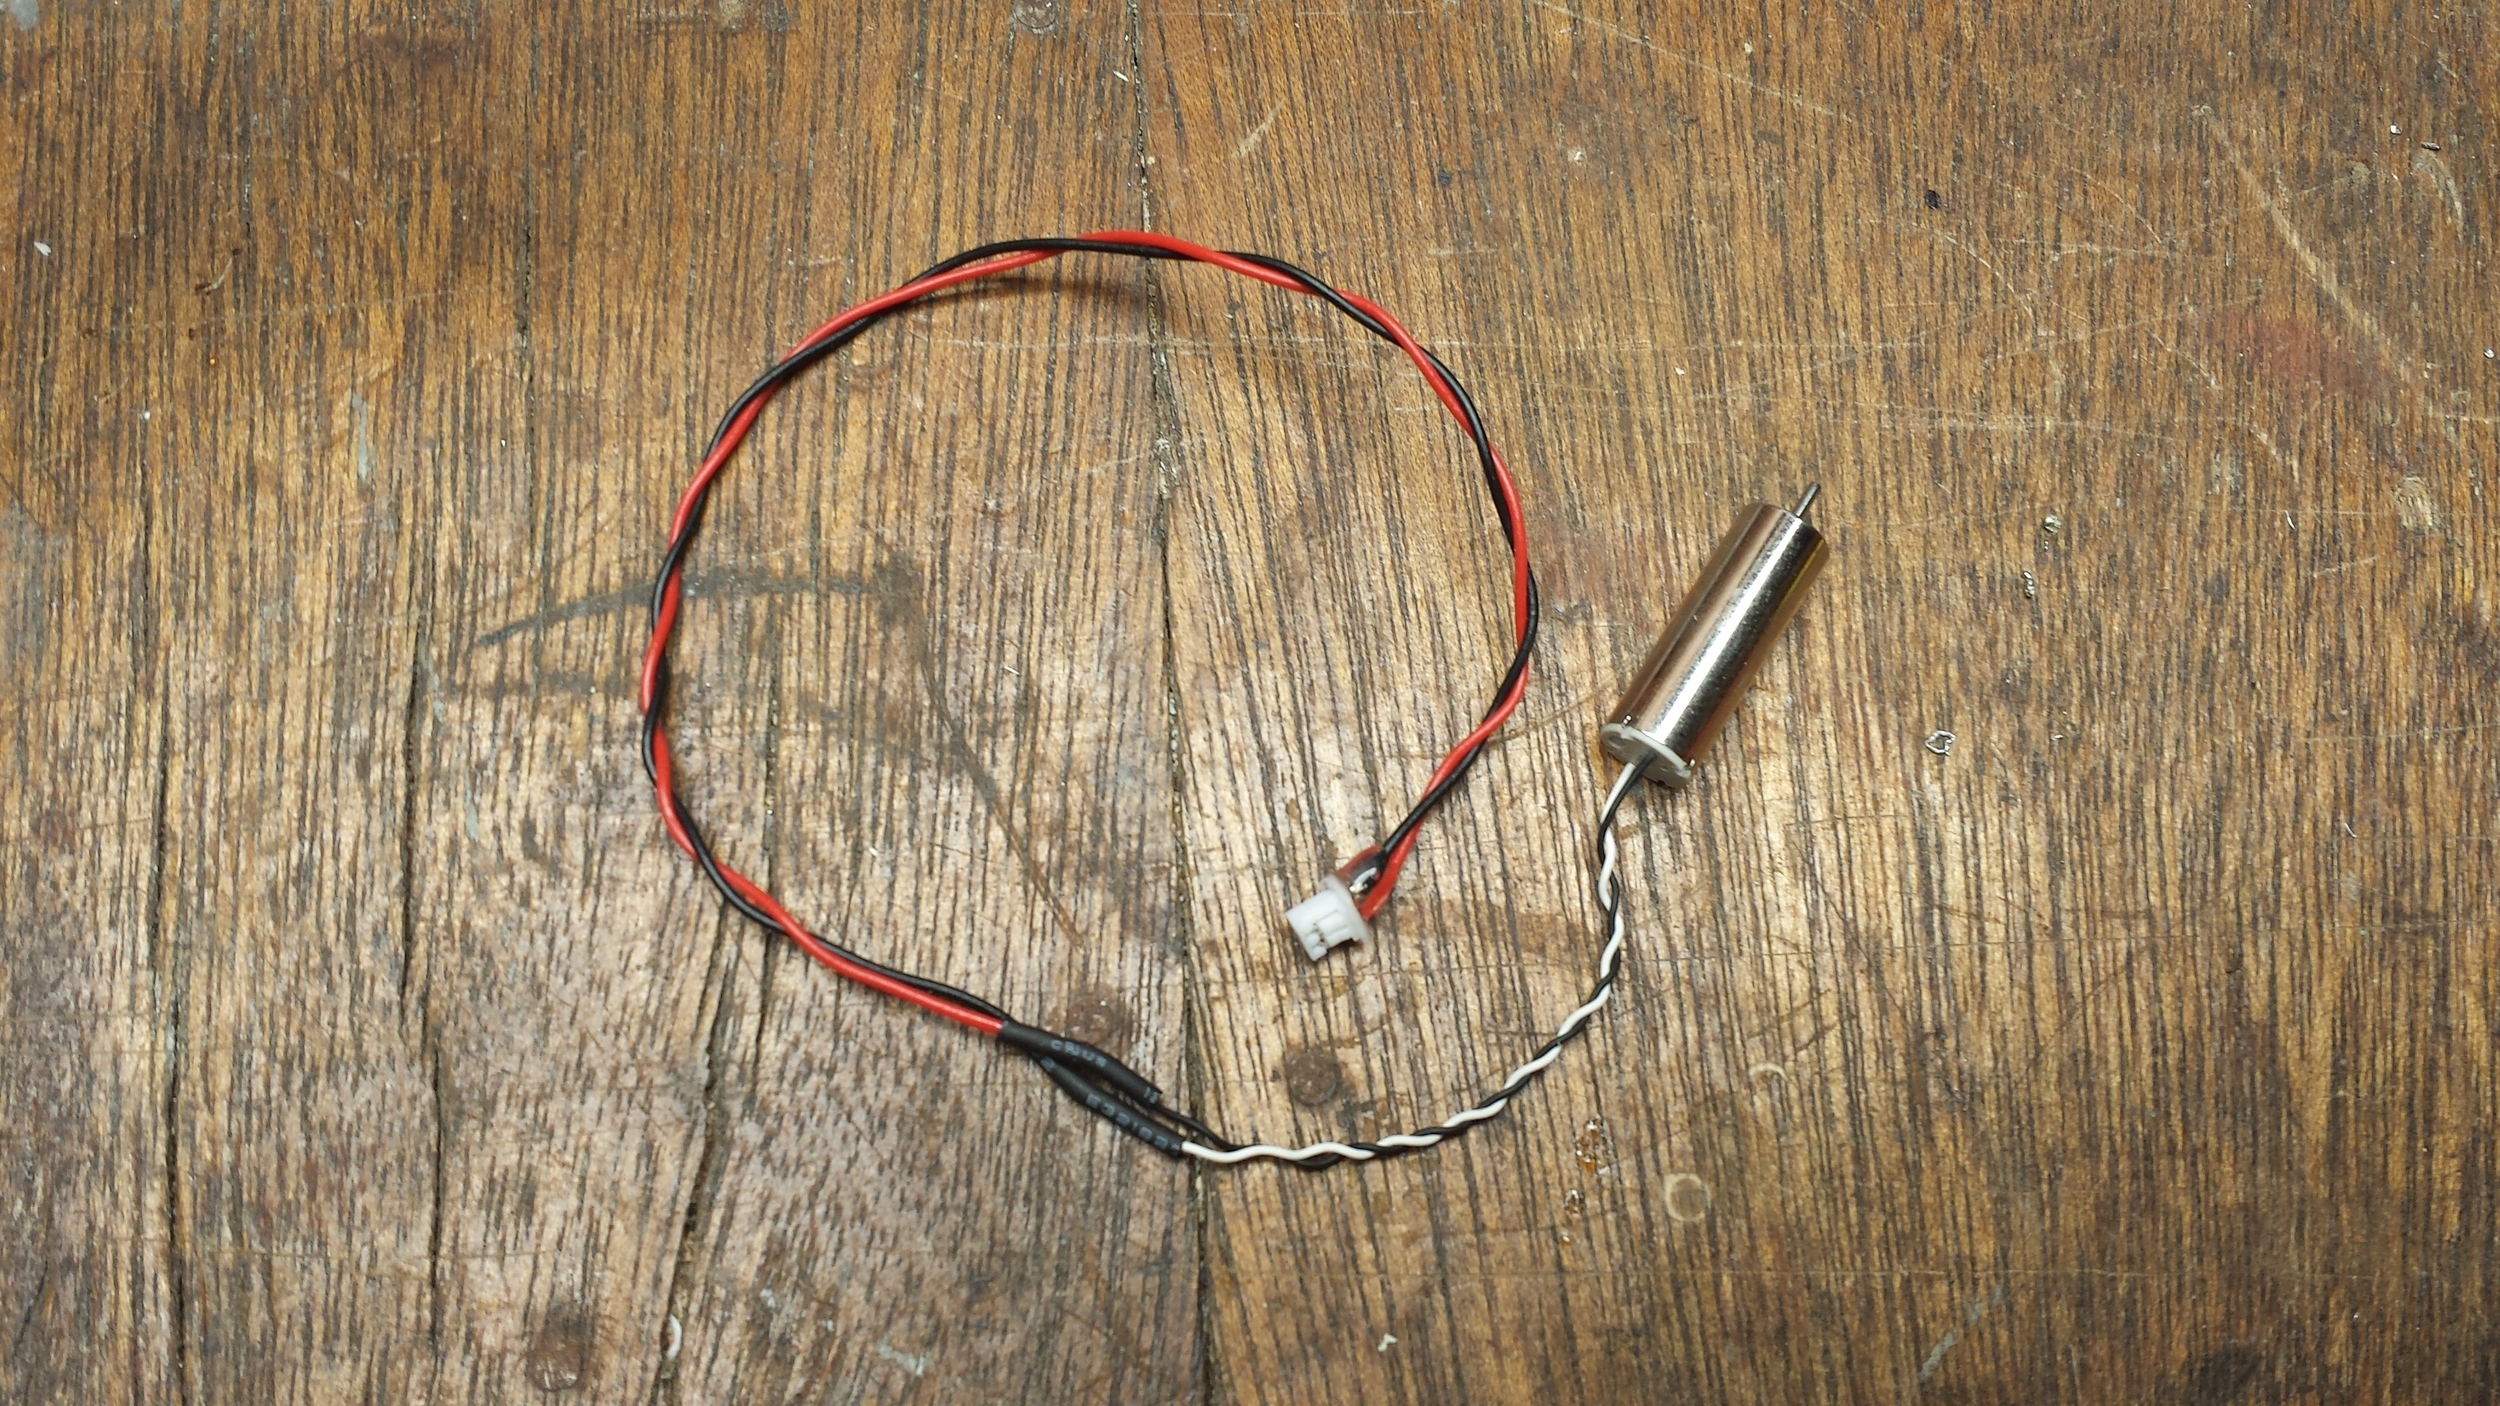
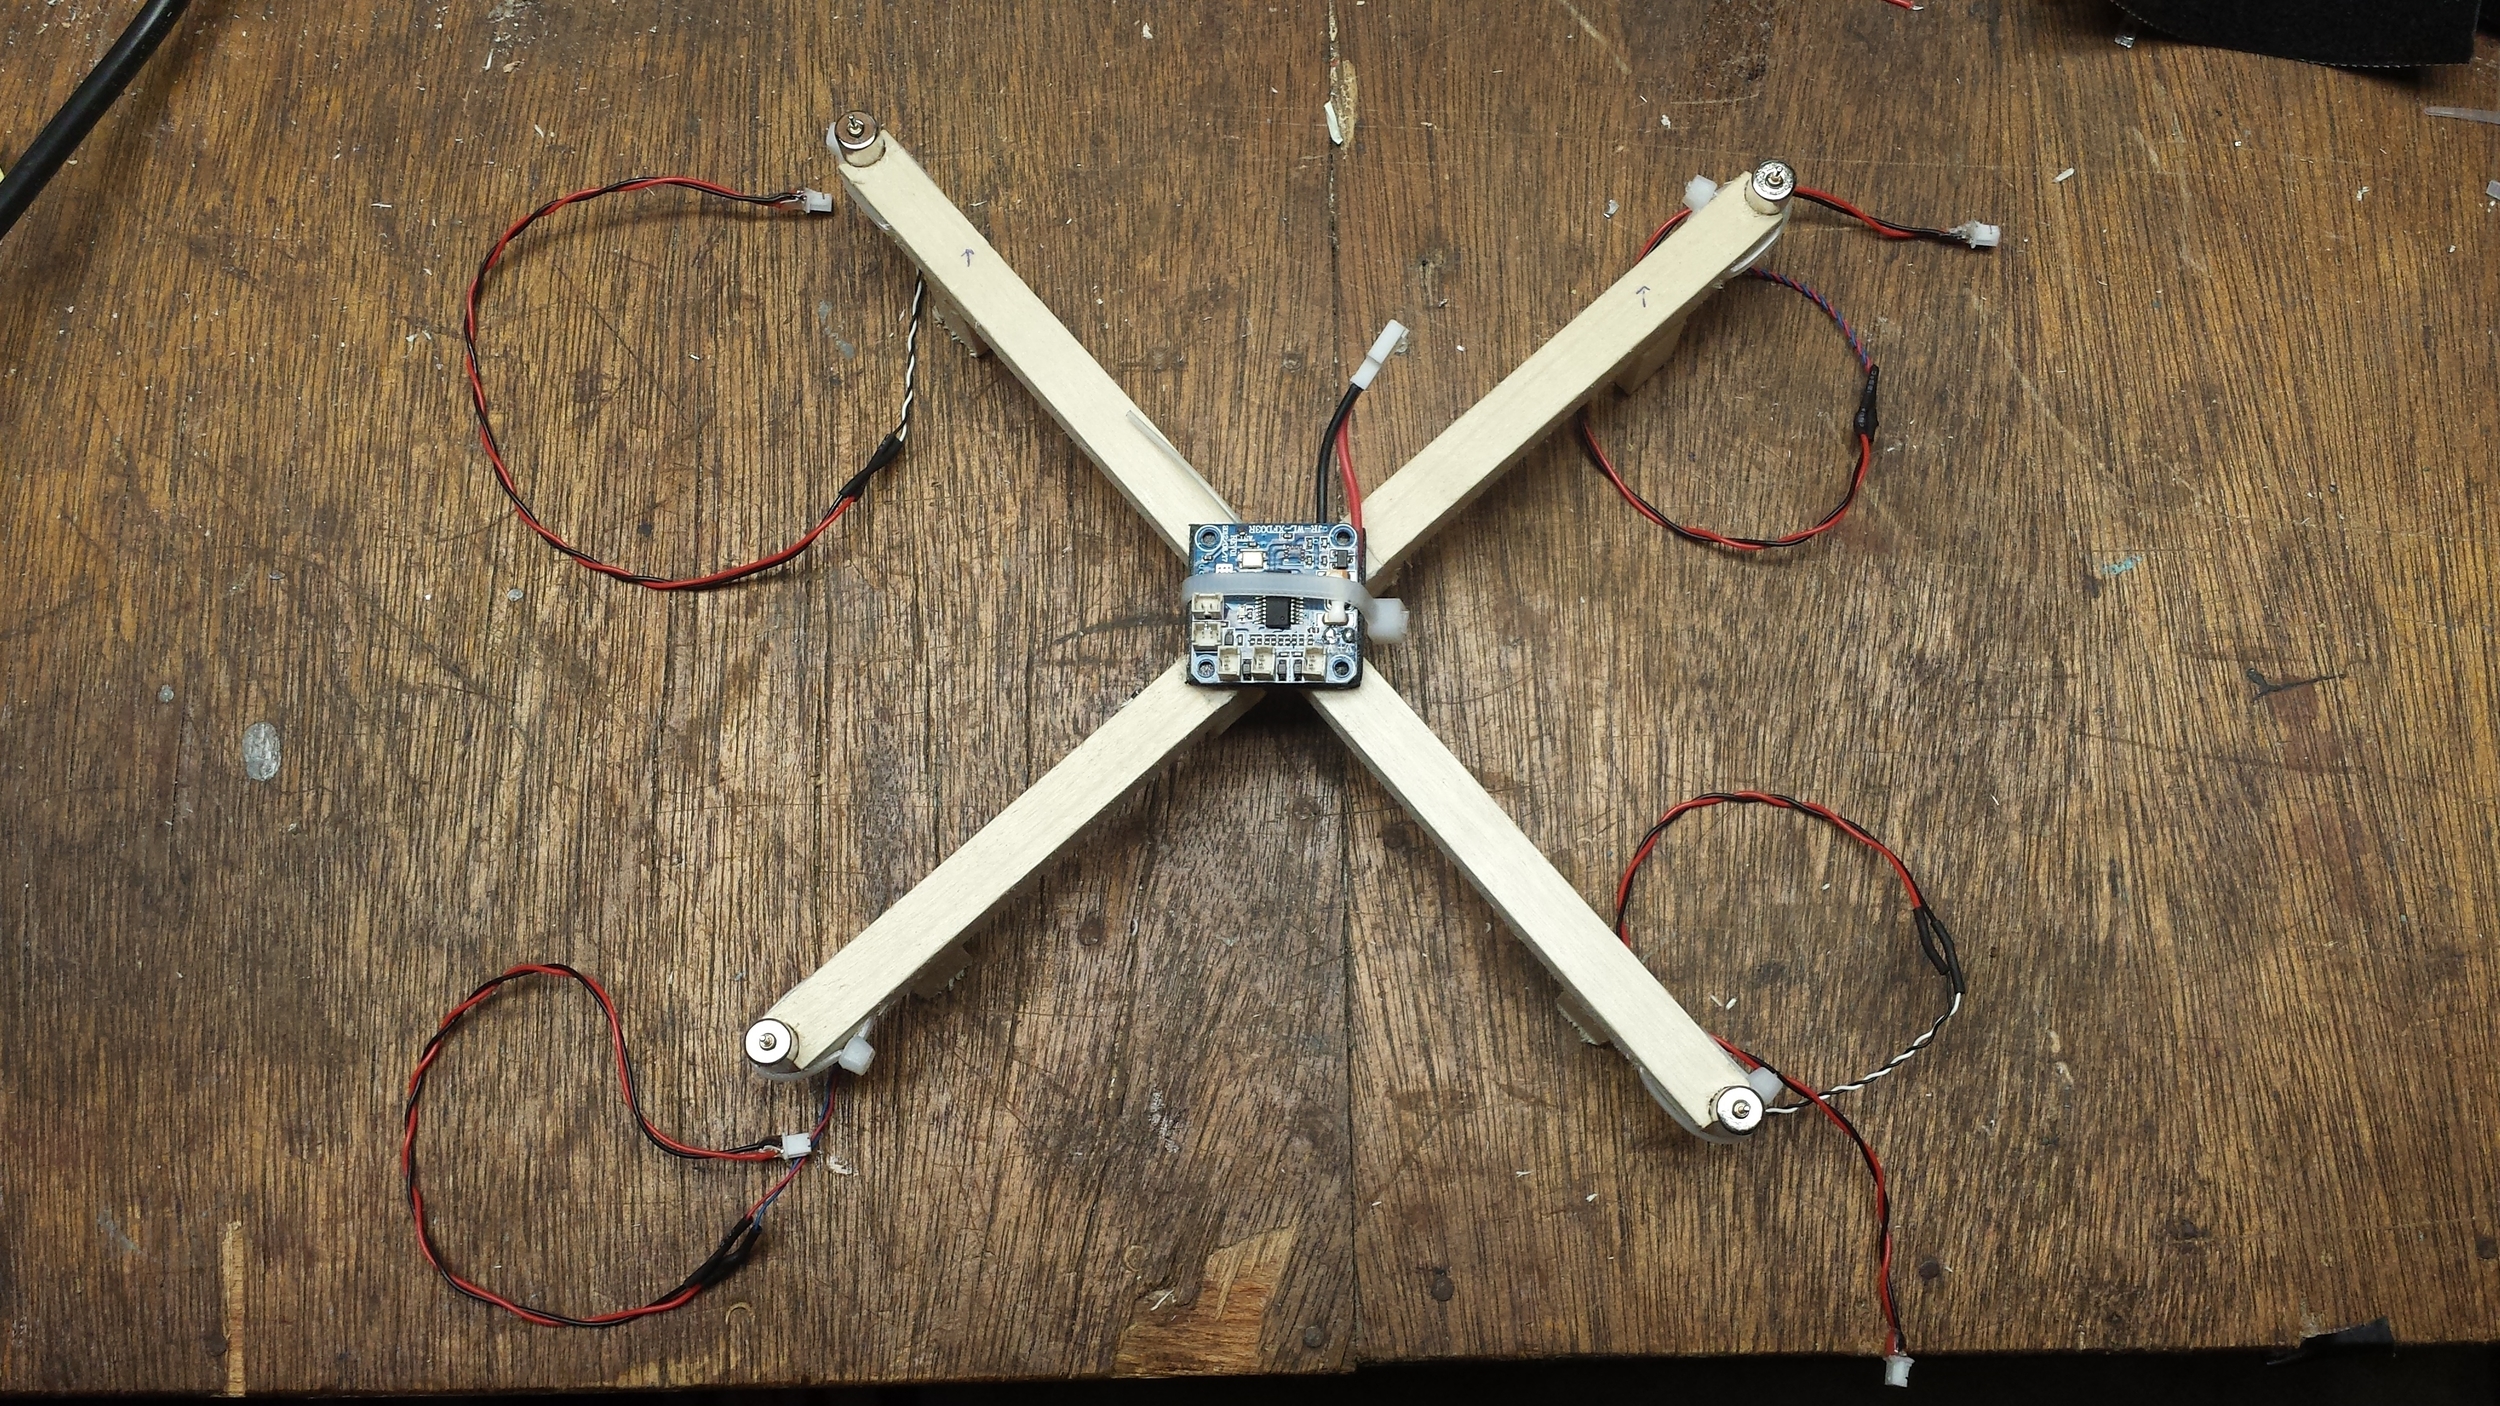
While the glue was drying, I started on crimping the motor wires. The WL939 flight control board uses mCPX connectors. I found some cheap connectors and terminals on eBay. Each motor will need a male mCPX plug connected to the wire leads. I cut four sets of red and black wire at 7" long, attached the terminals, and seated them inside of the plastic housing. Be mindful of polarity! I did not have a crimping tool so I carefully bent the tabs over the wire with a pair of small pliers and lightly soldered them to ensure a good connection. As an extra safety measure, I added a bead of hot glue at the back of each connector, once both wires were mated in the housing, to keep the wires in place. After the motor wires were prepared, I spliced them to the motors and covered them in heat shrink tubing.
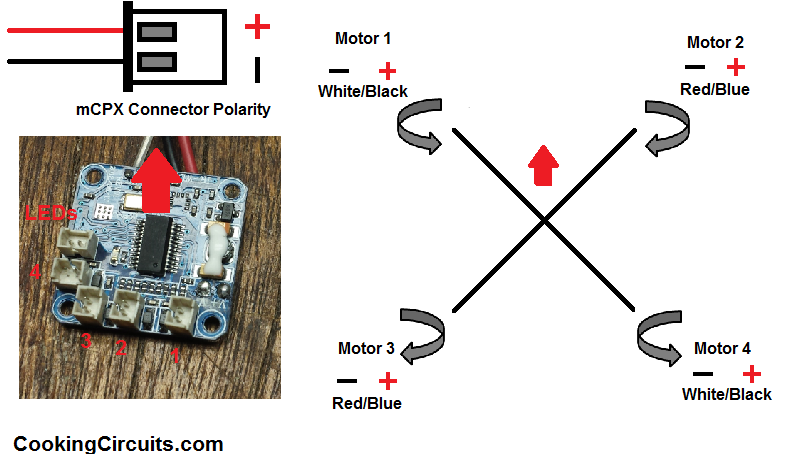

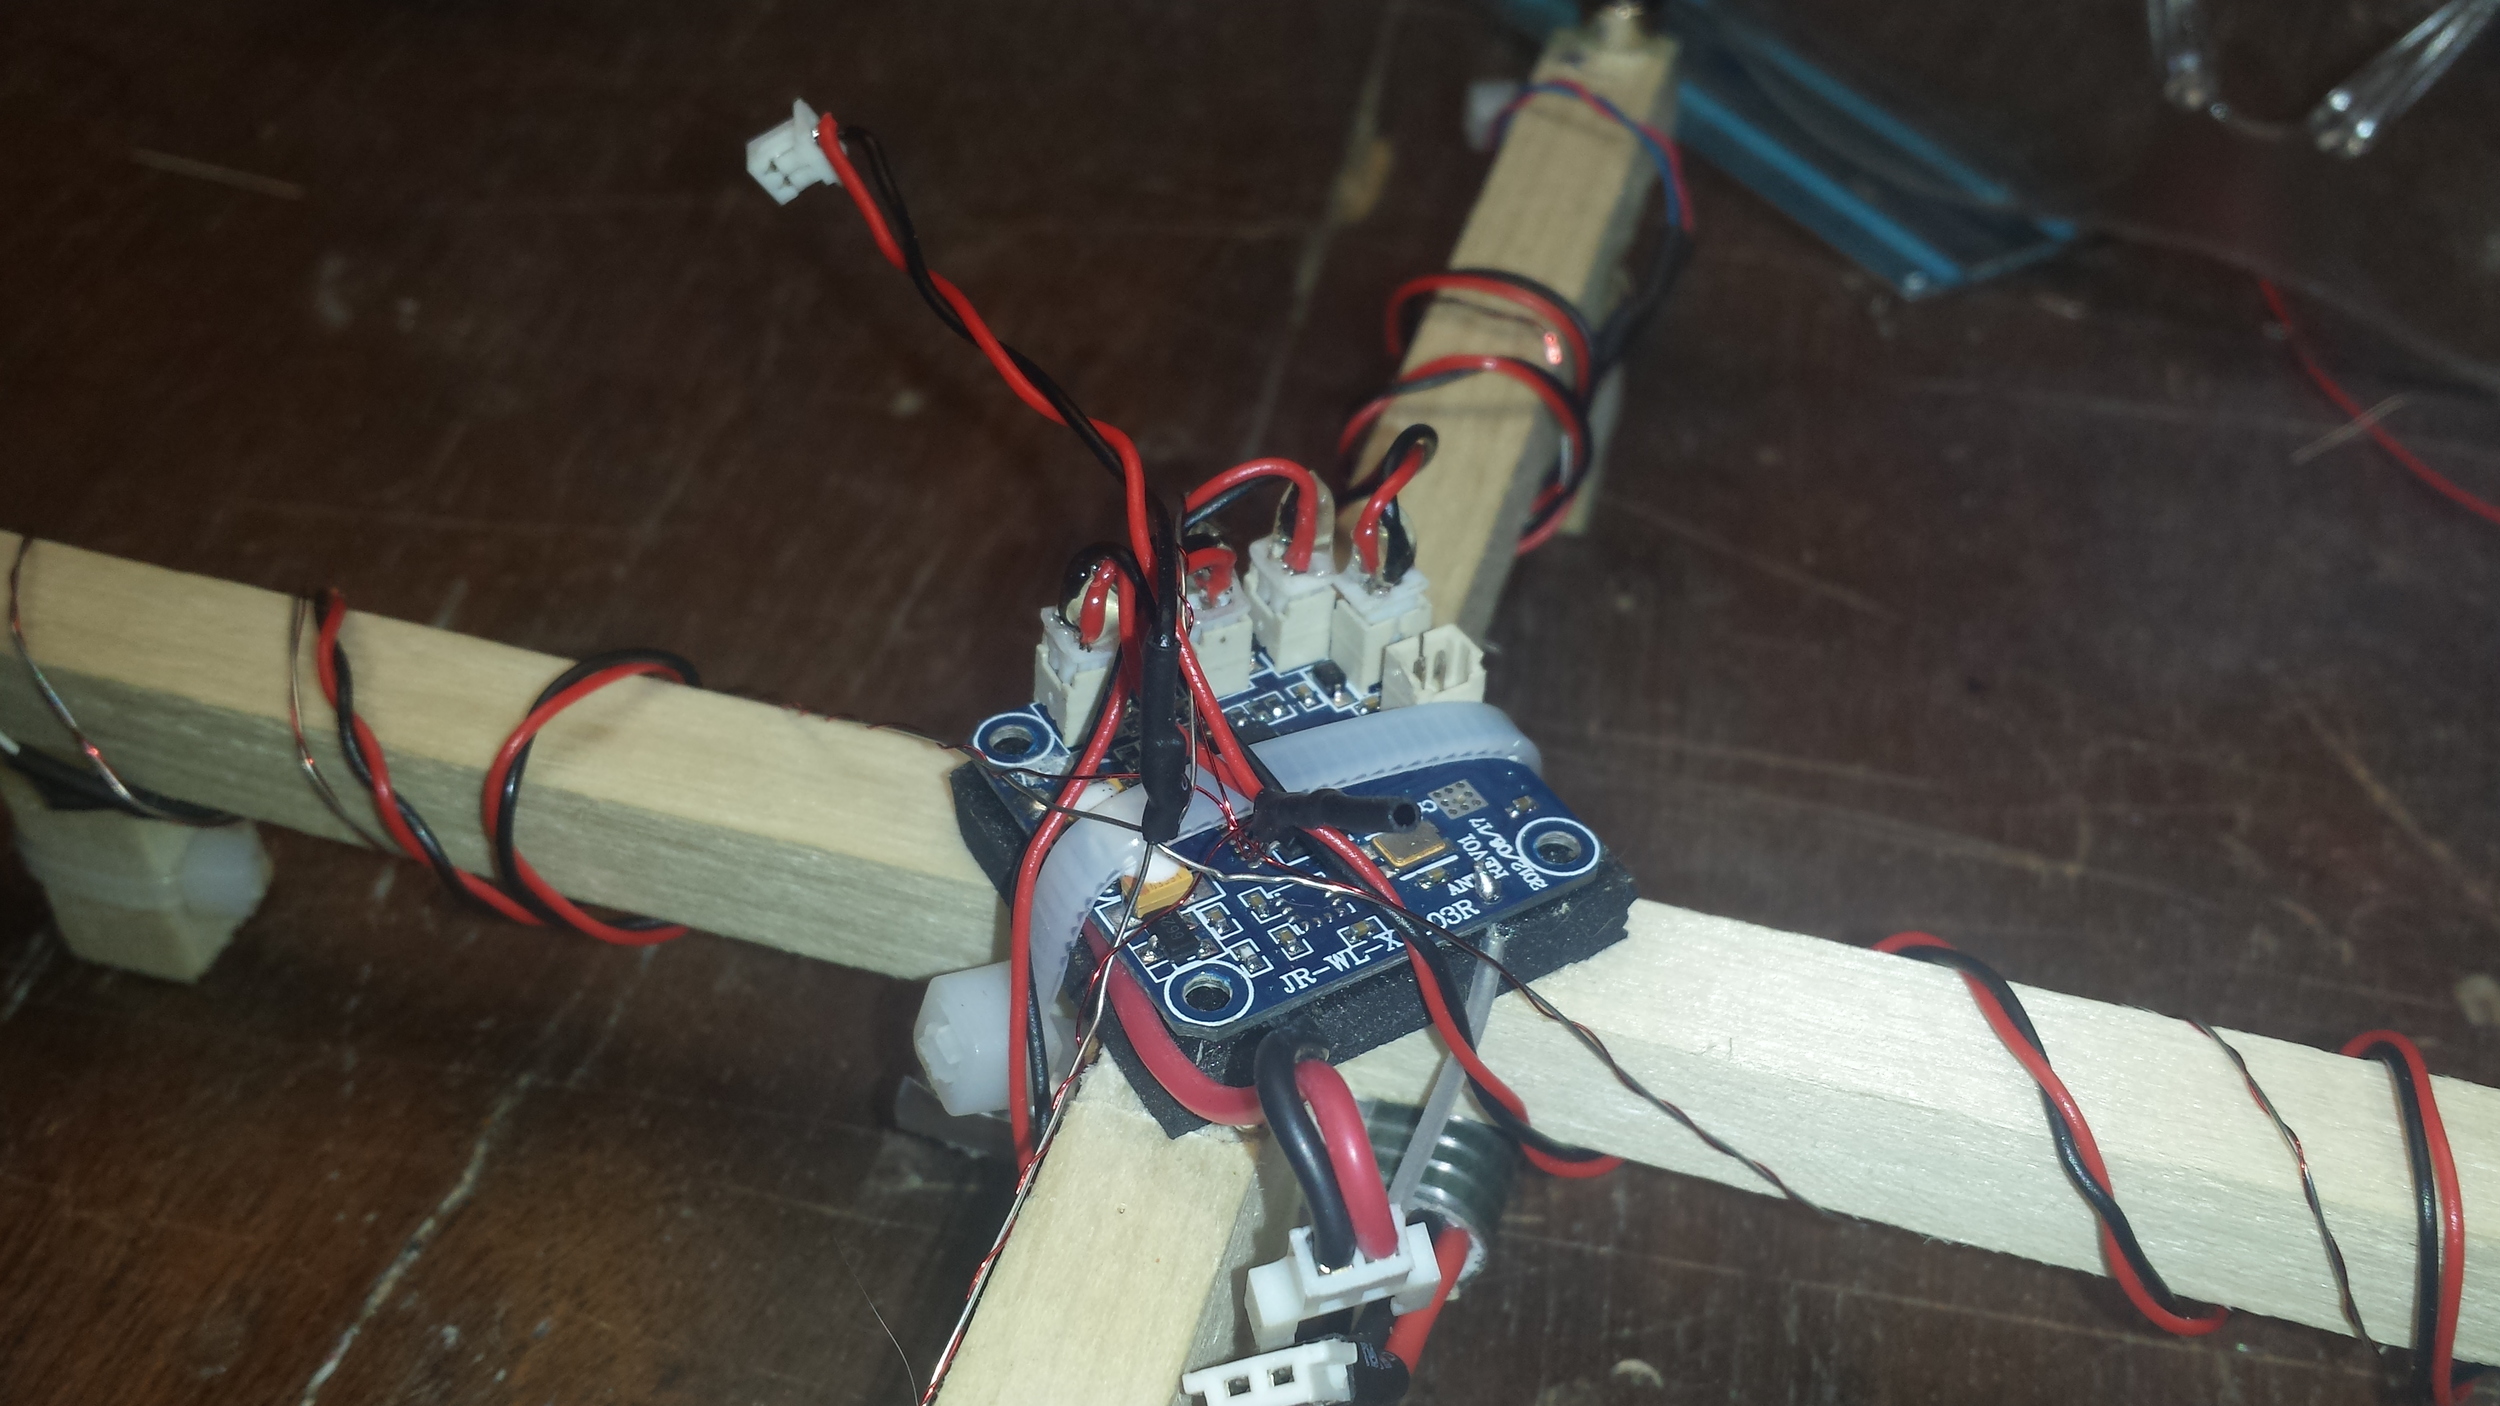
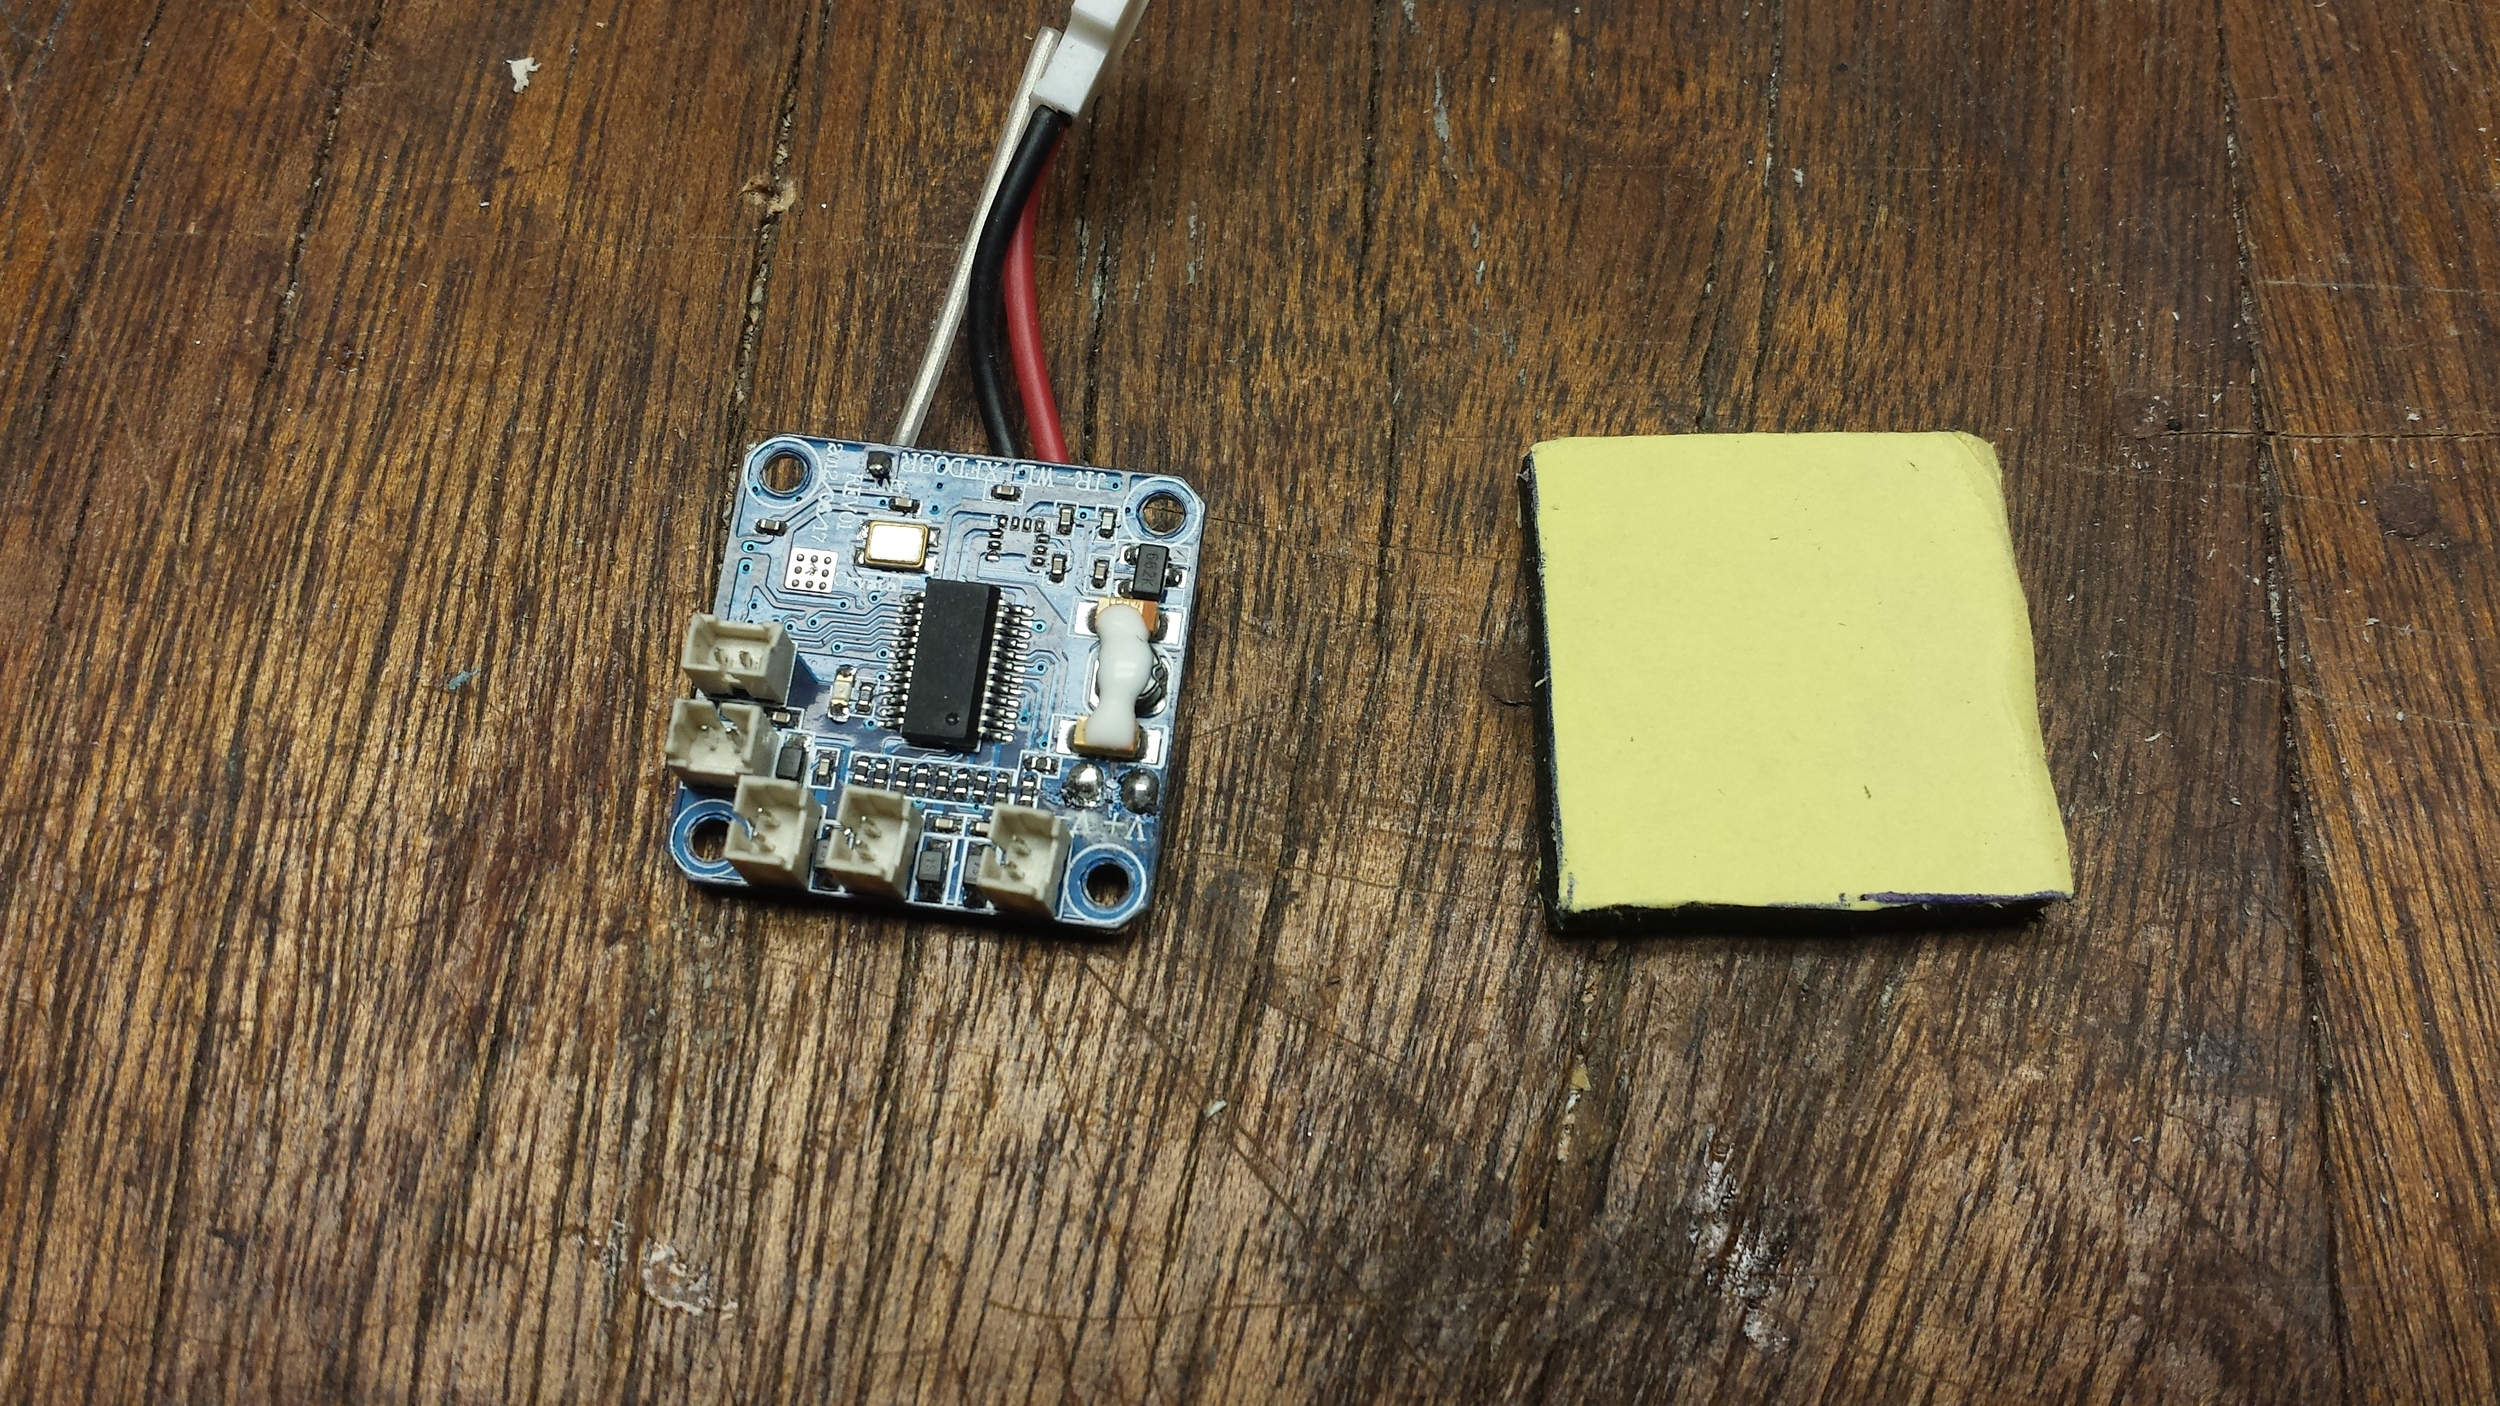
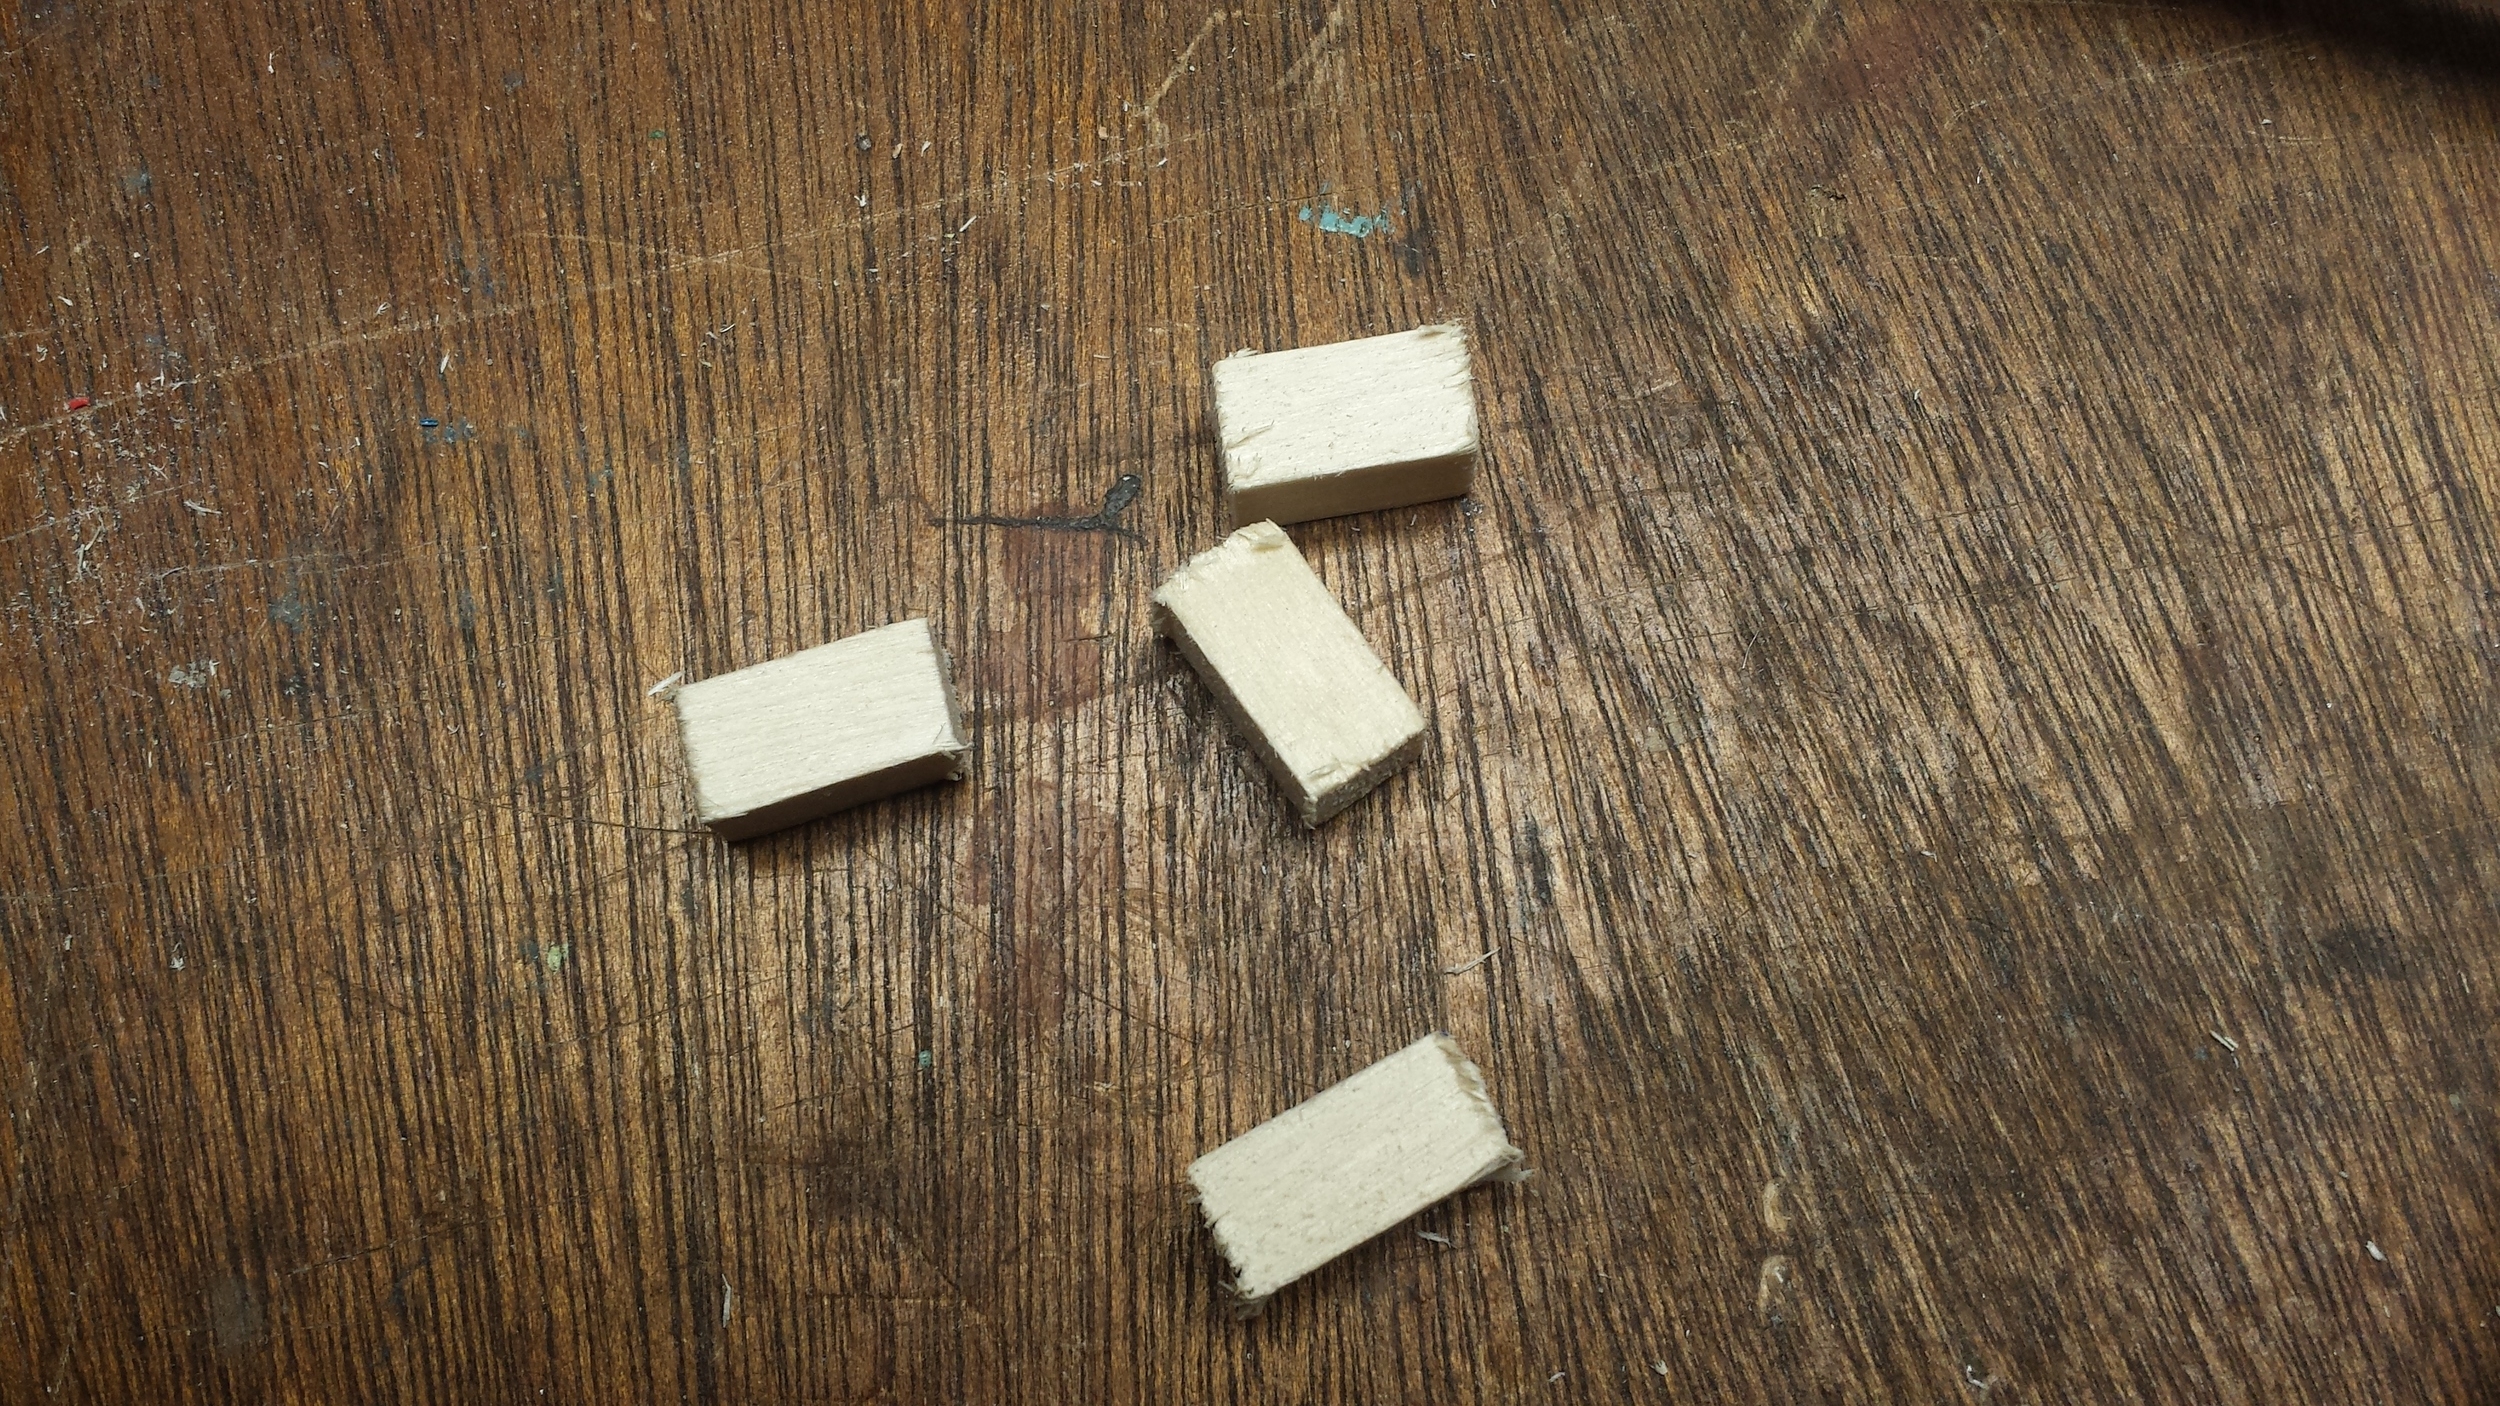
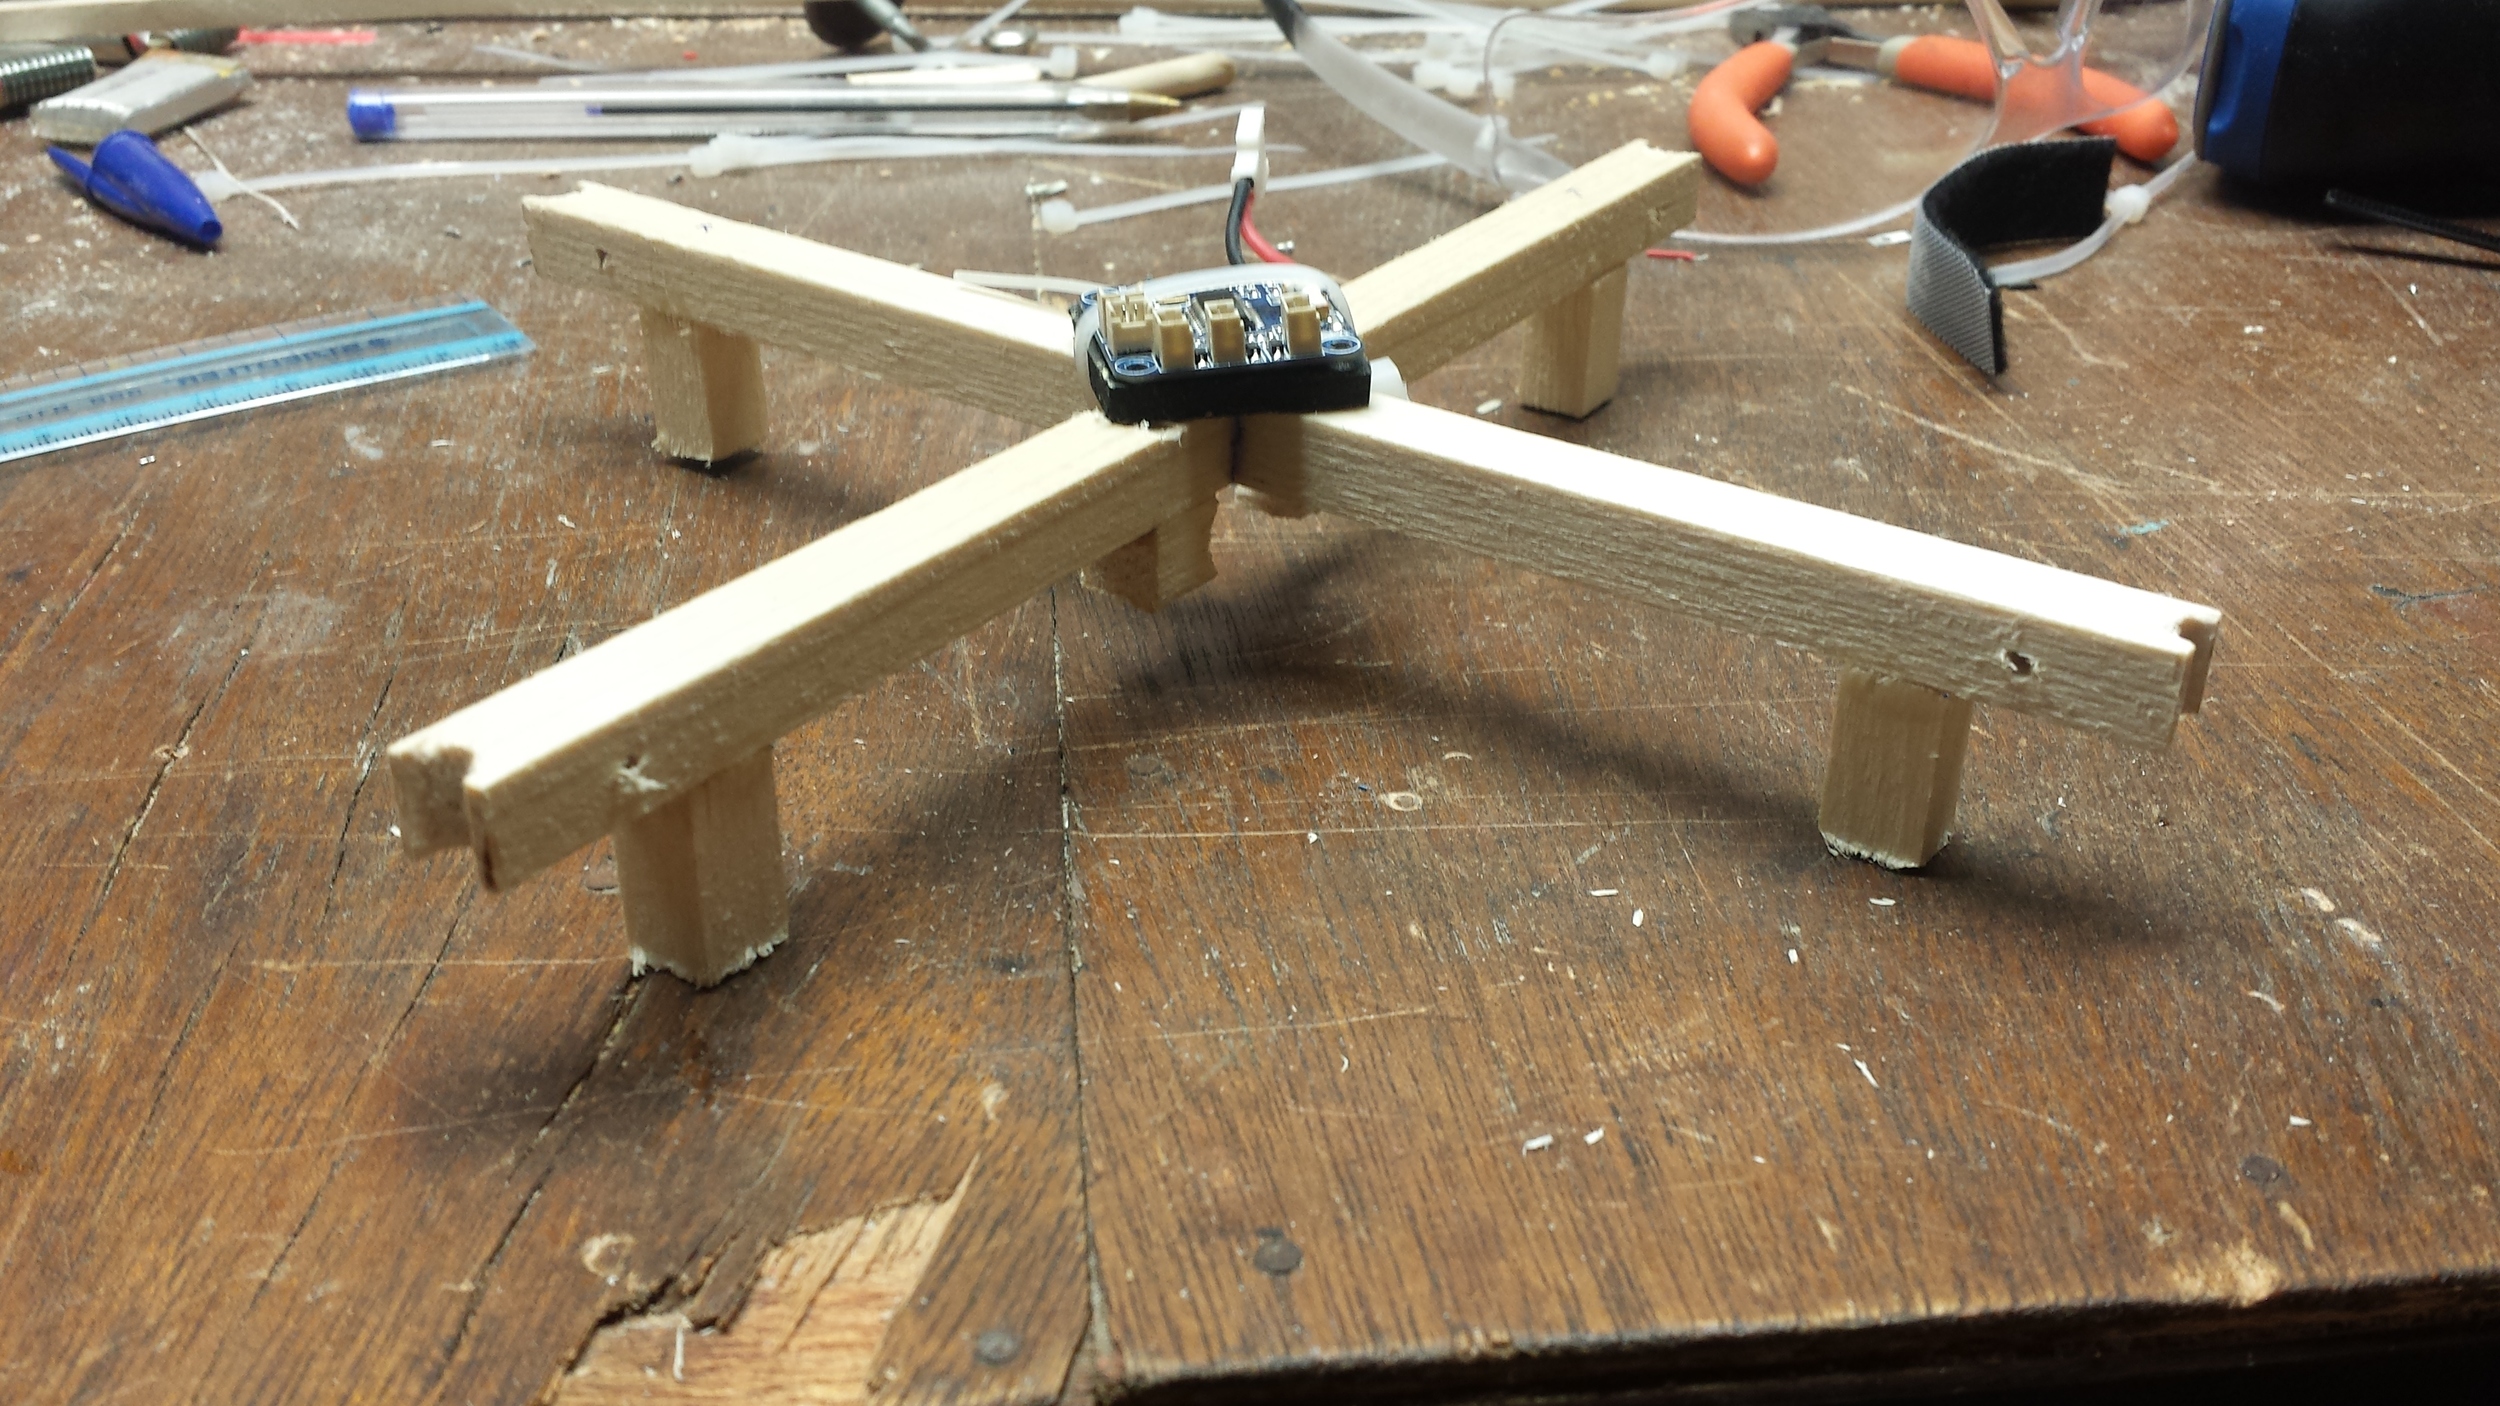
Once the frame glue was dry, I got to work on the battery mount. I used the edges I cut off the main frame arms to create a battery mount. The 1/4" holes hold the battery perfectly. I used one of the batteries to estimate the spacing for the mounting location, and glued the two brackets to the bottom of the frame. I then affixed the flight controller board to the top of the frame using some anti-vibration foam and a zip tie -- be mindful of orientation! You want to make sure your board is facing forward. Next I cut 4 small pieces of the 3/8" dowel for feet and glued them to the bottom of each arm. Finally, I attached each motor to its corresponding arm with a zip tie, wrapped the wires around the arms, and connected them to the flight controller. I ran a quick test to make sure everything was working properly and then attached the propellers.

I used my Turnigy 9x Transmitter to test my new quadcopter. If you have the same equipment, follow the steps below to bind the Turnigy 9x Transmitter with the WLToys V939.
- Connect the battery power to the WLToys V939 Flight Controller.
- While pressing the bind button on the back of the Turnigy 9x Transmitter, turn the transmitter on. The Turnigy 9x Transmitter will beep when it is bound.
- Turn off the Transmitter and verify the throttle is all the way down.
- While holding down the quadcopter (keep your fingers away from the propellers!) turn the Turnigy 9x Transmitter back on. The propellers should spin up to full speed and then stop. The quadcopter is now ready to fly.
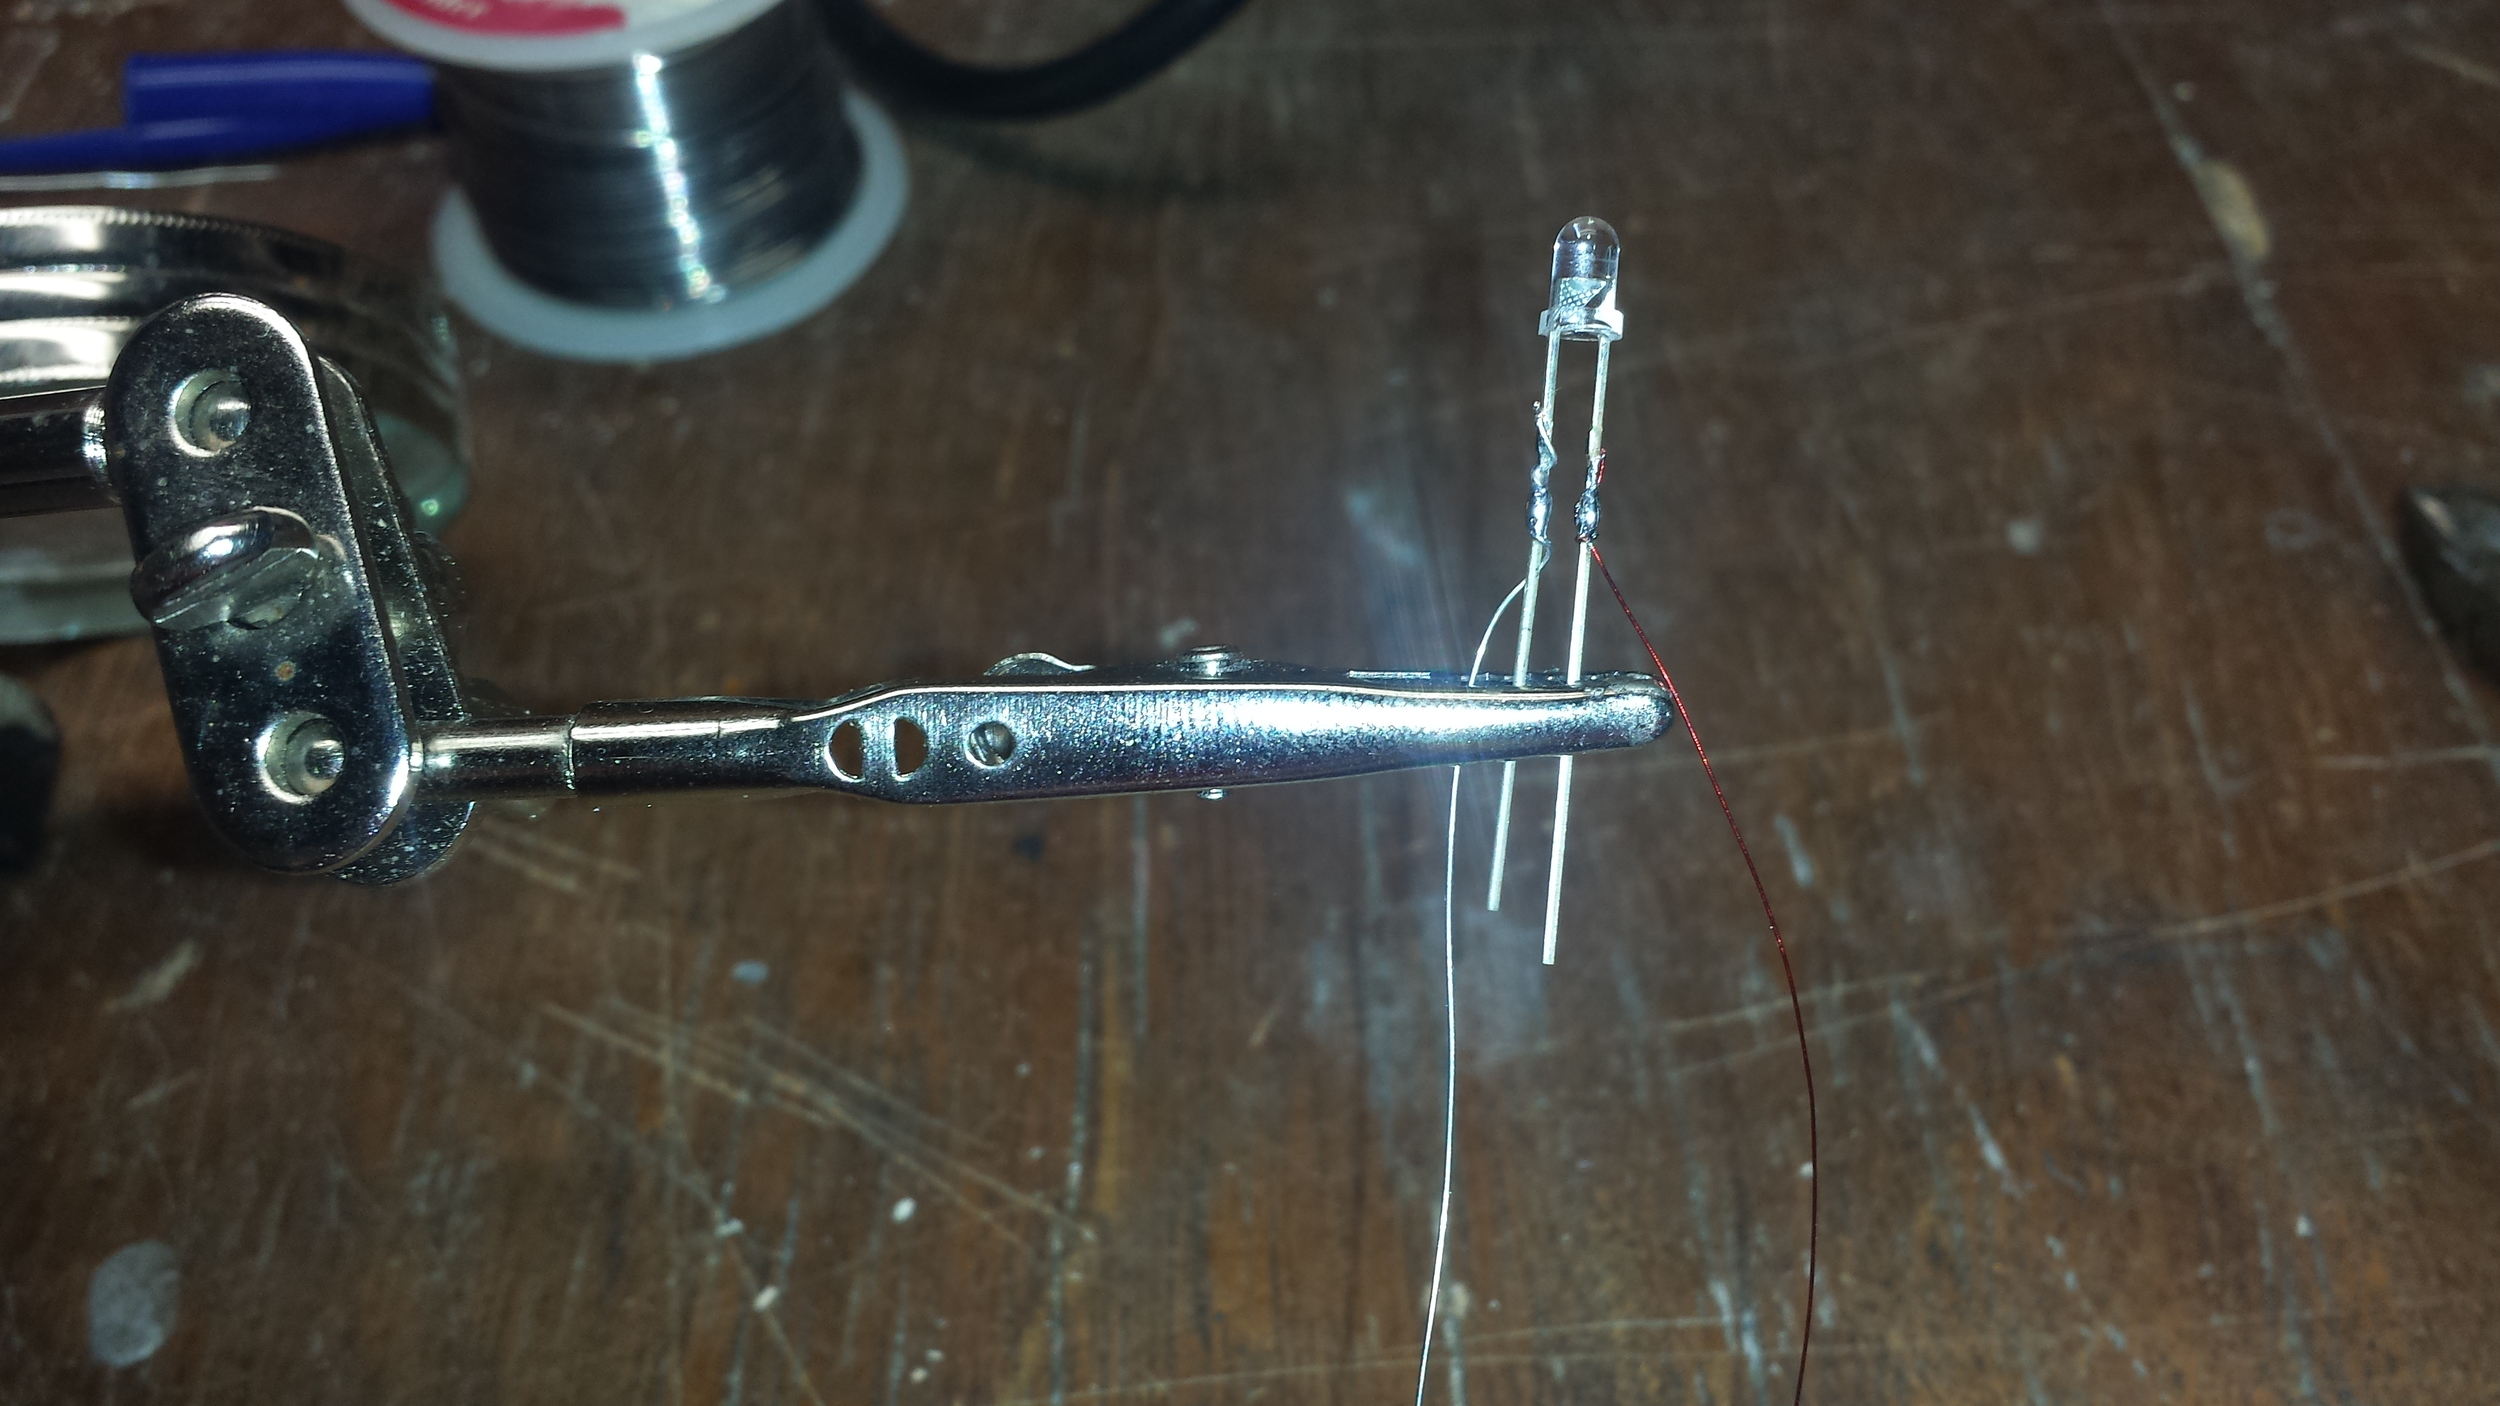
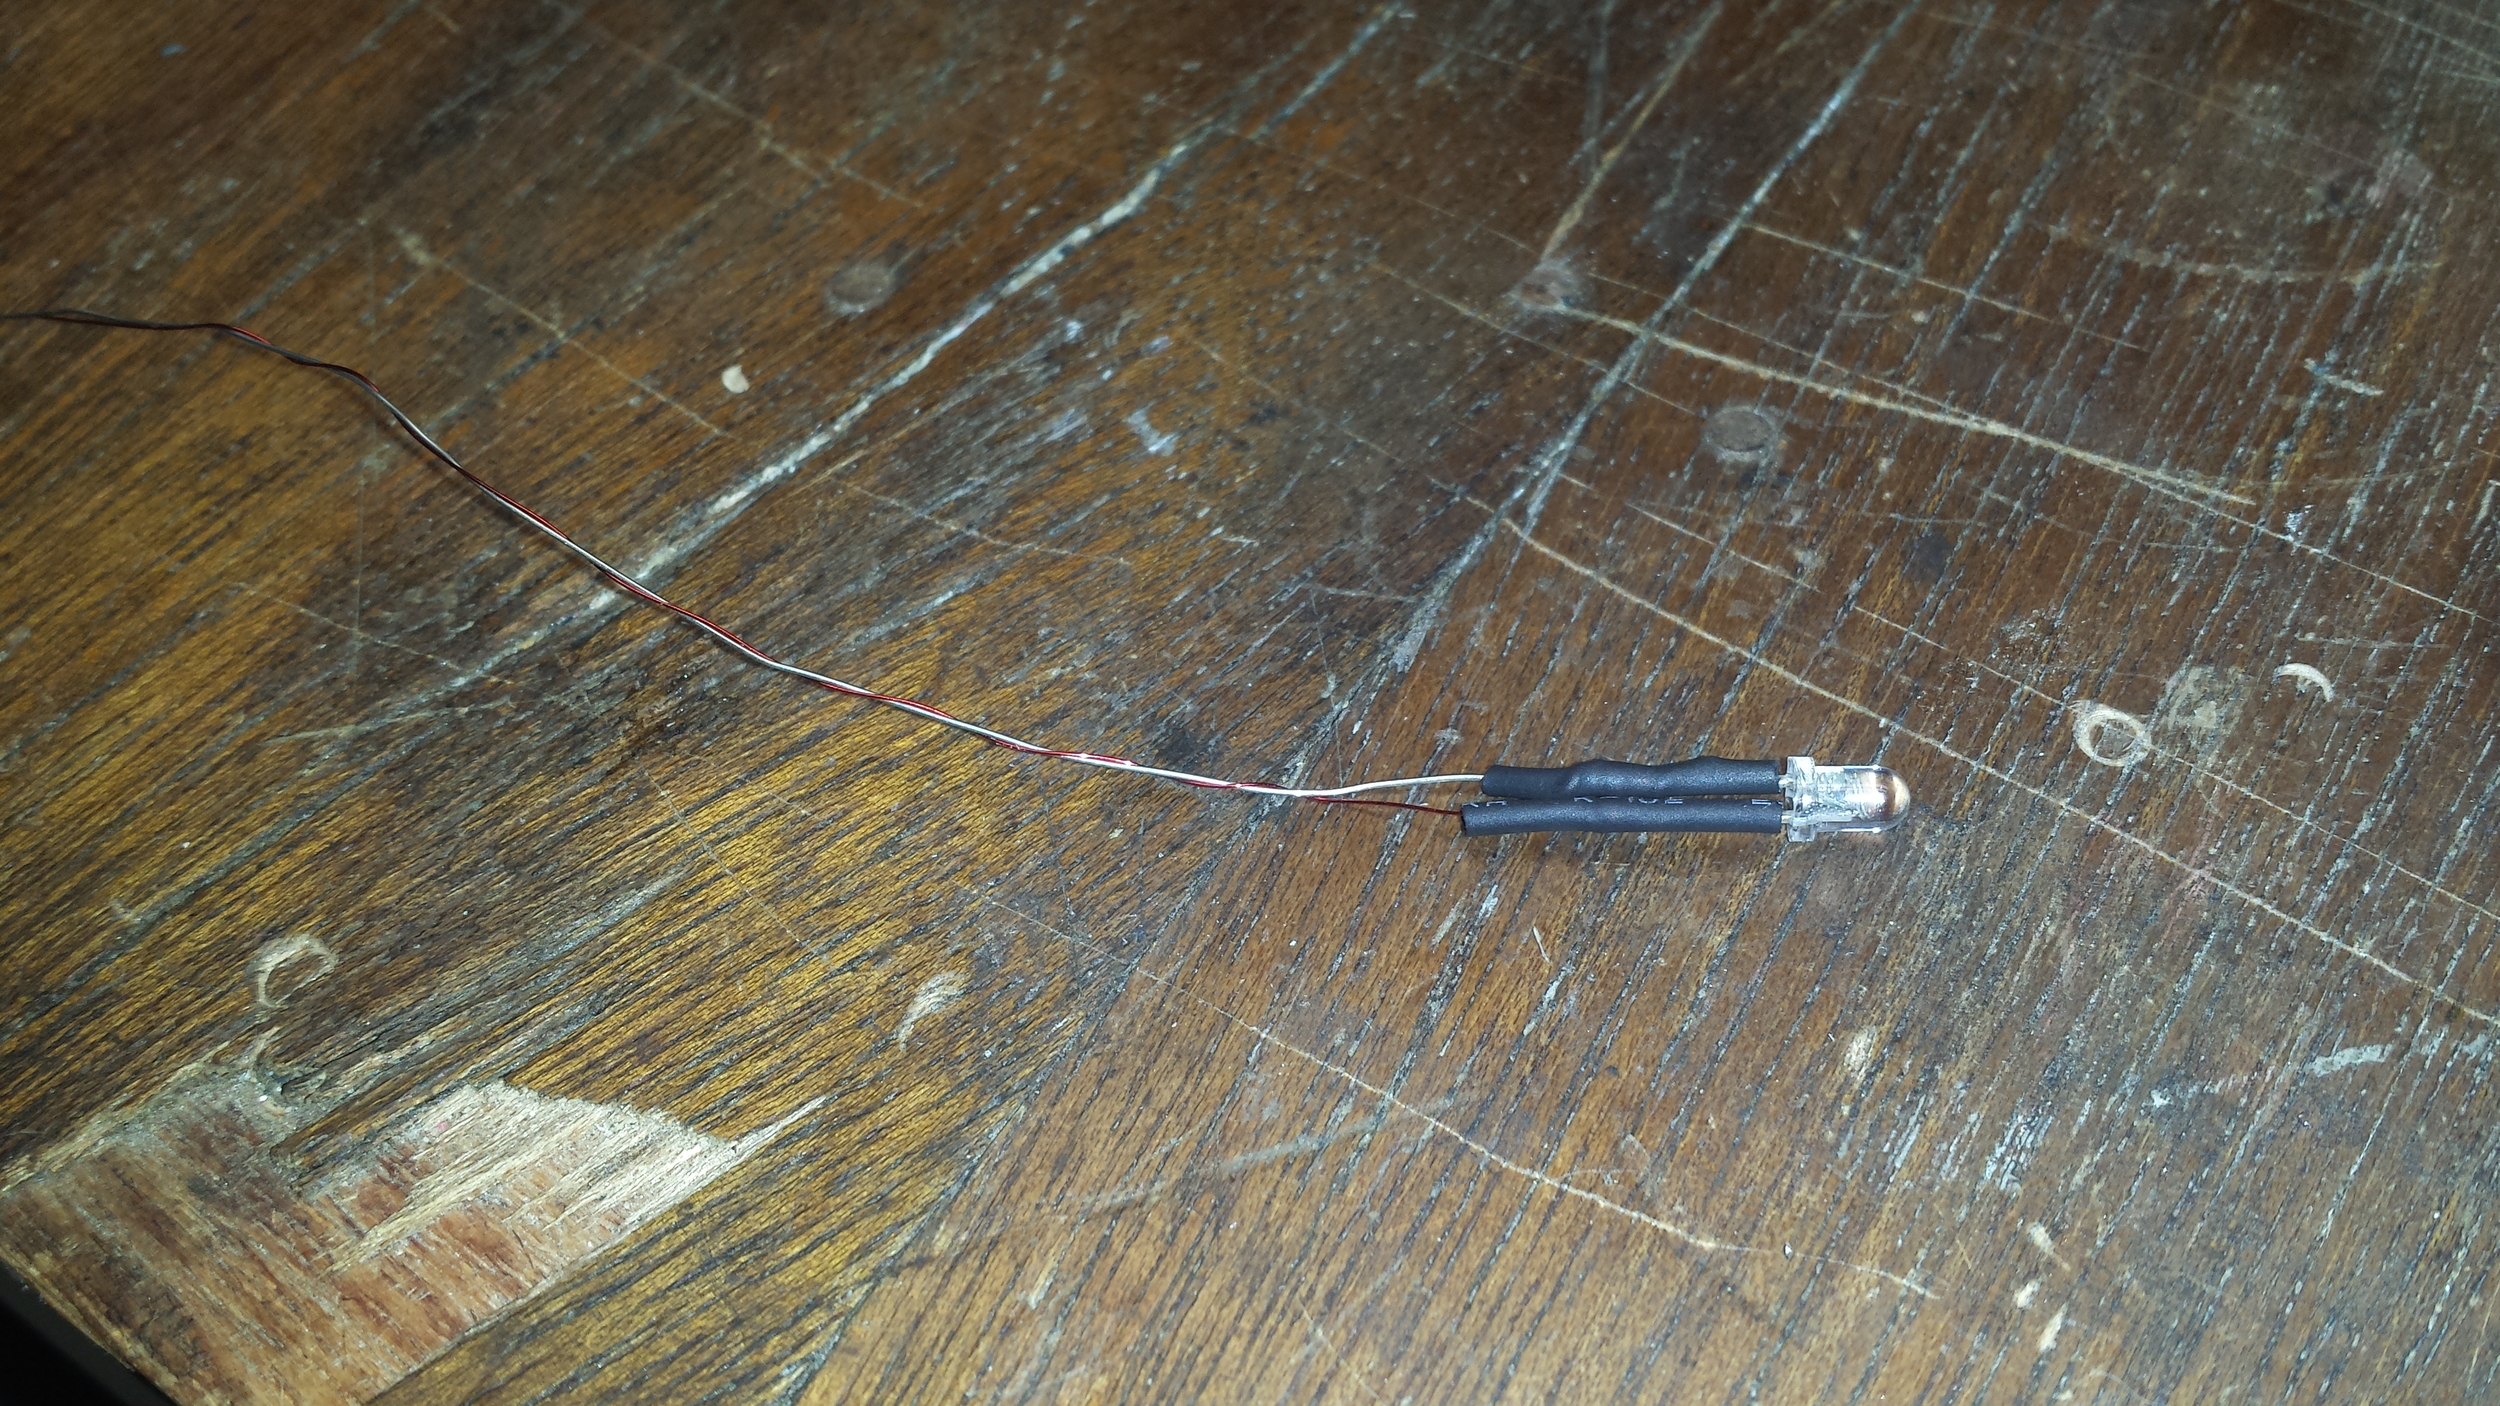
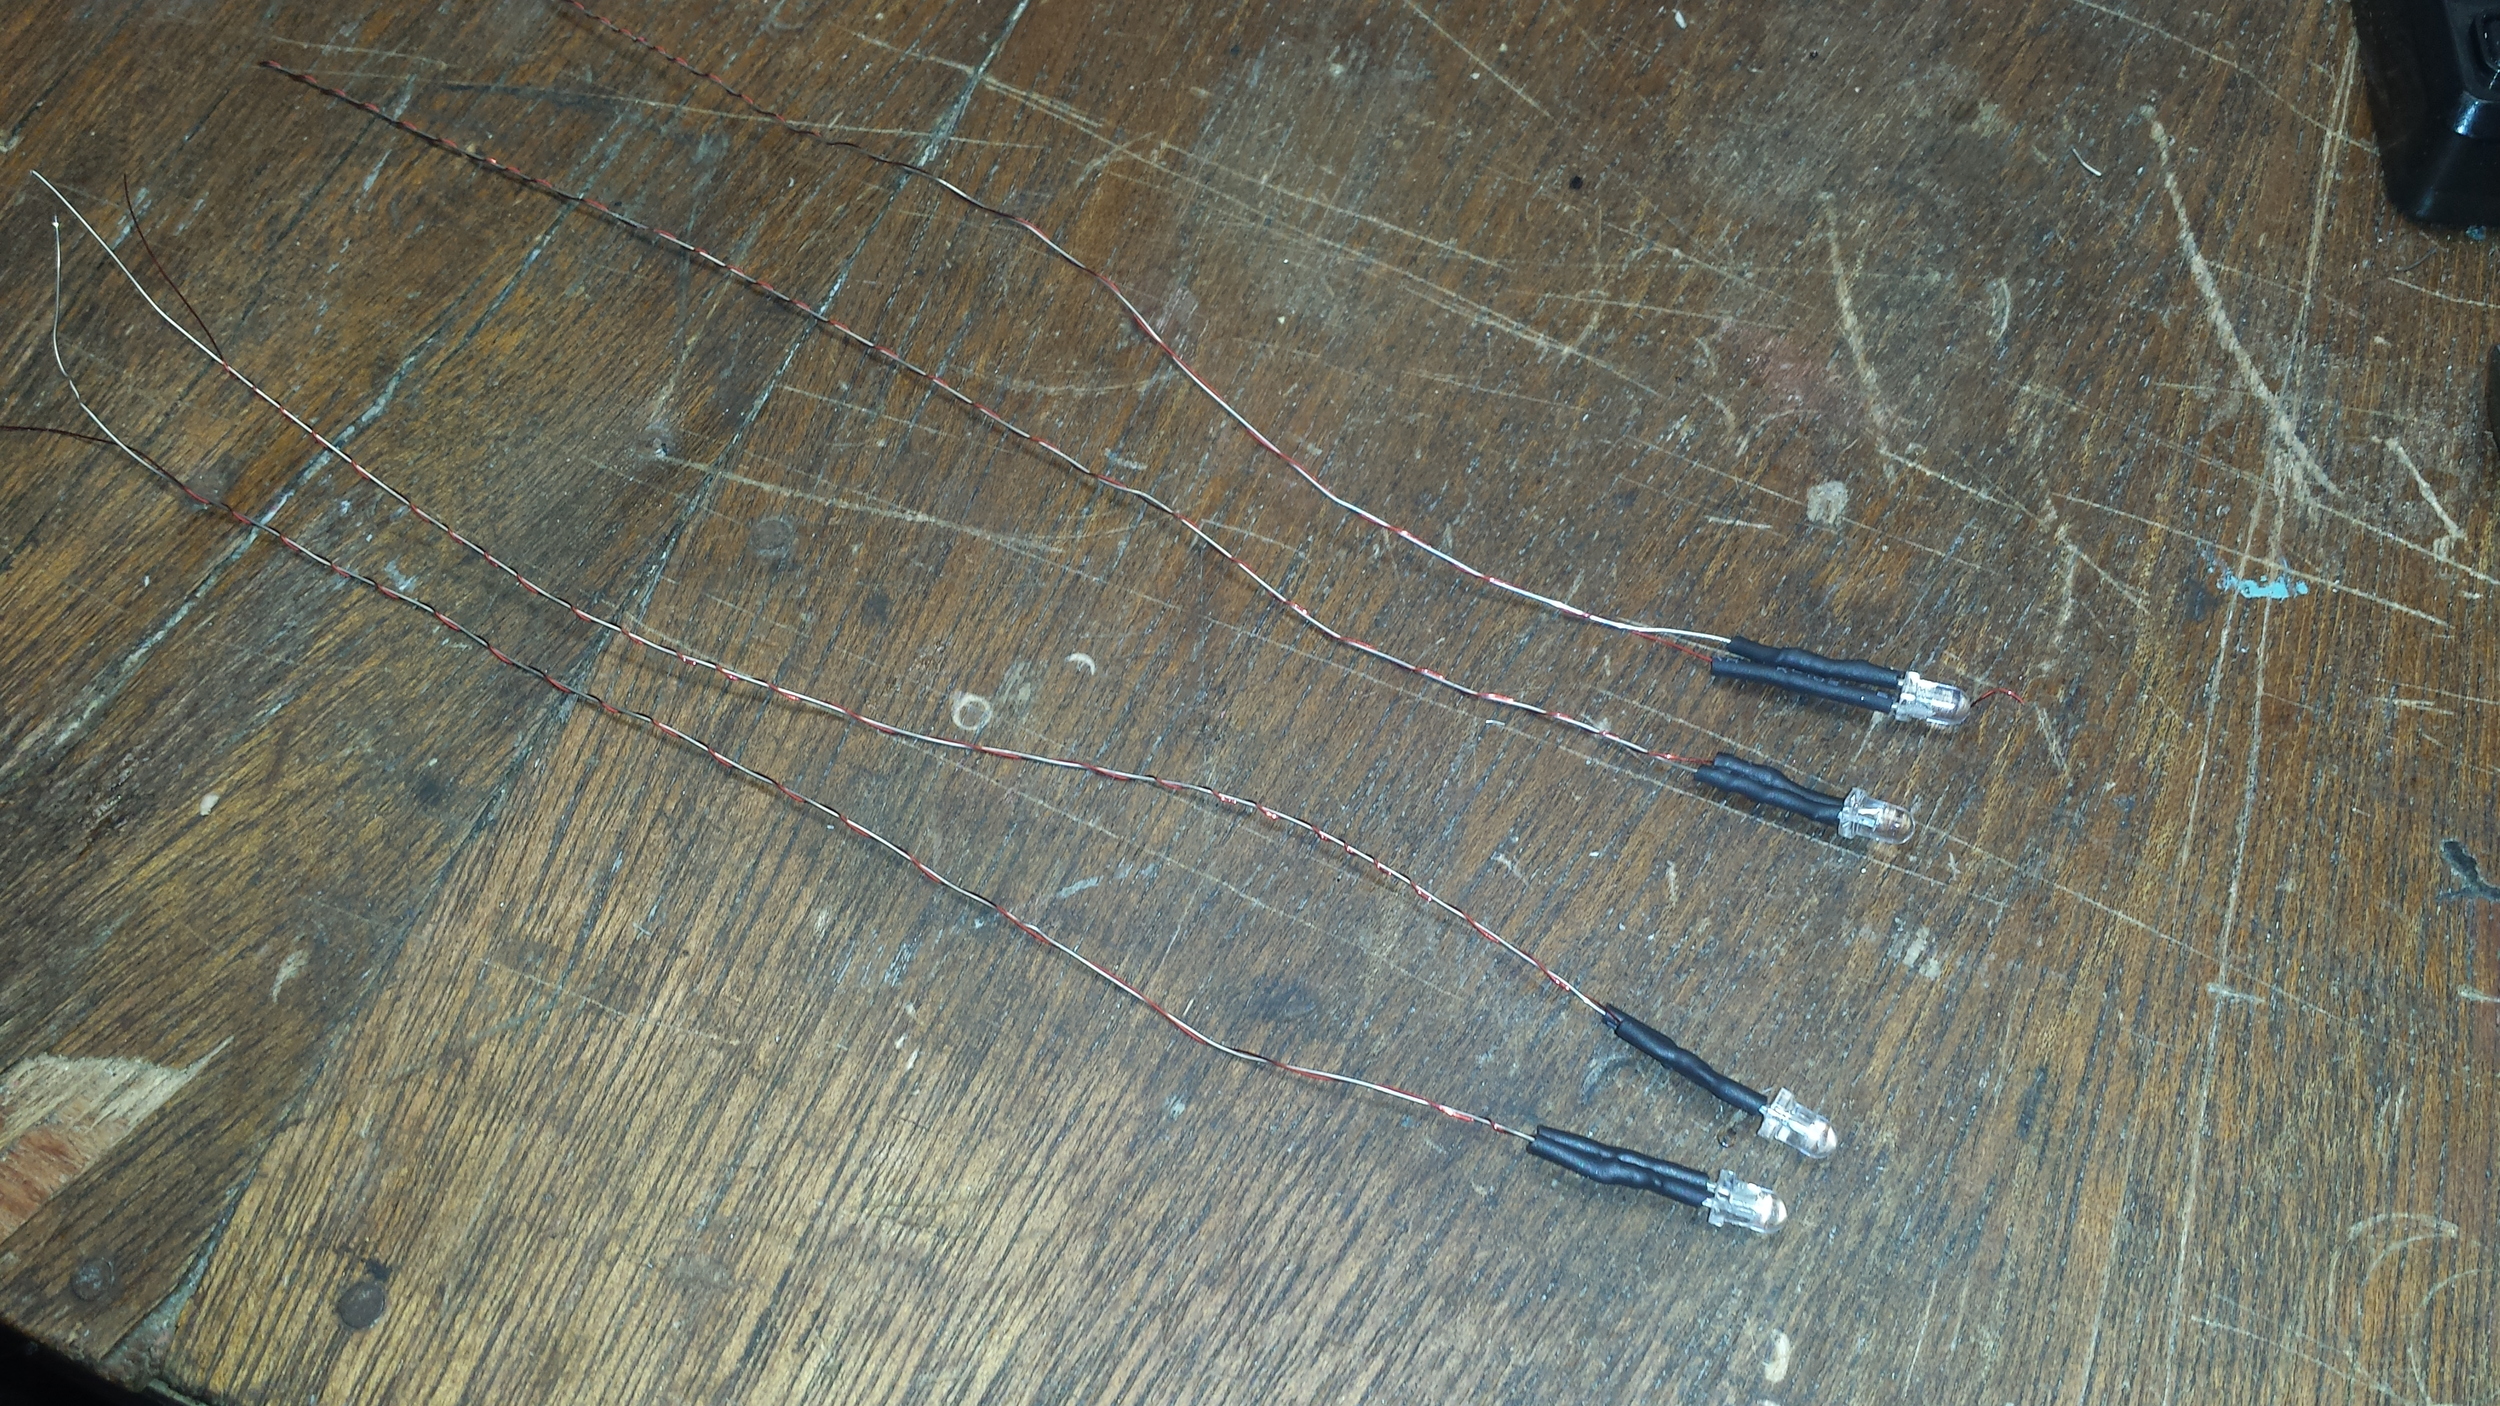
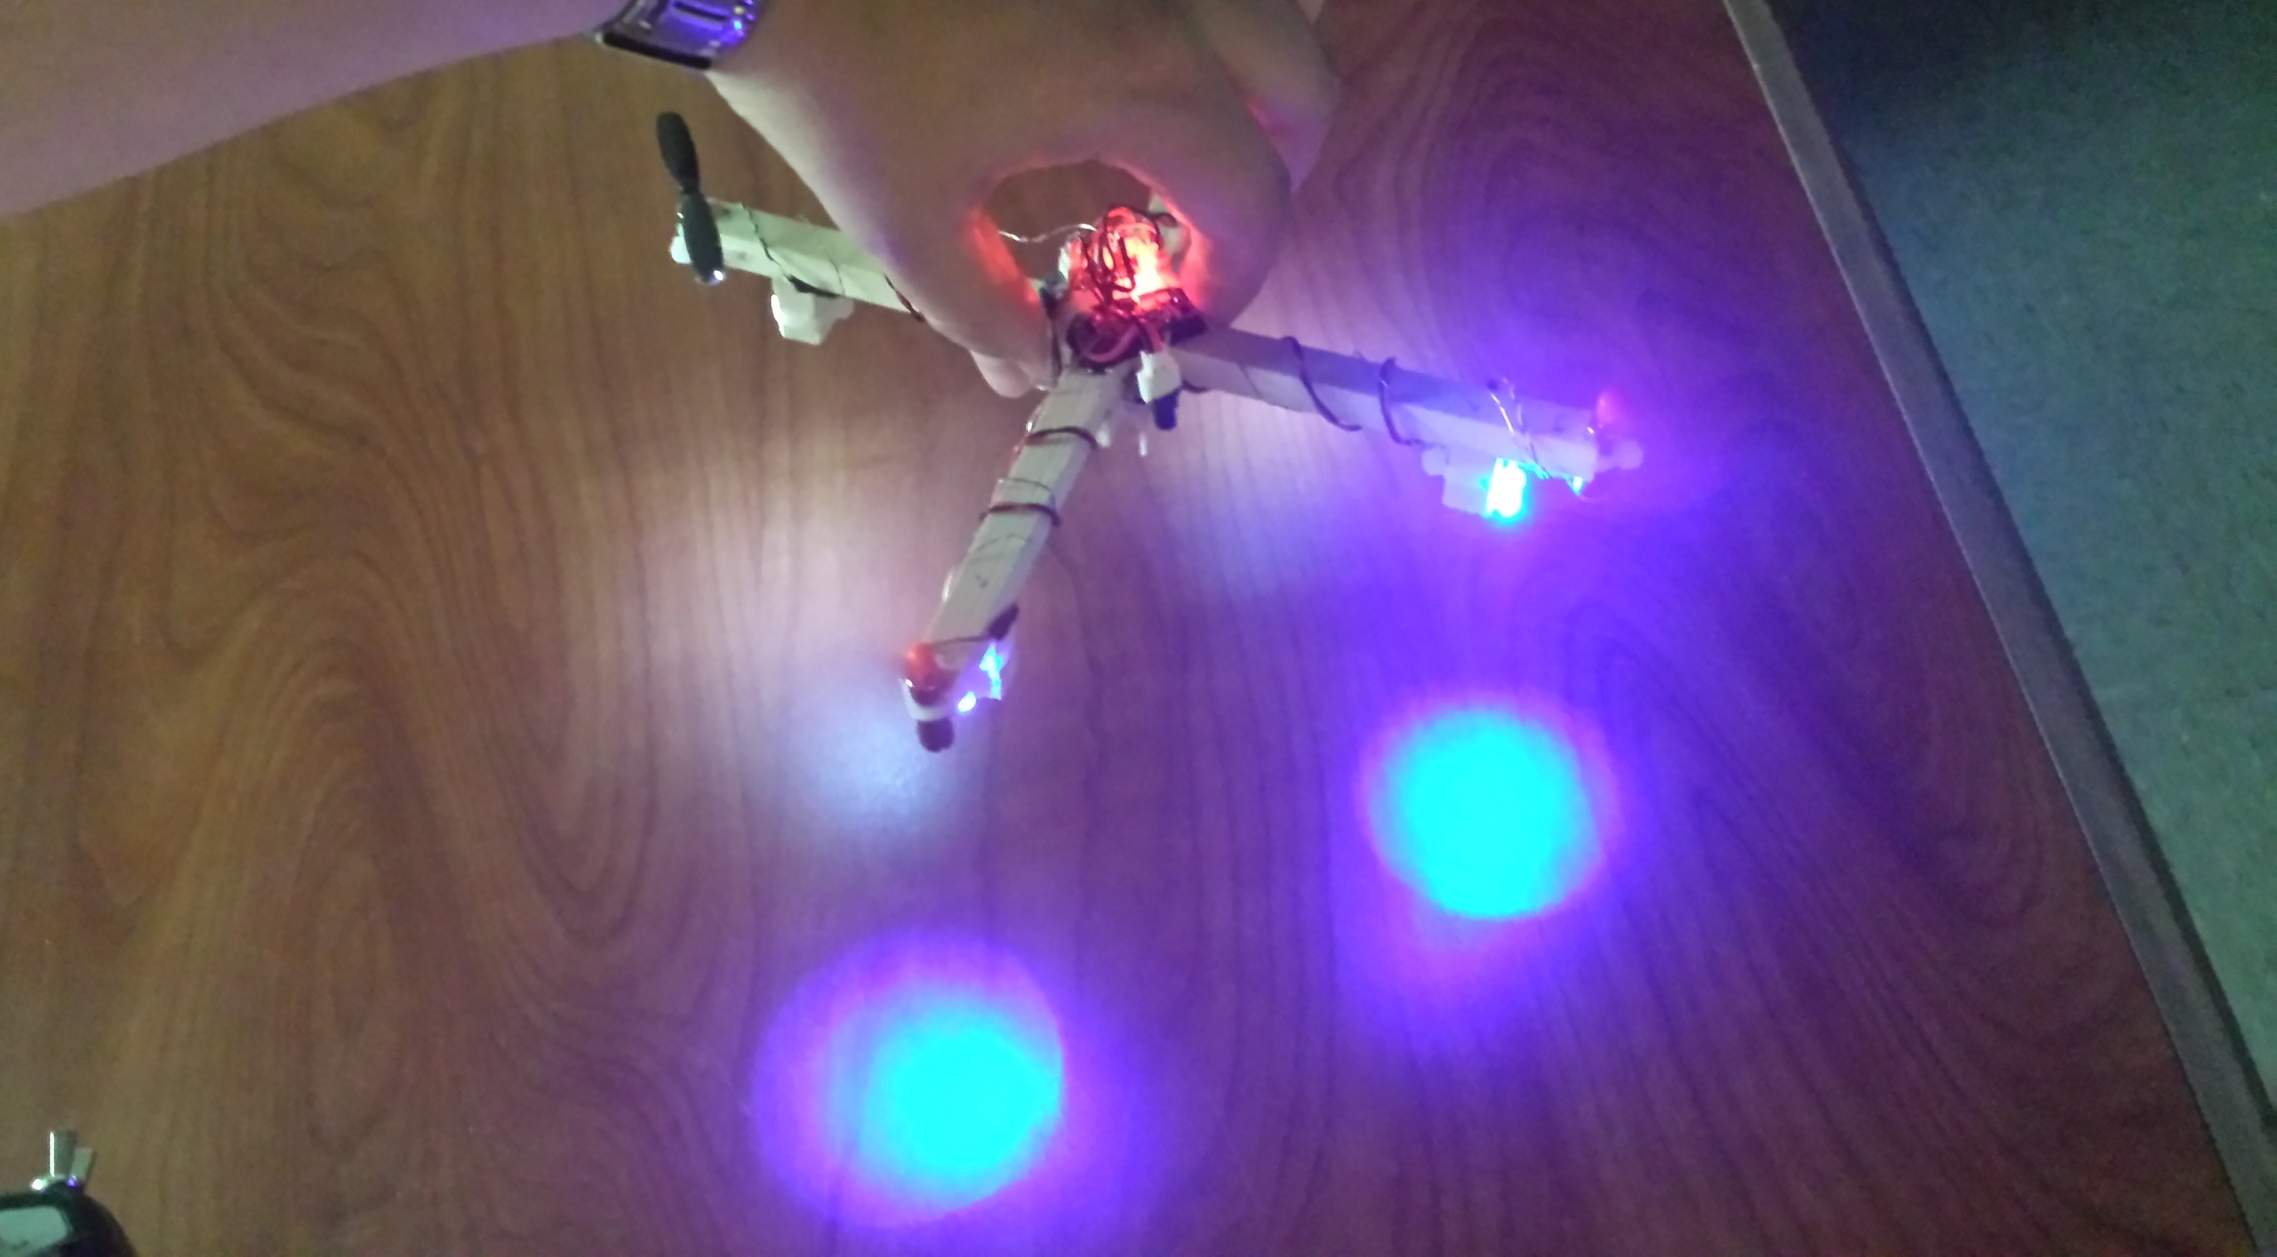
This Quadcopter is incredibly stable and really fun to fly. After the first test flight, I decided to wire up some LEDs for easier orientation recognition. I used some enameled magnet wire for the 6" long LED leads. Be careful of your LED choices. If you choose two colors, both need to have similar voltage and current requirements or only one color will light. Once I had the lights working and the flight test complete, I installed the bottom half of a beer can to protect the electronics.