Fixing the Backbone One - Unresponsive Left Side Buttons
/A while back I received a Backbone One as a gift. It has worked very well for playing my PS5 remotely but recently I noticed some of the buttons stopped working on the left side. In the end the L1, thumbstick, and directional buttons were not working. I searched online and found a lot of complaints about this happening and only one repair guide by user 704Xa on YouTube. The repair seemed easy enough so I decided to spend ~$15, give it a shot, and provide some pictures of the process. I used the following items for the repair. The process was quick and only took me about 15 minutes.
The design flaw of the Backbone one controller is the ribbon cable. After repeatedly expanding and contracting the controller to dock the phone, the ribbon cable experiences a lot of bending/crimping. When I disassembled I found a severe crease in the ribbon cable. When I pressed on the crease, I could see the left side buttons go crazy on the Backbone calibration app.
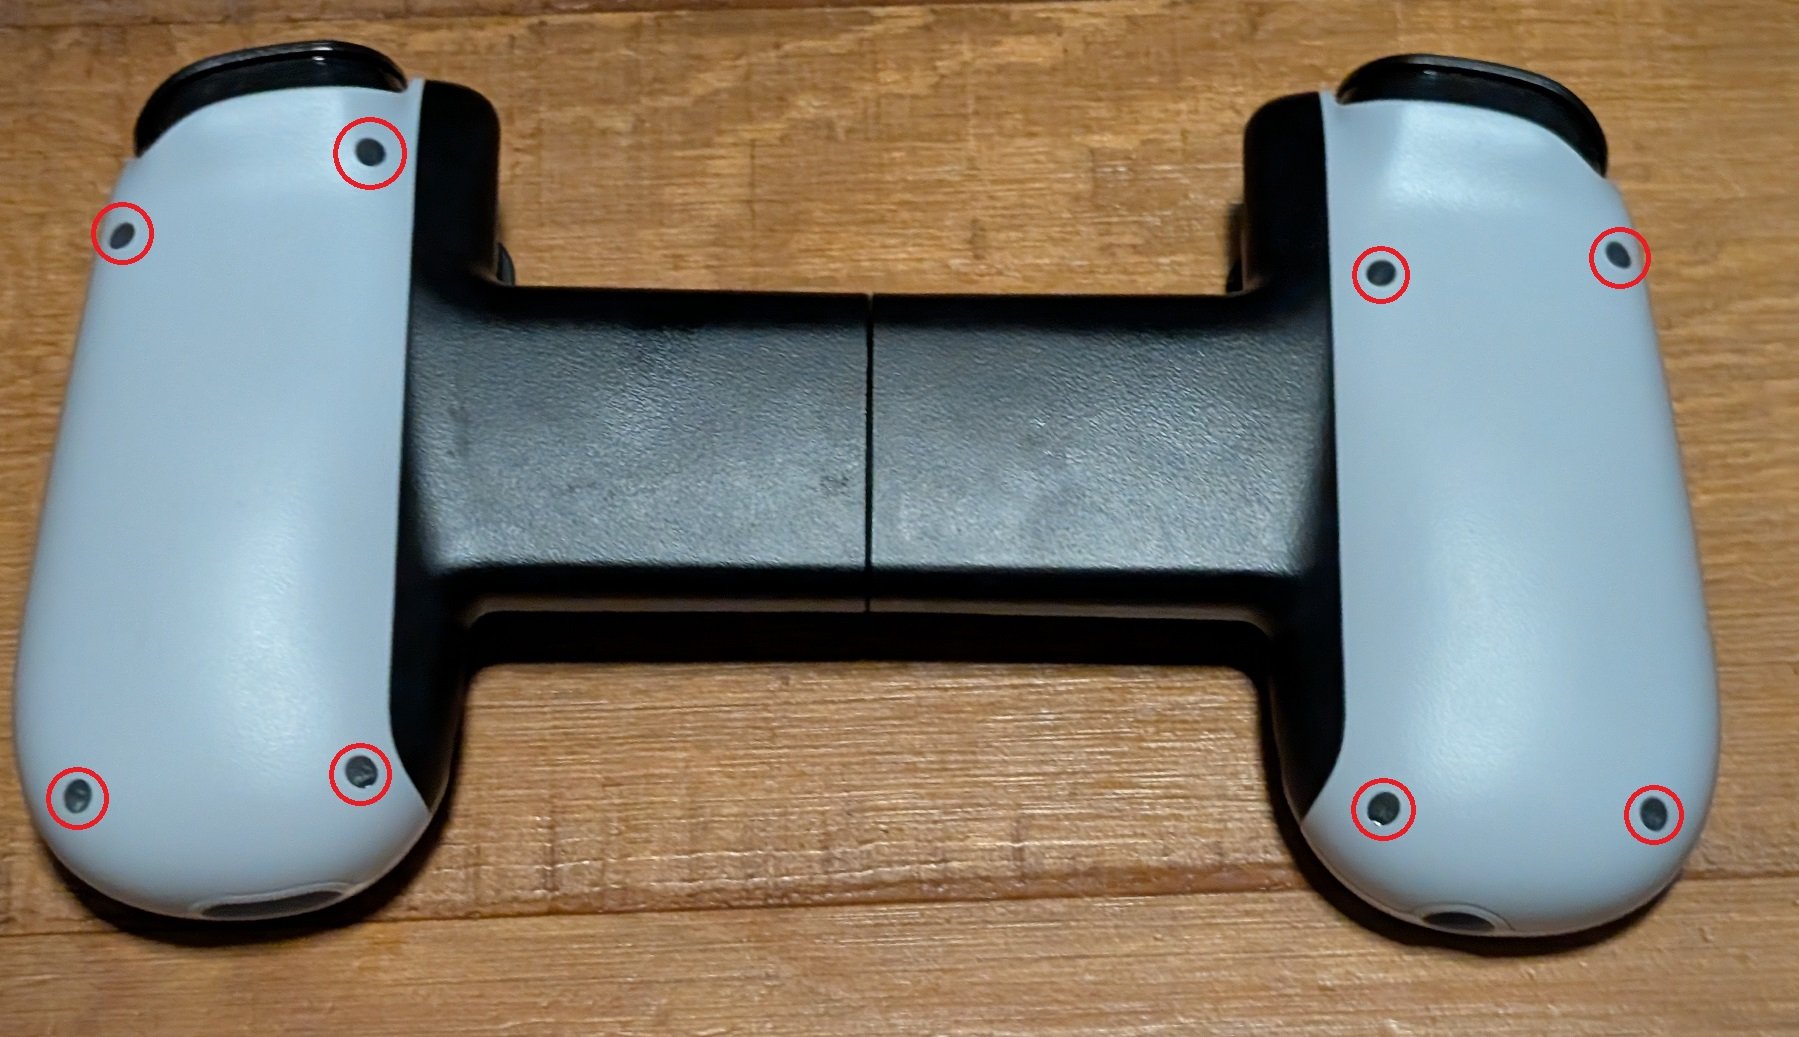
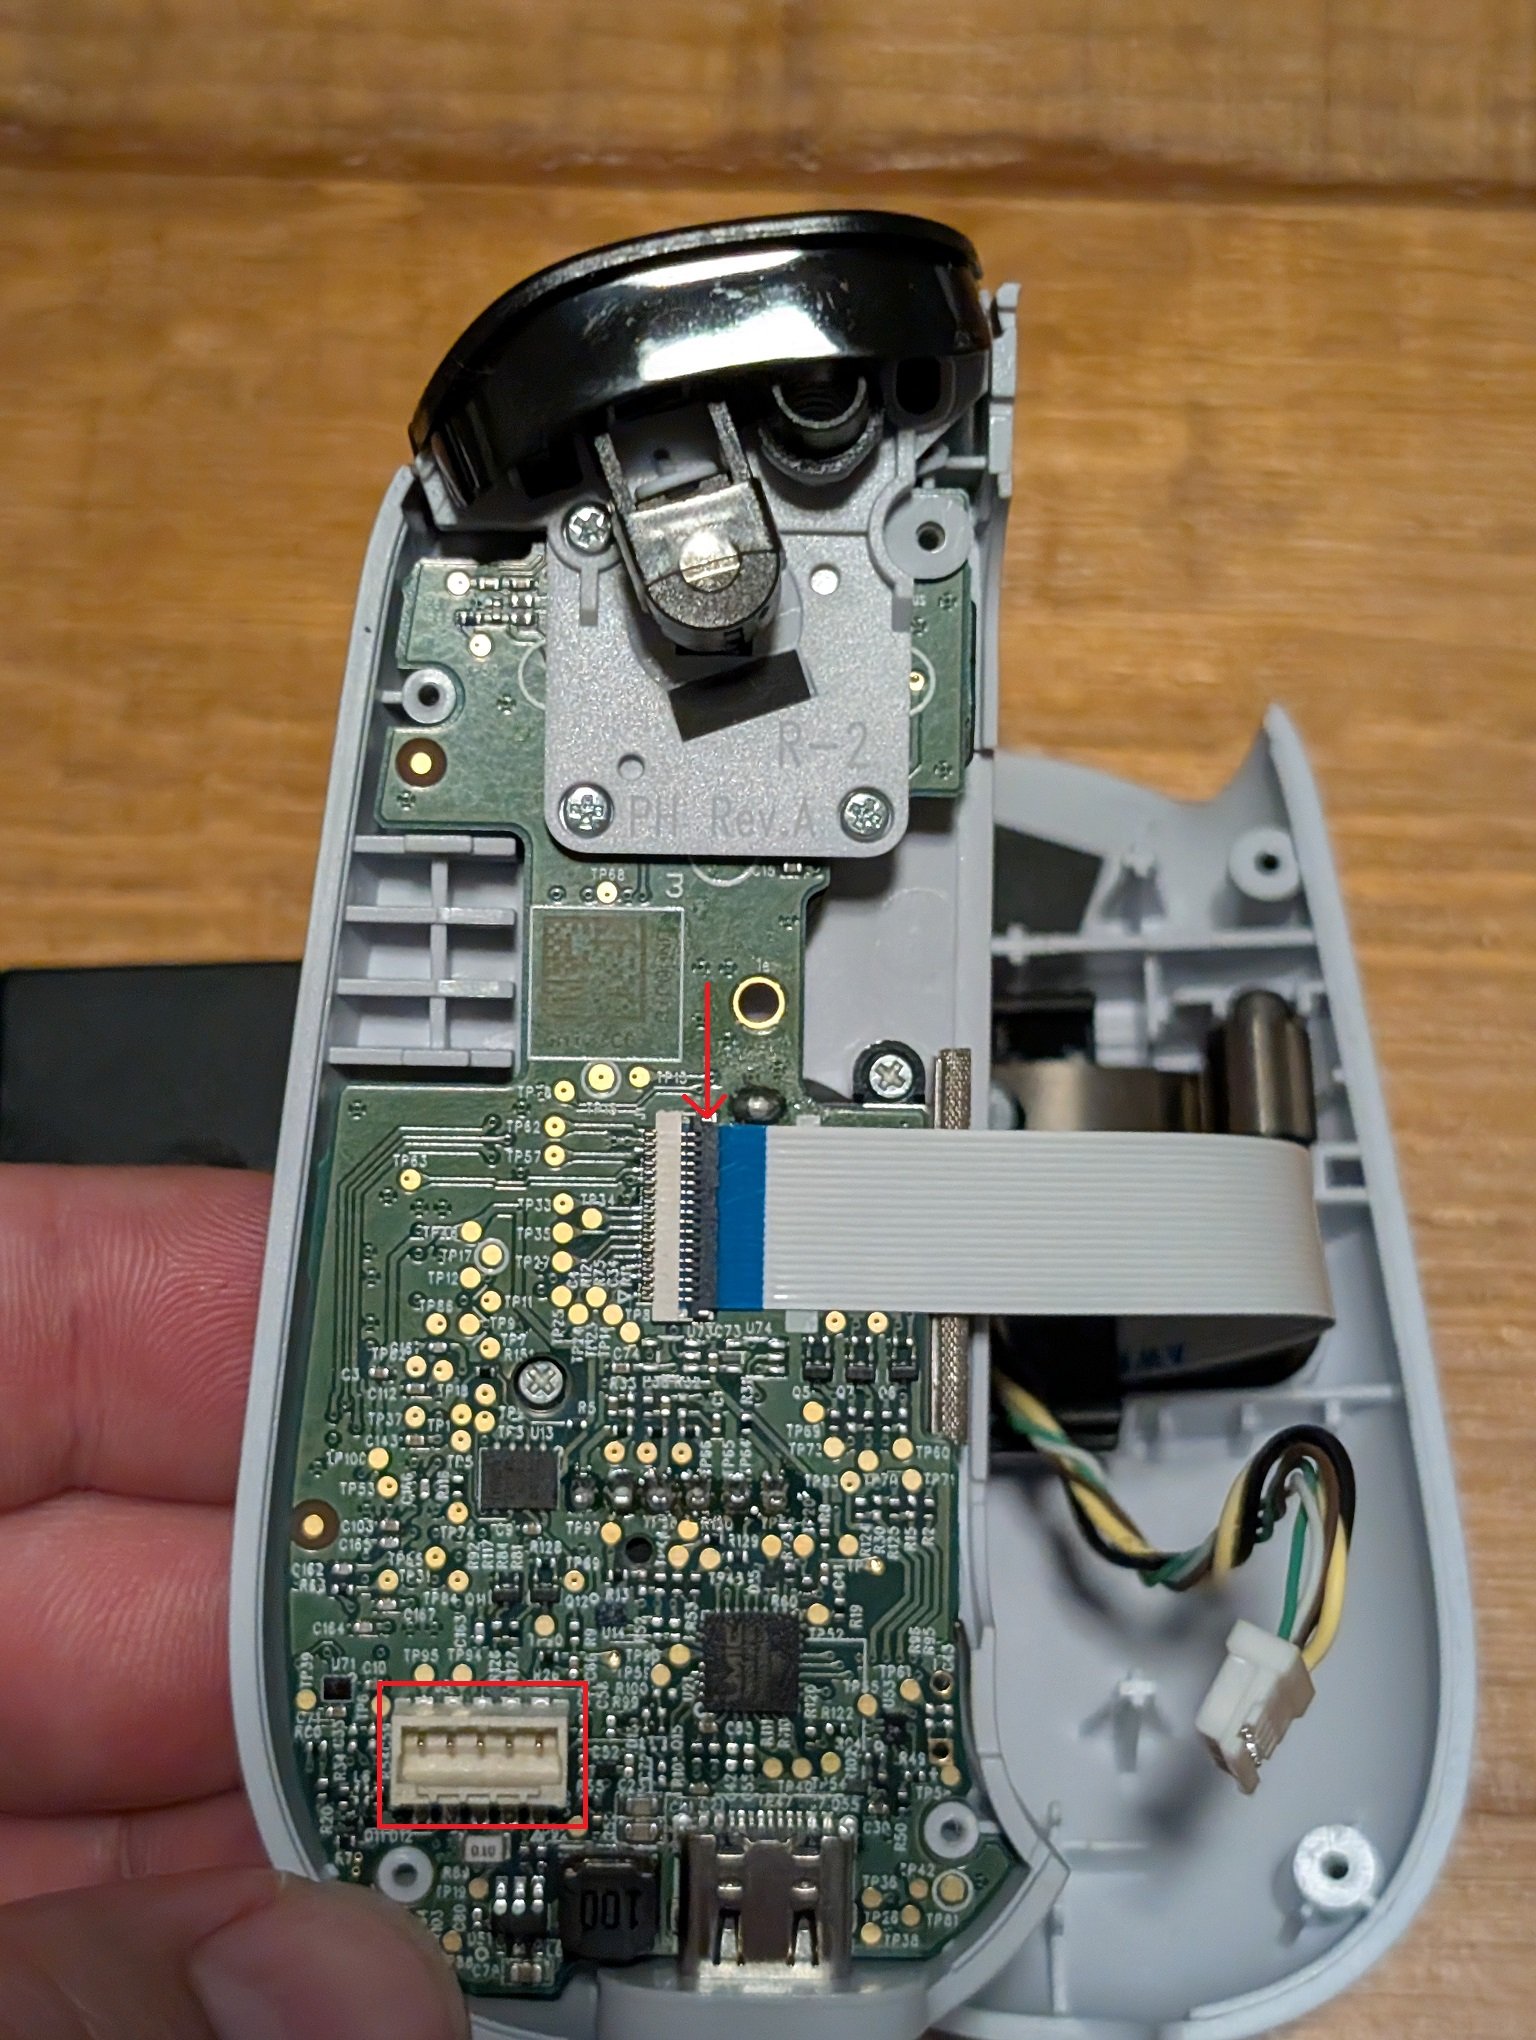
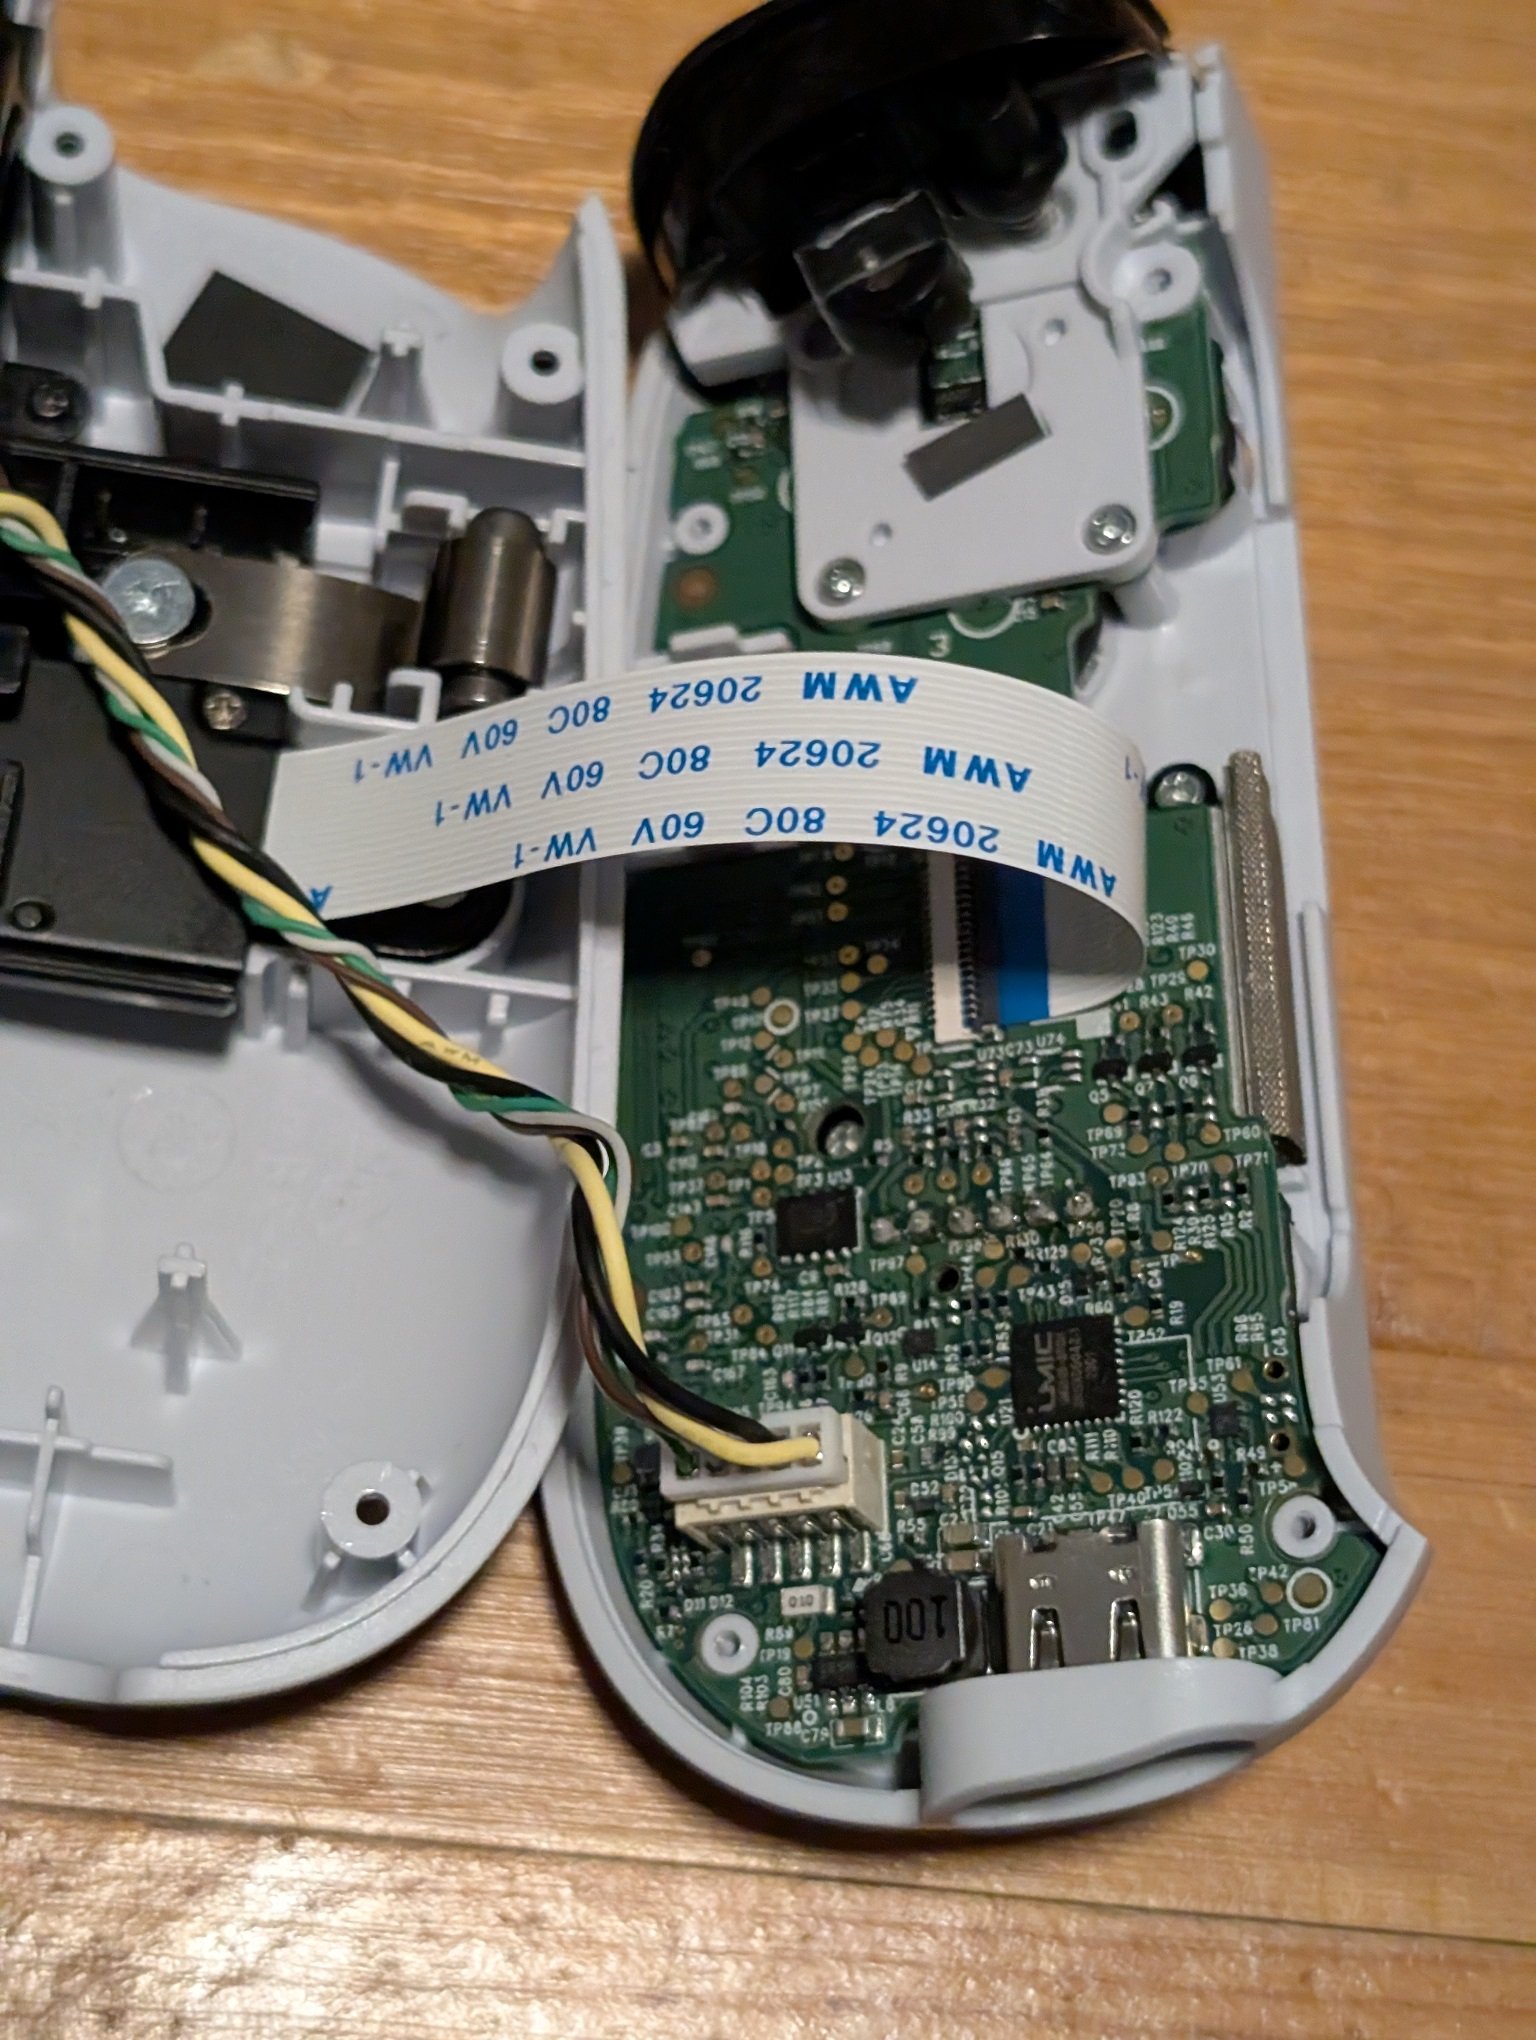
Start by removing the 8 screws on the back of the grips. Use your fingernail to flip up the black ribbon cable latch and unplug the 5 pin connector on the right grip. Repeat this process for the left grip. There may be some orange Kapton tape. If there is, remove that. Place the tops of the grips and the screws aside and you should be left with the back shell.
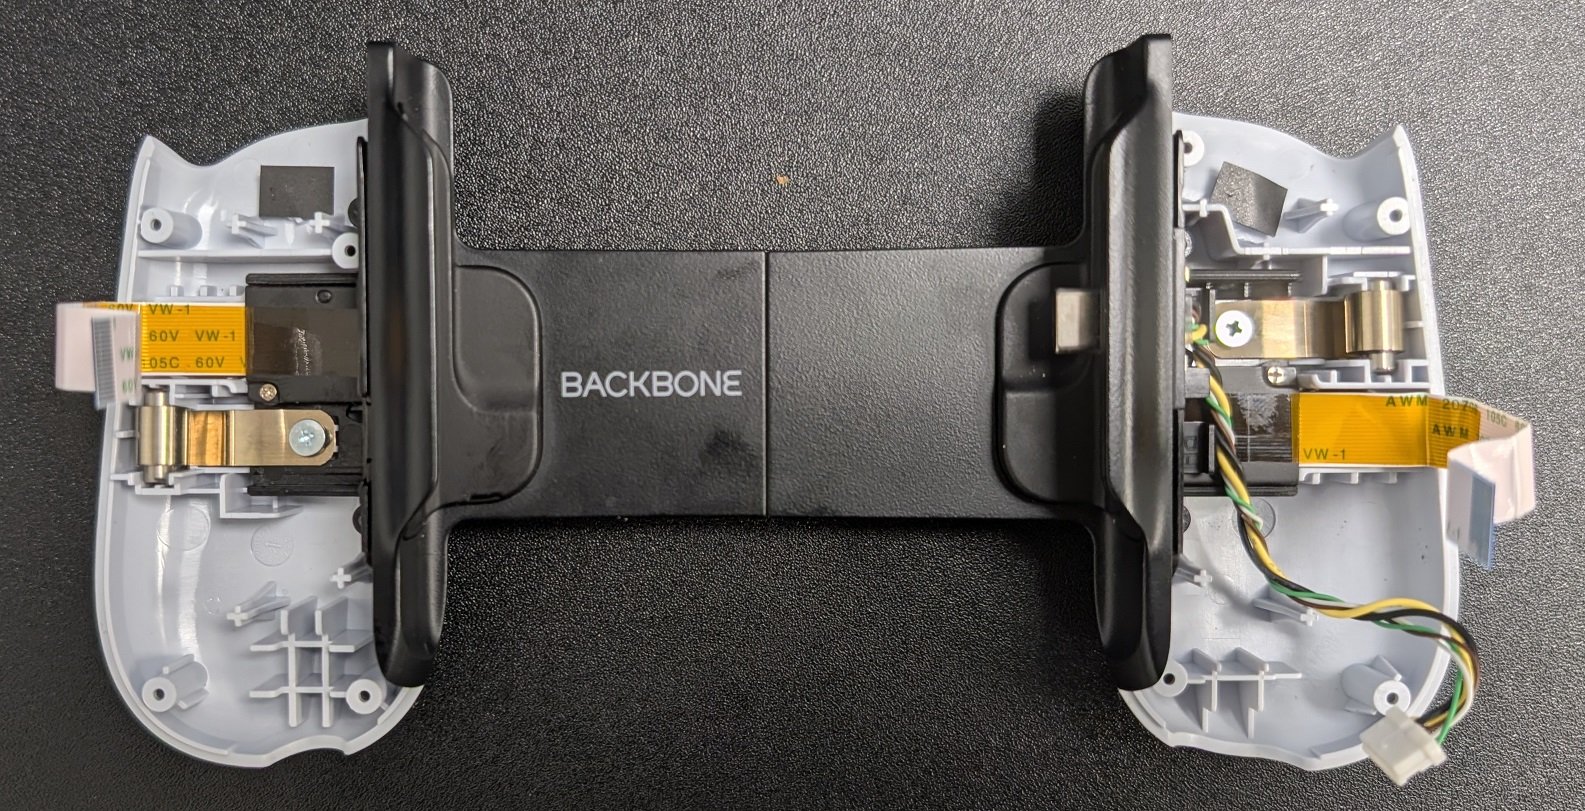
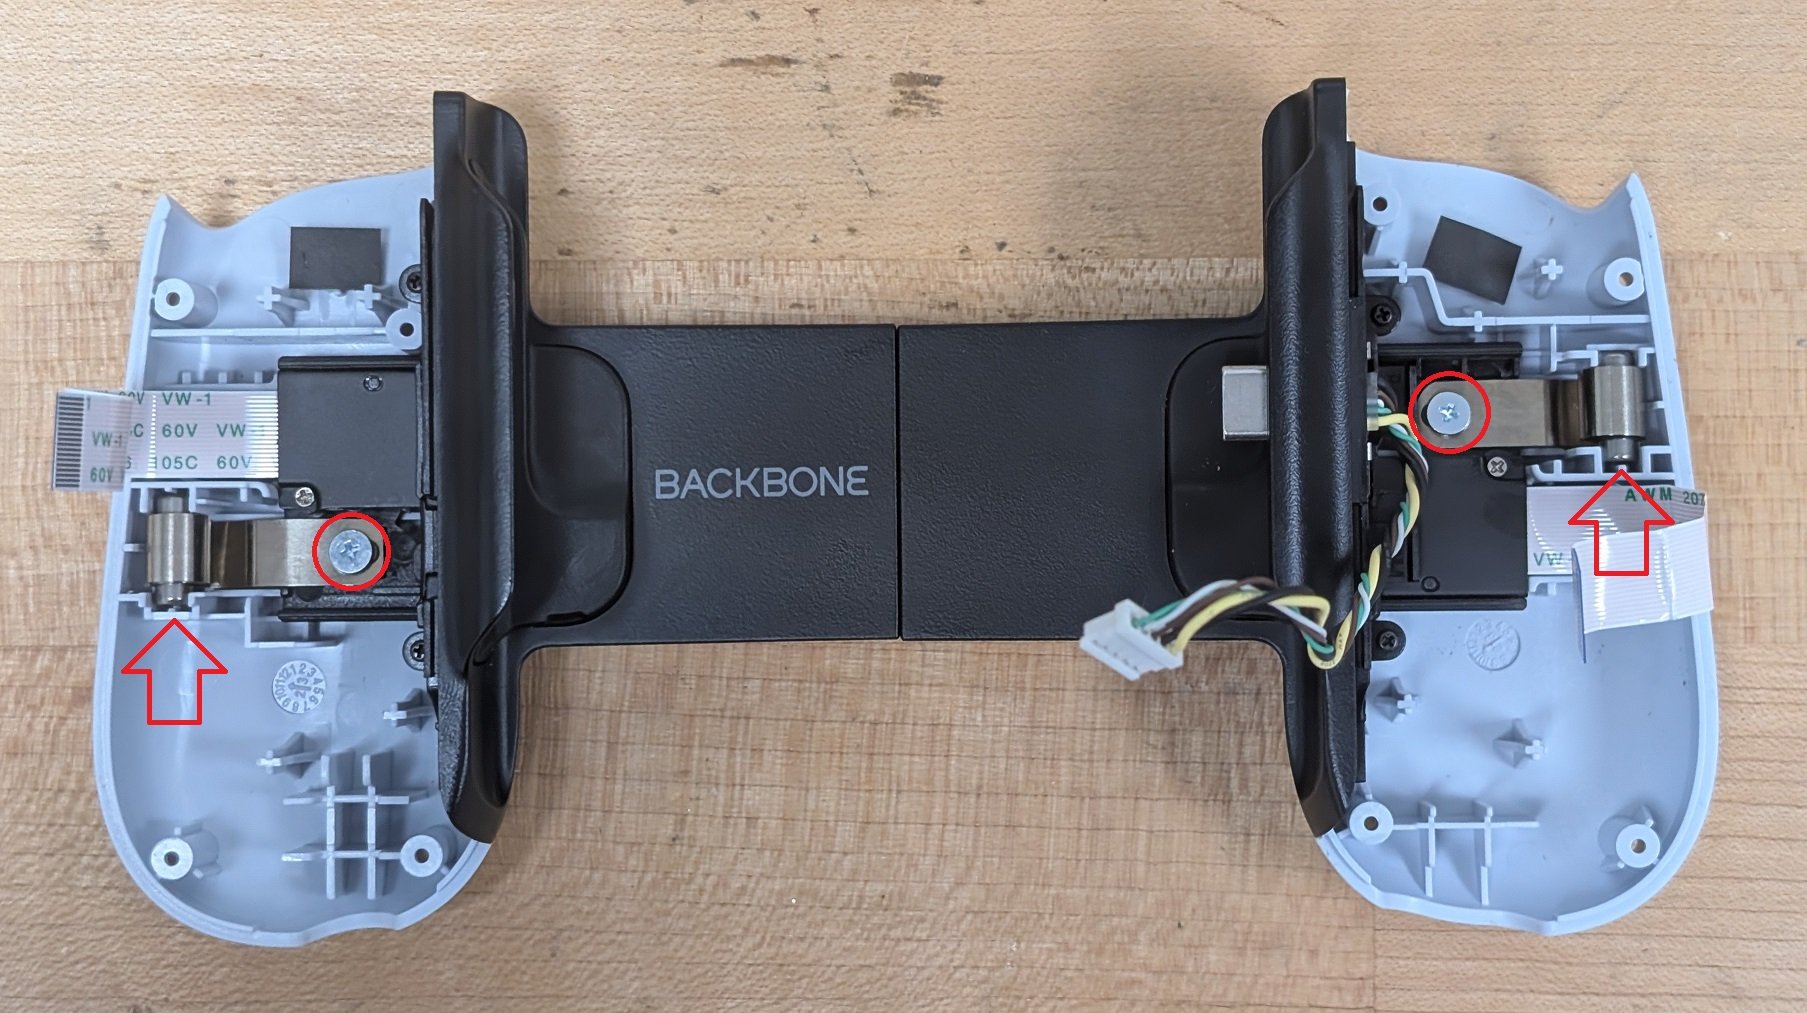
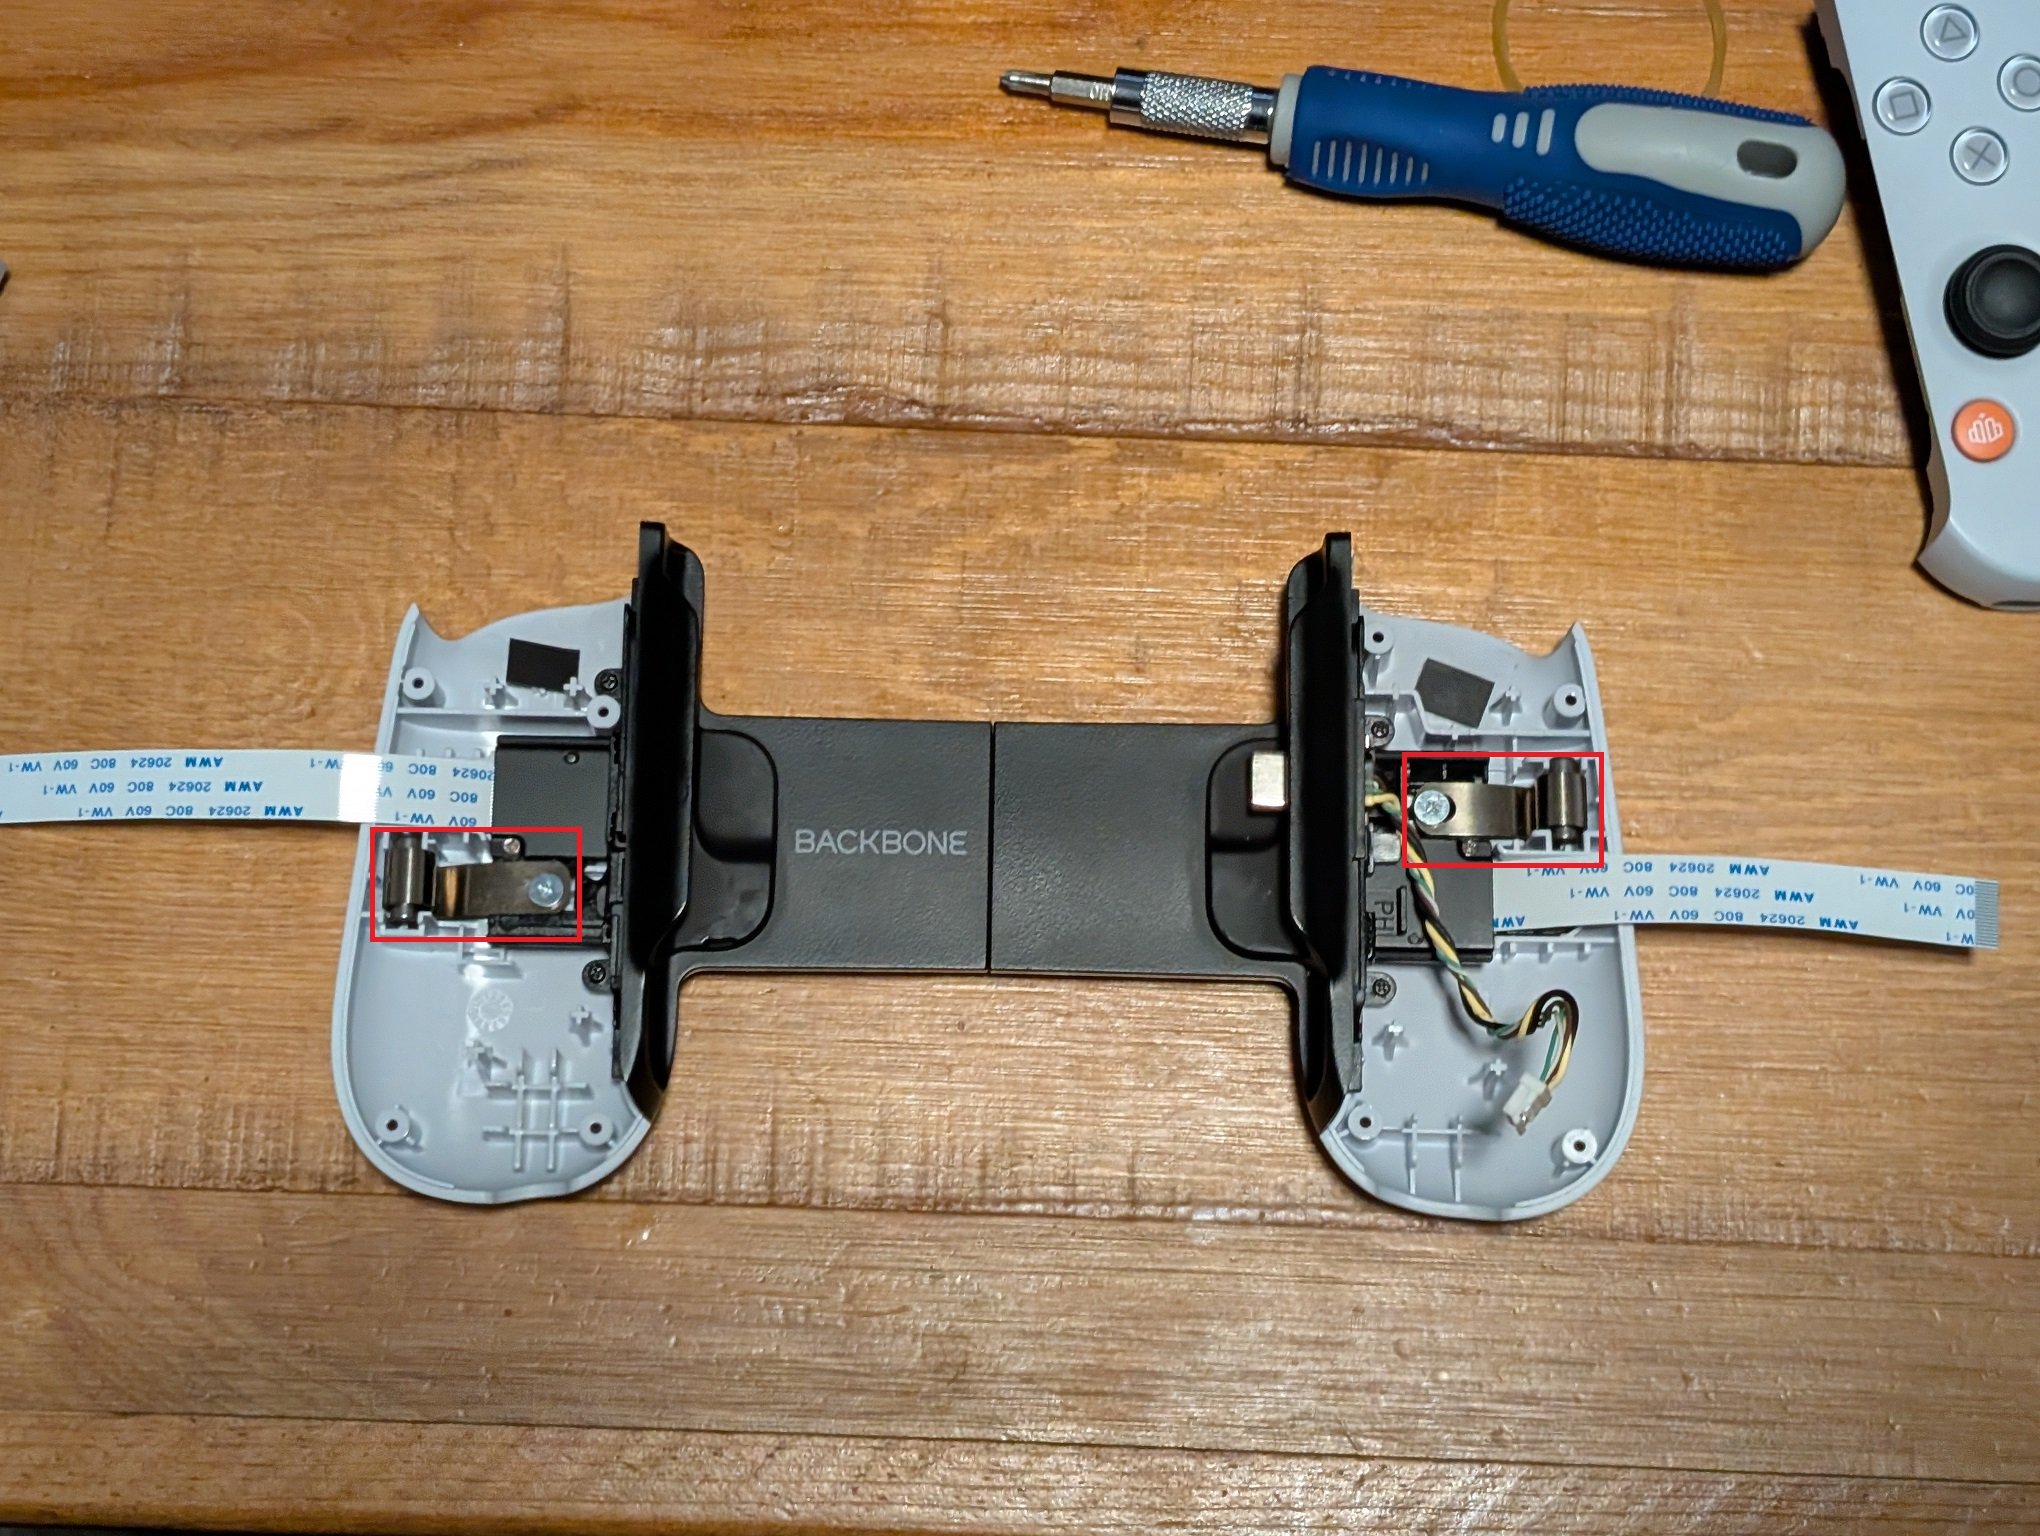
Next remove the larger flathead screw and carefully pop out the springs. These are under tension so be careful not to let them go flying. The springs have a metal spool, a black plastic bearing, and a metal stud. After the springs are removed, lift up the ribbon cable on each grip and unscrew the two screws holding the gear arms in place. Unscrew the 4 screws that hold the back of the grips to the center piece. Remove the back grips and you will be left with the center piece. Slide the two sides off the center piece and unscrew the two silver screws. Using a flathead screw driver, carefully pop the metal plate up, exposing the ribbon cable. I used a sharpie to mark the creases to help with folding the new ribbon cable.
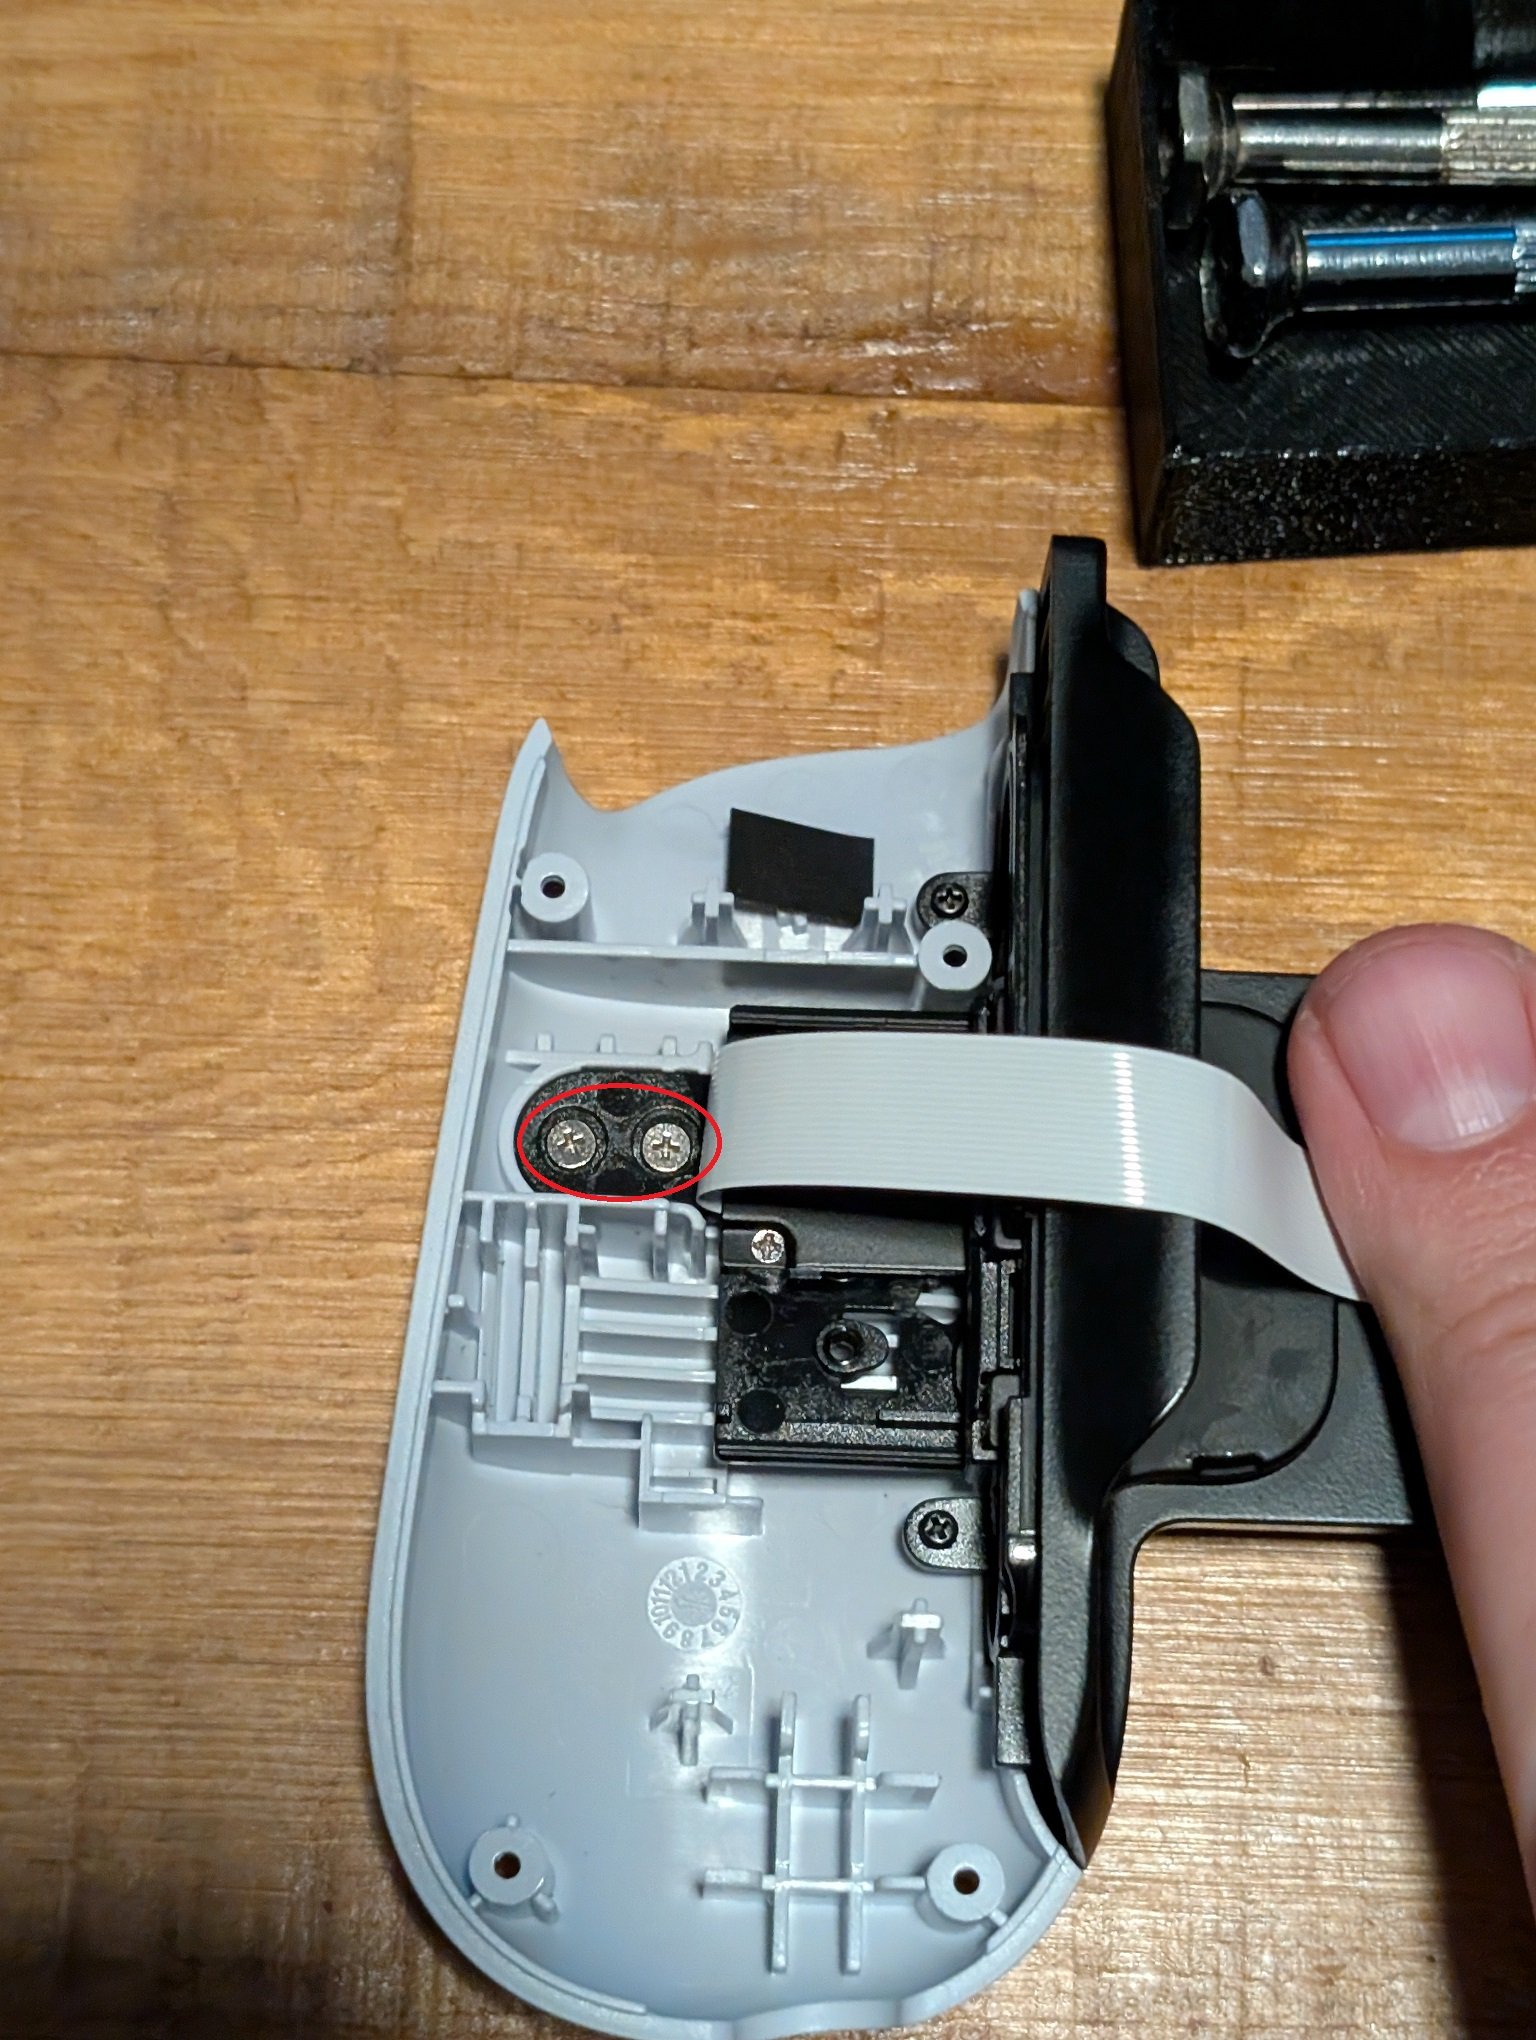
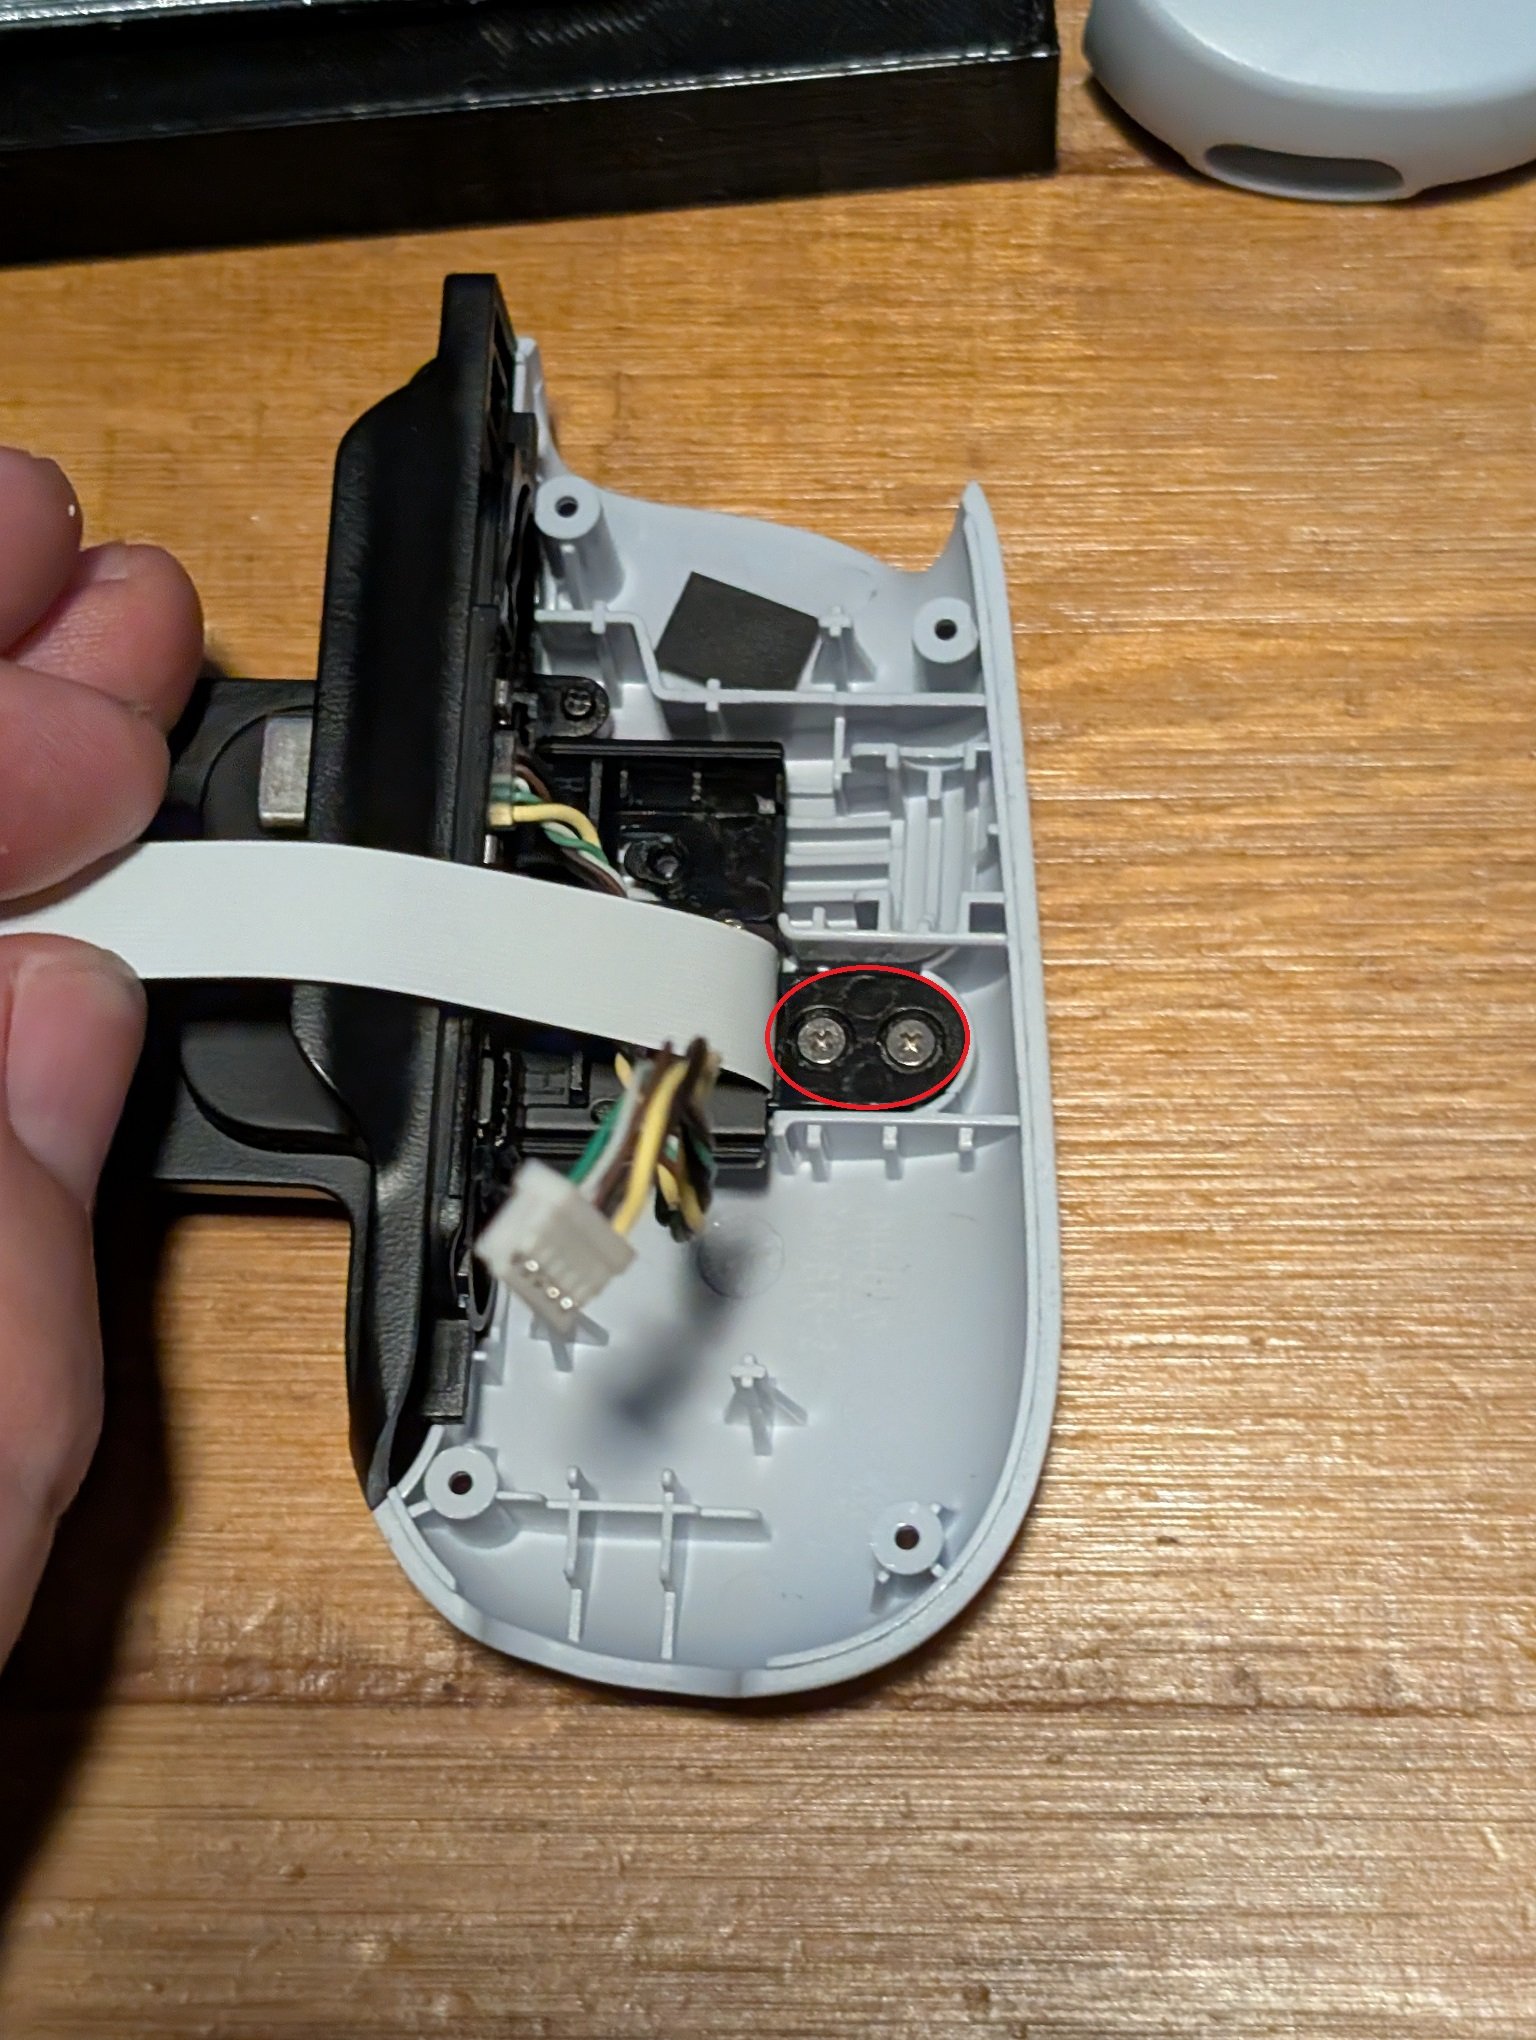

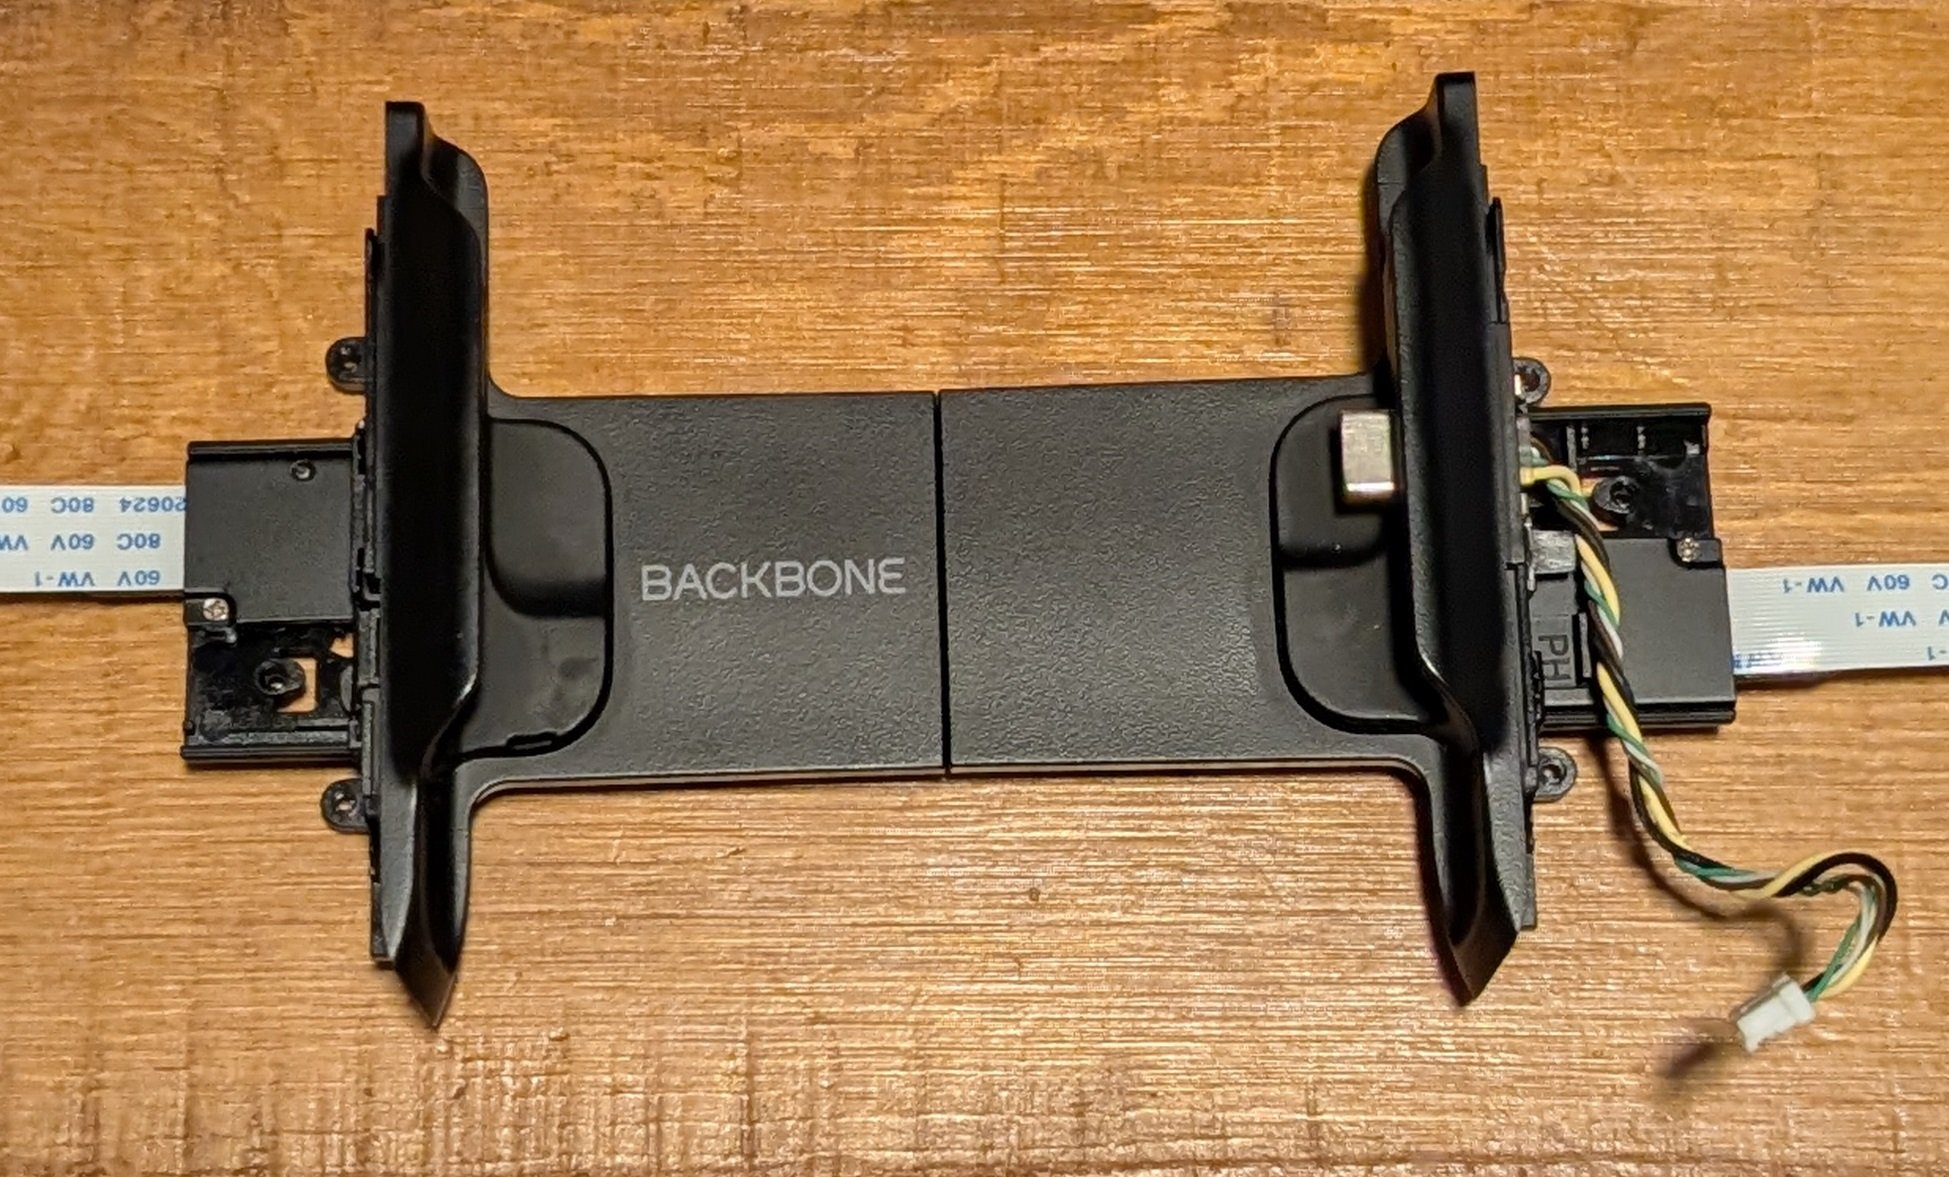


Next, carefully peel up the old ribbon cable, fold the new ribbon cable twice, and place it onto the adhesive. Make sure the silver terminals on each end of the ribbon cable are facing up. Also make sure the geared arms are in the correct position and reassemble the center piece holding it all together with the two screws. Slide back on the phone grips to each side. Screw in the four black screws that hold the back grips and screw in the four screws that hold the gear arms in place. Screw in the springs and lock them back in place.
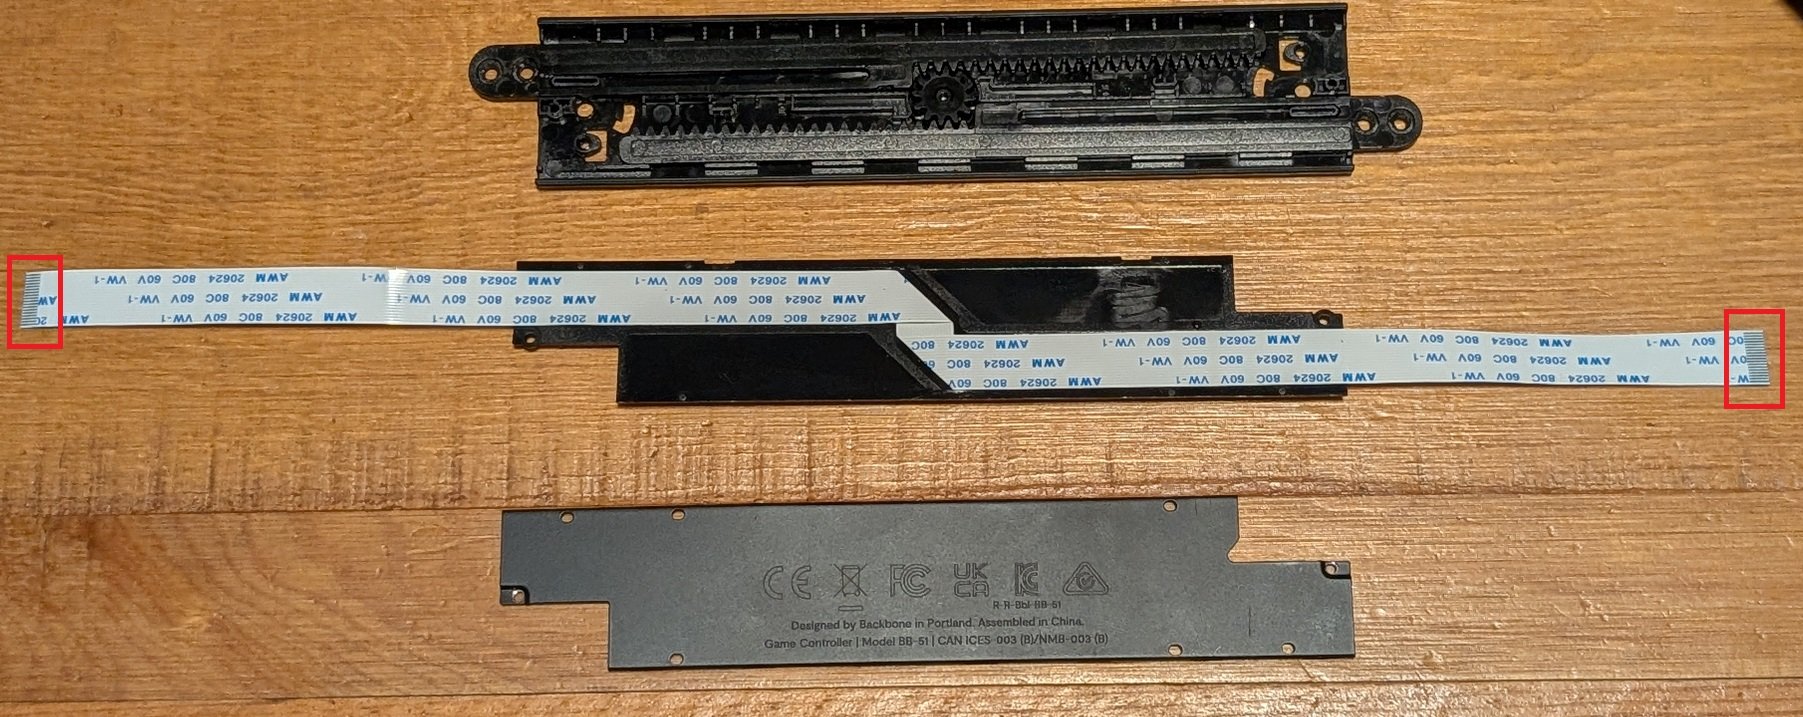


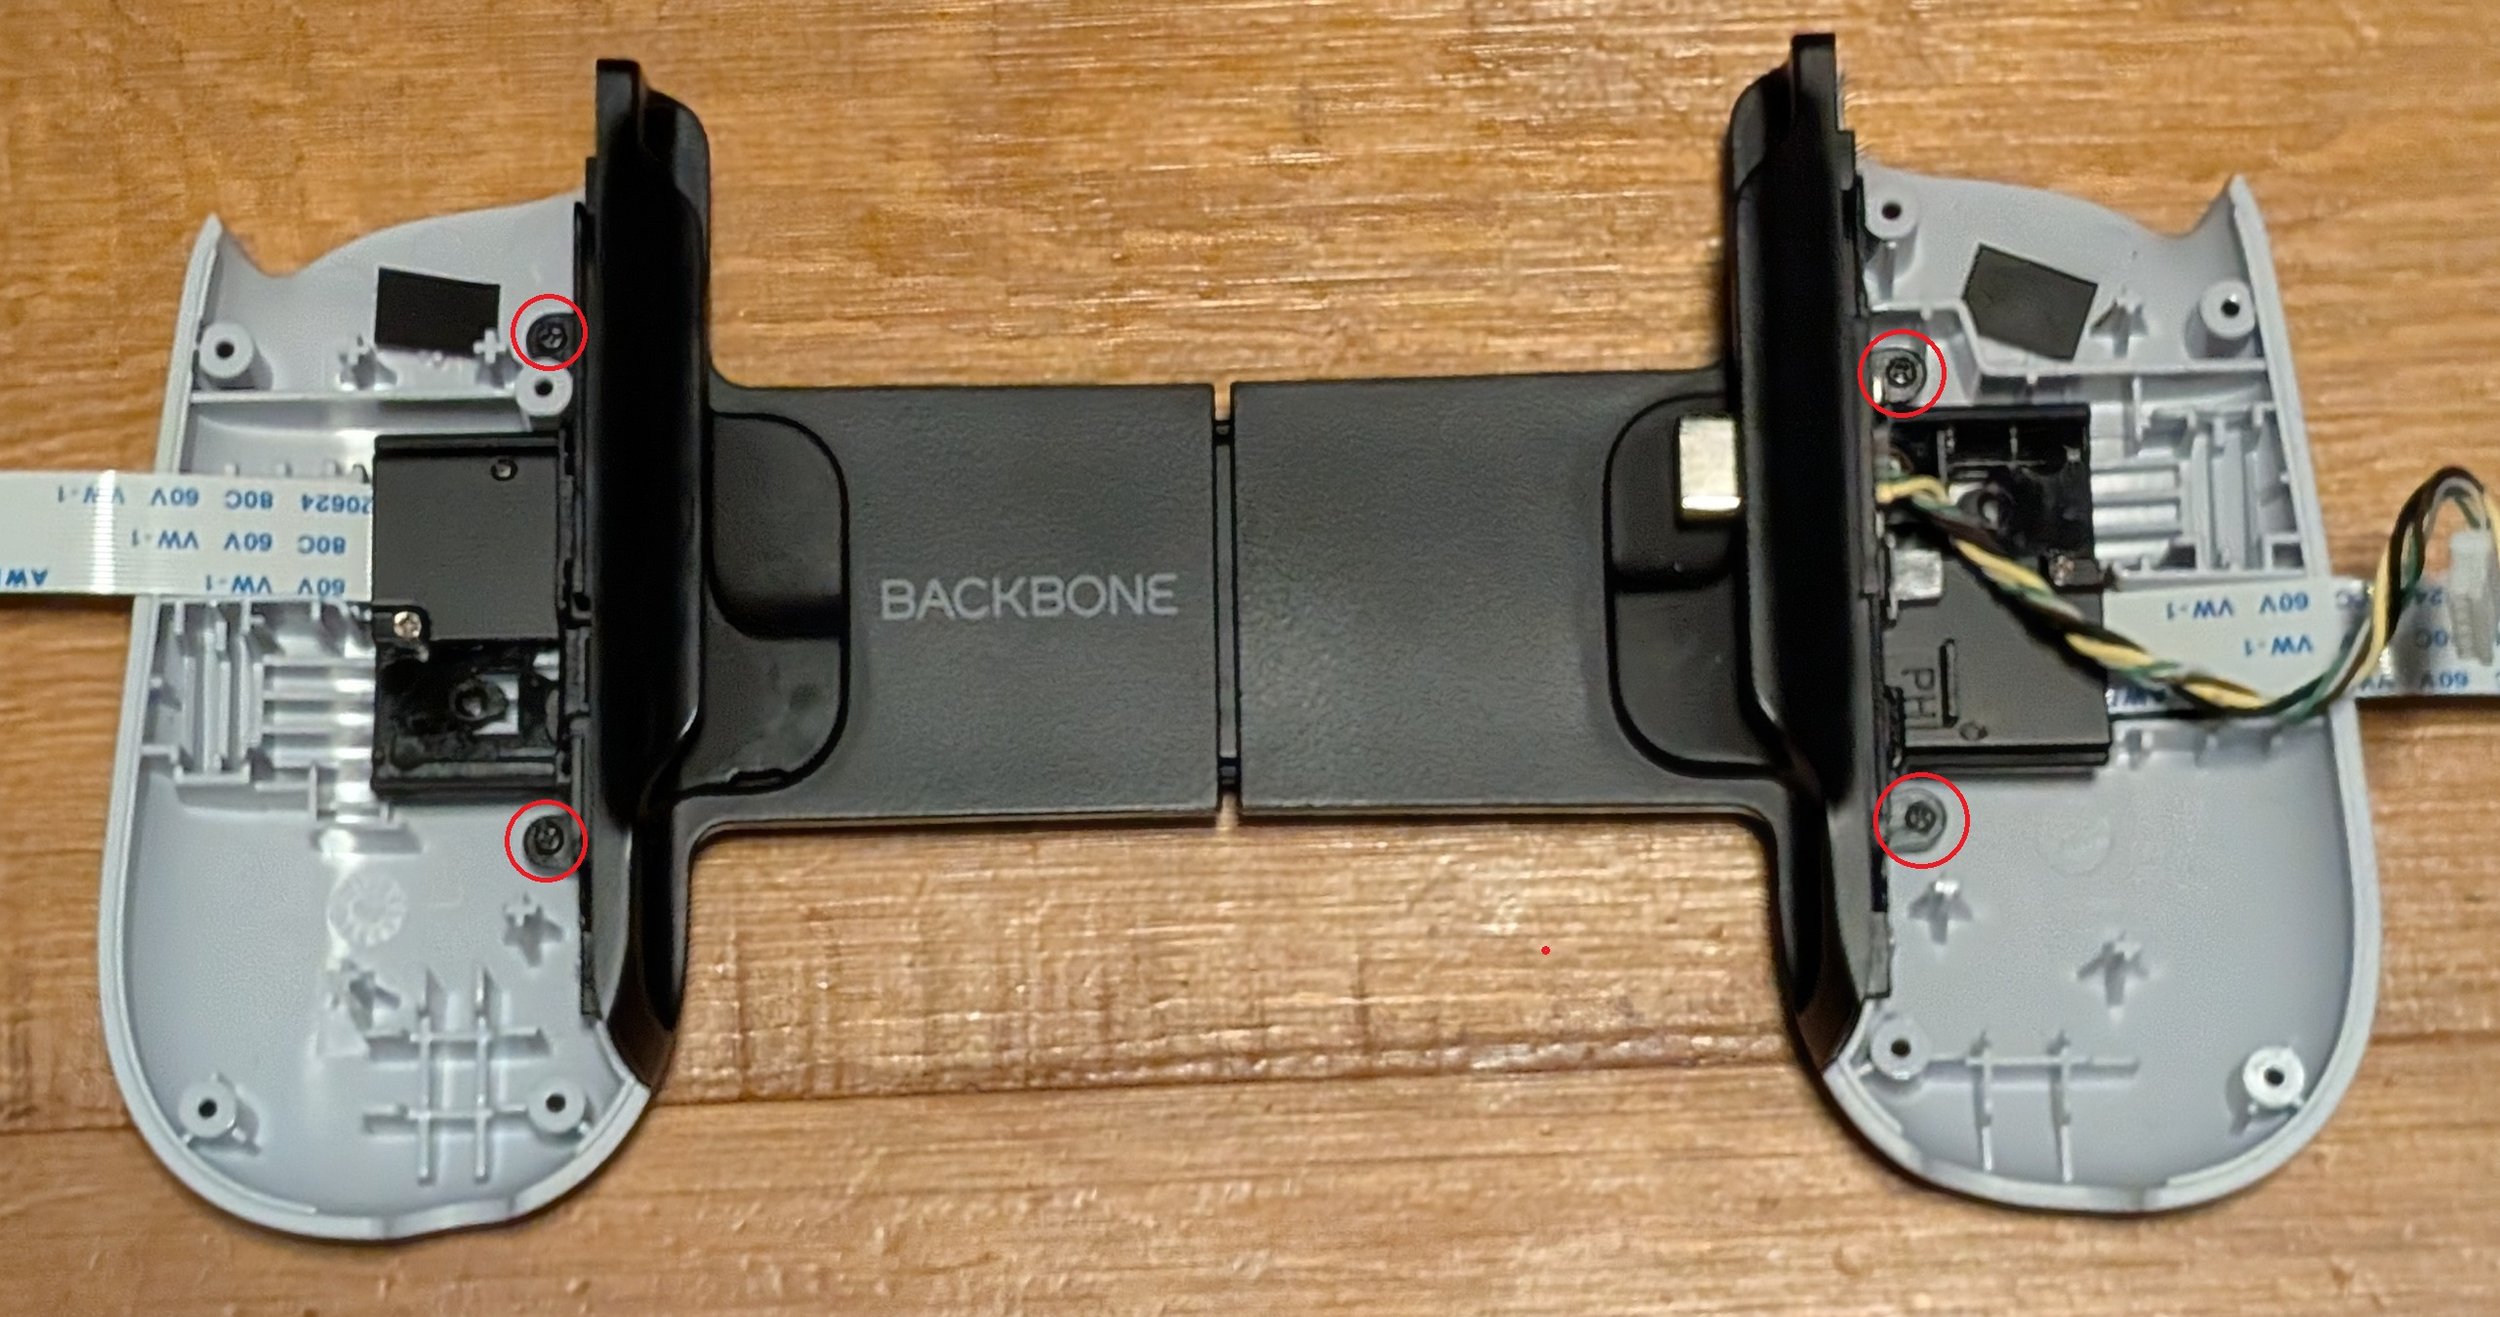


On the right grip, slide the new ribbon cable into the connector with the blue tab facing up. Fold down the black tab to keep it in place. Click back in the 5 pin connector and then carefully fold the ribbon cable and close the grip making sure not to pinch any wires. Screw back in the 4 screws in the back of the grip. Repeat the process for the left grip, minus the 5 pin connector part.



That’s it! Pretty simple process. Make sure the controller grips expand and contract properly. I used the Backbone app to make sure all buttons were in working order.


